


Welcome to our step by step guide on how to add AVAX to your Metamask wallet! If you’re new to the world of cryptocurrencies and decentralized finance, you may be wondering how to store and manage your AVAX tokens securely. Metamask is a popular Ethereum wallet that also supports various other tokens, including AVAX. In this guide, we will walk you through the process of adding AVAX to your Metamask wallet, so you can start enjoying the benefits of this exciting digital currency.
Step 1: Install Metamask
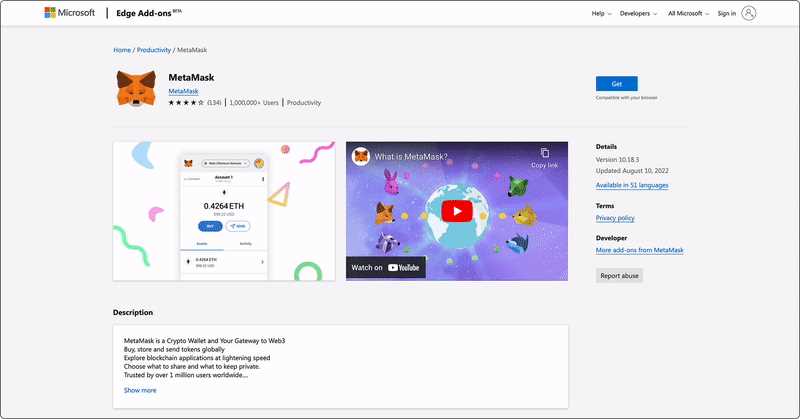
To get started, you need to have Metamask installed on your device. Metamask is available as a browser extension for Chrome, Firefox, and Brave. Simply search for “Metamask” in your browser’s extension store, click on the appropriate result, and follow the instructions to add it to your browser. Once installed, create a new wallet or import an existing one.
Step 2: Connect to Avalanche Network
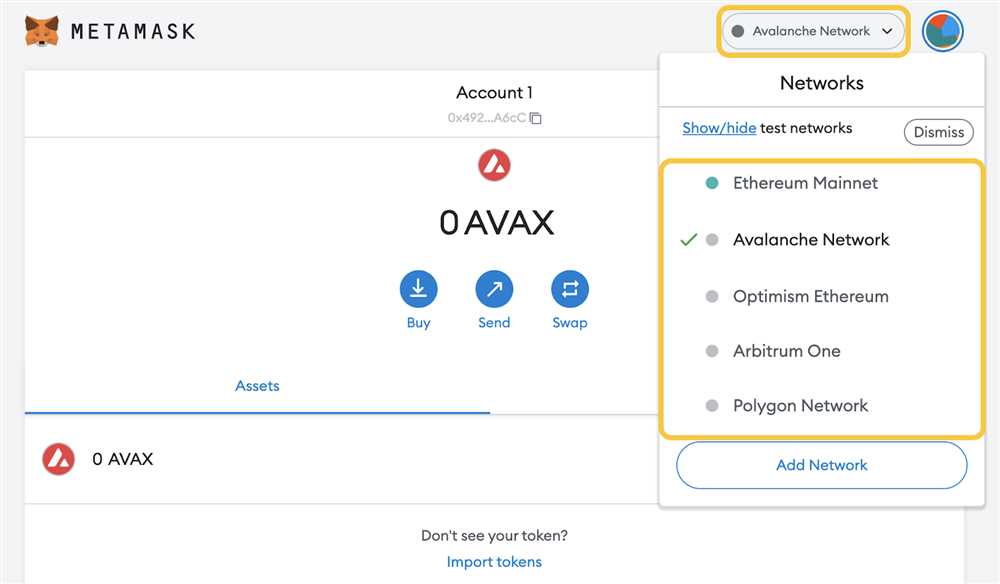
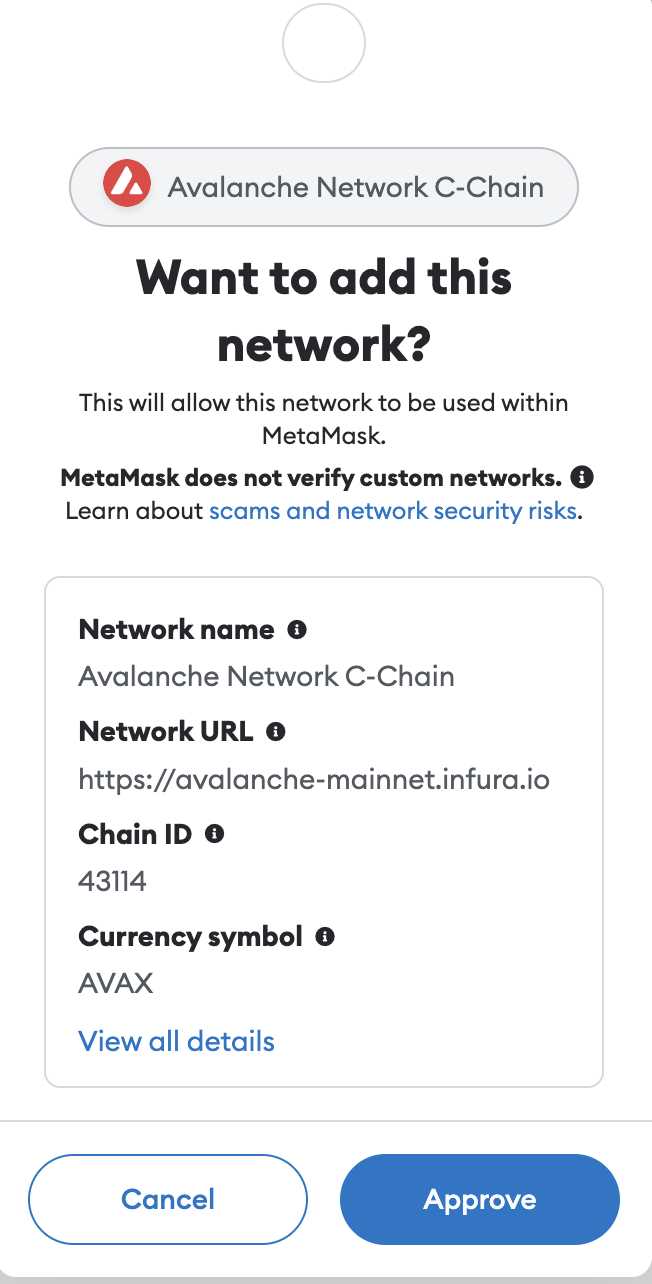
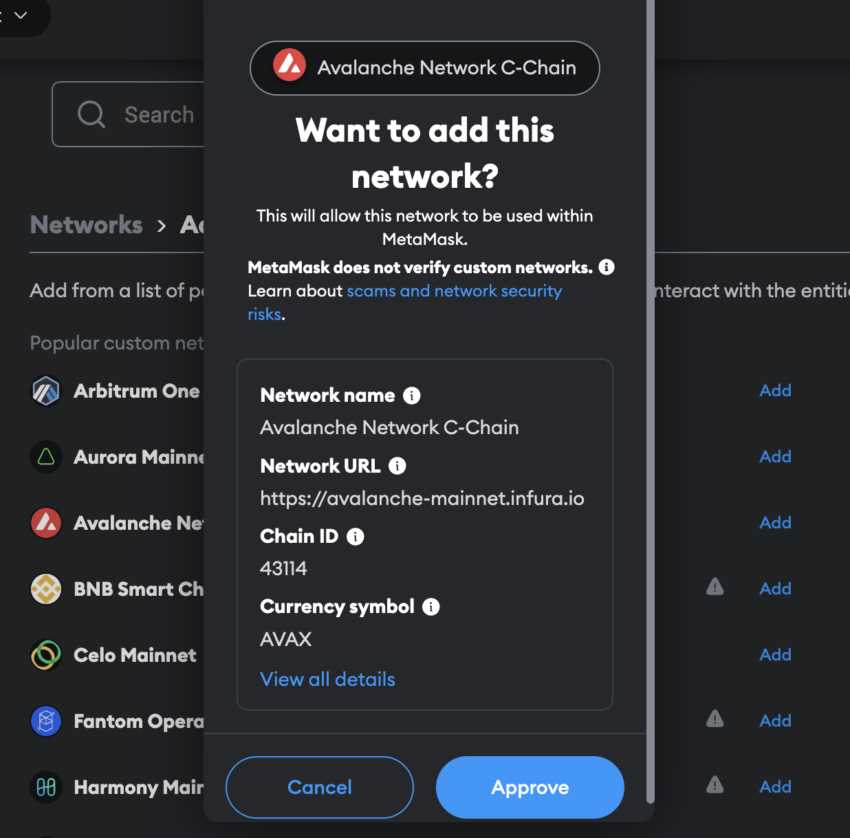
After setting up your Metamask wallet, you need to connect it to the Avalanche network. To do this, open Metamask and click on the network dropdown in the top right corner. Select “Custom RPC” and enter the following details:
Network Name: Avalanche
New RPC URL: https://api.avax.network/ext/bc/C/rpc
ChainID: 43114
Symbol: AVAX
Block Explorer URL: https://cchain.explorer.avax.network/
Step 3: Get AVAX Tokens
Now that your wallet is connected to the Avalanche network, it’s time to get some AVAX tokens. There are several ways to acquire AVAX, including purchasing it on a cryptocurrency exchange or participating in token sales. Once you have acquired AVAX, make sure it is in a wallet that you own and control.
Step 4: Add AVAX Token to Metamask
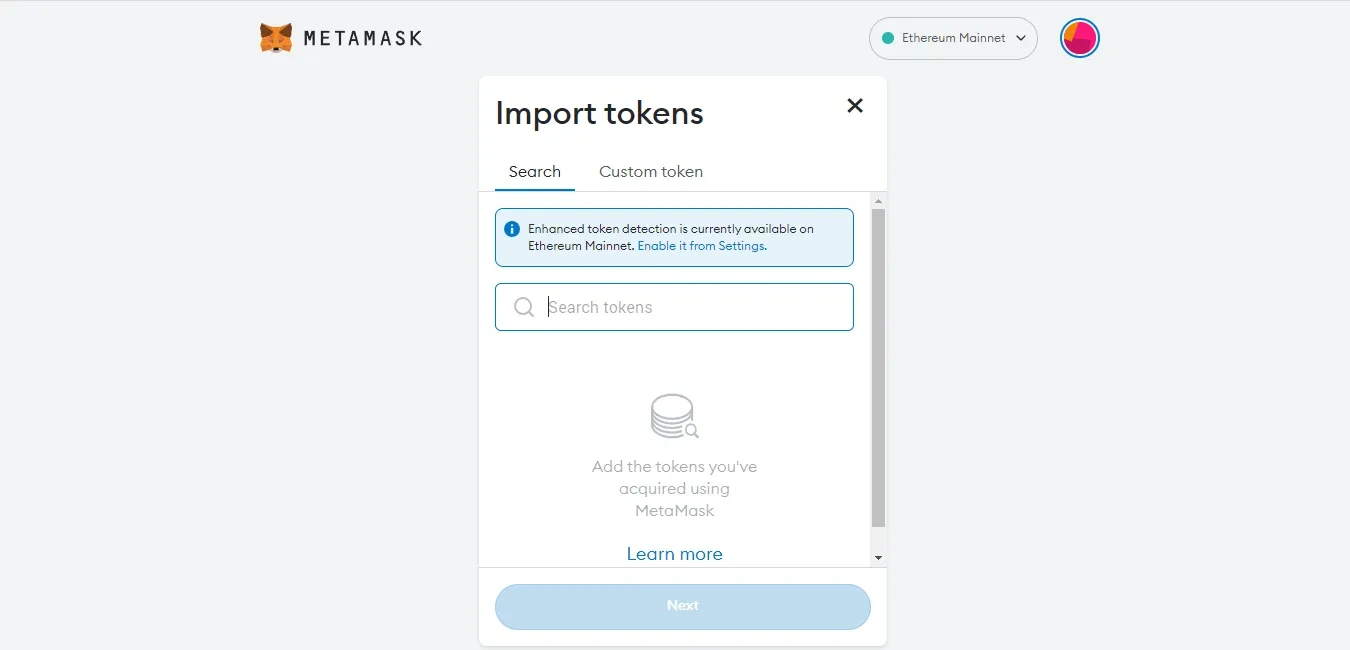
To add AVAX to your Metamask wallet, click on the “Assets” tab in Metamask and then click “Add Token” at the bottom. Select “Custom Token” and enter the AVAX contract address, which is 0x1CE0c2827e2eF14D5C4f29a091d735A204794041. Metamask should automatically fill in the rest of the details. Click “Next” and then “Add Tokens” to complete the process.
Congratulations! You have successfully added AVAX to your Metamask wallet. Now you can easily manage and transfer your AVAX tokens through Metamask. Remember to always keep your wallet and private keys secure, and never share them with anyone.
Note: The steps mentioned above are for adding AVAX to your Metamask wallet using the Avalanche network. If you wish to use another network, such as Ethereum, the process may be slightly different. Make sure to double-check the network details and contract address before proceeding.
Step 1: Install Metamask on Your Browser
To add AVAX to your Metamask wallet, the first step is to install the Metamask extension on your preferred browser.
Metamask is a popular cryptocurrency wallet that allows you to manage and store various digital assets. It is compatible with major browsers such as Google Chrome, Firefox, and Brave.
Follow these steps to install Metamask:
1. Open your browser and visit the official Metamask website.
Go to https://metamask.io/ to access the official Metamask website.
2. Click on the “Get Chrome Extension” (or “Get Firefox Extension”) button.
Choose the appropriate button for your browser. Metamask is available for both Google Chrome and Mozilla Firefox.
3. Review the details and permissions required by Metamask.
Make sure to read the information provided by Metamask before proceeding with the installation. You should also review the permissions required by the extension.
4. Click on the “Add to Chrome” (or “Add to Firefox”) button.
By clicking on this button, you will initiate the installation process. The extension will be added to your browser.
5. Click on the Metamask logo that appears in the toolbar of your browser.
After installation, a small fox logo will appear in the toolbar of your browser. Click on it to launch Metamask.
6. Set up a password for your Metamask wallet and create a new account.
Follow the on-screen instructions to set up a password for your wallet. Then, create a new account by clicking on the “Create Account” button.
Once you have completed these steps, you will have successfully installed Metamask on your browser and created a new wallet. You are now ready to proceed with adding AVAX to your Metamask wallet.
Step 2: Create or Import Your Metamask Wallet

To add AVAX to your Metamask wallet, you first need to create or import a wallet. Follow the steps below to get started:
Create a New Wallet
- Open the Metamask extension on your browser.
- Click on the “Get Started” button.
- Read and accept the Terms of Use.
- Create a new password for your wallet and click on “Create” to proceed.
- Save the recovery seed phrase provided by Metamask. This phrase is essential for recovering your wallet in case you forget your password or lose access to your device.
- Confirm the recovery seed phrase by selecting the words in the correct order.
- Once confirmed, your wallet is created, and you can proceed to the next step.
Import an Existing Wallet
- If you already have a Metamask wallet or a wallet from another platform, you can import it to Metamask.
- Open the Metamask extension on your browser.
- Click on the profile icon at the top right corner and select “Import Account”.
- Enter your wallet’s private key or recovery phrase and click on “Import”.
- Your wallet will be imported, and you can now proceed to the next step.
Once you have created or imported your wallet, you are ready to move on to the next step and add AVAX to your Metamask wallet.
Step 3: Add AVAX to Your Metamask Wallet
Now that you have your Metamask wallet set up and connected to the Avalanche network, it’s time to add AVAX tokens to your wallet. Follow these steps to add AVAX to your Metamask wallet:
1. Obtain AVAX Tokens
Before you can add AVAX to your wallet, you will need to obtain AVAX tokens. You can do this by purchasing AVAX on a cryptocurrency exchange or receiving AVAX from another wallet or individual.
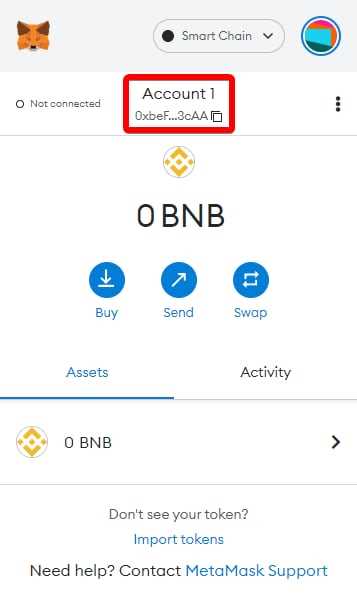
2. Copy Your Metamask Wallet Address

In order to receive AVAX tokens in your Metamask wallet, you will need to provide the sender with your wallet address. To copy your wallet address, click on the account icon in the top right corner of the Metamask extension and select “Copy Address to Clipboard”.
3. Send AVAX to Your Metamask Wallet
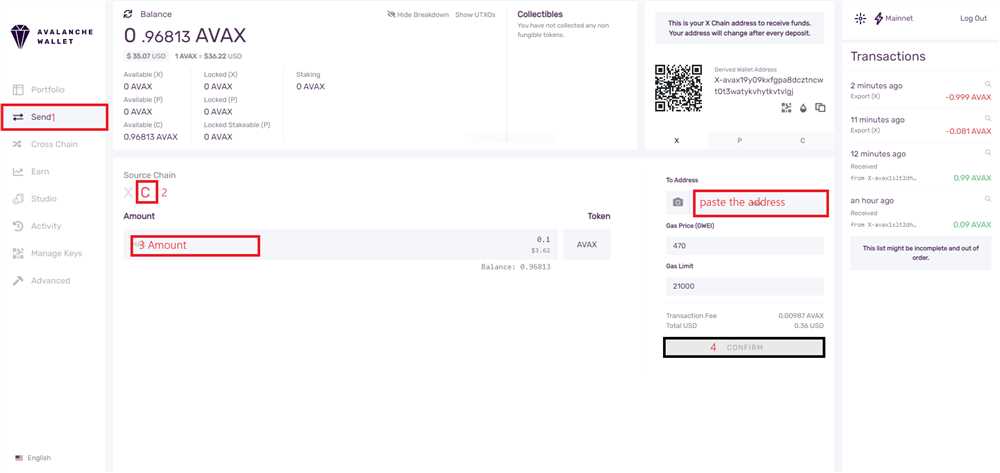
Once you have obtained AVAX tokens and copied your wallet address, you can initiate a transaction to send AVAX to your Metamask wallet. This can be done through the exchange or wallet you used to obtain AVAX. Paste your Metamask wallet address as the recipient address and specify the amount of AVAX you wish to send. Double-check the wallet address to ensure accuracy before confirming the transaction.
4. Confirm the Transaction
After initiating the transaction, you will need to confirm it using the appropriate method provided by the exchange or wallet. This may include confirming through email or using two-factor authentication.
5. Monitor the Transaction
Once the transaction is confirmed and initiated, you can monitor the status of the transaction using the transaction ID or hash provided by the exchange or wallet. This will allow you to track the progress of the transaction and ensure that the AVAX tokens are successfully transferred to your Metamask wallet.
6. Verify AVAX in Your Metamask Wallet
Once the transaction is completed, you can verify that the AVAX tokens have been successfully added to your Metamask wallet. Open your Metamask extension and click on the account icon in the top right corner. Select “Account Details” to view the balance of AVAX in your wallet. The amount of AVAX you sent should now be reflected in your wallet balance.
| Tips: |
|---|
| Make sure to always double-check the wallet address when sending AVAX to your Metamask wallet to avoid any errors or loss of funds. |
| Keep your Metamask wallet backup phrase safe and secure. This will allow you to recover your wallet and access your AVAX tokens in case of loss or theft. |
Frequently Asked Questions:
Can I add AVAX to my Metamask wallet?
Yes, you can add AVAX to your Metamask wallet. The process is relatively simple and involves a few steps.
What is AVAX?
AVAX is the native cryptocurrency of the Avalanche network, an open-source platform for launching decentralized applications (dApps) and enterprise blockchain deployments. AVAX serves as both a means of payment for transactions on the network and as a stake in the platform’s proof-of-stake consensus algorithm.
How do I create a Metamask wallet?
To create a Metamask wallet, you need to install the Metamask extension in your web browser, click on the extension icon, and follow the prompts to set up your wallet. This will involve choosing a password, agreeing to the terms of service, and backing up your recovery phrase.
Where can I get AVAX?
You can obtain AVAX from various cryptocurrency exchanges, such as Binance, Kraken, or Bitfinex. You will need to create an account on one of these exchanges, deposit funds, and then trade for AVAX. Once you have acquired AVAX, you can send it to your Metamask wallet.
How do I add AVAX to my Metamask wallet?
To add AVAX to your Metamask wallet, you’ll first need to copy your wallet’s address. Then, go to the Avalanche wallet bridge, connect your Metamask wallet, select the AVAX network, enter your Metamask address, and click on “Bridge.” Follow the instructions to complete the bridge transaction, and once it’s successful, you’ll see AVAX in your Metamask wallet.
+ There are no comments
Add yours