


Are you looking to add Solana to your Metamask wallet? You’ve come to the right place! Adding Solana to Metamask is a straightforward process that gives you access to the exciting world of decentralized applications (dApps) and the Solana ecosystem.
Before we dive into the step-by-step guide, let’s briefly discuss why you might want to add Solana to Metamask. Solana is a high-performance blockchain network that boasts lightning-fast transaction speeds and low fees. By adding Solana to your Metamask wallet, you can interact with Solana-based dApps, swap tokens, and participate in the growing Solana DeFi ecosystem.
So, without further ado, let’s get started with the guide!
Step 1: Install Metamask
If you don’t already have Metamask installed, head over to the Metamask website and follow the instructions to download and install the extension for your preferred web browser. Once installed, create a new account or import an existing one if you already have a Metamask wallet.
Step 2: Access the Metamask Settings
After installing Metamask, you’ll see the Metamask logo in your browser’s toolbar. Click on the logo to open the Metamask extension. In the extension, you’ll find a menu icon (three lines) in the top right corner. Click on it, and a drop-down menu will appear. From the menu, select “Settings.”
Step 3: Add Solana Network
In the Metamask Settings, navigate to the “Networks” tab. Scroll down until you find the “Add Network” button. Click on it to add a new network. Here’s where you’ll enter all the necessary information to add Solana to Metamask.
Network Name: Enter “Solana” or any other name you prefer.
New RPC URL: Enter “https://api.mainnet-beta.solana.com” as the RPC URL.
Chain ID: Enter “101” as the Chain ID.
Symbol: Enter “SOL” as the Symbol.
Block Explorer URL: Enter “https://explorer.solana.com” as the Block Explorer URL.
After entering all the required information, click on the “Save” button.
Step 4: Switch to the Solana Network
Now that you’ve added Solana to Metamask, it’s time to switch to the Solana network. In the Metamask extension, click on the network dropdown menu (usually displaying “Ethereum Mainnet”), and select the newly added Solana network.
And voila! You’ve successfully added Solana to your Metamask wallet. Now you can take full advantage of the Solana ecosystem and explore all the exciting dApps and DeFi opportunities it has to offer.
Please note that interacting with the Solana network may incur gas fees, just like with other blockchain networks. Make sure you have sufficient funds in your Metamask wallet to cover any transaction fees.
Happy exploring!
Prepare Your Metamask Wallet
In order to add Solana to your Metamask wallet, you need to ensure that you have the latest version of Metamask installed on your browser. If you have not installed Metamask yet, you can download and install it from the official Metamask website.
Create a New Wallet or Import an Existing One

If you don’t have a Metamask wallet yet, you will need to create a new wallet. To do this, follow these steps:
- Click on the Metamask extension icon in your browser toolbar.
- Click on “Get Started” and then “Create a Wallet”.
- Follow the instructions to create a strong password and agree to the terms of use.
- Save or write down your secret backup phrase. This is extremely important as it is the only way to restore your wallet if you lose access to it.
- Click on “Next” and confirm your backup phrase by selecting the correct words in the right order.
- Your wallet is now created and you can proceed to the next step.
If you already have a Metamask wallet, you can import it by following these steps:
- Click on the Metamask extension icon in your browser toolbar.
- Click on “Import Wallet”.
- Enter your secret backup phrase and click on “Import”.
- Your wallet will be imported and you can proceed to the next step.
Add Solana to Metamask
Now that you have your Metamask wallet ready, you can add Solana to it by following these steps:
- Open your Metamask wallet by clicking on the extension icon in your browser toolbar.
- Click on the account dropdown in the top right corner and select “Settings”.
- Scroll down to the “Networks” section and click on “Add Network”.
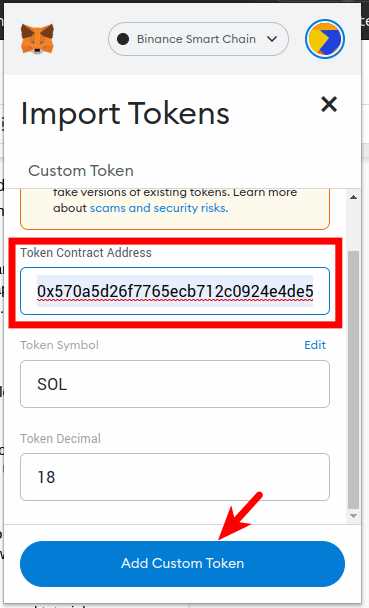
- Fill in the following details:
| Network Name | Solana |
| New RPC URL | https://api.mainnet-beta.solana.com |
| Chain ID | 101 |
| Symbol | SOL |
| Block Explorer URL | https://explorer.solana.com |
- Click on “Save” to add the Solana network to your Metamask wallet.
Congratulations! You have successfully prepared your Metamask wallet to support Solana. You can now use your wallet to send, receive, and store Solana tokens.
Create or Access an Existing Account
In order to add Solana to your Metamask wallet, you will first need to create a new account or access an existing one. Here’s how:
Create a New Account
If you do not have a Metamask account yet, follow these steps to create a new one:
- Install the Metamask browser extension by going to the official Metamask website and following the download instructions for your browser.
- Once the extension is installed, click on the Metamask icon in your browser toolbar to open the extension.
- Click on the “Get Started” button to begin the account creation process.
- Read and accept the terms of use and privacy policy.
- Create a strong password for your account and click “Create”.
- You will be presented with a unique backup phrase. Make sure to write it down and keep it in a safe place. This phrase can be used to recover your account if you ever lose access to it.
- Confirm your backup phrase by entering the words in the correct order.
- Your account is now created and ready to use!
Access an Existing Account
If you already have a Metamask account and want to add Solana to it, follow these steps:
- Open the Metamask extension by clicking on the Metamask icon in your browser toolbar.
- Enter your account password to unlock the extension.
- Click on the account dropdown menu and select the account you want to access.
- Your selected account is now ready to use.
Once you have created a new account or accessed an existing one, you are now ready to add Solana to your Metamask wallet.
Install the Metamask Extension
To add Solana to your Metamask wallet, you need to first install the Metamask extension. Follow the steps below to get started:
- Open your web browser and visit the official Metamask website.
- Click on the “Get Chrome Extension” button if you’re using Google Chrome, or the “Get Firefox Add-On” button if you’re using Mozilla Firefox.
- A pop-up will appear asking for confirmation to add the extension to your browser. Click on the “Add to” button.
- The extension will start downloading and installing.
- Once the installation is complete, you will see the Metamask icon added to your browser’s toolbar.
- Click on the Metamask icon to open the extension.
- A new tab will open with the Metamask welcome screen.
- Click on the “Get Started” button.
- You will be presented with the option to import an existing wallet or create a new one. Choose the desired option.
- If you are creating a new wallet, you will be asked to set a password and backup your secret seed phrase. Make sure to save your secret seed phrase in a safe place.
- Complete the on-screen instructions to finish setting up your Metamask wallet.
- Congratulations! You have successfully installed the Metamask extension on your browser and set up your wallet.
Now that you have Metamask installed, you can proceed to the next step of adding Solana to your wallet.
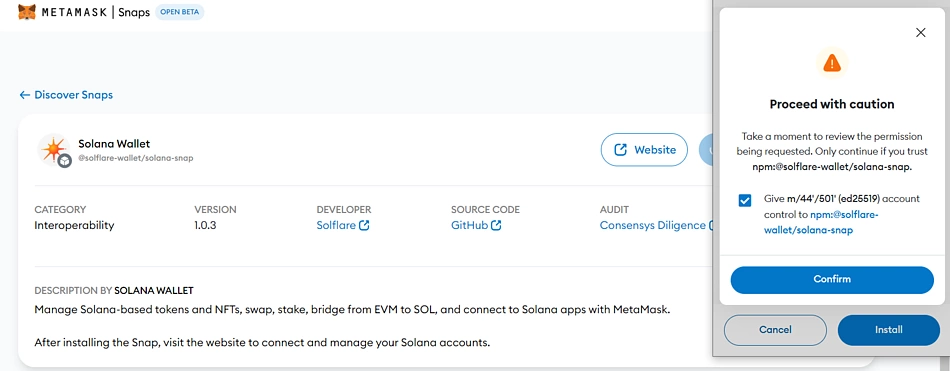
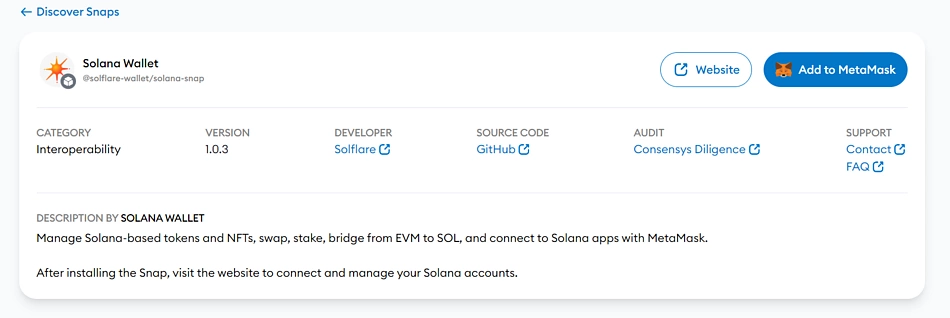
Connect Metamask to the Solana Blockchain
Metamask, a popular Ethereum wallet, now supports the Solana blockchain, allowing users to interact with Solana-based dapps and assets. Here’s a step-by-step guide on how to connect Metamask to the Solana blockchain:
- Open your Metamask extension or mobile app.
- Click on the account icon in the top right corner, then click on “Settings”.
- In the settings menu, click on “Networks”.
- Click on “Add Network” to add a custom network.
- Fill in the following details for the Solana network:
- Network Name: Solana
- New RPC URL: https://api.mainnet-beta.solana.com
- Chain ID: 101
- Symbol: SOL
- Block Explorer URL: https://explorer.solana.com
- Click on “Save” to add the Solana network to Metamask.
- Once the network is added, you’ll see Solana as an option in the network switcher.
- Click on Solana to switch to the Solana network.
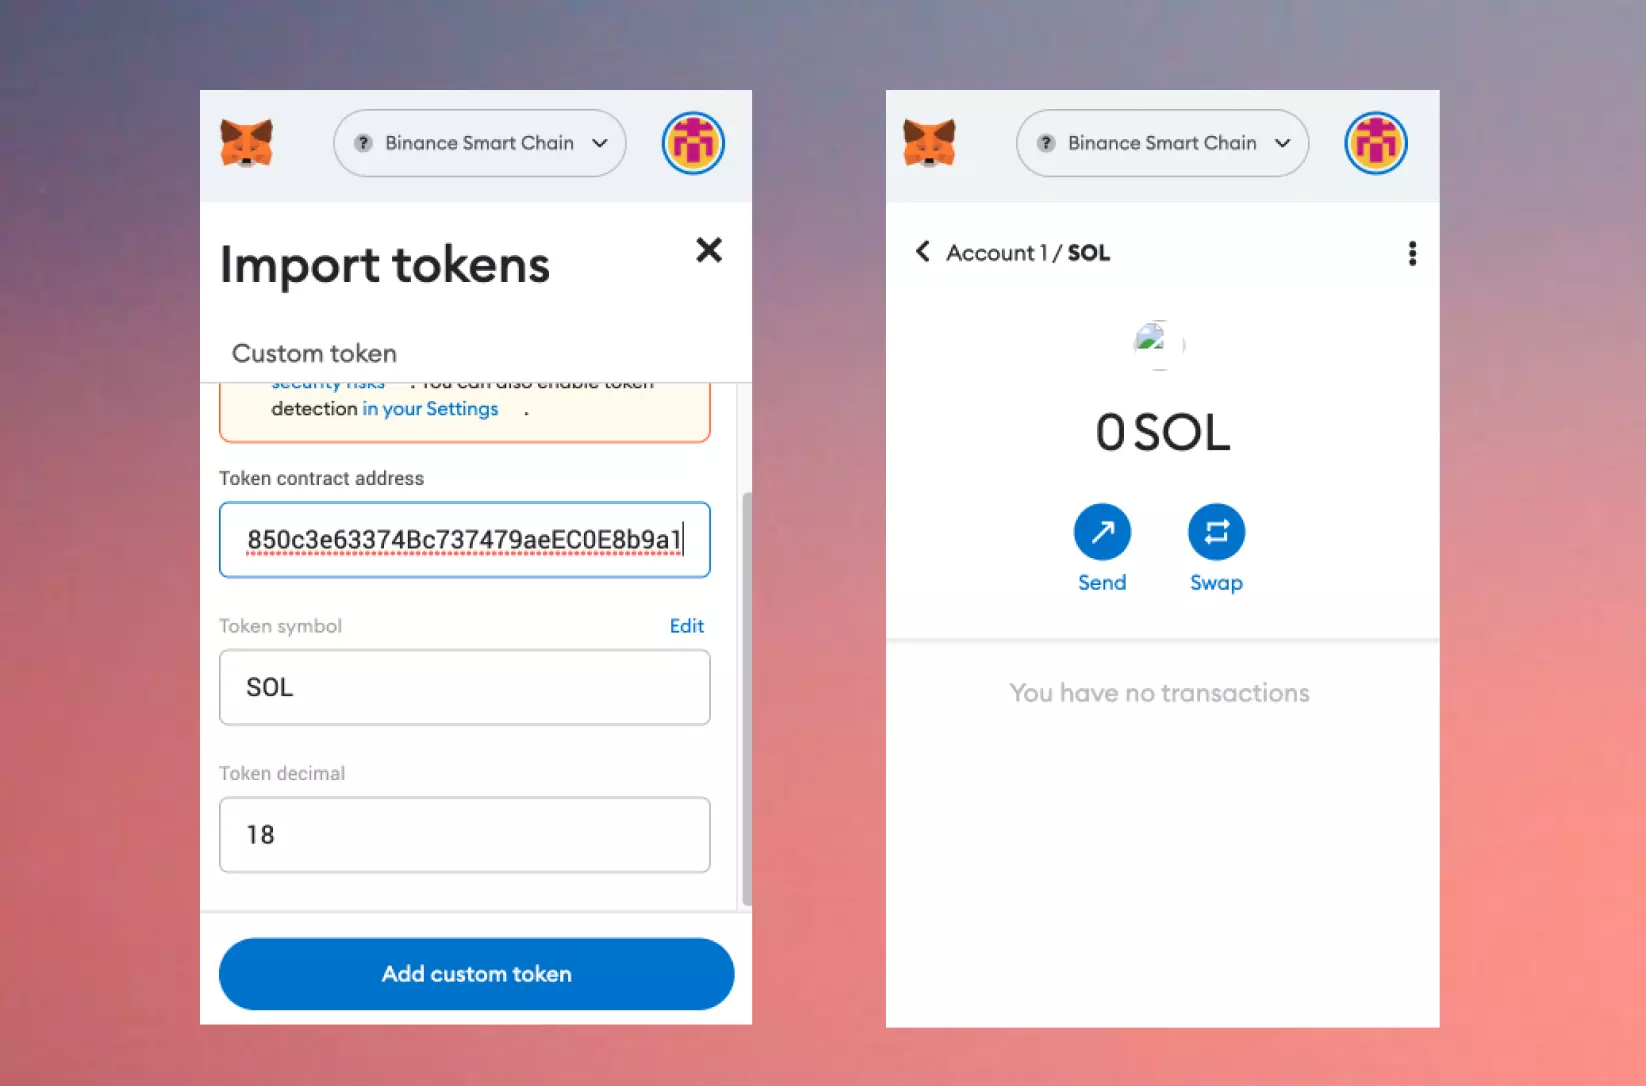
Now you’re connected to the Solana blockchain using your Metamask wallet. You can now view your Solana assets, send and receive SOL, and interact with Solana-based dapps.
Add Solana Network to Metamask
To add the Solana network to your Metamask wallet, follow these step-by-step instructions:
Step 1: Open the Metamask extension in your browser.
Step 2: Click on the Networks dropdown menu.
Step 3: Scroll down and click on the “Custom RPC” option.
Step 4: In the “New Network” section, enter the following details:
Network Name: Solana
New RPC URL: https://api.mainnet-beta.solana.com
Chain ID: 101
Currency Symbol: SOL
Step 5: Click on the “Save” button to add the Solana network to your Metamask wallet.
Step 6: Now you should see the Solana network listed in the Networks dropdown menu. Select it to switch to the Solana network.
Step 7: You have successfully added the Solana network to your Metamask wallet. You can now interact with Solana-based decentralized applications (dApps) and manage your SOL tokens.
Frequently Asked Questions:
Can I add Solana to Metamask?
Yes, you can add Solana to Metamask by following these steps.
What is Solana?
Solana is a high-performance blockchain platform that aims to provide fast and secure decentralized applications (Dapps) and crypto-assets.

+ There are no comments
Add yours