


Welcome to the complete guide on how to set up and use Avalanche Metamask! If you have been wanting to explore the world of Avalanche and interact with decentralized applications (dApps), you have come to the right place. In this guide, we will walk you through the step-by-step process of setting up Avalanche Metamask and using it effectively.
Avalanche Metamask is an extension for your web browser that allows you to connect to the Avalanche network. With Avalanche, you can access a wide range of dApps, including decentralized exchanges, lending platforms, and much more. By setting up and using Avalanche Metamask, you can securely manage your digital assets and seamlessly interact with this thriving ecosystem.
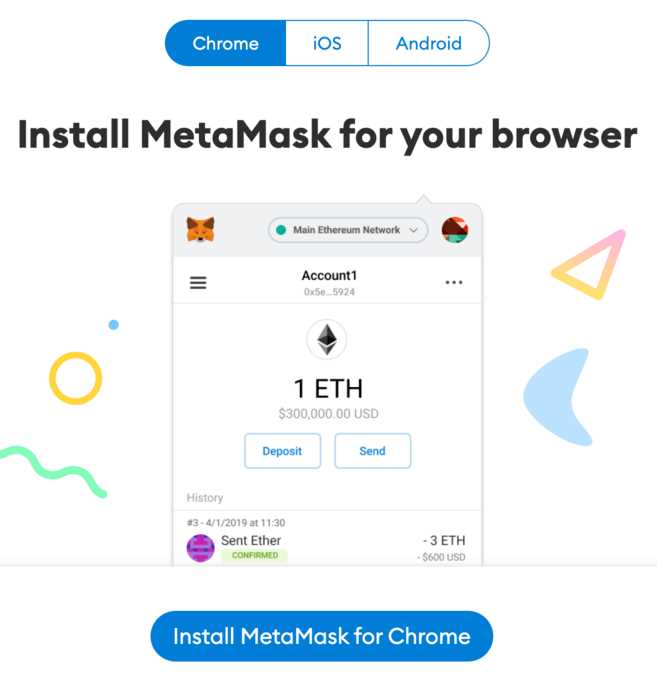
To get started, you will need to install the Metamask extension on your web browser. Open your favorite browser, such as Chrome or Firefox, and search for the Metamask extension. Once you find it, click on the “Add to Chrome” (or “Add to Firefox”) button to begin the installation process. Follow the on-screen prompts to complete the installation.
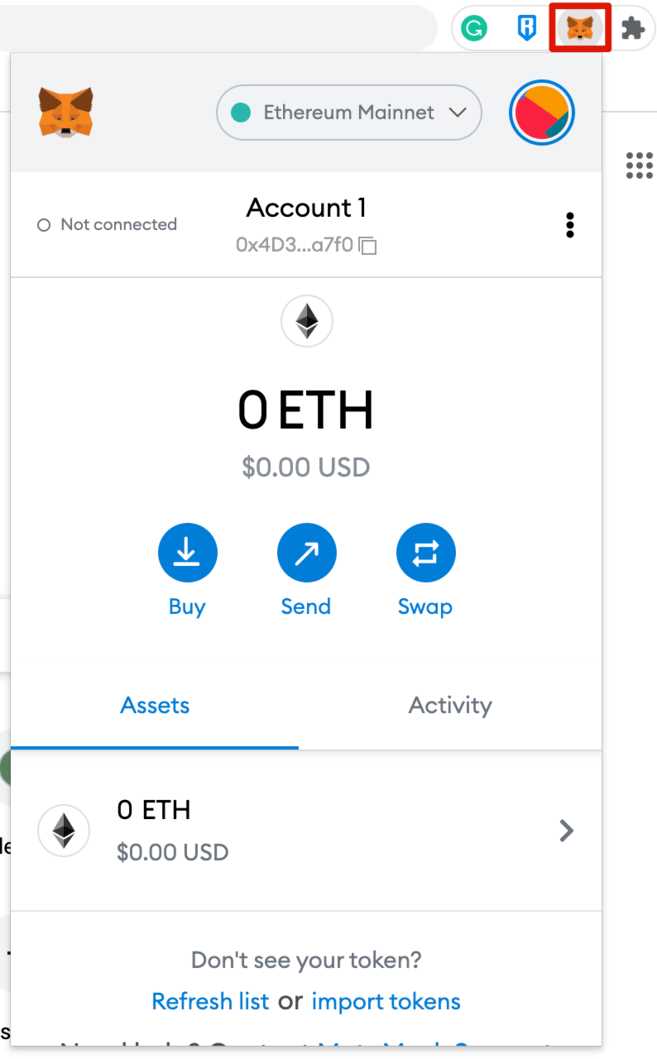
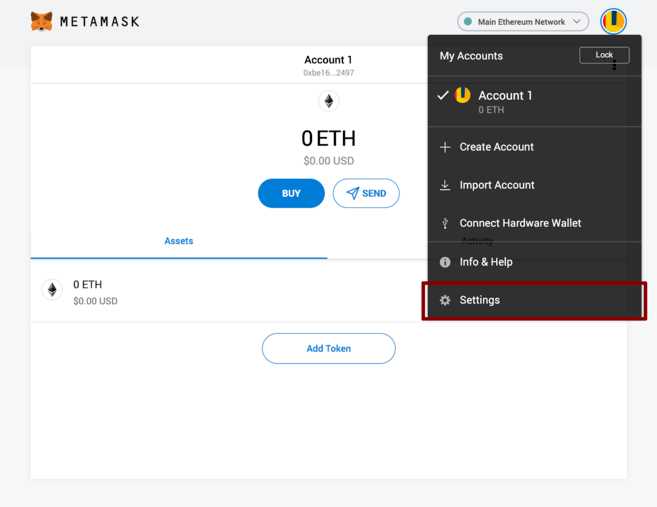
Once the installation is complete, you will see the Metamask logo in your browser’s toolbar. Click on the logo to open the Metamask extension. If this is your first time using Metamask, you will be prompted to create a new wallet. Choose a strong password and carefully store your secret backup phrase. This backup phrase is crucial for recovering your wallet in case you forget your password or lose access to your device.
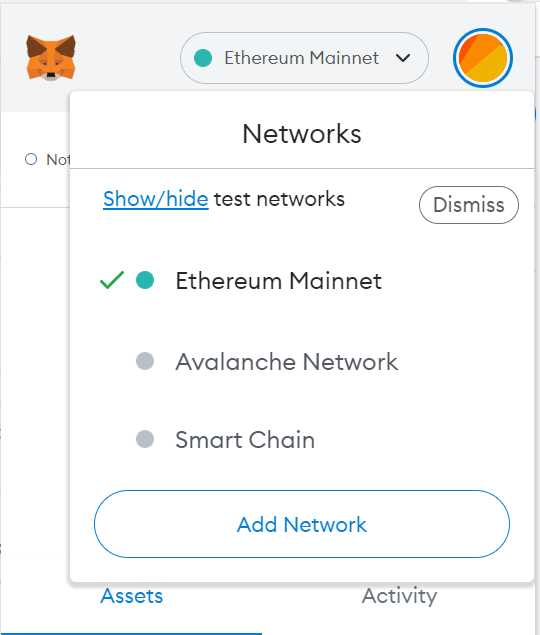
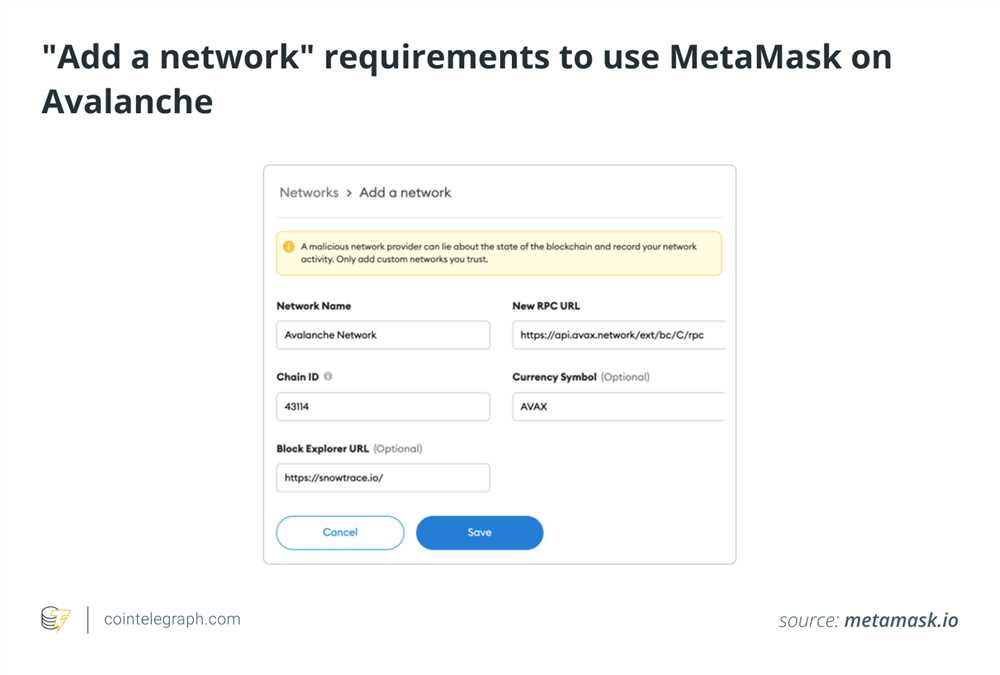
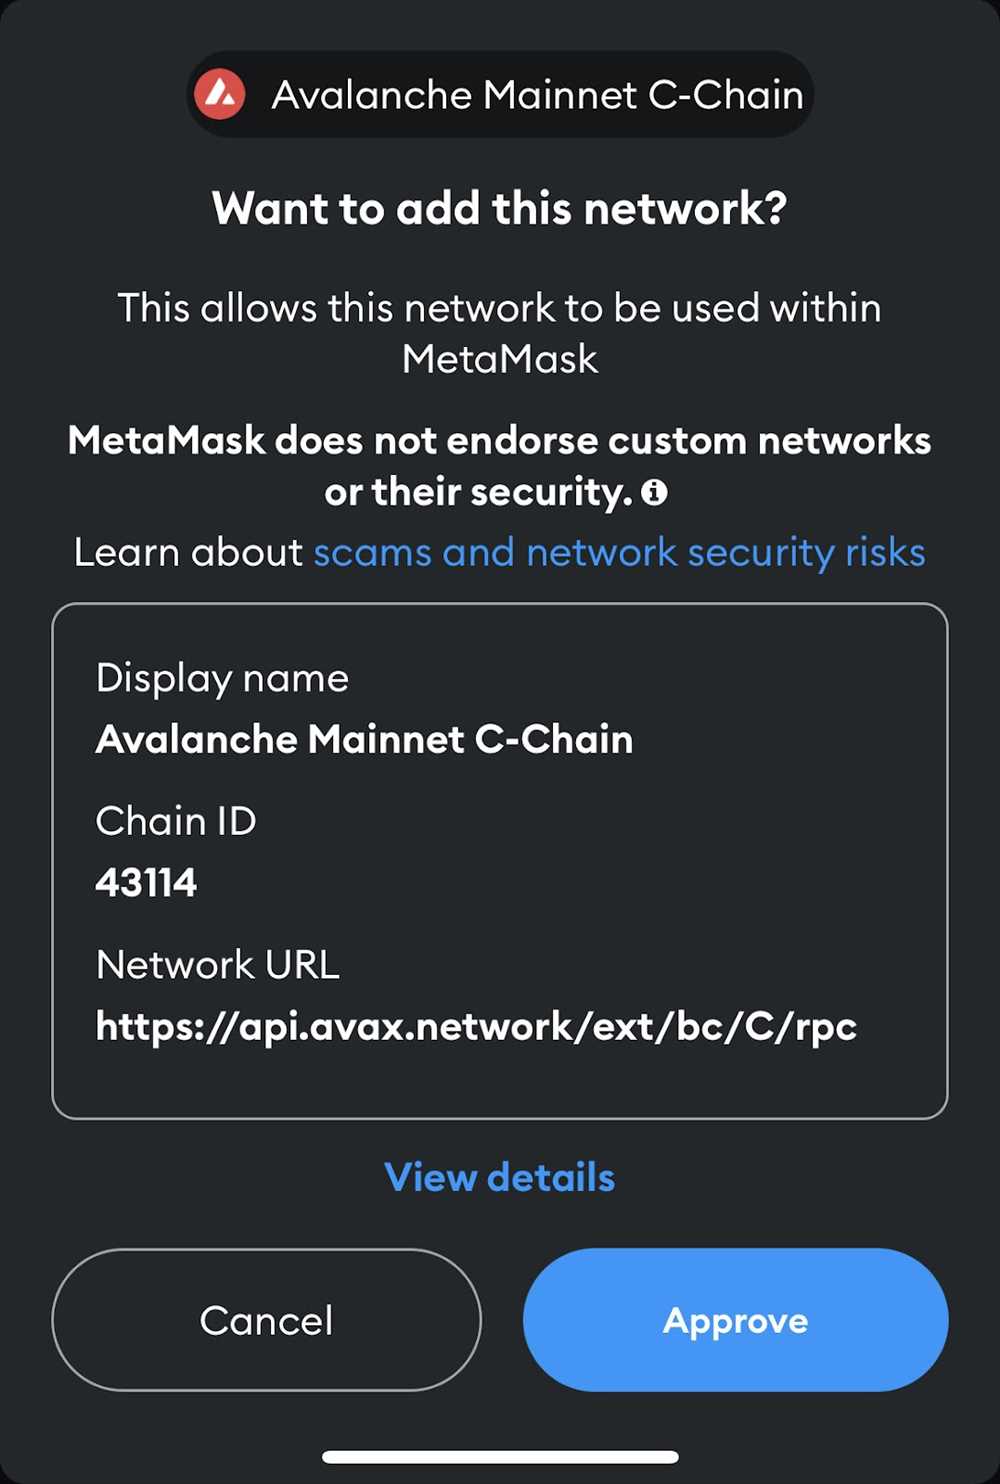
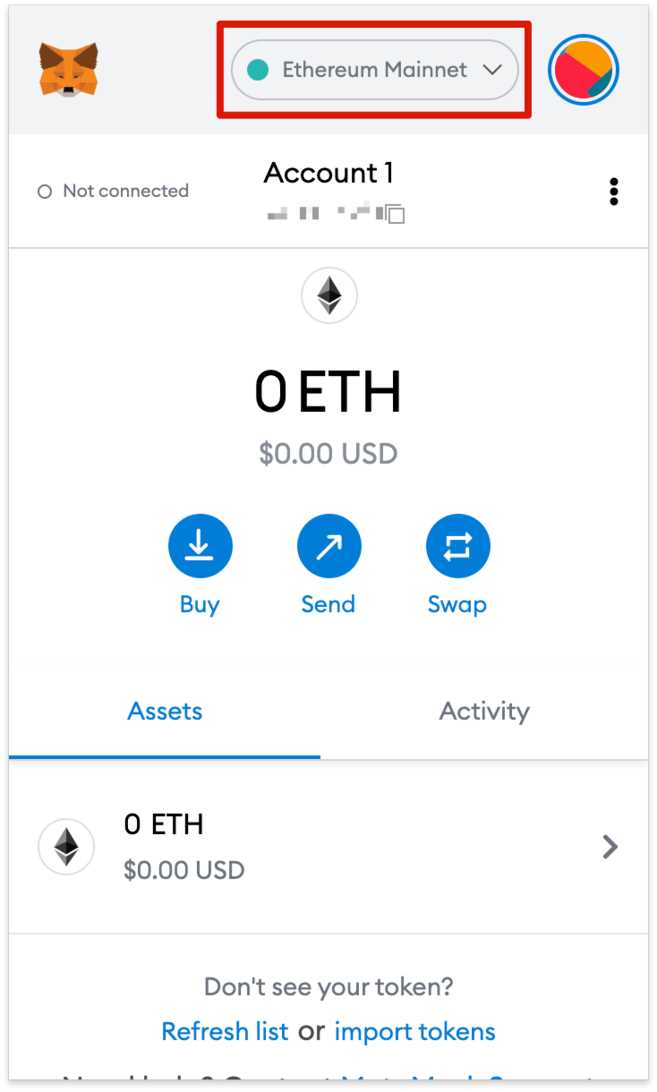
With your wallet set up, it’s time to connect Metamask to the Avalanche network. Click on the network selector in the top center of the Metamask window and choose “Custom RPC” from the dropdown menu. In the “New RPC URL” field, enter “https://api.avax.network/ext/bc/C/rpc” and click “Save”. Metamask will now be connected to the Avalanche network, and you can begin exploring the world of decentralized finance.
Now that you have successfully set up and connected Avalanche Metamask, you can start using it to interact with dApps on the Avalanche network. Whether you want to trade tokens, provide liquidity, or participate in decentralized governance, Avalanche Metamask will be your gateway to this exciting world. Enjoy the freedom and opportunities that Avalanche and Metamask bring, and always remember to stay informed and practice good security measures!
Step-by-Step Guide to Setting Up Avalanche Metamask
Setting up Avalanche Metamask allows you to access and interact with decentralized applications (dApps) and manage your Avalanche assets conveniently. Follow these steps to get started:
| Step 1: | Download Metamask extension for your web browser. |
| Step 2: | Open Metamask and click “Get Started”. |
| Step 3: | Read and accept the terms of use. |
| Step 4: | Create a strong password and click “Create”. |
| Step 5: | Save and securely backup your seed phrase. This is crucial for recovering your account. |
| Step 6: | Select “Avalanche” as your network and click “Next”. |
| Step 7: | Enter the network details: |
|
|
| Step 8: | Click “Save” and you will be connected to the Avalanche network. |
| Step 9: | Import an existing wallet or create a new one. |
| Step 10: | Congratulations! You have successfully set up Avalanche Metamask. Now you can manage your Avalanche assets and dApps. |
Note: It is important to keep your Metamask password and seed phrase secure. Do not share it with anyone and store it in a safe place.
How to Use Avalanche Metamask
Metamask is a popular web3 wallet that allows users to interact with decentralized applications (dApps) on the Avalanche network. Here are the steps to set up and use Avalanche Metamask:
- Install the Metamask extension: Go to the Metamask website and download the extension for your preferred browser. Once installed, create a new account and set up a password.
- Connect to the Avalanche network: Open Metamask and click on the network selection dropdown. Choose “Custom RPC” and enter the Avalanche network details:
- Network Name: Avalanche
- New RPC URL: https://api.avax.network/ext/bc/C/rpc
- Chain ID: 43114
- Symbol: AVAX
- Block Explorer URL: https://cchain.explorer.avax.network/
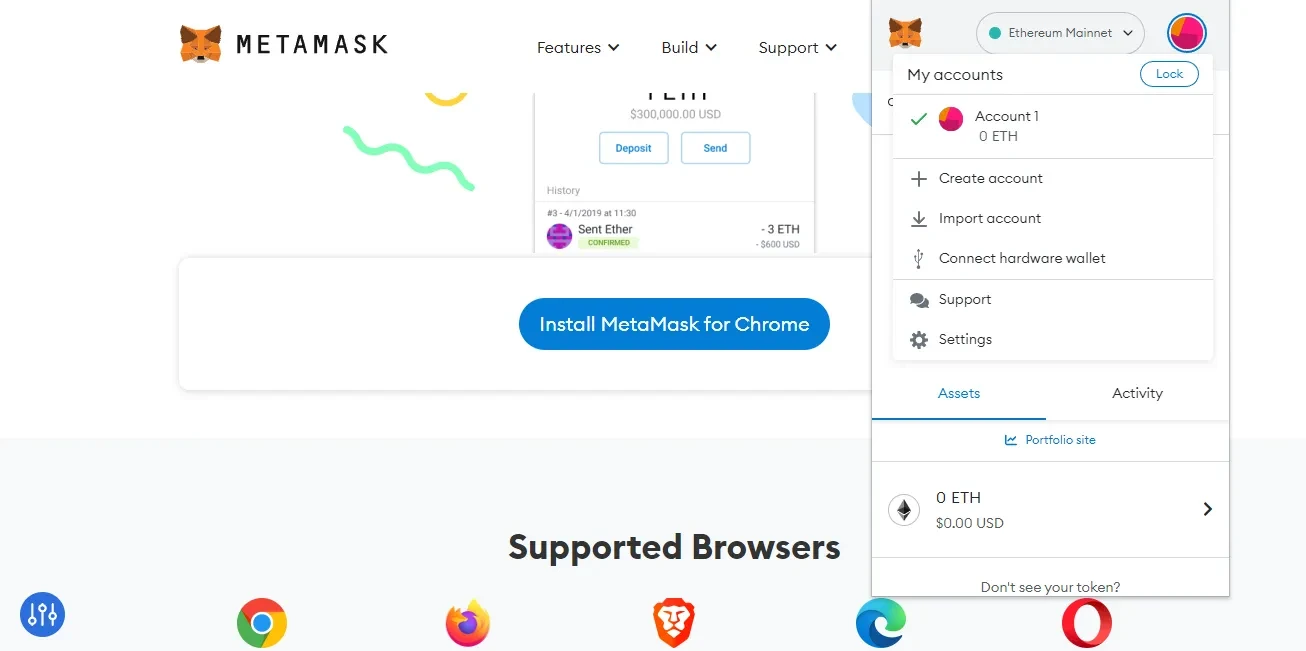
- Create or import your wallet: Once connected to the Avalanche network, you can either create a new wallet or import an existing one. Click on the account icon in the top right corner of the Metamask extension and choose the desired option.
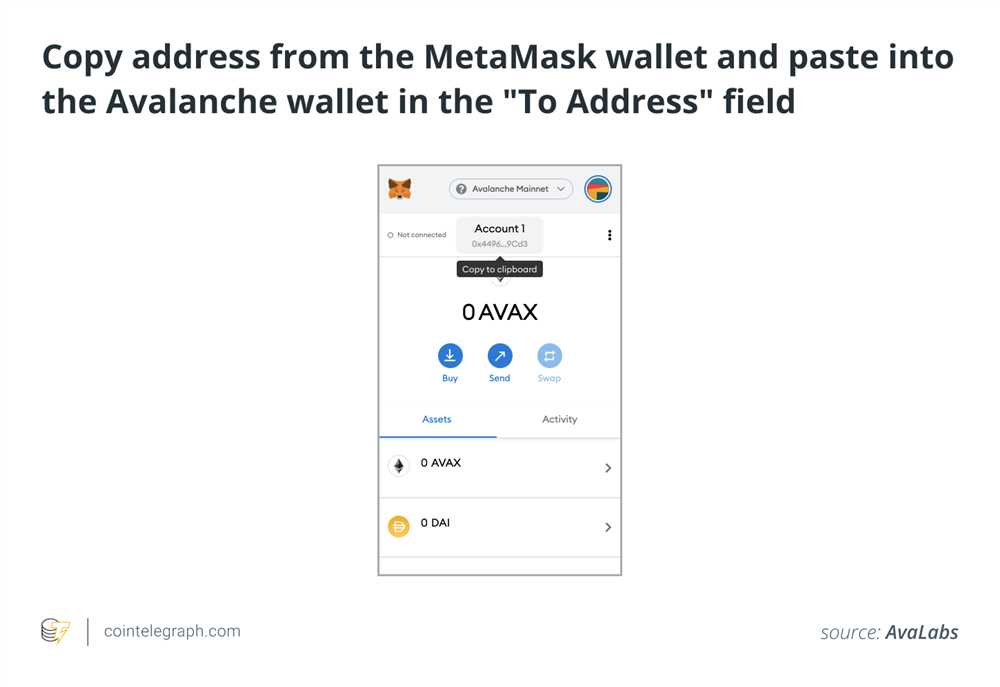
- Transfer AVAX to your wallet: In order to interact with dApps on Avalanche, you will need AVAX tokens. You can transfer AVAX from an external wallet or exchange to your Metamask wallet address.
- Start using Avalanche dApps: With AVAX tokens in your Metamask wallet, you can now start using decentralized applications on Avalanche. Visit the Avalanche ecosystem websites or dApp marketplaces and connect your Metamask wallet to access their features.
Using Avalanche Metamask enables you to securely and conveniently interact with the Avalanche network and its decentralized applications. Make sure to keep your wallet backup file and password safe, as they are essential for accessing your funds.
Tips and Tricks for Using Avalanche Metamask
As you start using Avalanche Metamask to interact with the Avalanche blockchain, here are some tips and tricks to enhance your experience:
1. Customizing Network Settings
Avalanche Metamask allows you to connect to different networks, and it’s important to ensure you are connected to the correct network for the task at hand. To customize your network settings, click on the network dropdown in the top center of the Metamask extension and select “Custom RPC”. Here you can enter the details of the Avalanche network you want to connect to, including the RPC URL and the Chain ID.
2. Adding Custom Tokens
If you want to interact with tokens on the Avalanche network that are not displayed by default in your Metamask wallet, you can add them as custom tokens. To do this, click on the “Add Token” button in the Metamask extension, and enter the contract address of the token you want to add. Metamask will automatically fetch the token symbol and decimals for you.
3. Managing Multiple Accounts
If you have multiple accounts connected to your Avalanche Metamask wallet, you can easily switch between them. To do this, click on the account dropdown in the top right corner of the Metamask extension and select the account you want to switch to.
4. Exporting and Importing Accounts
If you want to use the same Avalanche Metamask wallet on multiple devices or securely backup your accounts, you can export and import your accounts. To export your accounts, go to the Metamask extension settings, select the “Advanced” tab, and click on “Export Accounts”. This will generate a JSON file containing all your account information. To import an account, click on “Import Account” and select the JSON file you previously exported.
5. Protecting Your Wallet
Security is crucial when using Avalanche Metamask or any other cryptocurrency wallet. Make sure to set a strong, unique password for your wallet and enable two-factor authentication (if available). Additionally, be cautious of phishing attempts and only interact with trusted websites and dApps.
6. Keeping an Eye on Gas Prices
When performing transactions on the Avalanche network, it’s important to monitor the current gas prices to ensure your transactions are processed efficiently. You can use websites or apps that track gas prices on the Avalanche network, or check the gas prices directly within the Metamask extension by clicking on the transaction fee in the transaction confirmation popup.
| Tips and Tricks | Benefits |
|---|---|
| Customizing Network Settings | Ensures proper connection to the desired Avalanche network |
| Adding Custom Tokens | Enables interaction with additional tokens on Avalanche |
| Managing Multiple Accounts | Easily switch between different accounts |
| Exporting and Importing Accounts | Use the same wallet on multiple devices or securely backup accounts |
| Protecting Your Wallet | Ensure the security of your funds and personal information |
| Keeping an Eye on Gas Prices | Optimize transaction fees and processing time |
Frequently Asked Questions:
What is Avalanche Metamask?
Avalanche Metamask is a wallet extension that allows users to interact with the Avalanche blockchain and access decentralized applications (dApps) on the network.
How do I set up Avalanche Metamask?
To set up Avalanche Metamask, you will need to first install the Metamask browser extension. Once installed, click on the Metamask icon and select “Create a Wallet.” Follow the instructions to set up a new wallet, and then click on the network dropdown and select “Custom RPC.” In the RPC URL field, enter the Avalanche network’s RPC URL. Click “Save” and you will have successfully set up Avalanche Metamask.
What are the advantages of using Avalanche Metamask?
Using Avalanche Metamask provides several advantages. It allows users to securely store their digital assets on the Avalanche blockchain, access and interact with dApps on the Avalanche network, and easily transfer assets between wallets. Additionally, Avalanche Metamask offers a user-friendly interface and integrates seamlessly with the existing Metamask ecosystem.

+ There are no comments
Add yours