


Welcome to the world of cryptocurrencies! If you’re interested in buying Ether (ETH) and exploring the decentralized world of blockchain, you’ve come to the right place! In this beginner’s guide, we will walk you through the process of purchasing ETH using MetaMask, a popular Ethereum wallet and browser extension.
MetaMask is a user-friendly wallet that allows you to store, send, and receive Ethereum. It also serves as a gateway to the decentralized web, providing a seamless experience when interacting with decentralized applications (dApps) and smart contracts. With MetaMask, you can easily connect your wallet to various decentralized exchanges and begin your journey into the world of cryptocurrencies.
Before we get started, it’s important to note that MetaMask is available as a browser extension for Google Chrome, Firefox, and Brave browsers. Make sure you have one of these browsers installed on your computer before proceeding. Now, let’s dive into the step-by-step process of purchasing ETH with MetaMask!
A Beginner’s Guide to Purchasing ETH with MetaMask
If you are new to the world of cryptocurrencies and want to buy Ethereum (ETH), MetaMask is a great choice for a beginner-friendly wallet. MetaMask is a browser extension that allows you to store, send, and receive ETH and other Ethereum-based tokens. In this guide, we will walk you through the process of purchasing ETH using MetaMask.
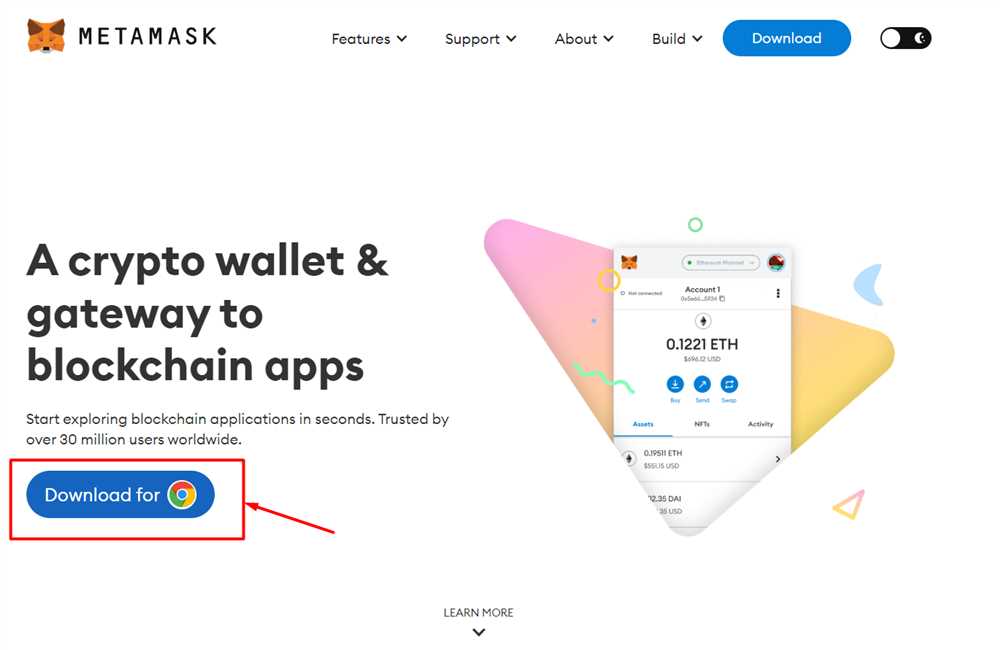
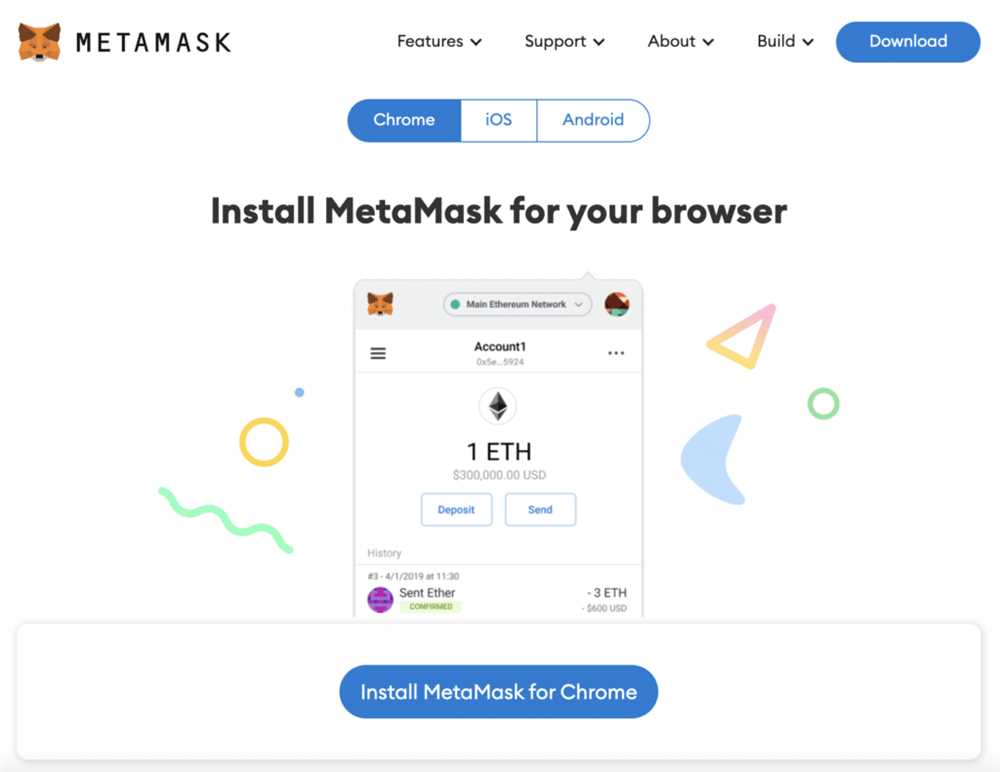
Step 1: Install MetaMask
The first step is to install the MetaMask extension on your preferred browser. Go to the MetaMask website and follow the instructions to add the extension to your browser.
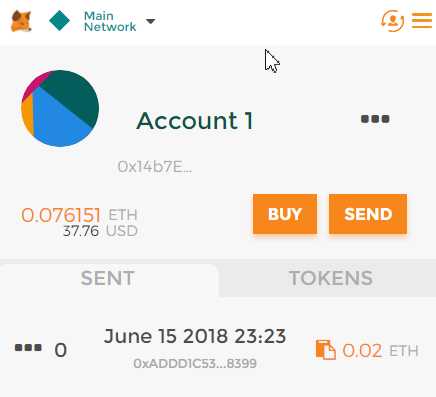
Step 2: Create a MetaMask Wallet
Once MetaMask is installed, click on the extension icon in your browser to open it. You will be prompted to set up a new wallet. Choose a strong password and make sure to write down your secret backup phrase, as this is the only way to restore your wallet if you lose access to it.
Step 3: Add Ethereum to Your Wallet
Before you can buy ETH, you need to have some Ethereum in your wallet. You can obtain Ethereum from different sources, such as cryptocurrency exchanges or decentralized marketplaces. Once you have acquired Ethereum, you can send it to your MetaMask wallet by copying the wallet address provided by MetaMask and using it as the recipient address when making the transaction.
Step 4: Connect MetaMask to a Decentralized Exchange
To purchase ETH, you will need to connect MetaMask to a decentralized exchange (DEX) that supports Ethereum and has a trading pair with ETH. Some popular DEX options include Uniswap, SushiSwap, and PancakeSwap. Open the DEX website of your choice and connect your MetaMask wallet to the platform by clicking on the connect wallet button and selecting MetaMask.
Step 5: Swap Ethereum for ETH
Once your MetaMask wallet is connected to the DEX, you can initiate a swap to exchange your Ethereum for ETH. On the DEX platform, locate the ETH trading pair and enter the amount of Ethereum you want to swap. The platform will show you the equivalent amount of ETH you will receive. Review the transaction details and confirm the swap.
Step 6: Confirm the Transaction
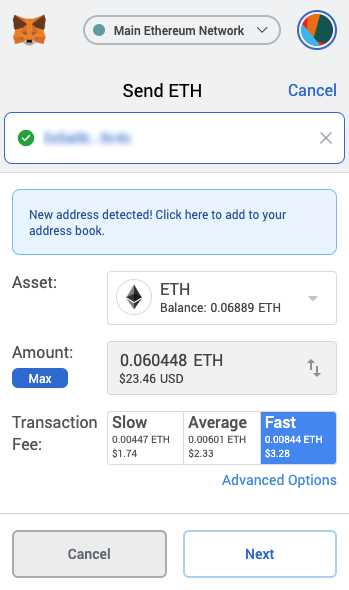
After confirming the swap, MetaMask will open a new window or tab showing the transaction details. Review the gas fees and ensure that you have enough Ethereum in your wallet to cover the transaction fees. Once you are ready, click the confirm button to initiate the transaction. The swap will usually take a few moments to complete, and you will see the ETH balance in your MetaMask wallet once it is done.
Now you have successfully purchased ETH with MetaMask! Remember to keep your wallet and secret backup phrase secure to protect your funds. You can use your ETH for various purposes, such as investing in other cryptocurrencies, participating in decentralized finance (DeFi) projects, or simply holding it as a digital asset.
Understanding MetaMask and Ethereum
MetaMask is a browser extension that serves as a digital wallet for the Ethereum blockchain. It allows users to manage their Ethereum accounts, store their private keys, and interact with decentralized applications (dApps) directly from their web browser.
Ethereum is a decentralized, open-source blockchain platform that supports smart contracts. It provides developers with a platform to build and deploy their own decentralized applications on top of the Ethereum network. Ethereum has its native cryptocurrency called Ether (ETH), which is used to pay for services and execute smart contracts.
MetaMask works by creating a secure and encrypted vault to store a user’s Ethereum accounts and private keys. When a user interacts with a dApp, MetaMask prompts the user to sign transactions using their private keys, providing an extra layer of security and preventing unauthorized access to their accounts.
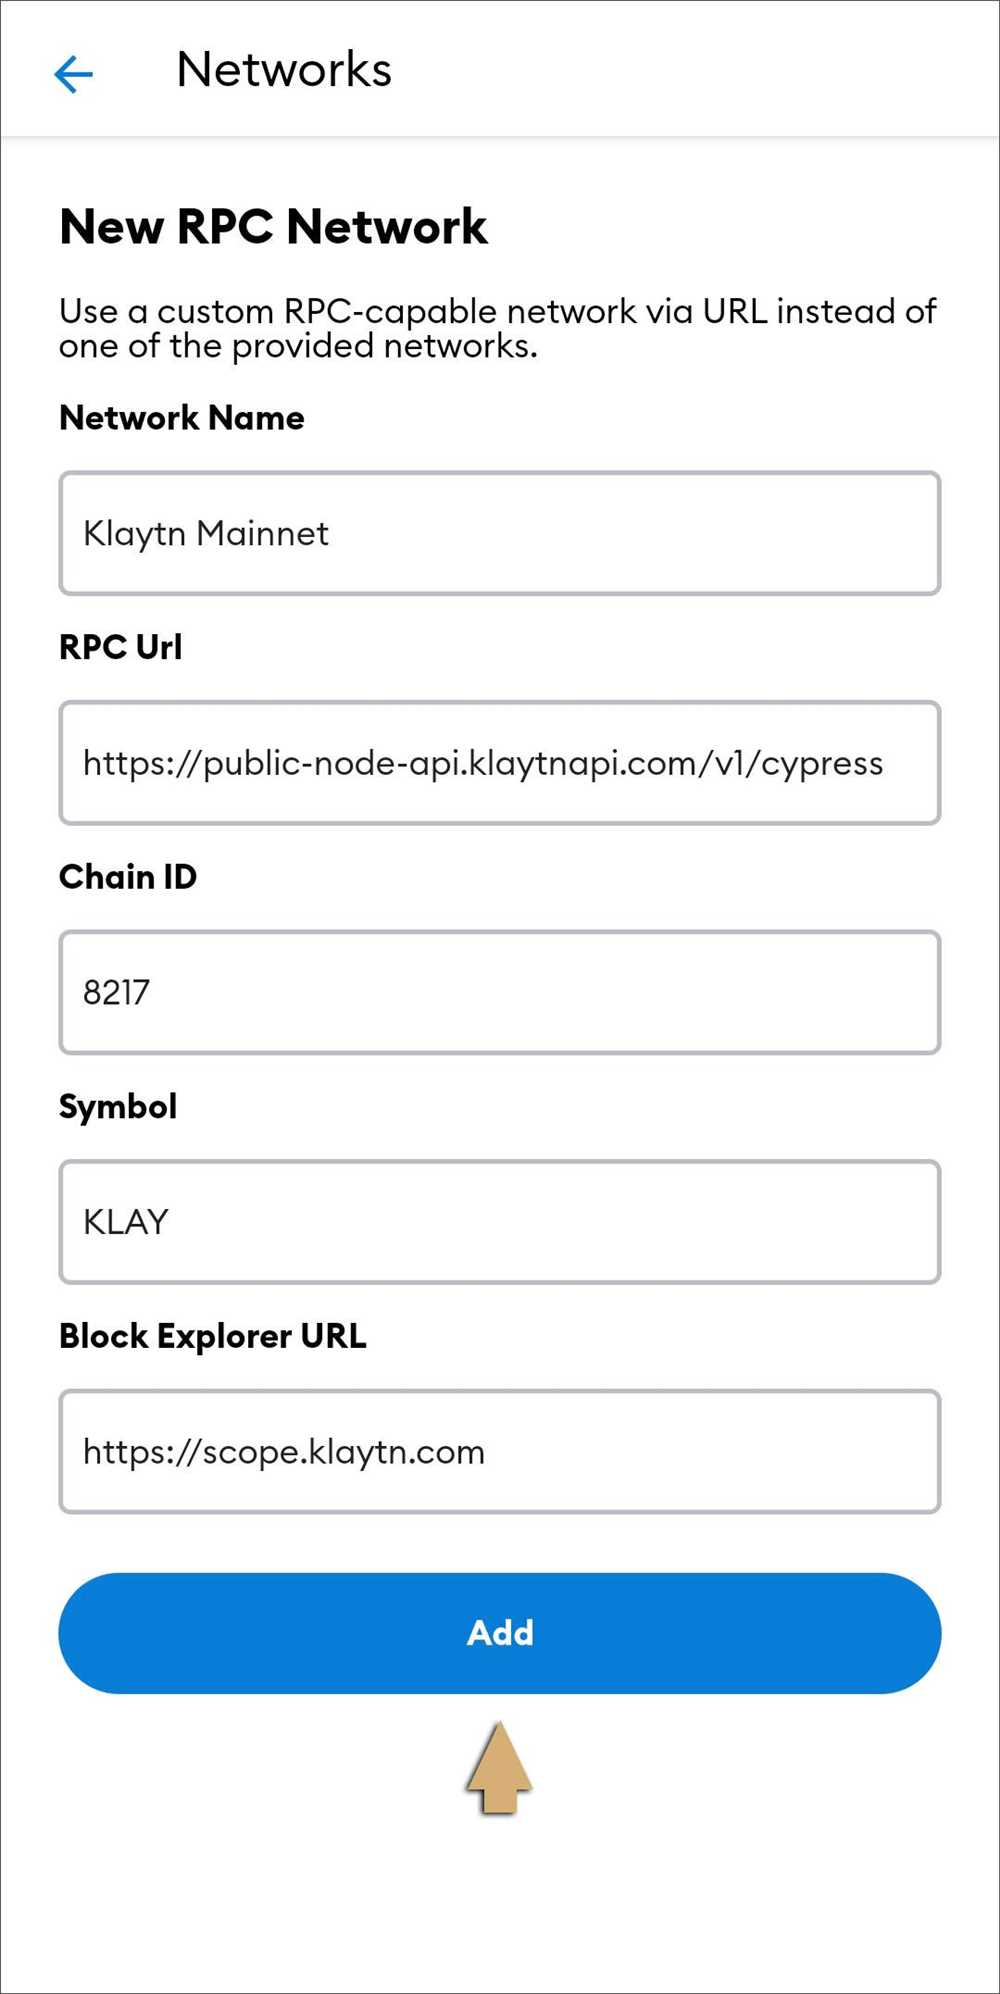
One of the key features of MetaMask is its ability to connect and interact with different Ethereum networks. By default, MetaMask is connected to the Ethereum Mainnet, but users can easily switch to other networks such as the Rinkeby Testnet or the Binance Smart Chain.
Using MetaMask, users can send and receive Ether (ETH) and other Ethereum-based tokens, interact with dApps, participate in decentralized finance (DeFi) protocols, and more, all through a user-friendly interface integrated into their web browser.
| Key Terms | Definitions |
|---|---|
| MetaMask | A browser extension that serves as a digital wallet for the Ethereum blockchain. |
| Ethereum | A decentralized, open-source blockchain platform that supports smart contracts. |
| Ether (ETH) | The native cryptocurrency of the Ethereum blockchain used to pay for services and execute smart contracts. |
| dApps | Decentralized applications built on top of the Ethereum network. |
| Ethereum Networks | Different networks in the Ethereum ecosystem, such as the Ethereum Mainnet, Testnets, and side chains. |
| Decentralized Finance (DeFi) | A term used to describe various financial applications built on decentralized networks, typically leveraging smart contracts. |
Step-by-Step Guide to Purchasing ETH
Are you interested in purchasing Ethereum (ETH) using the MetaMask wallet? Follow these simple steps to get started:
- Install the MetaMask browser extension. You can find it in the Chrome Web Store or the Firefox Add-Ons Marketplace. Once installed, create a new wallet.
- Set up your wallet by following the prompts from MetaMask. Make sure to securely store your seed phrase as it will be needed to recover your wallet if necessary.
- Once your wallet is set up, you need to add funds to it. You can do this by purchasing ETH from an exchange or from another person.
- If you are buying ETH from an exchange, navigate to the exchange’s website and create an account if you don’t already have one. Complete the necessary identity verification process.
- Once your account is set up, deposit funds into the exchange. This can usually be done by connecting your bank account or using a credit card.
- After depositing funds, locate the ETH trading pair and place a buy order for the amount of ETH you wish to purchase.
- Once you have completed the purchase, the ETH will be added to your exchange account.
- Now, you need to transfer the ETH from the exchange to your MetaMask wallet. To do this, go to your MetaMask wallet and click on the “Receive” button.
- A unique wallet address will be provided to you. Copy this address, go back to the exchange, and initiate a withdrawal to this address.
- Double-check that you have entered the correct wallet address to avoid losing your ETH.
- Confirm the withdrawal and wait for the transaction to be processed. This may take some time depending on network congestion.
- Once the transaction is confirmed, you should see the ETH in your MetaMask wallet.
- Congratulations! You have successfully purchased ETH using MetaMask!
Remember to always exercise caution when buying and storing cryptocurrencies. Make sure to use reputable exchanges and double-check wallet addresses to avoid any potential scams or losses.
Tips and Best Practices for Buying ETH with MetaMask
Buying ETH with MetaMask can be an exciting experience, but it’s important to keep a few tips and best practices in mind to ensure a smooth and secure transaction.
1. Do Your Research
Before you purchase ETH using MetaMask, it’s essential to understand the basics of cryptocurrencies and the Ethereum network. Research the current market conditions and be aware of the risks involved.
2. Use a Secure Internet Connection
Make sure you are connected to a secure and trusted internet connection when buying ETH with MetaMask. Avoid using public Wi-Fi networks or unsecured connections to minimize the risk of unauthorized access to your personal information.
3. Verify the Source
Ensure that you are buying ETH from a reputable and trusted source. Double-check the website or platform’s credentials and user reviews before making any transactions. Be cautious of phishing attempts and avoid sharing your private keys or seed phrases with anyone.
4. Set a Strong Password
When creating your MetaMask account, choose a strong and unique password that is not easy to guess. Consider using a password manager to securely store and manage your passwords.
5. Enable Two-Factor Authentication
Adding an extra layer of security to your MetaMask account by enabling two-factor authentication (2FA) can help protect your funds from unauthorized access. Use an authenticator app like Google Authenticator or Authy for added security.
6. Double-Check Transaction Details
Before confirming any transaction, carefully review the details to ensure accuracy. Verify the amount of ETH you are purchasing, the recipient’s address, and any associated fees. Sending funds to the wrong address can result in irreversible loss.
7. Start with Small Investments
If you’re new to buying ETH with MetaMask, it’s advisable to start with smaller investments until you become more comfortable with the process. This way, you can limit potential losses while gaining experience.
8. Stay Informed
Stay updated with the latest news and developments in the cryptocurrency market, especially Ethereum. Subscribe to reliable sources, follow reputable influencers, and engage in relevant communities to expand your knowledge and make informed decisions.
Remember, buying ETH with MetaMask is just the beginning of your crypto journey. It’s important to stay vigilant, educate yourself, and adopt best practices to protect your investment and ensure a positive experience.
Frequently Asked Questions:
What is MetaMask?
MetaMask is a cryptocurrency wallet and browser extension that allows users to interact with the Ethereum blockchain. It allows users to securely store, send, and receive Ether (ETH) and ERC-20 tokens.
How can I install MetaMask?
To install MetaMask, you need to go to the MetaMask website and download the extension for your preferred browser. Once downloaded, follow the installation instructions provided by MetaMask. After installation, you will need to create a new wallet or import an existing one.
What is ETH?
ETH is the native cryptocurrency of the Ethereum blockchain. It is used to pay for transaction fees and as a store of value. ETH can also be used to participate in decentralized finance (DeFi) applications and to purchase other digital assets.
How can I purchase ETH with MetaMask?
To purchase ETH with MetaMask, you will need to connect your MetaMask wallet to a cryptocurrency exchange or a decentralized exchange (DEX) that supports ETH. Once connected, you can deposit funds into the exchange and trade them for ETH. The ETH will be directly deposited into your MetaMask wallet.
Is it safe to use MetaMask?
MetaMask is considered to be a secure wallet, but it is important to take certain precautions to protect your funds. It is recommended to enable two-factor authentication, use strong passwords, and ensure that your computer or device is free from malware. Additionally, be cautious of phishing attempts and only interact with trusted websites and applications.
+ There are no comments
Add yours