


Metamask is a popular Ethereum wallet and browser extension that allows users to interact with decentralized applications (dApps) on the Ethereum blockchain. It provides a secure and convenient way to store, manage, and transact cryptocurrencies, as well as access various decentralized networks.
Whether you’re new to the world of cryptocurrency or already familiar with Ethereum, understanding how Metamask wallets work is essential for navigating the decentralized landscape. In this comprehensive guide, we will take you through the basics of Metamask wallets, providing you with the knowledge and tools necessary to get started.
With Metamask, you can create multiple wallets, each with its own unique address and private key. These wallets serve as your virtual identity on the Ethereum network, allowing you to send, receive, and securely store Ether (ETH) and other ERC-20 tokens. By connecting your Metamask wallet to a dApp, you can interact with smart contracts, participate in token sales, and engage in various decentralized activities.
In addition to its functionality as a wallet, Metamask also acts as a browser extension, seamlessly integrating with popular web browsers like Google Chrome and Firefox. This enables you to browse dApps and Ethereum-enabled websites with ease, without the need for additional software or plugins.
Whether you’re a cryptocurrency enthusiast, a developer, or simply curious about the world of decentralized applications, this comprehensive guide will provide you with the necessary information to start exploring the world of Metamask wallets. From setting up your wallet to securing your funds, we will cover all the essentials to ensure a smooth and secure experience.
What is Metamask Wallet?
Metamask Wallet is a cryptocurrency wallet that allows users to manage, store, and interact with their digital assets, all within the web browser. It is a popular wallet solution for Ethereum and other Ethereum-based tokens.
Metamask acts as a bridge between the user’s web browser and the Ethereum blockchain. It provides users with a user-friendly interface and a set of tools to easily interact with decentralized applications (dApps) and participate in the decentralized finance (DeFi) ecosystem.
One of the key features of Metamask Wallet is its ability to create and manage multiple Ethereum accounts. Each account has a unique address, which serves as the user’s digital identity on the Ethereum network. Users can easily switch between accounts to manage their different digital assets.
In addition to account management, Metamask Wallet also provides users with a secure and convenient way to send and receive Ether and other Ethereum-based tokens. Users can easily generate transaction requests, sign them with their private keys, and broadcast them to the Ethereum network.
Metamask Wallet also acts as a key vault, securely storing the user’s private keys and allowing them to sign transactions without ever exposing their private keys to the web browser or any third-party applications.
Furthermore, Metamask Wallet integrates with various decentralized applications and platforms, allowing users to seamlessly interact with dApps and access a wide range of decentralized services, such as decentralized exchanges, lending platforms, and decentralized gaming applications.
| Key Features of Metamask Wallet: |
|---|
| – Web browser extension wallet |
| – Multi-account management |
| – Secure private key storage |
| – Easy transaction management |
| – Integration with dApps and DeFi protocols |
In conclusion, Metamask Wallet is a versatile cryptocurrency wallet that provides a user-friendly interface, secure private key storage, and seamless integration with decentralized applications. It is an essential tool for anyone looking to explore the world of Ethereum and participate in the decentralized finance ecosystem.
Getting Started with Metamask Wallet
Metamask is a popular cryptocurrency wallet that allows users to store, send, and receive Ethereum and other ERC-20 tokens. This guide will walk you through the process of setting up your Metamask wallet and getting started with using it.
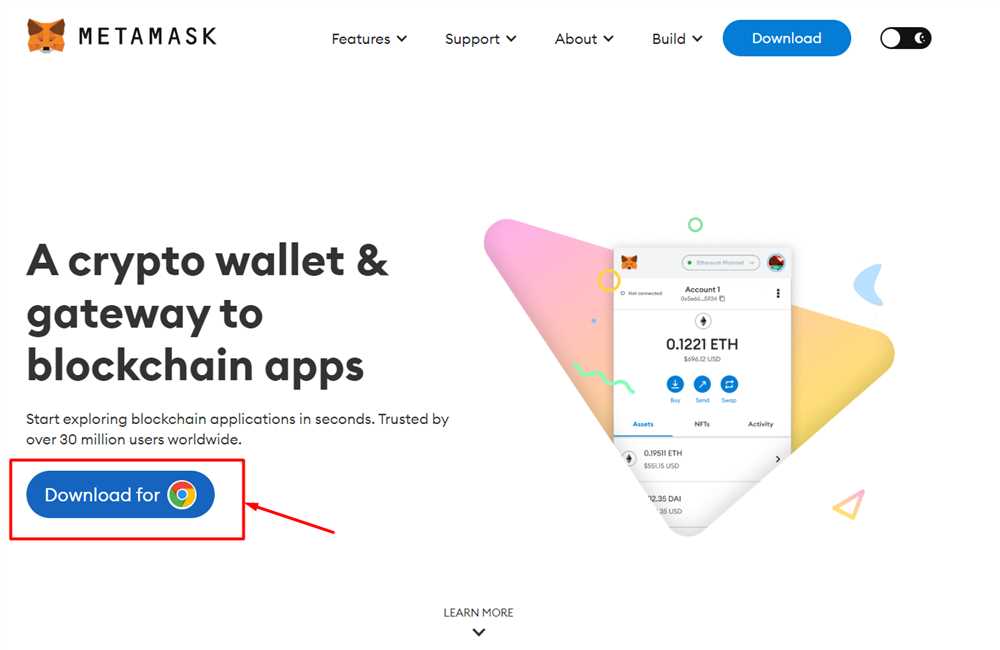
1. Install Metamask
The first step in getting started with Metamask is to install the wallet extension on your browser. Metamask is available for Chrome, Firefox, and Brave browsers. Simply search for “Metamask” in your browser’s extension store and click on the “Install” button.
2. Create a New Wallet
Once the Metamask extension is installed, click on the Metamask icon in your browser’s toolbar to open the wallet. If this is your first time using Metamask, click on the “Get Started” button to create a new wallet.
Follow the instructions to set up a password for your wallet. Make sure to choose a strong and unique password that you can remember.
3. Backup Your Seed Phrase
After setting up your password, Metamask will provide you with a unique 12-word seed phrase. This seed phrase is the key to accessing your wallet, so it’s crucial to back it up and store it in a safe place.
Write down the seed phrase and keep it in a secure location. It’s recommended to have multiple copies of the seed phrase and to store them in separate physical locations.
4. Connect to a Network
Metamask allows you to connect to various Ethereum networks. By default, it will be connected to the Ethereum Mainnet. To connect to a different network, such as a test network or a custom network, click on the network dropdown menu and select the desired network.
Make sure to choose the network that is compatible with the tokens or dapps you want to use.
5. Add Funds to Your Wallet
Once your wallet is set up and connected to a network, you can add funds to it by clicking on the account icon in the top right corner of the Metamask wallet and selecting “Receive”. This will show you your wallet address, which you can share with others to receive funds.
You can send funds to your wallet by copying the wallet address and pasting it into the recipient address field of the platform or wallet you are sending the funds from.
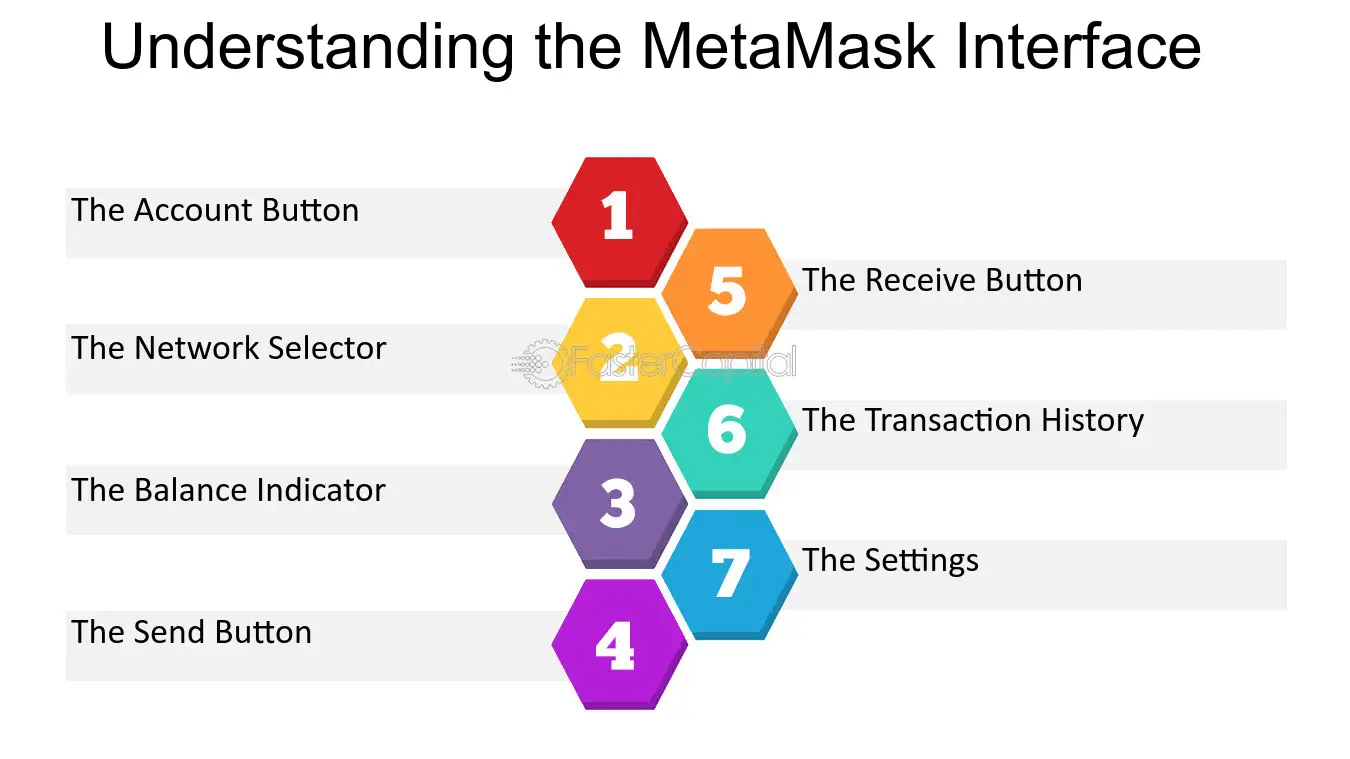
6. Explore Metamask Features
Now that your Metamask wallet is set up and funded, you can start exploring its features. Metamask allows you to interact with decentralized applications (dapps), exchange cryptocurrencies, and manage your wallet settings.
Take some time to familiarize yourself with the various tabs and options in the Metamask wallet, and don’t hesitate to explore the decentralized finance (DeFi) ecosystem that Metamask opens up to you.
Remember to always exercise caution and do thorough research before using any dapps or engaging in any financial transactions.
Conclusion
Getting started with Metamask is relatively easy and straightforward. By following the steps outlined in this guide, you’ll be able to set up your Metamask wallet, secure your funds with a backup seed phrase, and start exploring the world of decentralized finance.
Remember to stay informed about security best practices and never share your seed phrase or wallet password with anyone. With time and experience, you’ll become more comfortable using Metamask and taking advantage of its powerful features.
How to Install and Set Up Metamask Wallet
Metamask is a popular cryptocurrency wallet that allows users to securely store and manage their digital assets. In this guide, we will walk you through the process of installing and setting up Metamask on your device.
Step 1: Install Metamask Extension
The first step is to install the Metamask extension on your preferred web browser. Metamask is compatible with Chrome, Firefox, and Brave browsers. Simply open your browser and search for “Metamask” in the extension store. Click on the “Add to Chrome” (or similar) button to initiate the installation.
Step 2: Create a New Wallet
Once the installation is complete, you will see the Metamask icon in the top-right corner of your browser. Click on the icon to open the Metamask wallet. On the welcome screen, click on the “Create a Wallet” button to begin the wallet creation process.
You will be asked to set a strong password for your wallet. Make sure to choose a password that is both unique and secure. After entering your password, click on the “Create” button to proceed.
Step 3: Backup Your Seed Phrase
Next, Metamask will provide you with a unique seed phrase consisting of 12 words. It is crucial to write down and store this seed phrase in a safe place. This phrase is the key to accessing your wallet and should never be shared with anyone. Click on the “Next” button after you have securely backed up your seed phrase.
Step 4: Confirm Your Seed Phrase
In order to confirm that you have correctly backed up your seed phrase, Metamask will ask you to select the words in the correct order. Carefully select the words from the dropdown menus in the correct order and click on the “Confirm” button.
Step 5: Connect to a Network
After confirming your seed phrase, you will be redirected to the Metamask wallet interface. By default, Metamask is connected to the Ethereum mainnet. If you wish to connect to a different network such as the testnet or a custom network, click on the network name on the top of the wallet interface and select your desired network from the dropdown menu.
Congratulations! You have successfully installed and set up your Metamask wallet. You can now start using Metamask to send, receive, and manage your cryptocurrencies.
Using Metamask Wallet for Transactions

Metamask is not only a secure and convenient cryptocurrency wallet, but it also allows users to seamlessly execute transactions on various decentralized applications (dApps). In this section, we will explore the steps involved in using Metamask wallet for transactions.
Before proceeding with any transaction, it is important to ensure that your Metamask wallet is properly set up and connected to the desired network. Once your wallet is ready, follow the steps below:
- Open the dApp or website where you want to perform the transaction.
- Look for the option to connect your wallet or enable Metamask.
- Click on the connect or enable button, and a Metamask pop-up will appear.
- Review the transaction details, including the recipient address, amount, and gas fees.
- Customize the gas fees if desired or leave it as the default.
- Click on the “Confirm” or “Sign” button to approve the transaction.
- Wait for the transaction to be processed and confirmed on the blockchain.
- You can check the status of your transaction on the Metamask interface or by using a blockchain explorer.
It is important to note that the exact steps may vary depending on the dApp or website you are using. However, the general process remains the same. Always verify the transaction details and double-check the recipient address to avoid any mistakes.
In addition to executing transactions, Metamask wallet also provides features such as managing multiple wallets, storing ERC-20 tokens, and interacting with decentralized exchanges. These additional functionalities make Metamask a versatile wallet for various cryptocurrency activities.
| Pros | Cons |
|---|---|
| Easy to use and navigate. | Requires a computer or mobile device with internet access. |
| Secure storage of private keys. | Transactions may have high gas fees during network congestion. |
| Compatible with a wide range of dApps. | Dependent on the Ethereum network for transactions. |
| Supports multiple wallets and ERC-20 tokens. | Limited support for other blockchains. |
Overall, using Metamask wallet for transactions provides a convenient and secure way to interact with the world of decentralized finance. Its user-friendly interface, compatibility with various dApps, and additional features make it a popular choice among cryptocurrency enthusiasts.
Step-by-step Guide on Conducting Transactions with Metamask Wallet
Metamask is a popular Ethereum wallet that allows users to securely store, manage, and transact with their digital assets. In this guide, we will walk you through the process of conducting transactions using Metamask Wallet.
Step 1: Install and Set Up Metamask Wallet
The first step is to install the Metamask extension for your preferred browser. Once installed, open the extension and click on “Create a Wallet” to set up your wallet. Follow the on-screen instructions to create a strong password and backup your seed phrase. Make sure to securely store your seed phrase as it is the key to recovering your wallet.
Step 2: Connect Metamask to the Ethereum Network
After setting up your wallet, you need to connect it to the Ethereum network. Click on the network dropdown at the top of the Metamask extension and select the desired network (e.g., Mainnet for the Ethereum main network). Confirm the network switch by clicking “Connect” or “Switch”.
Step 3: Add Ethereum to Your Metamask Wallet
In order to conduct transactions, you need to add Ethereum to your Metamask wallet. To do this, click on the “Assets” tab in the extension and then click on “Add Token”. Enter the token contract address or search for the token in the available list. Once added, you will see your Ethereum balance in the “Assets” tab.
Step 4: Send Ethereum or Tokens
To send Ethereum or tokens from your Metamask wallet, click on the “Send” button in the extension. Enter the recipient’s Ethereum address, the amount you want to send, and select the desired gas fee. Review the transaction details and click on “Confirm” to proceed with the transaction. Metamask will prompt you to confirm the transaction by entering your wallet password.
Step 5: Track and Verify Transactions
After sending a transaction, you can track its progress by clicking on the “Activity” tab in Metamask. This will show you the status of your transactions, including whether they are pending or confirmed. Additionally, you can verify the transaction on an Ethereum blockchain explorer by clicking on the transaction hash.
That’s it! You have successfully conducted a transaction using Metamask Wallet.
Remember to always verify the recipient’s address and double-check the transaction details before confirming a transaction. Keep your seed phrase safe and never share it with anyone.
Advanced Features and Security of Metamask Wallet
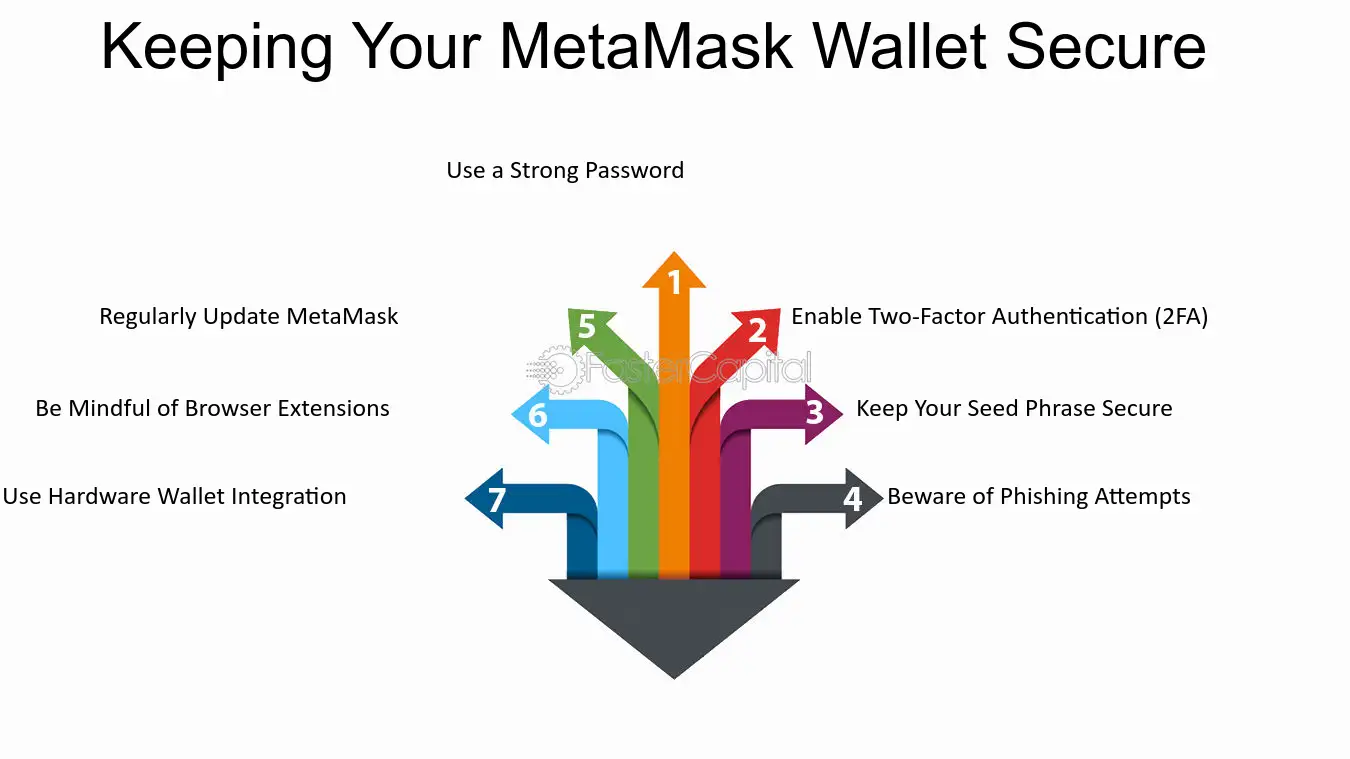
In addition to its basic functionality as a cryptocurrency wallet, Metamask offers several advanced features and security measures to enhance user experience and protect funds. Here are some of the key features that make Metamask a popular choice:
- Multi-chain Support: Metamask supports multiple blockchains, allowing users to interact with various decentralized applications (dApps) built on different networks such as Ethereum, Binance Smart Chain, and more. This feature provides flexibility and convenience for users.
- Custom Networks: Besides supporting major blockchains, Metamask allows users to connect to custom networks. This feature is useful for developers and advanced users who want to connect to private or test networks for testing and development purposes.
- Hardware Wallet Integration: Metamask provides integration with popular hardware wallets like Ledger and Trezor. Hardware wallets offer an additional layer of security by storing private keys offline, away from potential online threats.
- Transaction History: Metamask keeps a record of all transaction history, which can be accessed and reviewed by users. This helps users track their spending and review the details of each transaction for transparency.
- Import/Export Wallet: Users can import and export their Metamask wallets using seed phrases or private keys. This feature enables users to easily switch between different devices or wallets without losing access to their funds.
- DApp Browser: Metamask includes a built-in DApp browser that allows users to discover, access, and interact with decentralized applications directly from the wallet interface. This eliminates the need to use separate browser extensions or applications.
- Password Protection: Metamask requires users to set up a password during the initial setup. This password adds an extra layer of security to protect funds and ensure that only authorized users can access the wallet.
- Backup and Restore: Metamask provides an easy backup and restore process. Users are prompted to create a backup phrase, also known as a seed phrase, during the initial setup. This backup phrase can be used to restore the wallet in case of device loss or damage.
By offering these advanced features and security measures, Metamask provides users with a reliable and convenient way to manage their cryptocurrency assets while prioritizing the safety of their funds and personal information.
Frequently Asked Questions:
What is Metamask?
Metamask is a cryptocurrency wallet that allows users to securely store, send, and receive digital assets on the Ethereum blockchain. It is a browser extension that can be easily installed on popular web browsers like Google Chrome and Mozilla Firefox.
Can I use Metamask on my mobile device?
Yes, Metamask is available as a mobile app for both iOS and Android devices. You can download it from the App Store or Google Play Store. The mobile app offers similar functionality to the desktop extension, allowing you to manage your Ethereum assets on the go.
+ There are no comments
Add yours