


If you’re interested in investing in cryptocurrency, you may have heard of Matic, one of the most promising projects in the blockchain space. Matic is an Ethereum-based digital asset that aims to provide scalable and efficient solutions for decentralized applications (dApps). If you’re looking to buy Matic, one popular option is to use Metamask, a digital wallet that allows you to interact with the Ethereum blockchain.
Buying Matic on Metamask is a straightforward process, but it can be intimidating for beginners. In this step-by-step guide, we’ll walk you through the process of setting up Metamask, transferring funds to your wallet, and finally, buying Matic. Whether you’re a beginner or an experienced investor, this guide will help you navigate the world of cryptocurrency and get started with Matic.
First, you’ll need to install Metamask on your browser. Metamask is available as an extension on popular browsers like Chrome and Firefox. Once installed, you’ll need to create a new wallet. Make sure to save your recovery phrase in a safe place, as it will be your only way to recover your wallet if you forget your password or lose access to your device.
Next, you’ll need to transfer funds to your Metamask wallet. You can do this by purchasing Ethereum from a cryptocurrency exchange and sending it to your wallet address. Once your funds are in your Metamask wallet, you’ll be ready to buy Matic.
A Guide to Purchasing Matic on Metamask
If you’re interested in buying Matic on Metamask, this step-by-step guide will walk you through the process. Matic, also known as Polygon, is a popular cryptocurrency that aims to solve scalability issues on the Ethereum network.
Step 1: Set up a Metamask wallet
In order to buy Matic, you’ll need a Metamask wallet. If you don’t have one yet, you can download and install the Metamask extension for your web browser. Once installed, create a new wallet and securely store your seed phrase.
Step 2: Add funds to your Metamask wallet
Before buying Matic, you’ll need to add some funds to your Metamask wallet. You can do this by purchasing Ethereum (ETH) from a cryptocurrency exchange and transferring it to your Metamask wallet address.
Step 3: Connect Metamask to a decentralized exchange (DEX)
In order to buy Matic, you’ll need to connect your Metamask wallet to a decentralized exchange that supports Matic trading. Popular DEXs include Uniswap and SushiSwap. Open the DEX website and click on the “Connect Wallet” button. Select Metamask from the options and authorize the connection.
Step 4: Select Matic as the trading pair
Once connected to the DEX, select Matic as the trading pair. This may require you to search for Matic using its contract address or ticker symbol. Make sure you have enough ETH in your Metamask wallet to complete the transaction.
Step 5: Set the transaction details
Before confirming the purchase, you’ll need to set the transaction details. This includes specifying the amount of Matic you want to buy and the slippage tolerance. Slippage tolerance helps protect you from price fluctuations during the transaction.
Step 6: Confirm the purchase
Once you’ve reviewed and set the transaction details, click on the “Swap” or “Buy” button to confirm the purchase. Metamask will prompt you to confirm the transaction and sign it with your wallet’s private key. Once confirmed, the transaction will be processed on the blockchain.
Step 7: Check your Metamask wallet
After the transaction is processed, you can check your Metamask wallet to see your newly purchased Matic tokens. They will be stored in your wallet’s address under the “Tokens” tab. Make sure to securely store your wallet details for future access.
Disclaimer: Buying and trading cryptocurrencies involves risk, and it’s important to do thorough research and exercise caution when making investment decisions.
Now that you have a step-by-step guide to purchasing Matic on Metamask, you can confidently begin your journey into the world of Matic and decentralized finance.
Step 1: Setting Up Metamask Wallet
To begin buying Matic on Metamask, you’ll first need to set up a Metamask wallet. Metamask is a popular browser extension that acts as a digital wallet for managing your cryptocurrency assets.
1. Install Metamask Extension
To get started, visit the Metamask website at https://metamask.io. From there, you can download the Metamask extension for your preferred browser (Chrome, Firefox, or Brave).
Once the extension is installed, you’ll see the Metamask icon in your browser’s toolbar.
2. Create a New Wallet
Click on the Metamask icon and select “Create a Wallet” from the dropdown menu. Follow the prompts to create a new wallet by setting up a strong and unique password. Make sure to store this password in a safe place as it will be used to access your wallet.
Next, Metamask will display a secret backup phrase consisting of 12 randomly generated words. Write down this phrase and keep it in a secure location. This backup phrase is essential for recovering your wallet in case of loss or device failure.
3. Connect to the Mainnet
After creating your wallet, you’ll be prompted to choose a network. Select “Main Ethereum Network” to connect to the mainnet, where Matic transactions can be performed.
You’re now ready to start buying Matic on Metamask! Ensure that you have sufficient funds in your wallet and proceed to the next step to learn how to purchase Matic tokens.
Step 2: Funding Your Metamask Wallet
Once you have successfully set up your Metamask wallet, the next step is to fund it with the necessary amount of Matic tokens. Without sufficient funds in your wallet, you won’t be able to complete any transactions on the Matic network.
1. Connect your Wallet to a cryptocurrency exchange

To acquire Matic tokens, you will need to connect your Metamask wallet to a cryptocurrency exchange that supports Matic. Some popular exchanges that offer Matic trading pairs include Binance, Coinbase, and Huobi.
2. Deposit funds into your Metamask wallet
Once you have connected your wallet to a cryptocurrency exchange, you can initiate a deposit of funds into your Metamask wallet. Follow the steps provided by the exchange to select your Metamask wallet as the destination for the deposit.
Note: Make sure to double-check the wallet address before initiating the deposit to prevent any mistakes. Sending tokens to the wrong address can result in permanent loss of funds.
3. Wait for the deposit to be confirmed
After initiating the deposit, you will need to wait for it to be confirmed on the blockchain. The time it takes for the deposit to be confirmed can vary depending on network congestion and other factors. You can track the progress of the deposit within your exchange account.
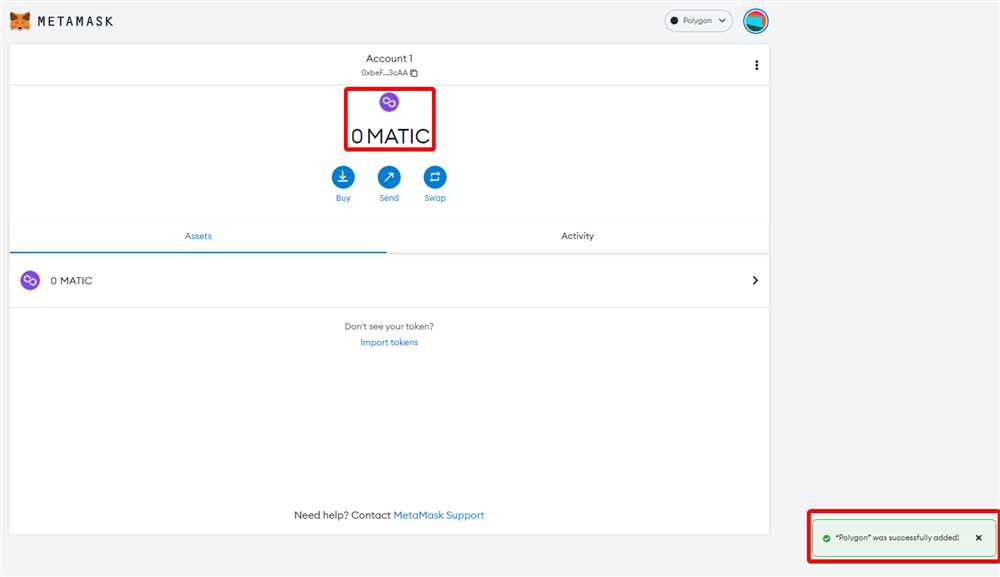
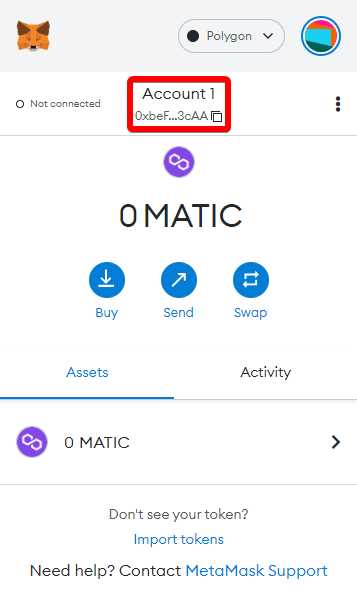
4. Verify funds in your Metamask wallet
Once the deposit is confirmed, you can check the balance in your Metamask wallet to ensure that the funds have been successfully transferred. Open your Metamask wallet and navigate to the “Assets” section to view the balance of your Matic tokens.
Congratulations! You have successfully funded your Metamask wallet with Matic tokens. You are now ready to proceed with the next steps in the buying process.
Step 3: Buying Matic on Metamask
Now that you have successfully set up your Metamask wallet and funded it with Ethereum, it’s time to buy Matic tokens. Here is a step-by-step guide on how to do it:
1. Launch Metamask
Open your Metamask extension in your browser and make sure you are connected to the correct network (e.g., Ethereum mainnet or testnet). If not, select the desired network from the dropdown menu.
2. Go to the Matic DEX
Next, navigate to the Matic DEX website or any other decentralized exchange that supports Matic trading. Make sure the exchange is reputable and has good liquidity.
3. Connect your Wallet
On the exchange website, look for the “Connect Wallet” or similar button. Click on it and select Metamask as your wallet provider. You may need to authorize the connection by signing a message in Metamask.
4. Set the Trading Pair
Once your wallet is connected, find the Matic trading pair you want to use. For example, if you want to buy Matic with Ethereum, select the ETH/MATIC pair.
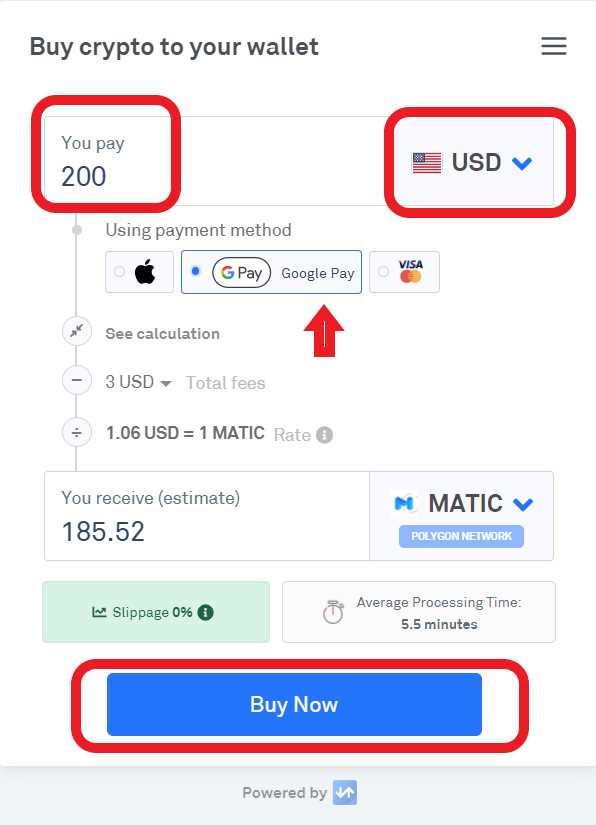
5. Enter the Amount
Specify the amount of Matic tokens you want to buy. Ensure you have enough ETH balance in your wallet to cover the transaction fees and the purchase amount.
6. Place the Order

Click on the “Buy” or “Swap” button to initiate the trade. Confirm the transaction details and review the gas fees. Adjust the gas fee if necessary, but keep in mind that lower fees may result in slower transaction times.
7. Confirm the Transaction
A Metamask window will open, displaying the transaction details. Review the details and click on the “Confirm” button to proceed with the purchase. Wait for the transaction to be confirmed on the blockchain.
8. Check your Balance
After the transaction is confirmed, go back to your Metamask wallet and check your balance. You should now see the purchased Matic tokens in your wallet.
Congratulations! You have successfully bought Matic on Metamask. You can now use your Matic tokens for various purposes such as staking or participating in the Matic ecosystem.
Frequently Asked Questions:
What is Matic?
Matic is a cryptocurrency and token that operates on the Polygon network. It is designed to provide scalability and fast transactions on the Ethereum blockchain.
How do I set up Metamask?
To set up Metamask, you first need to download the extension for your browser. Once installed, you can create a new wallet and set up a password. Then, you can import an existing wallet or generate a new one. Finally, you will need to backup your seed phrase.
How can I buy Matic on Metamask?
To buy Matic on Metamask, you will need to first have some Ethereum (ETH) in your wallet. Then, you can connect your wallet to a decentralized exchange like Uniswap or Sushiswap. From there, you can search for the Matic token and input the amount of ETH you want to swap for Matic. Confirm the transaction and wait for the tokens to appear in your wallet.
Are there any fees involved in buying Matic on Metamask?
Yes, there are fees involved in buying Matic on Metamask. You will have to pay gas fees for the Ethereum network to process your transaction. These fees can vary depending on network congestion and the complexity of your transaction.
Can I store Matic in my Metamask wallet?
Yes, you can store Matic in your Metamask wallet. Matic is an ERC-20 token, which means it can be stored in any wallet that supports Ethereum tokens. Metamask is a popular choice for storing Matic and other ERC-20 tokens.

+ There are no comments
Add yours