


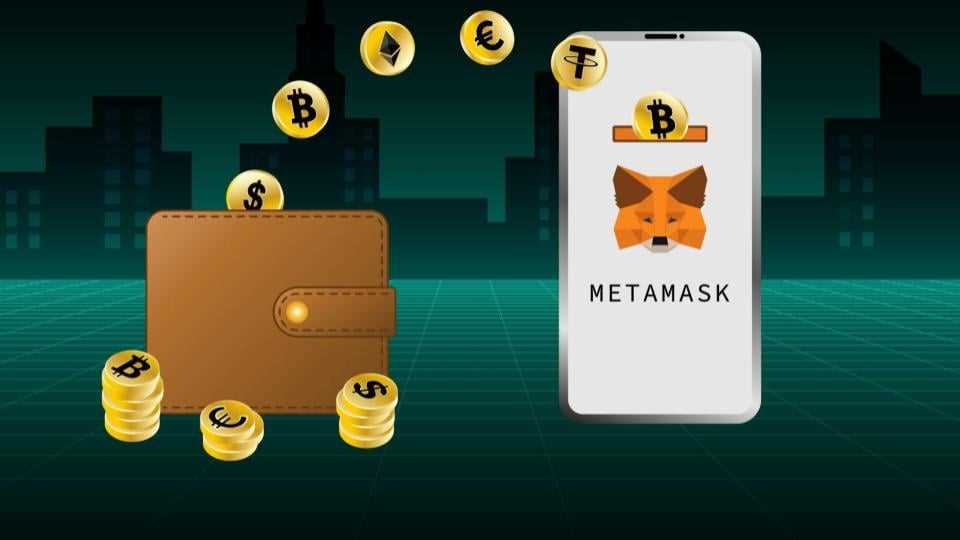
Metamask is a popular Ethereum wallet that allows users to securely store, manage, and interact with their Ethereum assets. Whether you’re new to the world of cryptocurrencies or a seasoned investor, Metamask provides a user-friendly interface that makes it easy to navigate the Ethereum ecosystem.
With Metamask, you can create and manage multiple Ethereum accounts, including both your own private keys and hardware wallet integration. This gives you full control over your assets, ensuring the utmost security. The wallet also supports a wide range of Ethereum-based tokens, allowing you to easily send, receive, and store various digital assets.
One of the key features of Metamask is its integrations with various decentralized applications (DApps). These DApps allow you to access a wide range of functionalities, such as decentralized exchanges, lending platforms, and even blockchain-based games. Metamask acts as a bridge between these DApps and your Ethereum wallet, making it seamless to interact with the Ethereum blockchain.
To get started with Metamask, simply install the extension on your web browser and set up a new wallet. Once you’ve created your wallet, you can start managing your Ethereum assets and exploring the world of decentralized finance (DeFi). Metamask also supports mobile devices, so you can seamlessly transition between your computer and smartphone.
Whether you’re looking to send funds to a friend, invest in the latest DeFi token, or simply explore the world of Ethereum, Metamask is the go-to wallet for many cryptocurrency enthusiasts. Its user-friendly interface, extensive integrations, and robust security features make it an ideal choice for both beginners and experienced users alike.
So, if you’re ready to dive into the world of Ethereum and take control of your digital assets, download Metamask today and get started with this popular Ethereum wallet.
A Complete Beginner’s Guide to Using Metamask: Start Your Journey with the Prominent Ethereum Wallet
If you’re new to the world of cryptocurrency and decentralized finance, it can be overwhelming to navigate the various wallets and tools available. One wallet that has gained significant popularity in the Ethereum community is Metamask. In this guide, we’ll walk you through the basics of using Metamask so you can start your journey with confidence.
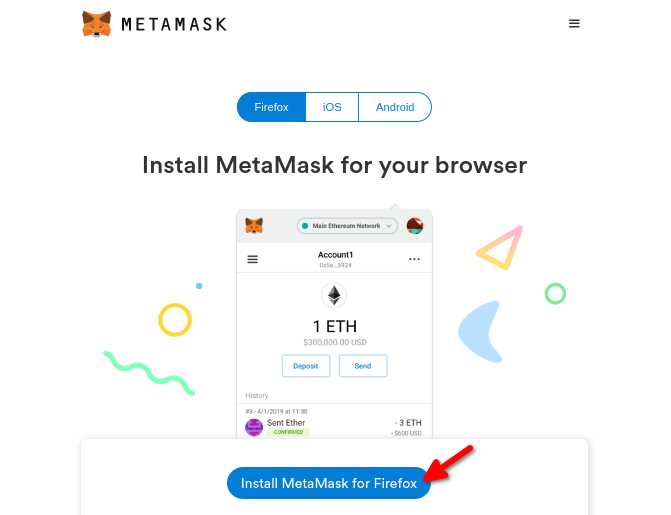
Step 1: Install Metamask
The first step is to download and install the Metamask extension for your preferred web browser. Metamask is available for Chrome, Firefox, Brave, and other popular browsers. Simply search for “Metamask” in your browser’s extension store and follow the instructions to install it.
Step 2: Create a New Wallet
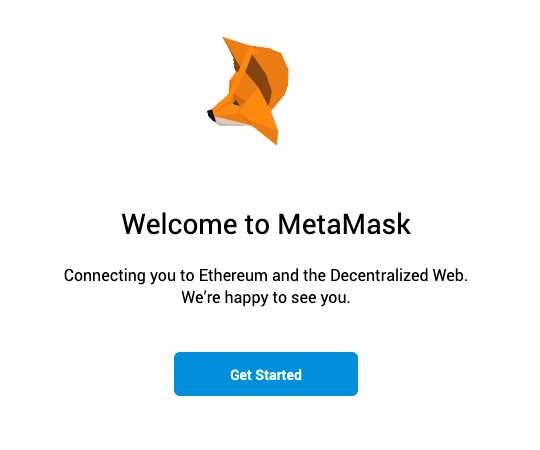
Once you have installed Metamask, click on the extension icon to open it. You will see a welcome screen with the option to import an existing wallet or create a new one. For beginners, we recommend creating a new wallet.
Click on the “Create a Wallet” button and follow the prompts to set up your password and generate a secret backup phrase. This backup phrase is crucial, as it is the only way to recover your funds if you lose access to your wallet. Make sure to write it down and store it in a safe place.
Step 3: Fund Your Wallet
Now that you have a Metamask wallet, you’ll need to add some Ethereum to it. There are a few ways to do this. You can purchase Ethereum on a cryptocurrency exchange and transfer it to your Metamask wallet, or you can receive Ethereum from someone else by providing them with your wallet address.
To find your wallet address, click on the account avatar in the top-right corner of the Metamask interface. From the dropdown menu, select “Copy Address” and share it with the person sending you Ethereum.
Step 4: Explore Metamask Features
With a funded wallet, you can now explore the various features of Metamask. One of the most popular features is the ability to interact with decentralized applications (dApps) on the Ethereum network. You can browse dApps within the Metamask interface or visit popular dApp directories to find applications that interest you.
Metamask also allows you to manage your Ethereum assets, view transaction history, and connect with other Ethereum users. Take some time to familiarize yourself with the interface and experiment with different features.
Step 5: Stay Secure
As with any digital wallet, security is paramount. Make sure to keep your secret backup phrase and password secure. Avoid sharing them with anyone and beware of phishing attempts. Additionally, consider enabling two-factor authentication for added security.
It’s important to note that Metamask is a hot wallet, meaning it is connected to the internet. While it provides a user-friendly experience, it may not be suitable for storing large amounts of funds long-term. For increased security, consider using a hardware wallet in conjunction with Metamask.
Conclusion
By following this beginner’s guide, you should now have a solid understanding of how to use Metamask. Remember to start small, only invest what you can afford to lose, and stay informed about the latest developments in the Ethereum community. With time and experience, you’ll become a confident user of this prominent Ethereum wallet.
Why Choose Metamask for Your Ethereum Needs: Benefits and Features
Metamask is a popular Ethereum wallet that offers several benefits and features, making it an excellent choice for managing your Ethereum needs. Whether you’re a beginner or an experienced user, Metamask has something to offer.
Here are some of the key benefits and features of using Metamask:
- Easy Installation and Setup: Metamask can be easily installed as a browser extension, making it accessible on popular browsers like Chrome, Firefox, and Brave. Once installed, setting up your wallet is a breeze with a simple setup process.
- Secure Storage: Metamask provides a secure way of storing your Ethereum assets. It uses industry-standard encryption and keeps your private keys locally, meaning you have full control over your funds.
- Effortless Transactions: With Metamask, you can easily send and receive Ethereum and ERC-20 tokens. The wallet integrates seamlessly with popular decentralized applications (dApps), making it convenient to interact with the Ethereum ecosystem.
- Multiple Networks: Metamask supports multiple Ethereum networks, including the mainnet, testnets, and custom networks. This flexibility allows you to switch between networks based on your needs and preferences.
- Customizable Gas Fees: In Metamask, you can customize the gas fees for your Ethereum transactions, helping you optimize the cost and speed of your transactions.
- Web3 Integration: Metamask provides a Web3 integration, enabling developers to build applications that interact directly with the Ethereum network. This feature opens up a world of possibilities for developers looking to leverage the Ethereum ecosystem.
Overall, Metamask stands out as a user-friendly and secure Ethereum wallet with a wide range of features. Whether you’re a casual user or a developer, Metamask has the tools you need to manage your Ethereum assets effectively.
Getting Started with Metamask: Installation and Account Setup
Metamask is a popular Ethereum wallet that allows you to securely manage your cryptocurrency assets and interact with decentralized applications (DApps) on the Ethereum network. Before you can start using Metamask, you’ll need to install it as a browser extension and set up an account.
Installation
To install Metamask, follow these steps:
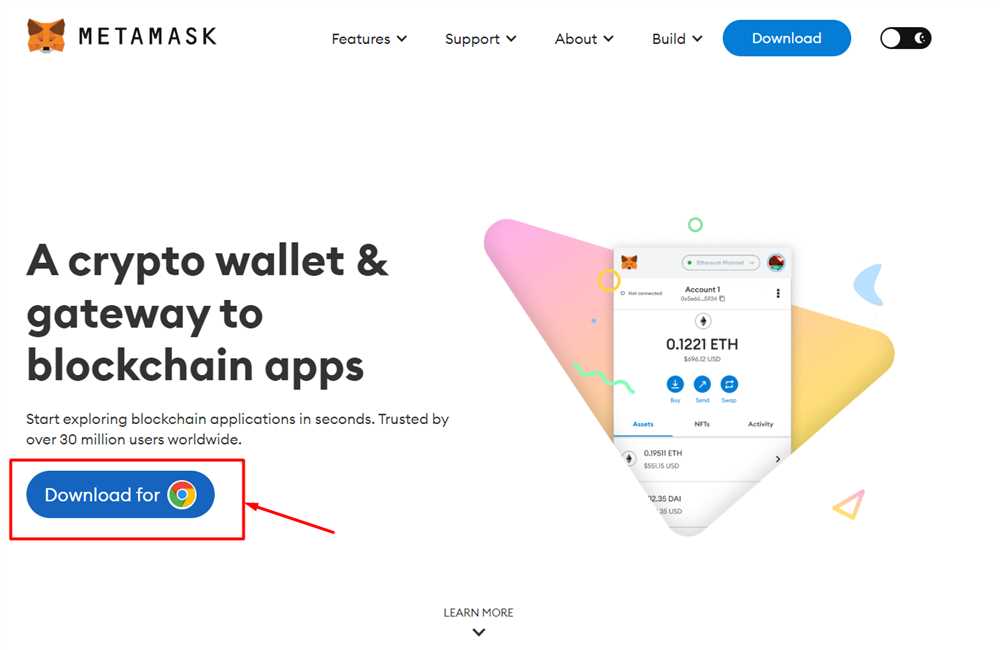
- Open your web browser (Google Chrome, Firefox, or Brave) and go to the official Metamask website.
- Click on the “Download” button to download and install the extension.
- Once the installation is complete, you’ll see the Metamask fox icon in your browser toolbar.
Account Setup
After installing Metamask, it’s time to set up your account:
- Click on the Metamask fox icon in your browser toolbar.
- A pop-up will appear with a welcome message. Click on the “Get Started” button.
- You’ll be presented with two options: “Import Wallet” and “Create a Wallet”. If you’re new to Metamask, select “Create a Wallet”.
- Choose a strong password for your wallet. Make sure to use a combination of uppercase and lowercase letters, numbers, and special characters.
- Read and accept the terms of service and privacy policy.
- Click on the “Create” button to create your wallet.
- You’ll be shown a secret backup phrase. This phrase is extremely important as it can be used to restore your wallet if you lose access to it. Write down the backup phrase and store it in a safe place.
- Confirm your backup phrase by selecting the words in the correct order.
Congratulations! You’ve successfully installed Metamask and set up your account. Now you can start using Metamask to manage your Ethereum assets and interact with DApps on the Ethereum network.
Remember to keep your password and backup phrase secure and never share them with anyone. Properly securing your Metamask account is essential to protect your funds.
Unlocking the Full Potential of Metamask: Advanced Features and Tips
Metamask is a powerful Ethereum wallet that offers a wide range of features and functionalities beyond basic wallet management. By utilizing these advanced features, you can enhance your experience and take full advantage of the capabilities of Metamask.
1. Custom Networks
Metamask allows you to connect to different networks besides the Ethereum mainnet. You can add custom networks such as test networks or private networks by specifying the network parameters. This is useful for developers or users who want to interact with other blockchain networks.
2. Importing and Exporting Accounts
If you have existing Ethereum accounts, you can import them into Metamask using your private key, mnemonic phrase, or JSON file. This allows you to manage all your accounts in one place. Additionally, you can export your accounts from Metamask to back them up or use them in other wallets.
3. Hardware Wallet Integration
If you are concerned about the security of your funds, you can integrate your hardware wallet with Metamask. This provides an extra layer of protection by storing your private keys offline. Supported hardware wallets include Ledger, Trezor, and KeepKey.
4. Managing Token Balances
Metamask displays the balances of your Ethereum and ERC20 tokens. You can easily add custom tokens by specifying the contract address, symbol, and decimals. This allows you to keep track of all your token holdings in one place.
5. DApp Integration
Metamask acts as a bridge between your browser and decentralized applications (DApps). You can seamlessly interact with DApps that are integrated with Metamask without the need to manually manage your private keys. This simplifies the user experience and makes it easier to access the full potential of the Ethereum ecosystem.
6. Transaction Settings
When sending transactions with Metamask, you can customize the gas price and gas limit to prioritize transaction speed or cost efficiency. You can also set transaction defaults for specific DApps or customize the nonce manually for advanced users.
7. Privacy Settings
Metamask offers privacy settings that allow you to control the information shared with DApps. You can choose to deny access to certain data like your account balance or transaction history, protecting your privacy while still being able to interact with DApps.
By unlocking the full potential of Metamask and utilizing these advanced features and tips, you can enhance your Ethereum wallet experience and take full advantage of the decentralized web.
Frequently Asked Questions:
What is Metamask?
Metamask is a popular Ethereum wallet that allows users to manage their Ethereum accounts, securely store and send Ether (ETH), as well as interact with decentralized applications (DApps) on the Ethereum blockchain.
How can I get started with Metamask?
To get started with Metamask, you first need to install the Metamask extension on your web browser. Once installed, you can create a new wallet or import an existing one using your seed phrase or private key. After setting up your wallet, you can start using Metamask to manage your Ethereum accounts and interact with DApps.

+ There are no comments
Add yours