


MetaMask is a popular browser extension that allows users to interact with the Ethereum blockchain. Whether you’re an experienced Ethereum enthusiast or just getting started, this comprehensive guide will walk you through everything you need to know about using MetaMask.
What is MetaMask?
MetaMask serves as a digital wallet, letting users manage their Ethereum accounts and store their digital assets securely. It enables users to interact with decentralized applications (DApps) on the Ethereum network directly from their browsers.
Getting Started – Installation and Setup
Before you can start using MetaMask, you’ll need to install the extension on your preferred browser. Currently, MetaMask supports Chrome, Firefox, Brave, and Edge. Once installed, you can create a new wallet or import an existing one using a seed phrase or private key.
Key Features of MetaMask
MetaMask offers a range of features that make it a powerful tool for Ethereum users:
- Account Management: MetaMask allows you to manage multiple Ethereum accounts, so you can easily switch between them.
- Secure Storage: Your private keys and digital assets are encrypted and stored locally on your device, ensuring top-notch security.
- Transaction Signing: MetaMask facilitates the signing of Ethereum transactions, providing an extra layer of security.
- DApp Integration: You can seamlessly connect MetaMask with various DApps, allowing you to interact with them effortlessly.
Using MetaMask with DApps
Once you have MetaMask set up, you can start using it with your favorite DApps. When you come across a DApp that requires access to your Ethereum account, MetaMask will prompt you to authorize the connection. You can review the requested permissions and choose to allow or deny them.
Final Thoughts
MetaMask is a game-changer in the world of Ethereum and blockchain technology. With its user-friendly interface and robust features, it has become an essential tool for anyone looking to interact with the Ethereum network and explore the growing ecosystem of DApps. Whether you’re a developer, trader, or casual user, MetaMask is a must-have extension that will enhance your Ethereum experience.
A Beginner’s Guide to Using Metamask: Everything You Should Know
Metamask is a popular cryptocurrency wallet that allows users to securely store, manage, and interact with various types of digital assets. If you are new to Metamask, this guide will provide you with all the information you need to get started.
What is Metamask?
Metamask is a browser extension wallet that serves as a bridge between your web browser and the Ethereum blockchain. It allows you to interact with decentralized applications (dApps) and securely manage your cryptocurrencies.
Getting Started with Metamask
To use Metamask, you first need to install it as a browser extension. Currently, it is available for Chrome, Firefox, and Brave browsers. Once installed, you can create a new wallet or import an existing one using a seed phrase or private key.
Tip: It is crucial to keep your seed phrase or private key safe and never share it with anyone. This is the key to accessing your wallet and funds.
Using Metamask
Once you have set up Metamask, you can start using it to manage your digital assets. You can view your account balance, send and receive cryptocurrencies, and interact with dApps that are compatible with Metamask.
Metamask also allows you to connect multiple Ethereum wallets and switch between them easily. This can be useful if you have different wallets for personal and business use.
Note: Metamask only supports the Ethereum blockchain. If you want to interact with other blockchains, you will need to use a different wallet.
Security and Privacy
Metamask puts a strong emphasis on security and privacy. As a user, you have full control over your private keys and can choose how you store them. It is recommended to use a hardware wallet or other secure devices to increase the security of your assets.
Tip: Always make sure to double-check the URL of any website you are interacting with through Metamask to avoid phishing attacks.
Conclusion
In conclusion, Metamask is a powerful tool that allows you to securely manage your digital assets and interact with decentralized applications on the Ethereum blockchain. By following the steps outlined in this guide, you can start using Metamask with confidence and take advantage of all its features.
Disclaimer: It is important to do your own research and exercise caution when dealing with cryptocurrencies. The information provided in this guide is for educational purposes only and should not be considered financial advice.
What is Metamask?
Metamask is a digital wallet and browser extension that allows users to interact with decentralized applications (dApps) on the Ethereum blockchain. It serves as a bridge between your browser and the Ethereum network, enabling you to securely store, manage, and transfer Ethereum and other ERC-20 tokens.
With Metamask, you can easily access a wide range of dApps, such as decentralized exchanges, NFT marketplaces, and decentralized finance (DeFi) platforms, all from within your browser. It eliminates the need to download and install separate wallets for each dApp, providing a seamless and user-friendly experience.
Key Features of Metamask

- Wallet Management: Metamask allows you to create and manage multiple Ethereum accounts, giving you full control over your funds.
- DApp Integration: It seamlessly integrates with various dApps, enabling you to interact with them directly from your browser.
- Secure Storage: Metamask stores your private keys locally on your device, offering enhanced security. It also supports hardware wallets for additional security measures.
- Transaction Confirmation: Before executing any transaction, Metamask presents a detailed summary of the transaction, allowing you to review and confirm the details.
- Network Customization: You can easily switch between Ethereum networks, such as the mainnet, testnets, and even custom networks, depending on your requirements.
- Token Management: Metamask provides an interface to manage your ERC-20 tokens, allowing you to view your balances, send and receive tokens, and interact with token smart contracts.
Metamask is widely used by both experienced cryptocurrency users and newcomers alike. Its intuitive interface and extensive functionality make it a valuable tool for anyone looking to explore the world of decentralized applications and digital assets on the Ethereum network.
How to Install and Set Up Metamask: Step-by-Step Guide

If you’re new to the world of decentralized finance (DeFi), you may have heard about Metamask. Metamask is a popular cryptocurrency wallet and Ethereum dApp browser that allows users to securely store, manage, and interact with Ethereum-based assets and decentralized applications.
So, how do you get started with Metamask? Follow these step-by-step instructions to install and set up Metamask on your device:
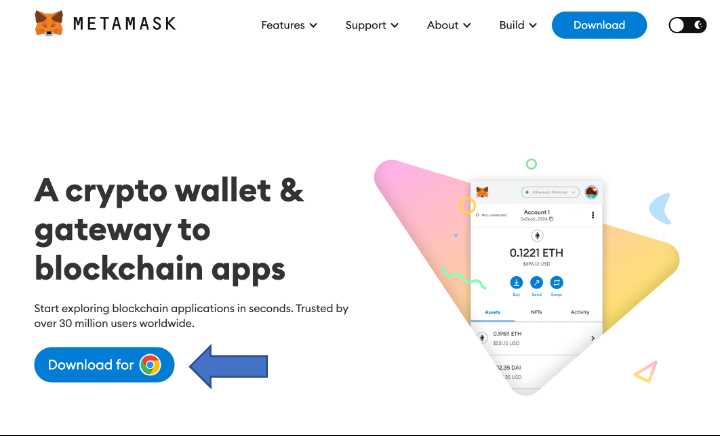
Step 1: Install Metamask
The first thing you need to do is install the Metamask extension on your preferred web browser. Metamask is available for Chrome, Firefox, Brave, and Edge. Simply visit the respective extension store for your browser and search for “Metamask”. Click on the “Add to Chrome” (or equivalent) button and follow the installation prompts.
Step 2: Create a New Wallet
Once you have installed Metamask, you will see the Metamask icon added to your browser toolbar. Click on the icon to launch Metamask. You will be presented with a welcome screen where you can choose to create a new wallet or import an existing one. Select “Create a Wallet” and follow the steps to set up a new wallet. Make sure to set a strong password and keep your seed phrase in a safe and secure location.
Step 3: Connect to a Network
After creating your wallet, Metamask will prompt you to choose a network. By default, it will be set to the Ethereum Mainnet. However, you can also connect to test networks like Ropsten, Rinkeby, or Kovan. Select the network you want to connect to and click on “Save”.
Step 4: Import or Purchase Ethereum

If you already have Ethereum, you can skip this step. Otherwise, you will need to import or purchase Ethereum to use with Metamask. You can import Ethereum from an existing wallet by selecting the “Import Wallet” option on the Metamask welcome screen. Alternatively, you can purchase Ethereum from a cryptocurrency exchange and send it to your Metamask wallet address.
Step 5: Start Using Metamask
Once you have installed Metamask, created a wallet, connected to a network, and added Ethereum to your wallet, you are ready to start using Metamask. You can now securely manage your Ethereum-based assets, interact with decentralized applications, and participate in DeFi protocols.
Remember to always exercise caution when using Metamask and be mindful of potential scams or phishing attempts. Never share your seed phrase or private keys with anyone and ensure you are only interacting with trusted websites and applications.
With this step-by-step guide, you should have no trouble installing and setting up Metamask. Start exploring the exciting world of decentralized finance and take control of your own financial future!
How to Use Metamask: A Comprehensive Tutorial
Metamask is a browser extension that allows users to interact with the Ethereum blockchain. In this comprehensive tutorial, we will guide you through the process of using Metamask to securely manage your Ethereum assets and seamlessly interact with decentralized applications (Dapps).
1. Install Metamask
The first step in using Metamask is to install the extension on your web browser. Metamask is available for Chrome, Firefox, and Brave browsers. Simply go to the respective browser’s extension store and search for “Metamask”. Click on the “Add to Chrome/Firefox/Brave” button, and the extension will be added to your browser.
2. Set Up Metamask
After the installation, you will see the Metamask fox logo in your browser toolbar. Click on the logo to open the Metamask popup. Follow the setup instructions to create a new account or import an existing one. Remember to set a secure password and back up your seed phrase in a safe place.
3. Connect to the Ethereum Network
By default, Metamask connects to the Ethereum Mainnet. If you want to use another network, such as the Rinkeby Testnet, click on the network name at the top of the Metamask popup and select the desired network.
4. Fund Your Metamask Account
Before you can start using Metamask, you need to have some Ethereum in your account. Click on the account balance in the Metamask popup, and you will be directed to the Metamask wallet. From there, you can buy or deposit Ethereum into your account.
5. Interacting with Dapps
Now that your Metamask account is set up and funded, you can easily interact with decentralized applications. When you visit a Dapp that supports Metamask, you will see a prompt asking for permission to connect. Click on “Connect” to give the Dapp access to your Metamask account. You may also need to confirm transactions using Metamask.
Note: Make sure to carefully review and understand the permissions and risks associated with each Dapp before granting access to your Metamask account.
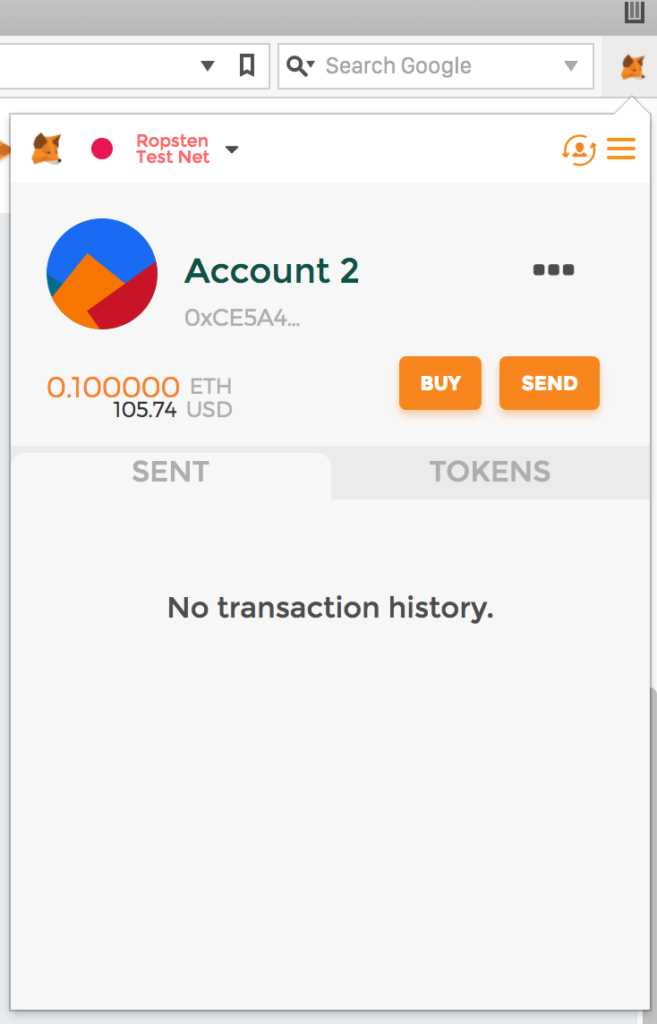
6. Managing Your Assets
Metamask allows you to manage your Ethereum assets directly from the browser extension. You can view your account balance, send and receive transactions, and check your transaction history. Make sure to keep your Metamask and account details safe to protect your assets from unauthorized access.
7. Stay Up to Date
The blockchain and cryptocurrency space is constantly evolving. It is essential to stay updated with the latest security practices and updates for Metamask. Regularly check for updates and security advisories from the official Metamask website or their social media channels.
By following this comprehensive tutorial, you should now have a good understanding of how to use Metamask and make the most out of its features. Happy exploring the world of decentralized finance!
Tips and Tricks for Secure and Convenient Metamask Usage
Metamask is a powerful tool for managing your cryptocurrency assets, but it’s important to use it securely and efficiently. Here are some tips and tricks to help you get the most out of your Metamask experience:
1. Enable Two-Factor Authentication
Adding an extra layer of security to your Metamask wallet is essential. Enable two-factor authentication to protect your account from unauthorized access. This can be done by linking your Metamask account to a mobile authenticator app like Google Authenticator or Authy.
2. Always Check the URL
When using Metamask, make sure to double-check the URL of the website you are interacting with. Phishing attacks can trick users into revealing their private keys or passwords on a fake website. Avoid clicking on suspicious links, and only transact on trusted, verified websites.
3. Keep Your Recovery Phrase Safe
Your recovery phrase is the key to your Metamask wallet. It’s crucial to keep it safe and secure. Write it down on a piece of paper and store it in a secure location, preferably offline. Avoid storing it digitally or sharing it with anyone.
4. Use Strong Passwords
Choose a strong, unique password for your Metamask account. Avoid using common words or easily guessable combinations. Use a mix of uppercase and lowercase letters, numbers, and special characters to create a strong password.
5. Regularly Update Metamask
Stay up to date with the latest version of Metamask to ensure that you have all the security patches and feature updates. Keeping your wallet software updated reduces the risk of vulnerabilities being exploited by malicious actors.
6. Be Mindful of Gas Fees
Gas fees are the transaction costs on the Ethereum network. Make sure to adjust the gas fees according to the network congestion and the urgency of your transaction. Set too low, and your transaction may get stuck. Set too high, and you may end up paying unnecessary fees.
7. Enable Hardware Wallet Integration
If you own a hardware wallet like Ledger or Trezor, consider integrating it with Metamask for an extra layer of security. Hardware wallets keep your private keys offline, making it nearly impossible for hackers to gain unauthorized access to your funds.
- 8. Regularly Monitor Your Account
- 9. Enable Notifications for Account Activity
- 10. Be Cautious of Browser Extensions
- 11. Be Aware of Crypto Scams
- 12. Educate Yourself
By following these tips and tricks, you can enhance the security and convenience of your Metamask usage. Remember to stay vigilant and keep yourself informed about the latest best practices in cryptocurrency security.
Frequently Asked Questions:
What is Metamask?
Metamask is a browser extension that allows users to interact with the Ethereum blockchain and use decentralized applications (dApps) on the web.
How do I install Metamask?
To install Metamask, you need to go to the official website (https://metamask.io/) and follow the instructions for your specific browser. It is available for Chrome, Firefox, and Brave browsers.
What is a seed phrase?
A seed phrase, also known as a mnemonic phrase, is a set of words that acts as a backup for your Metamask wallet. It is used to restore your wallet if you lose access to your device.
How do I add tokens to my Metamask wallet?
To add tokens to your Metamask wallet, you need to click on the “Add Token” button, enter the contract address of the token, and click “Add”. The token will then appear in your wallet.
How do I send a transaction with Metamask?
To send a transaction with Metamask, you need to click on the “Send” button, enter the recipient’s address, the amount you want to send, and choose the gas fee. Then click “Next” and “Confirm” to complete the transaction.
+ There are no comments
Add yours