


If you’ve ever been curious about incorporating blockchain technology into your web applications, you may have come across Metamask. Metamask is a popular browser extension that allows users to interact with the Ethereum blockchain directly through their web browsers. With Metamask, developers can leverage the power of Ethereum’s decentralized network to build secure and transparent applications.
In this beginner’s guide, we will explore the Metamask API and learn how to unlock Ethereum’s power in web applications. We will examine the basics of setting up Metamask, understand the fundamental concepts of Ethereum and smart contracts, and dive into the core functionalities of the Metamask API that will enable us to interact with the Ethereum network.
Before we begin, it’s important to note that a basic understanding of web development and Ethereum is beneficial but not required. Whether you’re a seasoned developer or just starting out, this guide will provide you with the necessary knowledge and step-by-step instructions to get started with the Metamask API.
So, if you’re ready to unleash the full potential of Ethereum in your web applications, let’s dive into the world of Metamask and learn how to integrate its API into your projects.
What is the Metamask API?
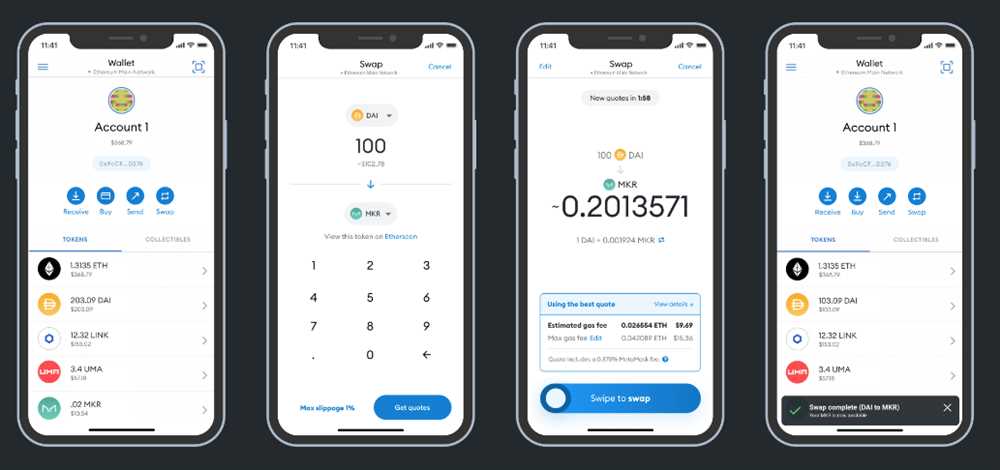
The Metamask API is a powerful tool that allows developers to integrate the capabilities of the Metamask browser extension into their web applications. Metamask is a popular Ethereum wallet and browser extension that allows users to access and interact with decentralized applications (dApps) on the Ethereum blockchain.
With the Metamask API, developers can unlock the full potential of Ethereum’s smart contracts and decentralized applications within their own web applications. This API provides a variety of functions and methods that enable developers to seamlessly interact with the Ethereum blockchain, including account management, transaction signing, and contract interaction.
By leveraging the Metamask API, developers can provide their users with a secure and user-friendly way to interact with Ethereum-powered features on their web applications. This allows for seamless integration of blockchain functionality, without requiring users to install additional software or navigate complex interfaces.
Furthermore, the Metamask API provides developers with the ability to easily authenticate users and obtain their Ethereum account information. This enables developers to build personalized and customized experiences for their users, tailored to their individual Ethereum accounts.
In summary, the Metamask API is a powerful tool that enables developers to integrate the features and functionality of Metamask into their web applications. By utilizing this API, developers can unlock the power of Ethereum within their own applications and provide their users with a seamless and secure experience.
Getting Started with the Metamask API
The Metamask API is a powerful tool that allows web developers to interact with the Ethereum blockchain and provide their users with seamless access to decentralized applications. In this guide, we will walk you through the steps of integrating the Metamask API into your web application.
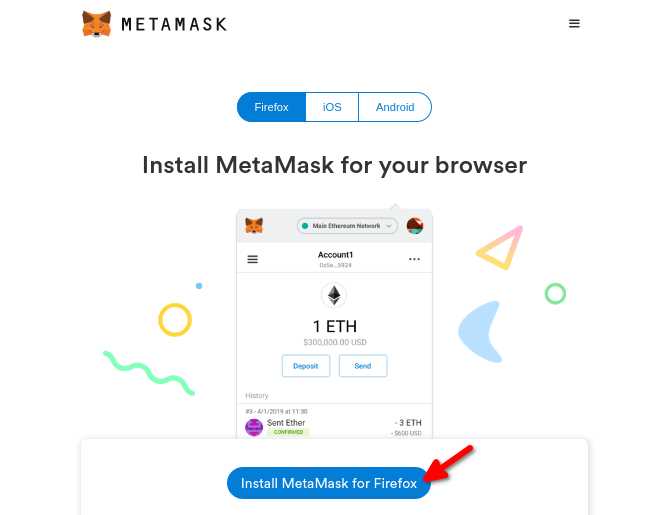
Before you can start using the Metamask API, you will need to have Metamask installed and set up on your computer. If you haven’t done so already, you can download Metamask from the Chrome Web Store and create a new wallet. Once you have Metamask installed, make sure that it is properly connected to the Ethereum network.
To get started with the Metamask API, you will need to include the Metamask script in the head section of your HTML file. You can do this by adding the following line of code:
<script src="https://cdn.jsdelivr.net/npm/@metamask/detect-provider@1.2.0/dist/detect-provider.min.js"></script>
Next, you will need to check if the user has Metamask installed and if it is correctly connected to the Ethereum network. You can do this by calling the detectEthereumProvider() function. Here is an example:
if (typeof window.ethereum !== 'undefined') {
console.log('Metamask is installed!');
}
If Metamask is installed, you can then request the user’s permission to access their Ethereum accounts by calling the request({ method: 'eth_requestAccounts' }) function. Here is an example:
async function requestAccount() {
try {
await ethereum.request({ method: 'eth_requestAccounts' });
console.log('Account access granted!');
} catch (error) {
console.log(error);
}
}
Once you have the user’s permission, you can begin interacting with the Ethereum blockchain using the Metamask API. You can send transactions, read smart contract data, and more. The Metamask API provides a wide range of functions for interacting with Ethereum, so be sure to check out the documentation for more details.
In this guide, we have covered the basics of getting started with the Metamask API. By following these steps, you can unlock the power of Ethereum in your web applications and provide your users with a seamless and secure decentralized experience.
Using the Metamask API in Web Applications
Metamask is a powerful tool that allows web applications to interact with the Ethereum blockchain. By integrating the Metamask API into your web application, you can unlock a wide range of capabilities that can revolutionize the way users interact with your application.
To begin using the Metamask API, first, ensure that the Metamask extension is installed in the user’s web browser. This extension acts as a bridge between the web application and the Ethereum network, providing access to the user’s Ethereum wallet and transaction capabilities.
Initializing the Metamask API

Once Metamask is installed, you can initialize the Metamask API in your web application by including the Metamask script in the HTML file:
<script src="https://cdn.jsdelivr.net/npm/@metamask/detect-provider@1.2.0/dist/detect-provider.js"></script>You can then use the following code snippet to check if Metamask is installed and connected to the Ethereum network:
// Check if Metamask is installed and connected
const provider = await detectEthereumProvider();
if (provider) {
// Metamask is installed and connected
} else {
// Metamask is not installed or not connected
}
Interacting with the Ethereum Network
Once the Metamask API is initialized and connected to the Ethereum network, you can use it to interact with the blockchain. The Metamask API provides a set of functions that allow you to perform various actions, such as:
- Retrieving the user’s Ethereum address
- Retrieving the user’s account balance
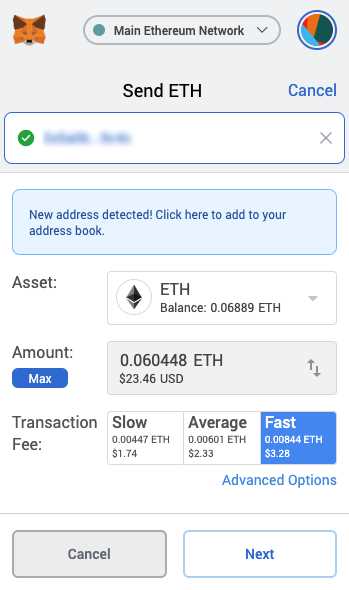
- Sending transactions
- Listening for events
For example, to retrieve the user’s Ethereum address, you can use the following code:
// Retrieve the user's Ethereum address
const accounts = await ethereum.request({ method: 'eth_requestAccounts' });
const address = accounts[0];
You can also use the Metamask API to send transactions:
// Send a transaction
const transactionParameters = {
to: '0x123abc...',
from: address,
value: ethers.utils.parseEther('0.1')
};
await ethereum.request({
method: 'eth_sendTransaction',
params: [transactionParameters]
});
Furthermore, you can listen for events emitted by the blockchain:
// Listen for events
ethereum.on('chainChanged', (chainId) => {
// Chain has changed
});
ethereum.on('accountsChanged', (accounts) => {
// Accounts have changed
});
By utilizing the Metamask API, you can enhance your web application with Ethereum blockchain capabilities, enabling features such as decentralized finance, non-fungible tokens, and much more.
Remember to handle errors and implement appropriate error handling in case Metamask is not installed or the user rejects a transaction. Additionally, always ensure that you inform users about the information and permissions your web application requires when interacting with their Ethereum wallet.
Frequently Asked Questions:
What is the Metamask API?
The Metamask API is a programming interface provided by the Metamask browser extension that allows developers to interact with the Ethereum blockchain and the user’s Ethereum wallet. It provides methods for handling account access, sending transactions, and retrieving blockchain data.
How can I unlock a user’s Ethereum wallet using the Metamask API?
To unlock a user’s Ethereum wallet using the Metamask API, you can use the `ethereum.request` method with the `eth_requestAccounts` parameter. This will prompt the user to unlock their wallet and provide access to their accounts for your web application.
Can I send transactions to the Ethereum blockchain using the Metamask API?
Yes, you can send transactions to the Ethereum blockchain using the Metamask API. You can use the `ethereum.request` method with the `eth_sendTransaction` parameter to send a transaction. This method requires the user to have an unlocked wallet and will prompt them to confirm the transaction details.
What kind of blockchain data can I retrieve using the Metamask API?
Using the Metamask API, you can retrieve various types of blockchain data such as account balances, transaction histories, and contract data. The `ethereum.request` method can be used with different parameters like `eth_getBalance`, `eth_getTransactionByHash`, and `eth_call` to retrieve specific data from the Ethereum blockchain.
Can I use the Metamask API for other blockchain networks besides Ethereum?
Yes, the Metamask API can be used with other blockchain networks besides Ethereum. The API supports multiple chains, and you can switch between them by using the `ethereum.request` method with the `wallet_addEthereumChain` parameter. This allows you to interact with different blockchain networks using the same API.

+ There are no comments
Add yours