


 for Binance Coin (BNB) Using Metamask")
If you’re new to the world of cryptocurrency, you may be wondering how to swap one token for another. In this step-by-step guide, we’ll walk you through the process of swapping Ethereum (ETH) to Binance Coin (BNB) using the popular digital wallet and browser extension, Metamask. This guide assumes you already have a Metamask wallet set up and connected to your browser.
Step 1: Open the Metamask Extension
First, ensure that your Metamask extension is open and unlocked in your browser. You should see the Metamask fox logo in your browser toolbar, indicating that the extension is active and connected to a wallet.
Step 2: Navigate to the Swap Function
In your Metamask wallet, click on the “Swap” tab in the top navigation menu. This will open the Swap interface, where you can select the tokens you want to swap.
Step 3: Select the Tokens and Set the Amount
On the Swap interface, you’ll see two dropdown menus labeled “From” and “To”. In the “From” dropdown, select Ethereum (ETH) as the token you want to swap. In the “To” dropdown, select Binance Coin (BNB) as the token you want to receive.
Next, set the amount of ETH you want to swap for BNB. You can enter the amount manually or use the percentage buttons to swap a portion of your ETH balance.
Step 4: Review the Swap Details
Before confirming the swap, review the details to ensure everything is correct. Pay attention to the estimated amount of BNB you will receive and any fees that may be involved. Metamask will also display the current exchange rate for the swap.
Step 5: Confirm the Swap and Wait
Once you’re satisfied with the swap details, click on the “Swap” button to confirm the transaction. Metamask will prompt you to review and confirm the transaction on the Ethereum blockchain. After confirming, you’ll need to wait for the transaction to be processed.
And that’s it! You’ve successfully swapped your ETH for BNB using Metamask. You can check the status of your transaction on the Ethereum blockchain explorer, and your new BNB balance will be visible in your Metamask wallet.
Remember, swapping tokens involves some degree of risk, so always double-check the details before proceeding with the transaction. Happy swapping!
What is Metamask?

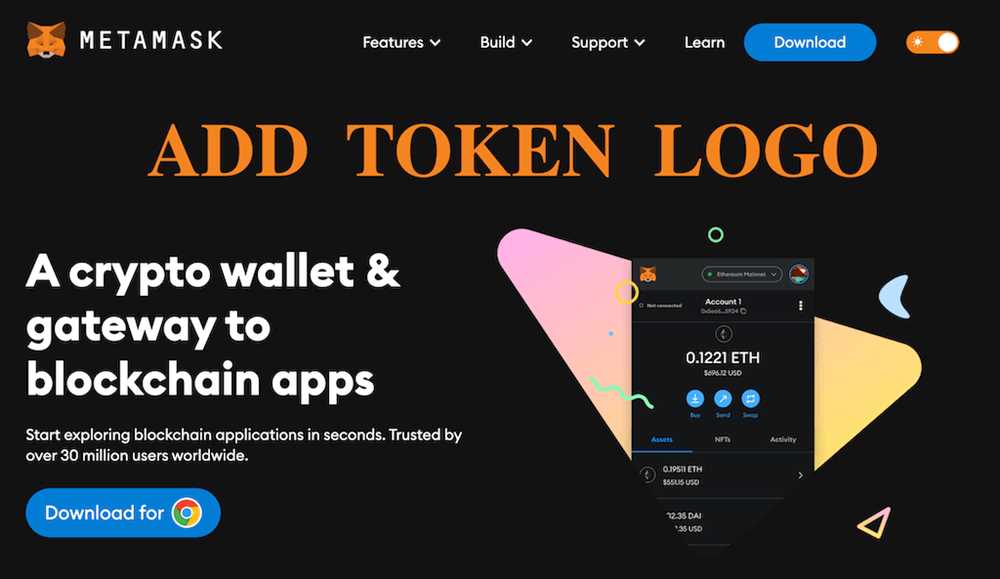
Metamask is a browser extension that serves as a digital wallet and a gateway to the world of decentralized applications (dapps) built on the Ethereum blockchain. It allows users to securely manage their cryptocurrency assets, interact with smart contracts, and seamlessly navigate the decentralized web.
With Metamask, users can easily store, send, and receive Ethereum (ETH) and Ethereum-based tokens. It provides a user-friendly interface with features like account management, transaction history, and a built-in decentralized application (dapp) browser.
One of the key advantages of using Metamask is its ability to connect to various decentralized exchanges (DEXs) such as Uniswap, enabling users to swap between different cryptocurrencies directly from their wallet. This eliminates the need for a centralized exchange and provides users with more control over their funds and trading activities.
Metamask also enhances the security of user transactions by requiring users to confirm each transaction within the extension itself. It leverages the security features of the browser it is installed on, providing an additional layer of protection against phishing attacks and malicious websites.
In summary, Metamask is an essential tool for anyone looking to explore the world of decentralized finance (DeFi) and interact with Ethereum-based applications. Its intuitive interface, robust security features, and compatibility with decentralized exchanges make it a go-to choice for cryptocurrency enthusiasts.
Why Swap ETH to BNB?
Swapping ETH to BNB can provide several advantages for cryptocurrency users. Here are a few reasons why swapping ETH to BNB might be beneficial:
1. Lower Transaction Fees:
BNB, the native token of the Binance Smart Chain (BSC), typically has lower transaction fees compared to ETH. This means that swapping ETH to BNB can help you save on transaction costs, especially when making frequent transfers or executing smaller transactions.
2. Faster Transactions:
Binance Smart Chain is designed for fast and efficient transactions, with block times averaging around 3 seconds. By swapping ETH to BNB and transacting on the Binance Smart Chain, you can experience quicker confirmation times compared to the Ethereum network, which can often be congested.
3. Access to Binance Smart Chain Ecosystem:
By holding BNB, you gain access to a wide range of decentralized applications (dApps) and DeFi projects built on the Binance Smart Chain. Many popular DeFi platforms, such as PancakeSwap and Venus, are available on BSC, offering unique investment opportunities and high-yield farming options.
4. Diversification:
Swapping ETH to BNB allows you to diversify your cryptocurrency portfolio. By holding BNB alongside ETH, you have exposure to two different blockchain ecosystems, each with its own set of projects and opportunities. This diversification can help mitigate risks and potentially enhance your overall investment strategy.
5. Potential for Higher Returns:
The Binance Smart Chain has gained significant momentum in the world of decentralized finance (DeFi) due to its lower fees and faster transaction times. By swapping ETH to BNB and participating in the BSC ecosystem, you can potentially tap into new investment opportunities and benefit from the growth of BSC-based projects.
Overall, swapping ETH to BNB can offer advantages such as lower transaction fees, faster transaction times, access to the BSC ecosystem, portfolio diversification, and potential for higher returns. However, it’s essential to research and understand the risks associated with any cryptocurrency investment or swap before proceeding.
Step 1: Install Metamask
To begin the process of swapping ETH to BNB using Metamask, you will first need to install the Metamask extension on your preferred web browser. Metamask is a digital wallet that allows you to store, manage, and interact with decentralized applications (DApps) on the Ethereum blockchain.
Here is a step-by-step guide on how to install Metamask:
- Open your web browser and go to the official Metamask website.
- Click on the “Get Chrome Extension” button if you are using Google Chrome or the “Get Firefox Extension” button if you are using Mozilla Firefox.
- You will be redirected to the respective web store for your browser. Click on the “Add to Chrome” button or the “Add to Firefox” button to start the installation.
- A pop-up window will appear confirming the installation. Click on the “Add Extension” button to proceed.
- Once the extension is installed, you will see the Metamask icon in your browser’s toolbar.
- Click on the Metamask icon to launch the extension. You will be greeted with the Metamask welcome screen.
- Click on the “Get Started” button to create a new wallet or restore an existing one.
- Follow the on-screen instructions to set up your wallet. This typically involves creating a strong password, accepting the terms of service, and backing up your wallet.
- Once your wallet is set up, you will be ready to use Metamask to swap ETH to BNB.
Installing Metamask is the first step towards swapping your ETH to BNB. Make sure to keep your password and wallet recovery phrase secure, as they are essential for accessing and managing your funds.
Create a Metamask Wallet
1. Open your preferred web browser and go to the Metamask website.
2. Click on the “Download” button to install the Metamask extension for your browser. Metamask supports most popular browsers, including Chrome, Firefox, and Brave.
3. Once the extension is downloaded, click on the installation file and follow the prompts to add the extension to your browser.
4. After the installation is complete, you will see the Metamask fox icon in your browser’s toolbar. Click on the icon to open the Metamask wallet.
5. If you are using Metamask for the first time, click on the “Create a Wallet” button to set up a new wallet. If you already have a Metamask wallet and want to import it, click on “Import Wallet” and follow the instructions.
6. Create a strong password for your new wallet and click on “Create” to proceed.
7. Metamask will provide you with a set of 12 random words known as the seed phrase. Write down these words in the exact order and keep them in a safe place. This phrase acts as a backup for your wallet and can be used to restore it if needed.
8. Confirm the seed phrase by selecting the words in the correct order. This is to ensure that you have written down the phrase correctly.
9. Once the seed phrase is confirmed, your Metamask wallet will be created. You can now enjoy the features and functionalities of Metamask, including swapping ETH to BNB.
10. To fund your wallet with ETH, you can either purchase ETH from an exchange or receive it from another wallet address. Make sure you have enough ETH in your wallet before proceeding with the swap.
Now that you have set up your Metamask wallet, you are ready to proceed with the ETH to BNB swap. Follow the next steps in this guide to complete the swap using Metamask.
Import an Existing Wallet
If you already have an existing Ethereum wallet that you would like to use with Metamask, you can easily import it into the extension. Here’s how:
Step 1: Open the Metamask extension by clicking on the fox icon in your browser toolbar.
Step 2: Click on the “Get Started” button to begin the wallet setup process.
Step 3: On the next screen, click on “Import Wallet” to import an existing wallet.
Step 4: You will be prompted with different options for importing a wallet. Choose the option that corresponds to your existing wallet.
Step 5: Enter the necessary information, such as the wallet’s private key or recovery phrase, depending on the import option you chose. Make sure to carefully enter the information to ensure the wallet is imported correctly.
Step 6: Once you have entered the required information, click on “Import” to begin the import process.
Step 7: After the import process is complete, you will see your imported wallet in the Metamask interface. You can now start using your existing wallet to swap ETH to BNB or perform other transactions.
Note: Importing a wallet into Metamask does not transfer any funds. It simply allows you to access and manage your existing wallet within the extension.
Step 2: Connect Metamask to Binance
Before you can swap ETH to BNB using Metamask, you need to connect your Metamask wallet to Binance. Follow the steps below to establish the connection:
1. Open Binance and log in to your account
If you don’t have a Binance account, you’ll need to create one. Simply go to the Binance website and click on the “Register” button to sign up. Once you have an account, log in using your credentials.
2. Go to the Wallet section
After logging in, navigate to the Wallet section on the Binance platform. You can usually find it in the top navigation menu.
3. Click on “Wallet Connect” or “Connect Metamask”
In the Wallet section, you will see an option to connect your wallet. Look for either the “Wallet Connect” or “Connect Metamask” button and click on it.
4. A QR code will appear
After clicking on the connection button, a QR code will appear on your screen.
5. Open Metamask and click on the Networks dropdown
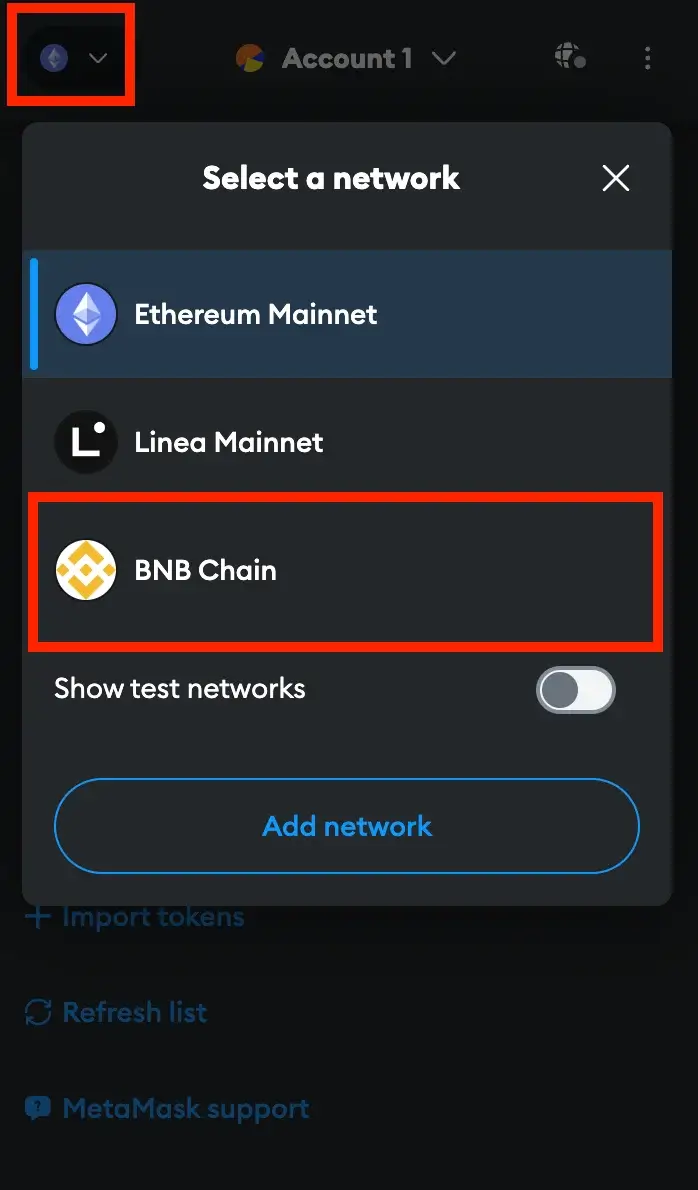
Open your Metamask wallet and click on the networks dropdown in the top right corner. It should be right next to the Metamask logo.
6. Select “Custom RPC”
From the Networks dropdown, select “Custom RPC” to add a custom network.
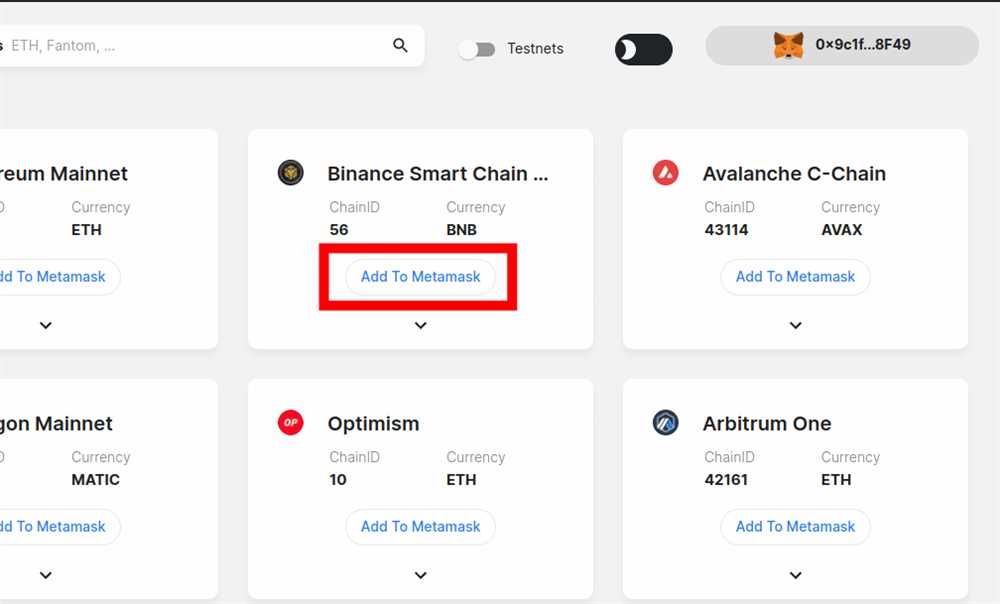
7. Enter the Binance Smart Chain details
Now, you’ll need to enter the Binance Smart Chain details to connect your Metamask wallet to Binance. Fill in the following details:
| Network Name | New RPC URL | Chain ID | Currency Symbol |
|---|---|---|---|
| Binance Smart Chain | https://bsc-dataseed.binance.org/ | 56 | BNB |
Make sure all the details are entered correctly.
8. Click on “Save”
After entering the Binance Smart Chain details, click on “Save” to add the network to your Metamask wallet.
9. Scan the QR code
Go back to the Binance platform and use the QR code scanner in your Metamask wallet to scan the QR code on the screen. This will establish the connection between your Metamask wallet and Binance.
Once the connection is established, you will see a confirmation message on both Binance and Metamask.
That’s it! You have successfully connected your Metamask wallet to Binance. Now you’re ready to proceed with swapping ETH to BNB.
Frequently Asked Questions:
What is Metamask?
Metamask is a cryptocurrency wallet and browser extension that allows users to interact with decentralized applications (dApps) on the Ethereum blockchain. It acts as a bridge between the user’s web browser and the Ethereum network.
Which decentralized exchanges (DEX) support the ETH to BNB swap?
There are several decentralized exchanges that support the ETH to BNB swap, including PancakeSwap and Binance DEX. These DEX platforms allow users to swap cryptocurrencies directly from their wallets, such as Metamask, without the need for intermediaries like centralized exchanges.
Are there any fees involved when swapping ETH to BNB using Metamask?
Yes, there are usually fees involved when swapping ETH to BNB using Metamask. These fees include network fees (gas fees) and exchange fees. The network fees are paid to miners to process the transaction on the Ethereum blockchain, while the exchange fees are charged by the DEX platform for facilitating the swap.
What is slippage tolerance and why is it important when swapping ETH to BNB?
Slippage tolerance refers to the maximum difference between the expected price and the actual executed price of a swap. It is important when swapping ETH to BNB because the price of cryptocurrencies can fluctuate rapidly, especially during periods of high volatility. Setting a higher slippage tolerance ensures that your transaction is still executed even if the price has slightly changed since you initiated the swap.

+ There are no comments
Add yours