


Have you recently started exploring the world of cryptocurrency and want to send your digital assets from Coinbase to MetaMask? Look no further! In this step-by-step guide, we will walk you through the process of transferring your crypto holdings securely and seamlessly.
Why would you want to send your crypto from Coinbase to MetaMask? Well, Coinbase is a popular cryptocurrency exchange platform that allows you to buy, sell, and store various digital currencies. On the other hand, MetaMask is a digital wallet that acts as a bridge between your web browser and the Ethereum blockchain, making it easier for you to interact with decentralized applications (dApps).
Before diving into the transfer process, make sure you have the following:
- A Coinbase account with crypto holdings
- A MetaMask account with an Ethereum wallet
- The MetaMask browser extension (available for Chrome, Firefox, and Brave browsers)
Once you have everything set up, here’s how you can send your crypto from Coinbase to MetaMask:
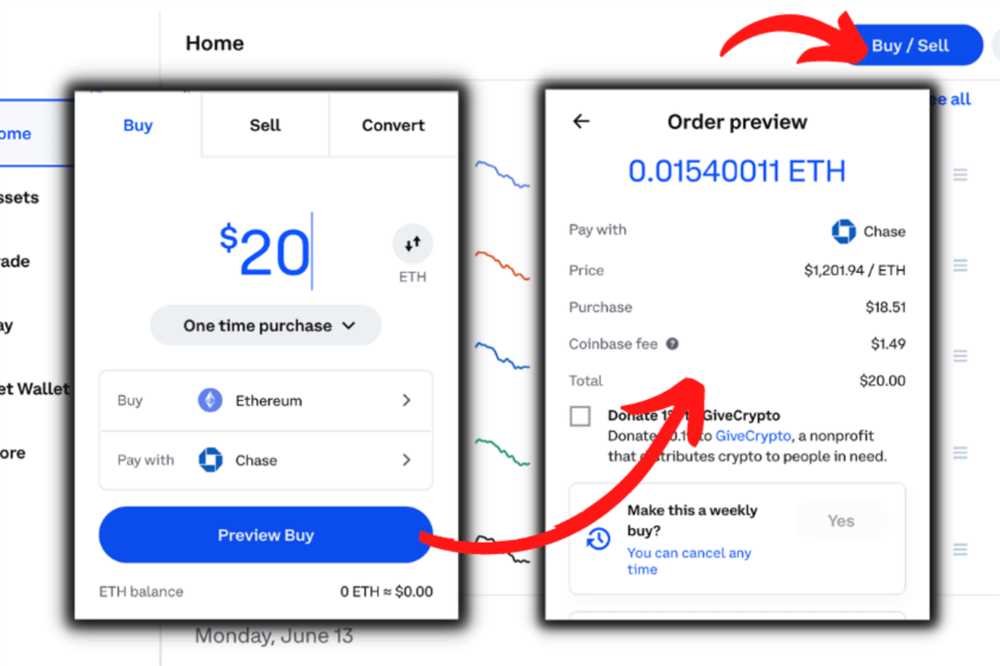
- Open your Coinbase account and sign in.
- Click on the “Accounts” tab to view your crypto holdings.
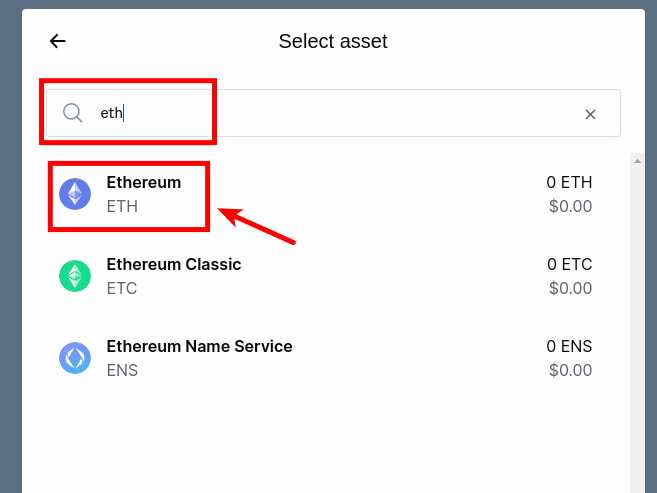
- Select the cryptocurrency you want to send to MetaMask.
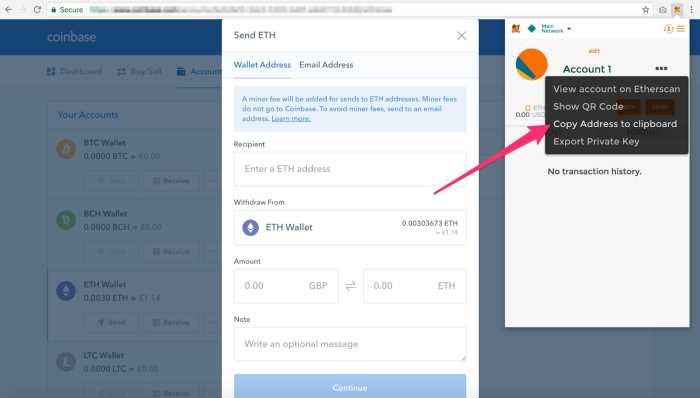
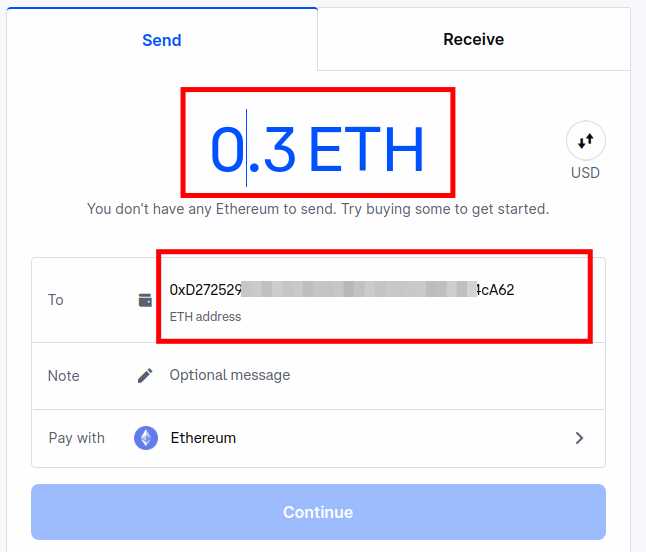
- Click on the “Send” button.
- Enter your MetaMask wallet address in the recipient field. Make sure to double-check the address to avoid any mistakes.
- Specify the amount of cryptocurrency you want to send and review the transaction details.
- Click on the “Confirm” button to initiate the transfer.
- Wait for the confirmation message to appear on Coinbase, indicating that the transfer has been successfully completed.
- Open your MetaMask wallet and refresh the page to see the newly transferred crypto.
Keep in mind that cryptocurrency transactions are irreversible, so it’s crucial to review all the details before confirming the transfer. Also, double-check the recipient address to ensure you’re sending your crypto to the correct wallet.
By following these simple steps, you can easily send your crypto from Coinbase to MetaMask and start exploring the world of decentralized finance (DeFi) and dApps with ease and security.
A Beginner’s Guide to Sending Crypto from Coinbase to MetaMask
If you’re new to the world of cryptocurrency and want to take your first steps in transferring crypto from Coinbase to MetaMask, this guide is for you. In this step-by-step tutorial, we’ll walk you through the process of sending crypto from Coinbase to your MetaMask wallet. Let’s get started!
Step 1: Set Up MetaMask Wallet
The first thing you need to do is set up your MetaMask wallet. If you haven’t done so already, visit the MetaMask website and download the MetaMask extension for your preferred web browser. Follow the instructions to create a new wallet and secure it with a strong password.
Step 2: Generate Your MetaMask Wallet Address
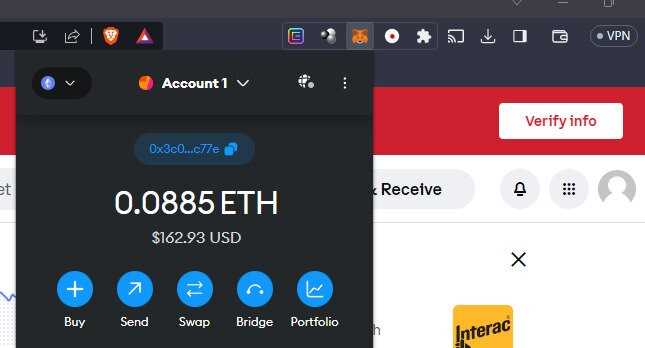
Once your MetaMask wallet is set up, you’ll be assigned a unique wallet address. To find your wallet address, click on the MetaMask extension in your browser and navigate to the “Account” section. Copy your wallet address as you’ll need it in the next step.
Step 3: Log in to Your Coinbase Account
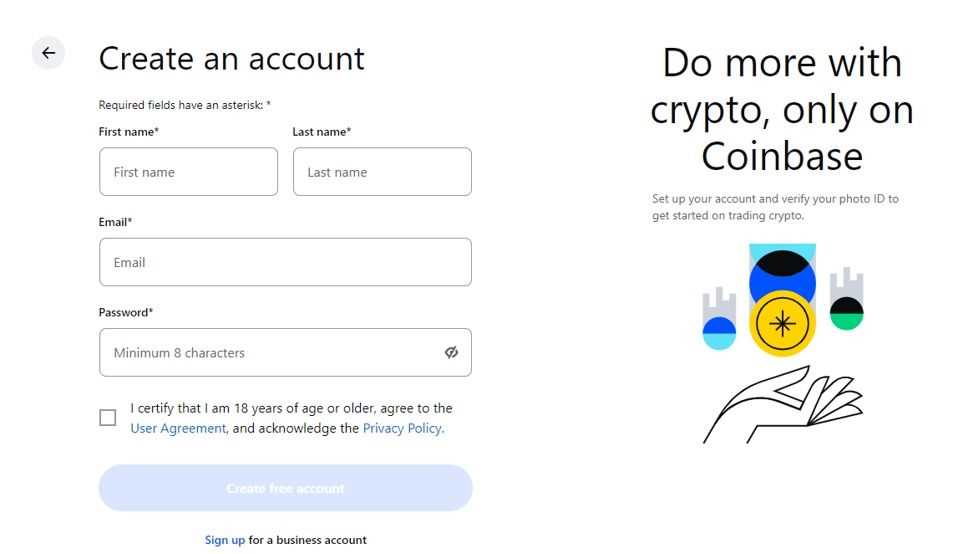
If you don’t have a Coinbase account yet, sign up for one and complete the verification process. Once you’re logged in, navigate to the “Accounts” tab and select the cryptocurrency you want to send to your MetaMask wallet.
Step 4: Initiate the Withdrawal Process
On the selected cryptocurrency’s page, click on the “Send” button. In the recipient field, paste your MetaMask wallet address. Double-check that the address is correct to avoid any losses. Enter the amount of crypto you want to send and review the details.
Step 5: Confirm and Send
After reviewing the details, click on the “Confirm” or “Send” button to initiate the withdrawal. Coinbase may require you to verify the transaction using two-factor authentication or email confirmation. Follow the prompts and complete the process.
Step 6: Wait for Confirmation
Once the transaction is initiated, you’ll need to wait for the blockchain to confirm it. This process can take some time depending on network congestion and the specific blockchain used by the cryptocurrency you’re sending. You can track the progress of the transaction using the transaction ID provided by Coinbase.
Step 7: Check Your MetaMask Wallet
After the transaction is confirmed, you can check your MetaMask wallet to see if the crypto has arrived. Click on the MetaMask extension and navigate to the “Account” section. Your balance should reflect the amount of crypto you sent from Coinbase.
That’s it! You’ve successfully sent crypto from Coinbase to your MetaMask wallet. Remember to double-check all the details before initiating any transactions and always keep your wallet and account information secure.
Please note that cryptocurrency transactions are irreversible, and it’s essential to exercise caution when sending funds.
Understanding Coinbase and MetaMask
Coinbase and MetaMask are both popular cryptocurrency wallets that allow users to securely store and manage their digital assets. While they serve a similar purpose, there are some key differences between the two:
- Coinbase: Coinbase is a centralized exchange and wallet platform that allows users to buy, sell, and hold various cryptocurrencies. It offers a user-friendly interface and provides a high level of security. Coinbase holds the private keys to users’ wallets, making it easier for beginners to use but potentially less secure.
- MetaMask: MetaMask is a decentralized wallet that operates as a browser extension. It allows users to interact with decentralized applications (DApps) on the Ethereum blockchain. Unlike Coinbase, MetaMask gives users full control of their private keys, providing a higher level of security. However, it may be less intuitive for beginners to use.
When sending crypto from Coinbase to MetaMask, you are essentially transferring your digital assets from a centralized platform to a decentralized wallet. This gives you more control over your funds and allows you to securely participate in the Ethereum ecosystem through MetaMask.
It’s important to note that while Coinbase and MetaMask are compatible, they are separate entities with different features and functionalities. Understanding the differences between these two wallets can help you choose the best option for your specific needs and preferences.
Creating a MetaMask Wallet
To start using MetaMask, you’ll first need to create a wallet. Follow these step-by-step instructions to get started:
- Install the MetaMask extension for your web browser by visiting the official MetaMask website or searching for it in your browser’s extension store.
- Click on the MetaMask extension icon that appears in your browser’s toolbar to open the MetaMask interface.
- Click on the “Get Started” button to begin the wallet creation process.
- Read and accept the MetaMask Terms of Service and Privacy Notice.
- Create a new wallet by choosing a strong password and clicking on the “Create” button.
- Confirm your password by entering it again in the provided field.
- Back up your wallet by clicking on the “Download” button and saving the backup file in a secure location.
- Click on the “Next” button and follow the on-screen instructions to reveal your secret backup phrase.
- Write down and store your secret backup phrase in a safe place, as it can be used to restore your wallet if you ever lose access to it.
- Confirm your secret backup phrase by entering it in the provided field.
- Complete the wallet creation process by clicking on the “Confirm” button.
Once your wallet is created, you can start managing your crypto assets, including sending cryptocurrencies from Coinbase to your MetaMask wallet.
Transferring Crypto from Coinbase to MetaMask
Once you have created a MetaMask wallet and have some crypto assets stored in your Coinbase account, you may want to transfer those assets from Coinbase to MetaMask. This allows you to have direct control and ownership of your crypto assets, as MetaMask is a non-custodial wallet.
Here is a step-by-step guide to transferring crypto from Coinbase to MetaMask:
| Step | Action |
|---|---|
| 1 | Login to your Coinbase account and navigate to the “Accounts” section. |
| 2 | Select the crypto asset you want to transfer from Coinbase to MetaMask. |
| 3 | Click on the “Send” button for the chosen crypto asset. |
| 4 | Enter your MetaMask wallet address as the recipient address. |
| 5 | Double-check the entered address to ensure it is correct. |
| 6 | Enter the amount of crypto you want to transfer. |
| 7 | Review the transaction details and confirm the transfer. |
| 8 | Wait for the transaction to be confirmed on the blockchain. |
| 9 | Once the transaction is confirmed, you will see the transferred crypto assets in your MetaMask wallet. |
It is important to note that transaction fees may apply when transferring crypto assets between platforms. Make sure to consider these fees and the current network congestion before initiating the transfer.
By following these steps, you can easily transfer crypto from Coinbase to your MetaMask wallet, giving you full control over your assets and the ability to interact with decentralized applications (dApps) on the Ethereum network.
Confirming and Using Your Crypto in MetaMask
Once you have successfully transferred your cryptocurrency from Coinbase to MetaMask, you need to confirm the transaction and make sure your crypto is accessible in MetaMask.
1. Confirming the Transaction
After the transfer is complete, open your MetaMask wallet extension in your web browser. You should see the newly received cryptocurrency in your account. Click on the transaction to view its details and confirm that it is the correct amount and currency.
If everything looks correct, you can proceed to the next step. If there is an issue or discrepancy, double-check the transaction details on Coinbase to ensure you sent the correct amount and currency to the correct MetaMask address.
2. Accessing Your Crypto in MetaMask
Now that you have confirmed the transaction, you can start using your cryptocurrency in MetaMask. Here are a few things you can do:
Sending Crypto: Click on the “Send” button in your MetaMask wallet and enter the recipient’s address, the amount you want to send, and any additional information required. Confirm the transaction and wait for it to be processed.
Receiving Crypto: If you want to receive cryptocurrency, you can share your MetaMask address with the sender. They can then send the desired amount of crypto to your MetaMask wallet.
Checking Balance: To check your cryptocurrency balance in MetaMask, simply open your wallet extension and look at the account details. It will show the total balance of each cryptocurrency you have in your wallet.
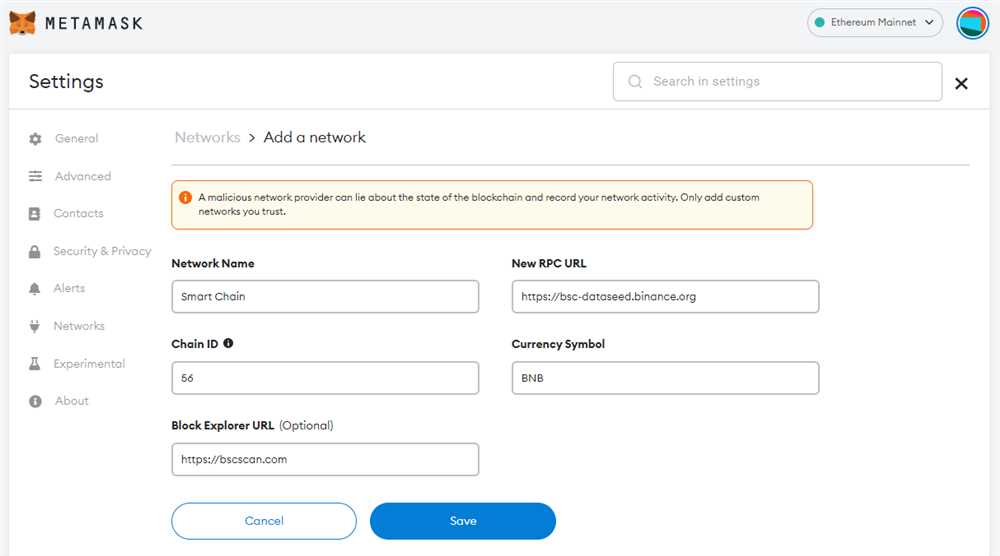
Managing Tokens: MetaMask allows you to manage various tokens in addition to major cryptocurrencies like Bitcoin and Ethereum. You can add new tokens, view your token balances, and even trade tokens within the MetaMask wallet interface.
Remember that MetaMask is not just a wallet but also a web3 interface, meaning you can interact with decentralized applications (dApps) and smart contracts directly from your wallet. Look for dApps that support MetaMask and explore the possibilities of decentralized finance and blockchain technology.
With your crypto now accessible in MetaMask, you can take advantage of its features and benefits within the Ethereum ecosystem and beyond.
Frequently Asked Questions:
What is Coinbase?
Coinbase is a popular cryptocurrency exchange platform that allows users to buy, sell, and store various cryptocurrencies.
What is MetaMask?
MetaMask is a digital wallet that allows users to manage and interact with various decentralized applications (dApps) on the Ethereum blockchain.
How do I connect MetaMask to Coinbase?
To connect MetaMask to Coinbase, you need to first install the MetaMask extension in your web browser. Then, log in to your Coinbase account and click on the “Send/Receive” button for the cryptocurrency you want to transfer. Choose the option to send the cryptocurrency to an external wallet and enter the wallet address provided by your MetaMask account. Confirm the transaction and the funds will be sent to your MetaMask wallet.
+ There are no comments
Add yours