


Metamask is a popular cryptocurrency wallet that allows users to securely store and manage their digital assets. It provides a user-friendly interface and supports various blockchain networks, making it a convenient choice for many crypto enthusiasts. Connecting your Metamask wallet to a Ledger device can provide an additional layer of security, ensuring the safety of your funds. In this step-by-step guide, we will walk you through the process of connecting your Metamask wallet to Ledger.
Step 1: Install the Metamask Extension
If you haven’t already done so, start by installing the Metamask extension in your browser. Metamask is available for Google Chrome, Mozilla Firefox, and Brave browsers. Simply search for “Metamask” in the extension store of your preferred browser and click on the “Add to Chrome” (or equivalent) button to install it.
Step 2: Set Up Your Metamask Wallet
Once the extension is installed, click on the Metamask icon located in the top right corner of your browser. Next, click on the “Get Started” button and follow the prompts to set up your Metamask wallet. Create a strong password and securely store your backup seed phrase, as this will be needed to restore your wallet in case you lose access to your device.
Step 3: Connect Your Ledger Device
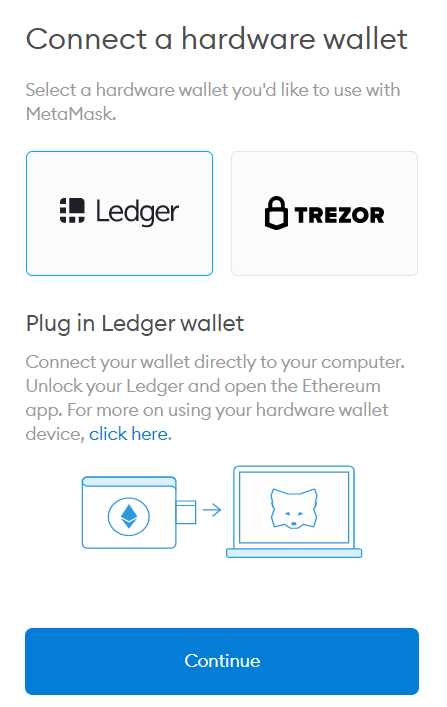
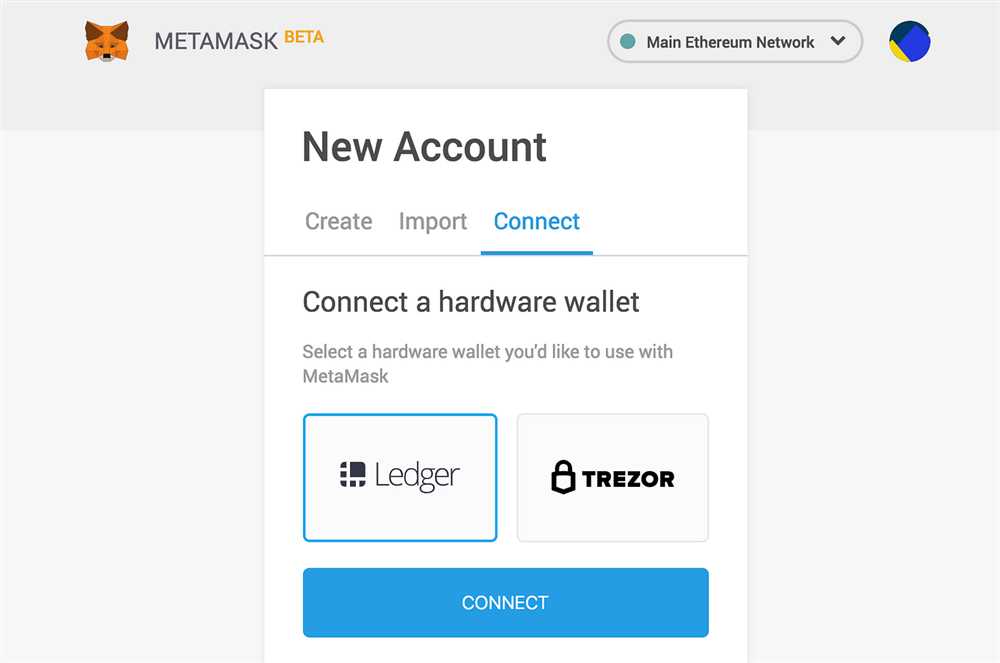
Make sure your Ledger device is properly connected to your computer via USB cable. Unlock your device and open the Ethereum app on your Ledger. In the Metamask extension, click on the account icon located at the top right and select “Connect Hardware Wallet”. Choose “Ledger” as the type of hardware wallet you want to connect, and click on the “Connect” button.
Step 4: Confirm Connection on Ledger
On your Ledger device, you will be prompted to “Export Public Key”. Verify that the public key shown on your Ledger matches the one displayed in the Metamask extension. Use the buttons on your Ledger device to confirm or deny the connection. Once the connection is confirmed, the accounts associated with your Ledger device will be displayed in the Metamask extension.
Congratulations! Your Metamask wallet is now successfully connected to your Ledger device. You can now securely manage your digital assets and perform transactions with peace of mind.
Remember to always keep your Ledger device and recovery seed phrase in a safe place and never share them with anyone. Regularly update your firmware and browser extensions to maintain the highest level of security for your crypto assets.
Connecting Metamask Wallet to Ledger: A Step-by-Step Guide
Metamask is a popular Ethereum wallet that allows users to securely manage their digital assets and interact with decentralized applications (dApps). If you own a Ledger hardware wallet, you can connect it to Metamask to enhance security and manage your funds more securely. Follow the step-by-step guide below to connect your Metamask wallet to Ledger:
Step 1: Install the Metamask extension on your browser (if you haven’t already) and set up your Metamask wallet by creating a new wallet or importing an existing one.
Step 2: Connect your Ledger hardware wallet to your computer using the USB cable.
Step 3: Open the Ethereum app on your Ledger device.
Step 4: In Metamask, click on the profile icon on the top right corner and select “Import Account”.
Step 5: In the import window, select “Hardware” as the type of wallet you want to import.
Step 6: Choose “Ledger” as the hardware wallet provider.
Step 7: Click on the “Connect” button to start the connection process.
Step 8: Confirm the connection on your Ledger device by verifying the address displayed on the screen.
Step 9: Once the connection is established, your Ledger wallet will appear as an available account in Metamask.
Step 10: You can now use your Ledger hardware wallet to securely sign transactions and interact with dApps through Metamask.
By connecting your Metamask wallet to Ledger, you benefit from the enhanced security provided by the hardware wallet. Your private keys are stored securely on the Ledger device and never exposed to the internet, reducing the risk of theft or unauthorized access to your funds. Remember to always keep your Ledger device and recovery phrase safe to ensure the security of your assets.
Step 1: Install Metamask Wallet on Your Device
In order to connect your Metamask wallet to your Ledger device, you will first need to install the Metamask wallet on your device.
Here is a step-by-step guide on how to install Metamask:
- Open your preferred web browser and go to the Metamask website.
- Click on the “Get Chrome Extension” button if you are using Google Chrome, or the “Get Firefox Extension” button if you are using Mozilla Firefox.
- Click on the “Add to Chrome” or “Add to Firefox” button to start the installation process.
- A pop-up window will appear asking for confirmation to install the extension. Click on the “Add extension” button.
- Once the installation is complete, the Metamask icon will appear in the top-right corner of your browser.
Note: Make sure to always download Metamask from the official website to avoid any potential risks or scams.
Now that you have successfully installed the Metamask wallet on your device, you can proceed to the next step of connecting it to your Ledger device.
Step 2: Set Up Your Ledger Hardware Wallet
Before you can connect your Ledger hardware wallet to your Metamask wallet, you need to set up your Ledger device. Follow these steps to get your hardware wallet ready:
1. Unbox and Connect Your Ledger Device
Unbox your Ledger hardware wallet and connect it to your computer using the supplied USB cable. Make sure the device is fully charged or plugged in during the process.
2. Install the Ledger Live Software

Visit the official Ledger website and download the Ledger Live software for your operating system. Once downloaded, follow the installation instructions to install the software on your computer.
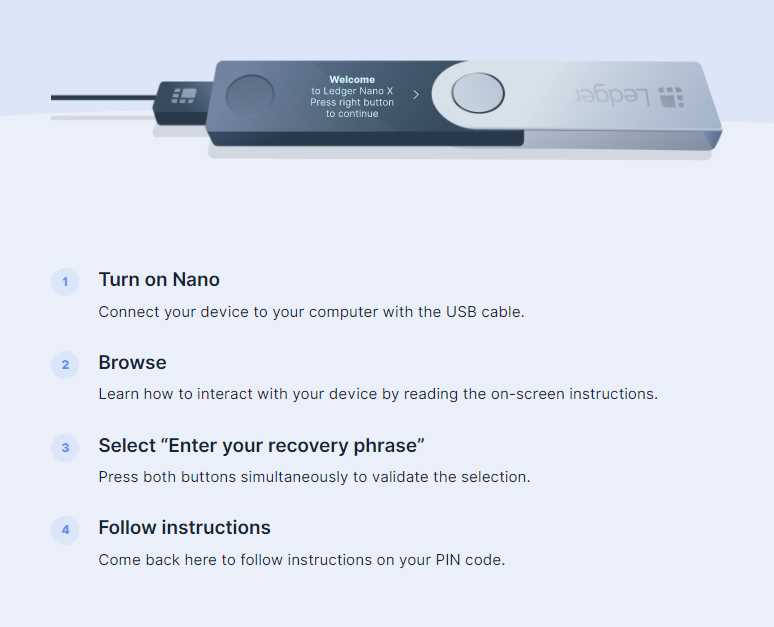
3. Initialize Your Ledger Wallet
- Launch the Ledger Live software and select “Set up as a new device.”
- Choose your device model from the list and click “Continue.”
- Follow the on-screen instructions to initialize your device. This typically involves setting up a PIN code and writing down your recovery phrase. Make sure to store your recovery phrase in a safe place, as it is your backup in case your device is lost or damaged.
- Create a device name and click “Continue.”
- Confirm your device setup by entering your PIN code.
4. Update Firmware (if necessary)
If your Ledger device firmware is not up to date, you will need to update it to ensure compatibility with Metamask. Follow the on-screen instructions in the Ledger Live software to update your device firmware.
5. Install Ethereum App

In order to connect your Ledger wallet to Metamask, you need to install the Ethereum app on your device. Open the Ledger Live software, go to the Manager tab, and search for Ethereum. Click on the “Install” button next to the Ethereum app to install it on your device.
Your Ledger hardware wallet is now set up and ready to connect to your Metamask wallet in the next step.
Step 3: Connect Metamask and Ledger Wallet
After setting up your Ledger wallet and installing Metamask extension on your browser, you can now connect both of them together to enhance the security of your crypto transactions.
To connect your Metamask wallet to your Ledger device, follow these steps:
- Open the Metamask extension on your browser and click on the profile avatar located at the top right corner of the screen.
- Select the “Settings” option from the menu that appears.
- On the settings page, scroll down and find the “Connect Hardware Wallet” section.
- Click on the “Connect” button located next to the “Ledger” option.
- A pop-up will appear, prompting you to connect your Ledger device to your computer using the USB cable.
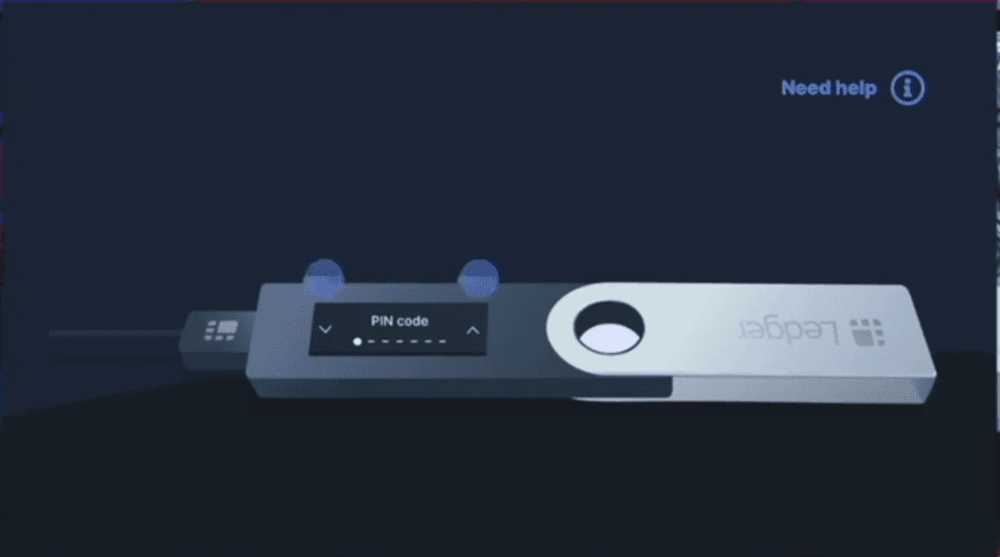
- Connect your Ledger device and unlock it by entering your PIN code.
- Once your Ledger device is connected and unlocked, click on the “Connect” button in the pop-up window.
- Metamask will now detect your Ledger device and establish a connection.
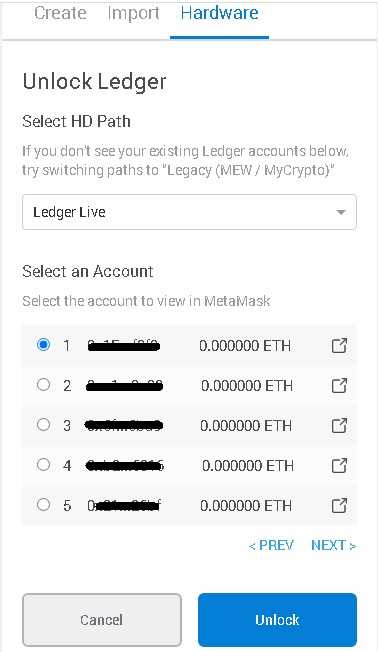
- You will be asked to choose the account you want to connect. Select the account you wish to use for your Metamask wallet.
- Finally, click on the “Connect” button to establish the connection between your Metamask wallet and Ledger device.
Your Metamask wallet is now connected to your Ledger device. This connectivity allows you to securely manage your crypto assets using the Ledger hardware wallet.
Step 4: Confirm the Connection and Start Using Your Metamask Wallet with Ledger
Once you have successfully connected your Metamask wallet to your Ledger device, you need to confirm the connection and start using your wallet with Ledger.
Confirm the Connection
To confirm the connection, follow these steps:
- Open the Metamask extension in your browser.
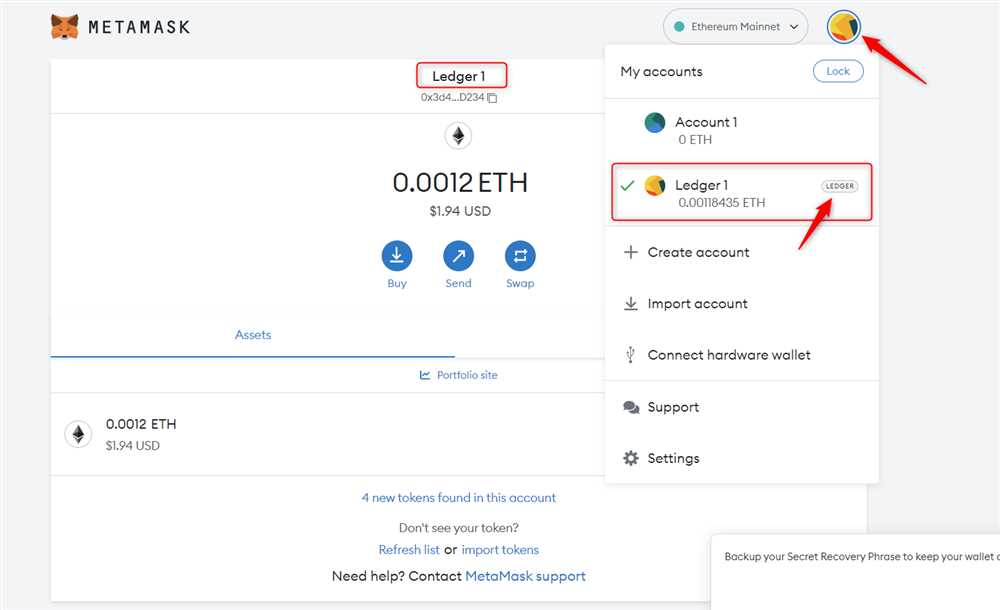
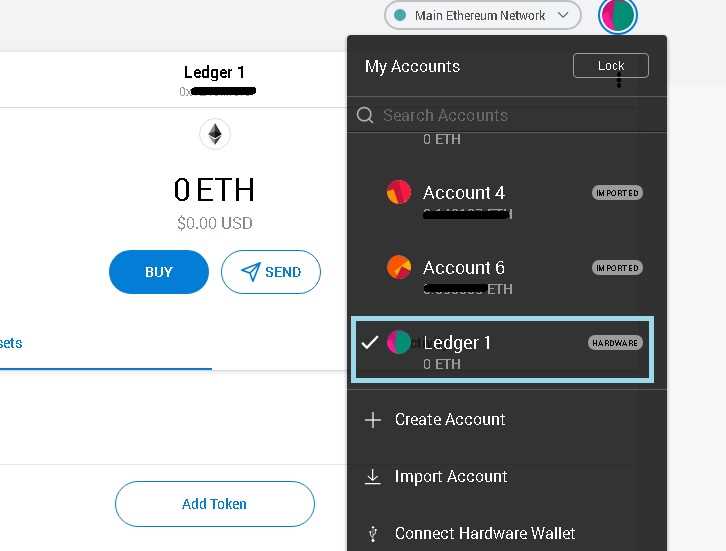
- Click on the account icon at the top right corner and select the connected Ledger device from the dropdown menu.
- Authorize the connection on your Ledger device by following the instructions on the screen and confirming the connection.
- Once the connection is confirmed, you will see your Ledger wallet address displayed in Metamask.
Start Using Your Metamask Wallet with Ledger
Now that your Metamask wallet is successfully connected to Ledger, you can start using it to manage your crypto assets and perform transactions securely.
You can:
- View your account balance and transaction history.
- Send and receive cryptocurrencies using your Ledger device for secure transaction signing.
- Access decentralized applications (DApps) and interact with smart contracts using your Metamask wallet.
With the combination of Metamask and Ledger, you have enhanced security and control over your digital assets, making it easier and safer to manage your cryptocurrency portfolio.
Remember to always keep your Ledger device safe and verify transactions on its screen before approving them through Metamask.
| TIP | Regularly update your Metamask extension and Ledger firmware to benefit from the latest security features and improvements. |
|---|
Frequently Asked Questions:
What is Metamask wallet?
Metamask wallet is a software cryptocurrency wallet that allows users to manage their digital assets, interact with decentralized applications (dApps), and securely store their private keys.
Why should I connect my Metamask wallet to Ledger?
Connecting your Metamask wallet to Ledger adds an extra layer of security to your cryptocurrency transactions. It allows you to store your private keys on a hardware device, protecting them from potential online threats.
Can I use any Ledger device to connect my Metamask wallet?
Yes, you can use any Ledger device that is compatible with Metamask to connect your wallet. Ledger Nano S and Ledger Nano X are both supported.
+ There are no comments
Add yours