


MetaMask is a popular browser extension that allows users to interact with decentralized applications (dApps) on the Ethereum blockchain. By default, MetaMask is set to the Ethereum Mainnet, but with a few simple steps, you can add the Matic Mainnet to your MetaMask wallet. This guide will walk you through the process.
Step 1: Install MetaMask Extension
If you haven’t already done so, start by installing the MetaMask extension on your preferred browser. MetaMask is available for Chrome, Firefox, Brave, and Edge. Once installed, you will see the MetaMask icon in your browser toolbar.
Step 2: Create or Import a Wallet
If you already have a MetaMask wallet, skip to the next step. Otherwise, click on the MetaMask icon and select “Get Started” to create a new wallet. Follow the prompts to set up your account and save your seed phrase in a safe place. If you already have a wallet, click on the icon and select “Import Wallet” to enter your seed phrase.
Step 3: Open the MetaMask Settings
With your MetaMask wallet set up, click on the icon to open the extension. In the top right corner, click on the menu icon (three horizontal lines) and select “Settings” from the dropdown menu.
Step 4: Network Selection
In the Settings menu, click on the “Networks” tab. Here, you will see a list of networks. Scroll down and click on “Add Network” at the bottom of the list.
Step 5: Enter Matic Mainnet Details
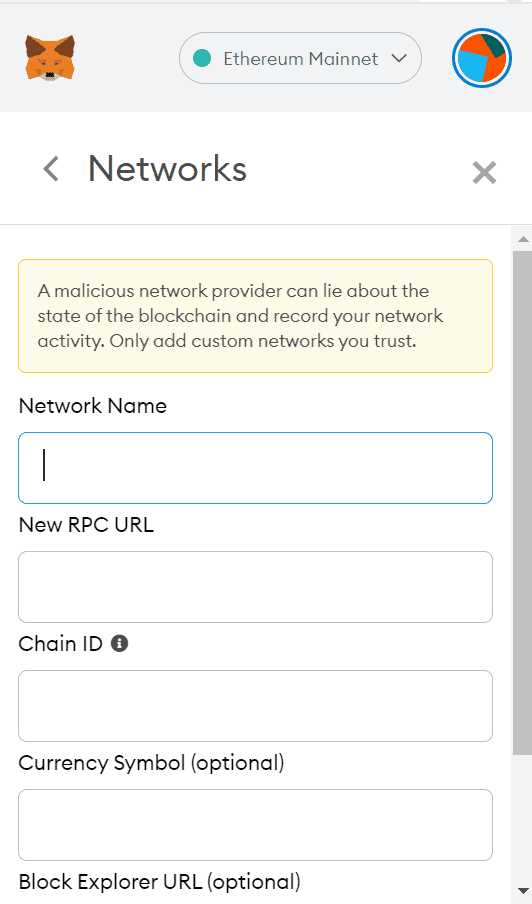
In the “Add Network” form, enter the following details:
- Network Name: Matic Mainnet
- New RPC URL: https://rpc-mainnet.maticvigil.com/ (or any other valid Matic Mainnet RPC URL)
- Chain ID: 137
- Currency Symbol (optional): MATIC
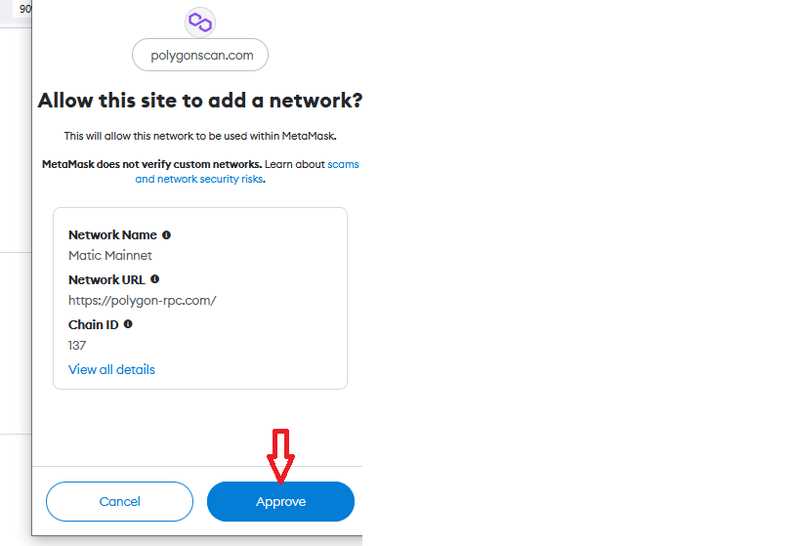
Step 6: Save and Connect to Matic Mainnet
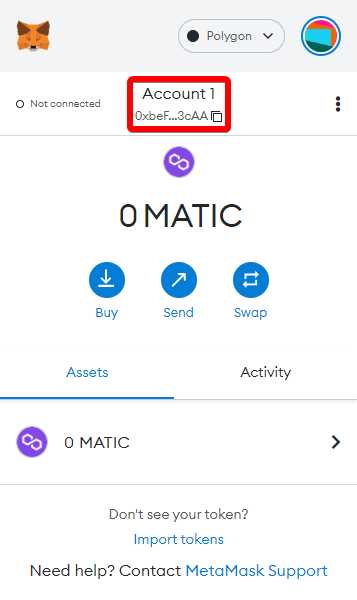
After entering the details, click on “Save” to add the Matic Mainnet to your network list. You will now see the Matic Mainnet option in the networks dropdown menu. Click on it to connect to the Matic Mainnet and start using dApps on Matic.
Note: It is important to double-check the URL and Chain ID to ensure you are connecting to the correct network. Be cautious of phishing attempts.
Congratulations! You have successfully added the Matic Mainnet to your MetaMask wallet. Now you can seamlessly explore and transact on Matic-powered dApps using MetaMask.
Step by Step Guide: Adding Matic Mainnet to MetaMask
MetaMask is a popular Ethereum wallet extension that allows users to interact with Ethereum-based decentralized applications (dApps) on their web browsers. By default, MetaMask only supports the Ethereum mainnet, but with a few simple steps, you can add the Matic mainnet to MetaMask to access Matic Network and its dApps.
Step 1: Install MetaMask
- Open your web browser and go to the MetaMask website.
- Click on “Get Chrome Extension” or “Get Firefox Extension” to install MetaMask as a browser extension.
- Follow the on-screen instructions to complete the installation process.
Step 2: Create a MetaMask Wallet
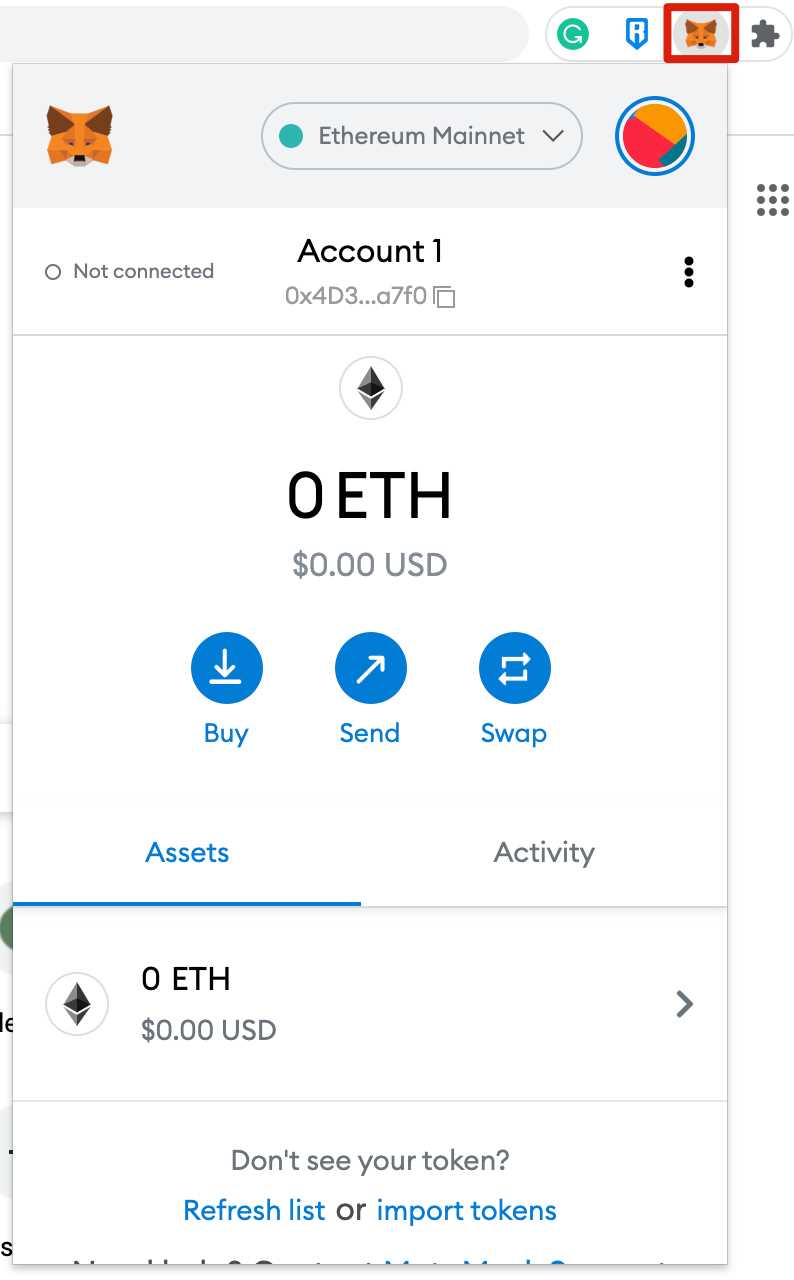
- Once MetaMask is installed, you’ll see the MetaMask icon in your browser toolbar.
- Click on the MetaMask icon to open the extension.
- Click on “Create a Wallet” and follow the prompts to set up a new wallet. Make sure to securely save your seed phrase as it will be needed to restore your wallet.
- Set up a strong password for your wallet and click on “Create”.
- Agree to the terms of use and privacy policy.
Step 3: Switch to Matic Mainnet
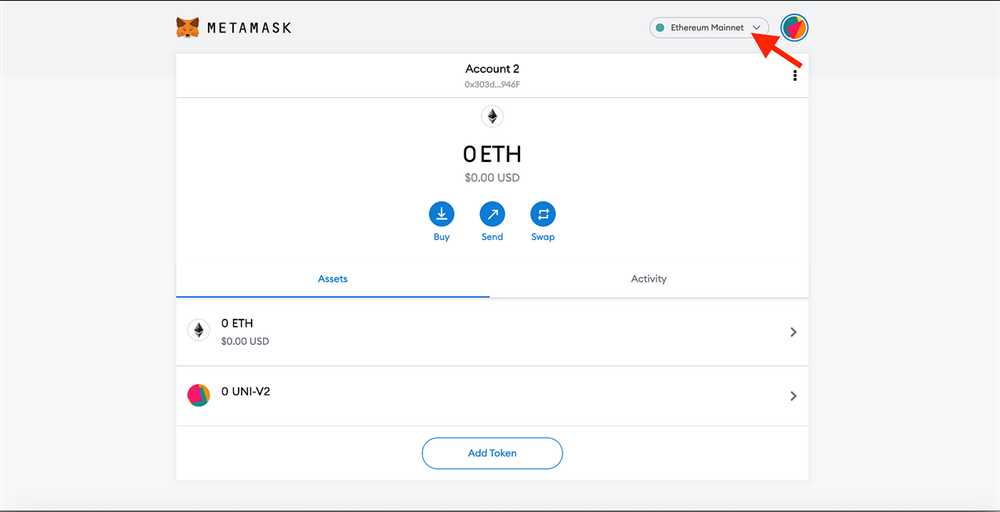
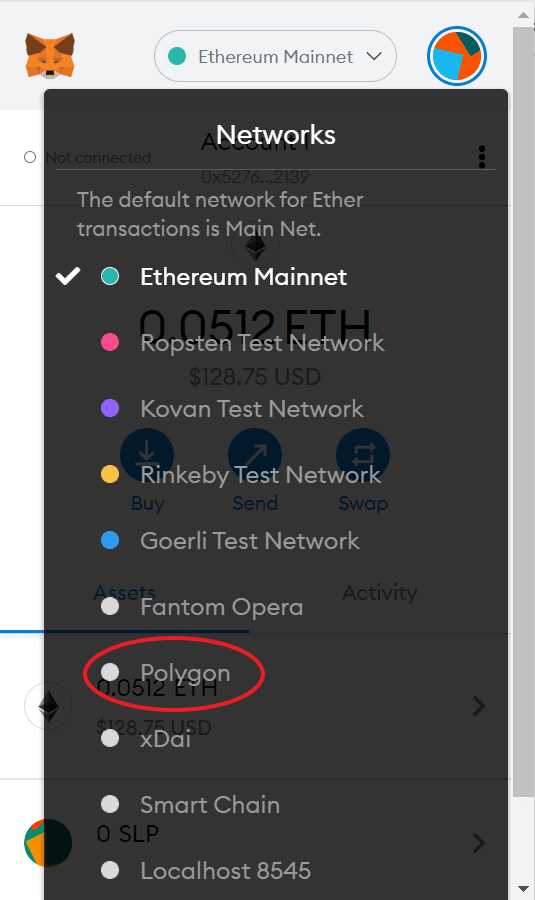
- With MetaMask open, click on the network dropdown menu located at the top of the window.
- Scroll down and select “Custom RPC” at the bottom of the list.
- In the “New RPC URL” field, enter the Matic mainnet RPC URL:
https://rpc-mainnet.maticvigil.com/ - Click on “Save” to add the Matic mainnet to your network list.
Step 4: Connect to Matic Network dApps
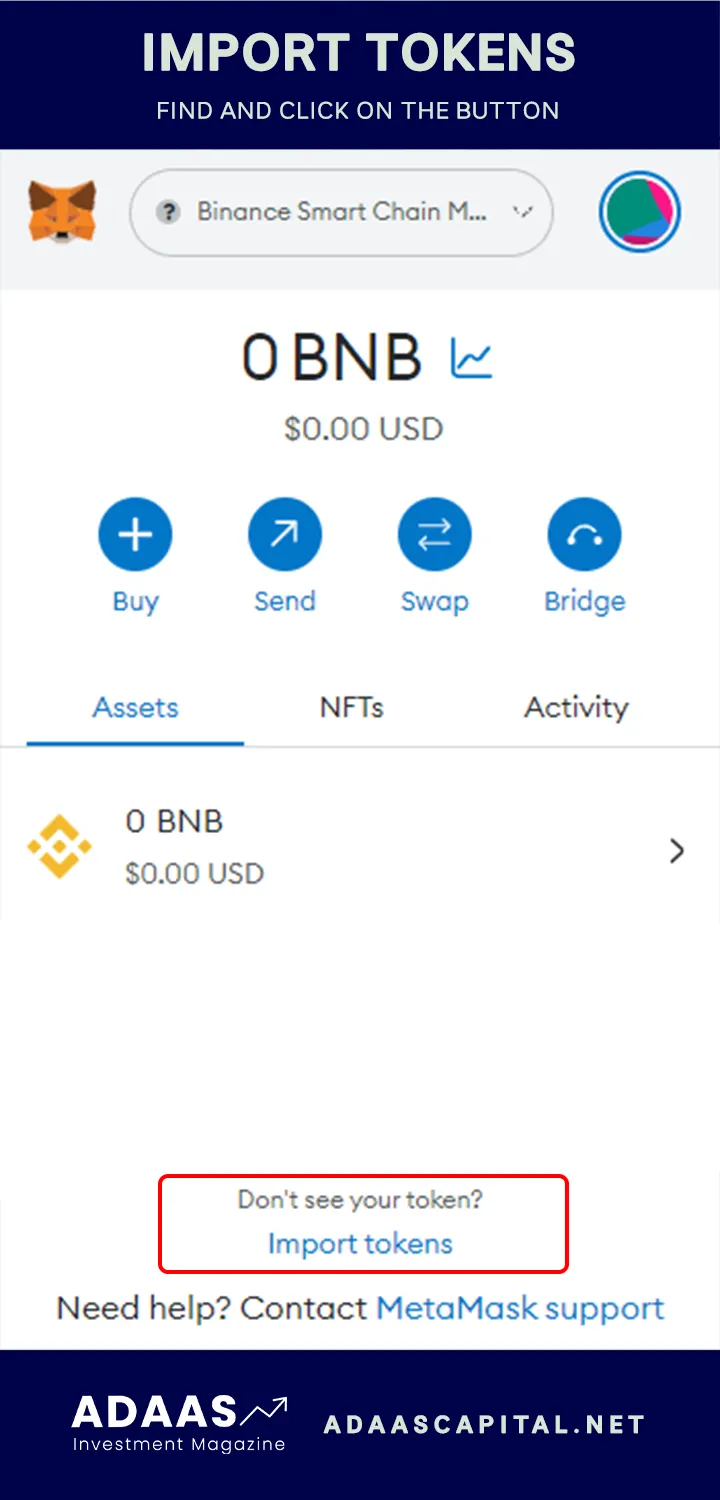
- Now that Matic mainnet is added to MetaMask, you can connect to Matic Network dApps.
- Visit a Matic Network dApp website and click on the MetaMask icon to connect your wallet.
- Authorize the connection by clicking on “Connect” or “Sign” in the MetaMask popup window.
- You’re now connected to the Matic Network and can start using the dApp.
Adding the Matic mainnet to MetaMask is a straightforward process and expands your access to the growing ecosystem of Matic Network dApps. Enjoy exploring the benefits and features of the Matic Network!
What is Matic Mainnet?
Matic Mainnet is a layer 2 scaling solution for Ethereum that aims to address the scalability issues of the Ethereum network. It achieves this by using a combination of sidechains, Plasma framework, and a decentralized network of validators.
The Matic Mainnet provides faster transaction times and lower fees compared to the Ethereum mainnet. It allows developers to build decentralized applications (dApps) with higher throughput and improved user experience. By utilizing the Matic Mainnet, users can enjoy seamless and high-speed transactions, while also benefiting from the security and decentralization of the Ethereum network.
With the Matic Mainnet, users can transfer assets from the Ethereum network to the Matic network and vice versa through the Matic Bridge. This interoperability allows users to take advantage of the benefits of both networks while maintaining compatibility with existing Ethereum applications and infrastructure.
Overall, the Matic Mainnet plays a crucial role in expanding the capabilities of Ethereum by offering a scalable and efficient solution that can support a wide range of dApps and user requirements.
How to Add Matic Mainnet to MetaMask
MetaMask is a popular Ethereum wallet and allows users to connect to various networks, including the Matic Mainnet. Adding the Matic Mainnet to MetaMask is a simple process that can be done in a few steps.
Step 1: Install and Set Up MetaMask
If you haven’t already, install MetaMask as an extension in your web browser and create an account. Set up a password and securely store your secret backup phrase.
Step 2: Open MetaMask and Add Custom RPC Network
- Click on the MetaMask extension in your browser to open it.
- Click on the network dropdown at the top of the MetaMask window.
- Click on “Custom RPC” to add a custom network.
Step 3: Configure Matic Mainnet

- In the “New Network” field, enter a name for the network, such as “Matic Mainnet”.
- In the “RPC URL” field, enter the Matic Mainnet RPC URL: “https://rpc-mainnet.maticvigil.com”.
- In the “Chain ID” field, enter “137” which is the chain ID for the Matic Mainnet.
- In the “Currency Symbol” field, enter “MATIC” or any other symbol you prefer.
- In the “Block Explorer URL” field, you can enter the URL for the Matic Mainnet explorer, such as “https://explorer.matic.network”.
- Click on “Save” to add the Matic Mainnet network to MetaMask.
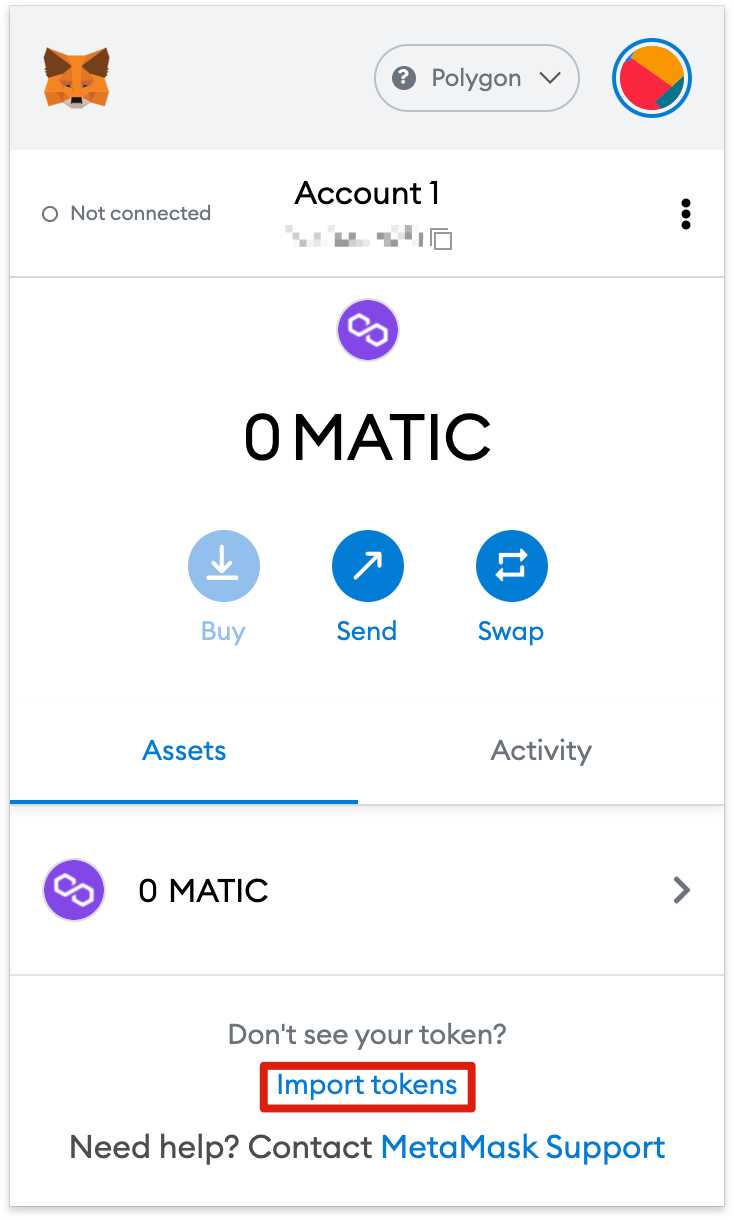
Once you have completed these steps, you should now see the Matic Mainnet as an option in the network dropdown of MetaMask. You can select the Matic Mainnet to interact with decentralized applications (DApps) and conduct transactions on the Matic network.
Frequently Asked Questions:
What is Matic Mainnet?
Matic Mainnet is the mainnet of the Matic Network, a Layer 2 scaling solution for Ethereum. It aims to address the scalability and user experience issues of the Ethereum network by providing fast and low-cost transactions. Adding Matic Mainnet to MetaMask allows users to interact with decentralized applications (dApps) and perform transactions on the Matic Network.
Why should I add Matic Mainnet to MetaMask?
Adding Matic Mainnet to MetaMask allows you to connect your MetaMask wallet to the Matic Network, providing you with the ability to interact with dApps and perform transactions on the Matic Network. This can be beneficial if you want to take advantage of the fast and low-cost transactions offered by the Matic Network, or if you want to access dApps that are built on the Matic Network.
Are there any risks involved in adding Matic Mainnet to MetaMask?
Adding Matic Mainnet to MetaMask does not inherently come with any risks. However, it’s important to note that once you switch to the Matic Mainnet, you will be interacting with the Matic Network instead of the Ethereum network. This means that you should exercise the same caution and security measures as you would when using any blockchain network. Make sure to only interact with trusted dApps and double-check the addresses and transactions you perform on the Matic Mainnet.
+ There are no comments
Add yours