


If you are new to the world of cryptocurrencies, you may have heard of Metamask. Metamask is a powerful browser extension wallet that allows you to securely store, manage, and interact with decentralized applications (dApps) built on blockchain technology.
With Metamask, you can easily access various dApps, send and receive cryptocurrencies, and even participate in decentralized finance (DeFi) protocols. In this step-by-step tutorial, we will guide you through the installation and setup process, so you can unleash the full potential of Metamask and enhance your crypto experience.
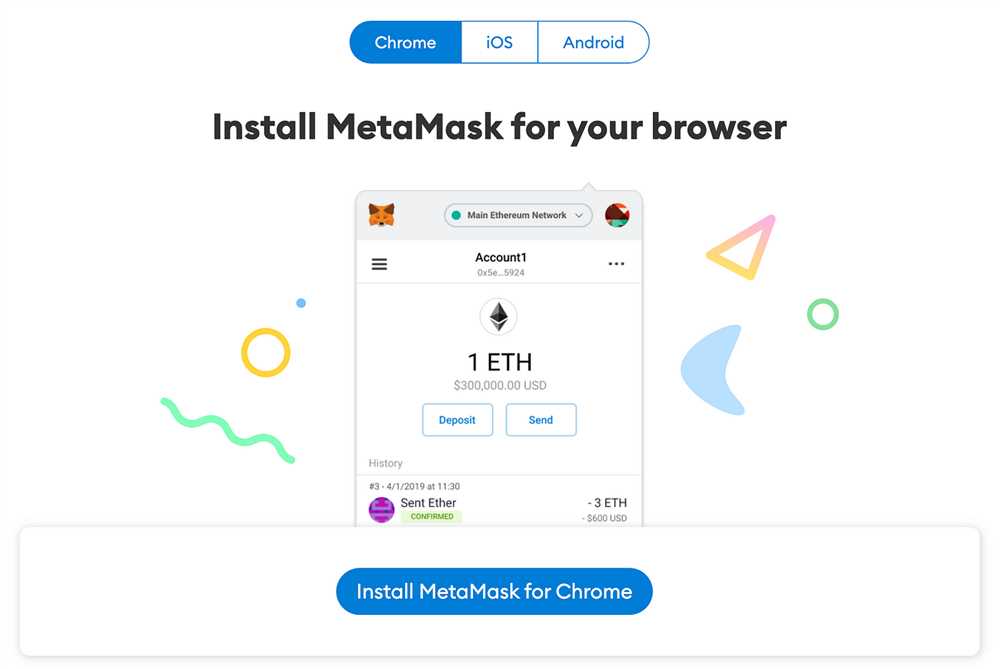
Step 1: Install Metamask Extension
The first step is to install the Metamask extension on your preferred web browser. Metamask is compatible with popular browsers like Google Chrome, Firefox, and Brave. Simply visit the official Metamask website or search for “Metamask” in your browser’s extension store, and click the “Install” button.
Step 2: Create a New Metamask Wallet
Once the extension is installed, click on the Metamask icon in your browser’s toolbar, and a new tab will open. In this tab, you will be prompted to create a new wallet. Click “Get Started” and follow the instructions to set up a new wallet. Make sure to create a strong password and carefully store your seed phrase, as this is the only way to recover your wallet in case of loss or device change.
Step 3: Import an Existing Wallet (Optional)
If you already have a wallet and want to import it into Metamask, you can do so by clicking on the “Import Wallet” option during the setup process. Follow the instructions and provide the necessary information to import your wallet. This step is optional, and you can skip it if you are creating a new wallet.
Step 4: Connect Metamask to a Network
Once your wallet is created or imported, you will need to connect Metamask to a blockchain network. By default, Metamask is connected to the Ethereum mainnet. However, you can also connect to test networks like Ropsten, Kovan, or your own local blockchain. Simply click on the network name at the top of the Metamask tab and select your desired network.
Step 5: Explore and Use Metamask
Congratulations! You have successfully installed and set up Metamask. Now, you can start exploring the world of decentralized applications and interacting with the blockchain ecosystem. Browse through the available dApps, send and receive cryptocurrencies, and take advantage of the numerous features offered by Metamask to enhance your crypto experience.
Note: Always exercise caution when using Metamask or any other crypto wallet. Keep your wallet updated, verify the authenticity of dApps and transactions, and only use trusted sources for information.
Now that you are familiar with the installation and setup process, you are ready to dive into the exciting world of Metamask and take full control of your cryptocurrencies. Get started today and unlock the endless possibilities offered by blockchain technology!
Step-by-Step Tutorial: Install and Set Up Metamask
Metamask is a popular cryptocurrency wallet that allows users to manage and interact with decentralized applications (DApps) on the Ethereum blockchain. In this tutorial, we will walk you through the step-by-step process of installing and setting up Metamask to enhance your crypto experience.
Step 1: Install Metamask
To get started, go to the official Metamask website at https://metamask.io. Download and install the Metamask extension for your preferred web browser, such as Chrome or Firefox. Once the installation is complete, you will see the Metamask icon added to your browser’s toolbar.
Step 2: Create a New Wallet
Click on the Metamask icon to open the wallet. Select “Create a Wallet” and follow the on-screen instructions to set up your new wallet. Make sure to create a strong password and securely store your seed phrase. This seed phrase will be your backup in case you forget your password or need to restore your wallet.
Step 3: Import an Existing Wallet
If you already have an Ethereum wallet, you can choose to import it into Metamask. Click on the Metamask icon, select “Import Wallet,” and follow the prompts to enter your wallet’s private key or seed phrase. Once imported, your wallet’s address and balance will be visible in Metamask.
Step 4: Connect to a Network
By default, Metamask is connected to the Ethereum mainnet. However, you can also connect to other networks, such as the Ropsten testnet or the Binance Smart Chain. To switch networks, click on the network name in Metamask, select the desired network, and confirm the switch.
Step 5: Explore DApps
With your Metamask wallet set up and connected to a network, you can now start exploring decentralized applications (DApps). Visit popular DApp directories or search for specific DApps based on your interests. When you find a DApp you want to use, click on its link, and Metamask will prompt you to confirm the interaction.
Step 6: Manage Transactions and Tokens
Metamask allows you to send and receive Ethereum and other ERC-20 tokens. To send a transaction, click on the Metamask icon, select “Send,” enter the recipient’s address, specify the amount, and confirm the transaction. Additionally, you can manage and view your token balances within the Metamask interface.
Step 7: Keep Your Wallet Secure
It is essential to take precautions to keep your Metamask wallet secure. Enable two-factor authentication (2FA) for an extra layer of security. Avoid sharing your seed phrase or private key with anyone and be cautious of phishing attempts. Regularly update your browser and Metamask extension to ensure you have the latest security features.
That’s it! You have successfully installed and set up Metamask for an enhanced crypto experience. Happy exploring and transacting with decentralized applications!
Metamask Overview and Benefits
Metamask is a browser extension that allows you to interact with the Ethereum blockchain and decentralized applications (DApps). It serves as a digital wallet and allows you to securely store, manage, and transfer your Ether (ETH) and other Ethereum-based tokens.
Metamask offers several key benefits that enhance your crypto experience. Here are some of its notable features and advantages:
User-Friendly Interface
Metamask provides a user-friendly interface that is easy to navigate, even for beginners. Its intuitive design allows you to perform actions such as sending and receiving cryptocurrency with just a few clicks.
Enhanced Security
Metamask prioritizes the security of your funds and private keys. It encrypts your private keys locally on your device, ensuring that only you have access to your funds. Additionally, it offers the option to set up a password or use biometric authentication for added protection.
Seamless Integration
Metamask seamlessly integrates with popular web browsers, including Chrome, Firefox, and Brave. This makes it easily accessible and allows you to interact with DApps directly from your browser without the need for additional software or hardware.
Ethereum Compatibility
Metamask is specifically designed for the Ethereum blockchain and supports Ethereum-based tokens (ERC-20 tokens). This compatibility gives you the flexibility to access a wide range of decentralized applications and participate in various Ethereum-based ecosystems.
In summary, Metamask provides a user-friendly and secure way to interact with the Ethereum blockchain and decentralized applications. Its seamless integration and Ethereum compatibility make it an essential tool for anyone looking to explore the world of cryptocurrencies and blockchain technology.
Step 1: Download and Install Metamask
To begin your enhanced crypto experience, you’ll need to download and install the Metamask extension. Metamask is a web browser wallet that allows you to interact with the Ethereum blockchain and seamlessly move tokens and assets.
Follow these steps to download and install Metamask:
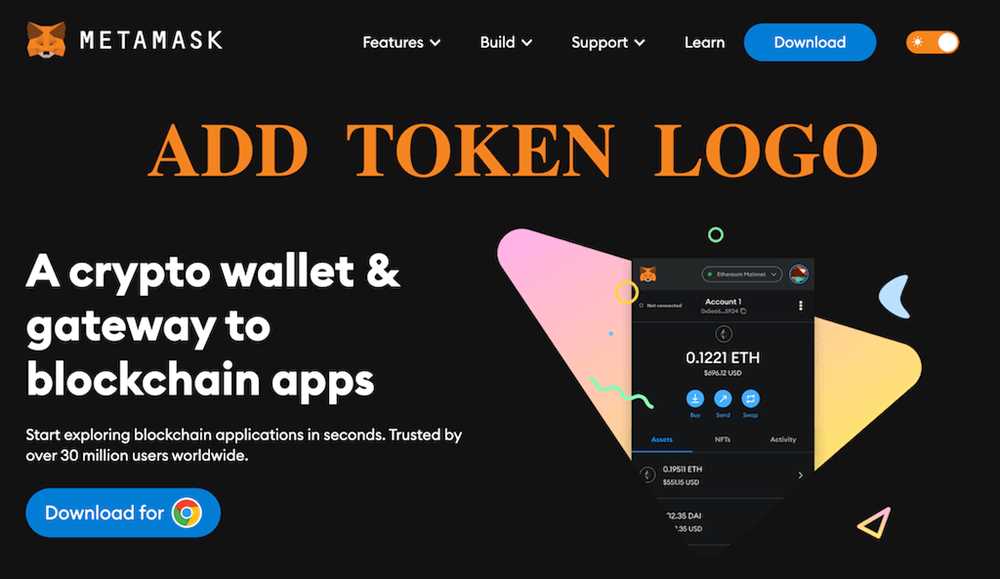
- Open your web browser and go to the official Metamask website.
- Click on the “Get Chrome Extension” button.
- A new window will appear, prompting you to download Metamask from the Chrome Web Store.
- Click on the “Add to Chrome” button.
- A pop-up window will appear asking for confirmation. Click on the “Add Extension” button.
- Metamask will begin downloading and installing.
- Once the installation is complete, you will see the Metamask icon in the top right corner of your browser.
- Click on the Metamask icon to open the extension.
- A welcome screen will appear, asking you to create a new wallet or import an existing one. Choose the option that suits you best.
- Follow the on-screen instructions to set up your wallet and create a strong password.
Congratulations! You have successfully downloaded and installed Metamask. In the next step, we will guide you on how to create a new Ethereum wallet.
Step 2: Create a New Metamask Wallet

Once you have installed Metamask, the next step is to create a new wallet. Follow these steps:
- Click on the Metamask extension icon in your browser’s toolbar.
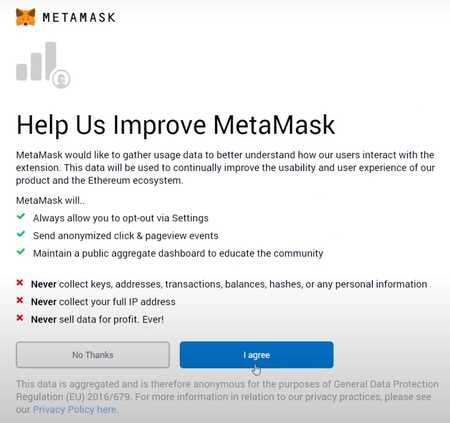
- A small window will pop up with an option to “Get Started”. Click on it.
- Read and accept the terms of use by clicking on “Accept”.
- Create a strong password for your wallet. Make sure to use a combination of uppercase and lowercase letters, numbers, and special characters.
- Click on “Create”.
- A secret backup phrase will be displayed. This is a unique set of words that you can use to recover your wallet in case you forget your password. It is crucial to write down this phrase and store it in a safe place. Do not share it with anyone!
- After writing down your secret backup phrase, click on “Next”.
- The next step is to confirm your secret backup phrase by selecting the words in the correct order. This is a security measure to ensure that you have properly recorded your secret backup phrase.
- Once you have confirmed your secret backup phrase, click on “Confirm”.
- Congratulations! Your new Metamask wallet has been created. You can now start using it to interact with decentralized applications (dApps) and manage your cryptocurrencies.
Remember to keep your wallet password and secret backup phrase safe and secure. Losing this information could result in permanent loss of access to your wallet and funds.
Step 3: Import an Existing Wallet or Account
In this step, we will learn how to import an existing wallet or account into MetaMask. If you already have a wallet or account set up with another tool or platform, you can easily transfer it to MetaMask for a seamless crypto experience.
Follow these simple steps to import your existing wallet or account:
Step 1: Click on the MetaMask extension icon on your browser toolbar to open the MetaMask popup window.
Step 2: In the MetaMask popup window, click on the “Import Wallet” button.
Step 3: You will be prompted to choose the type of wallet or account you want to import. MetaMask supports various types, including hardware wallets and software wallets.
Step 4: Once you have selected the type, you will be asked to provide the necessary details, such as the seed phrase or private key associated with your existing wallet or account.
Step 5: Carefully enter the required information and click on the “Import” button.
Step 6: MetaMask will import your wallet or account and display it in the extension window. You are now ready to use your existing wallet or account within MetaMask.
It’s important to note that when importing an existing wallet or account, MetaMask does not store your private keys on their servers. Instead, the wallet data is encrypted and stored locally on your device, providing you with full control and security.
By importing your existing wallet or account into MetaMask, you can access all its features and benefits, such as sending and receiving cryptocurrencies, interacting with decentralized applications (dApps), and managing your digital assets conveniently from one place.
Congratulations! You have successfully imported your existing wallet or account into MetaMask. Now you can enjoy an enhanced crypto experience with all the powerful features MetaMask has to offer.
Frequently Asked Questions:
What is Metamask?
Metamask is a cryptocurrency wallet that allows users to securely store, manage, and interact with their digital assets. It is a browser extension that can be installed on popular browsers like Chrome or Firefox.
+ There are no comments
Add yours