


Welcome to our step-by-step guide on accessing the Goerli Faucet using MetaMask! If you’re looking to test your Ethereum-based DApp or want to participate in a Goerli testnet, you’ve come to the right place. In this guide, we will walk you through the process of accessing the Goerli Faucet using MetaMask, a popular Ethereum wallet browser extension.
If you’re not familiar with MetaMask, it’s a digital wallet that allows users to interact with the Ethereum blockchain. It can be installed as a browser extension in Chrome, Firefox, Brave, or Edge. Once installed, MetaMask enables you to create and manage Ethereum accounts, sign transactions, and interact with decentralized applications (DApps).
The Goerli Faucet is a service that provides free test Ether (ETH) for developers and users who want to test their applications or participate in the Goerli testnet. The Goerli testnet is a stable, Ethereum-based testing environment that closely resembles the Ethereum mainnet. By accessing the Goerli Faucet using MetaMask, you can obtain test Ether to use on the Goerli testnet.
In the following sections, we will guide you through the step-by-step process of accessing the Goerli Faucet using MetaMask. Let’s get started!
How to Access the Goerli Faucet Using MetaMask
If you’re looking to access the Goerli Faucet using MetaMask, you’re in the right place. Here is a step-by-step guide on how to access the Goerli Faucet using MetaMask:
Step 1: Install MetaMask
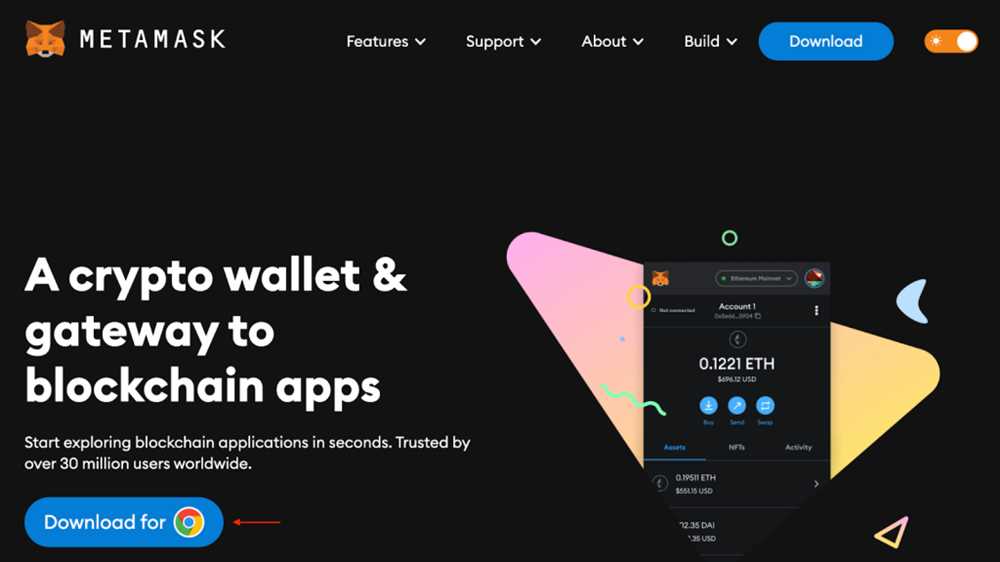
The first step is to install the MetaMask extension in your web browser. MetaMask is a cryptocurrency wallet that allows you to interact with Ethereum decentralized applications (dapps) in your browser. You can download and install MetaMask from the official website.
Step 2: Set Up and Connect MetaMask
After installing MetaMask, you need to set up a new wallet or import an existing one. Follow the prompts to create a new password and backup seed phrase. Once your wallet is set up, you will need to connect it to the Goerli test network. Click on the network dropdown in the MetaMask extension and select “Custom RPC”. In the network settings, enter the Goerli network details:
- Network Name: Goerli
- New RPC URL: https://rpc.goerli.mudit.blog/
- Chain ID: 5
- Symbol (optional): GOETH
- Block Explorer URL (optional): https://goerli.etherscan.io/
Step 3: Get Goerli Ether
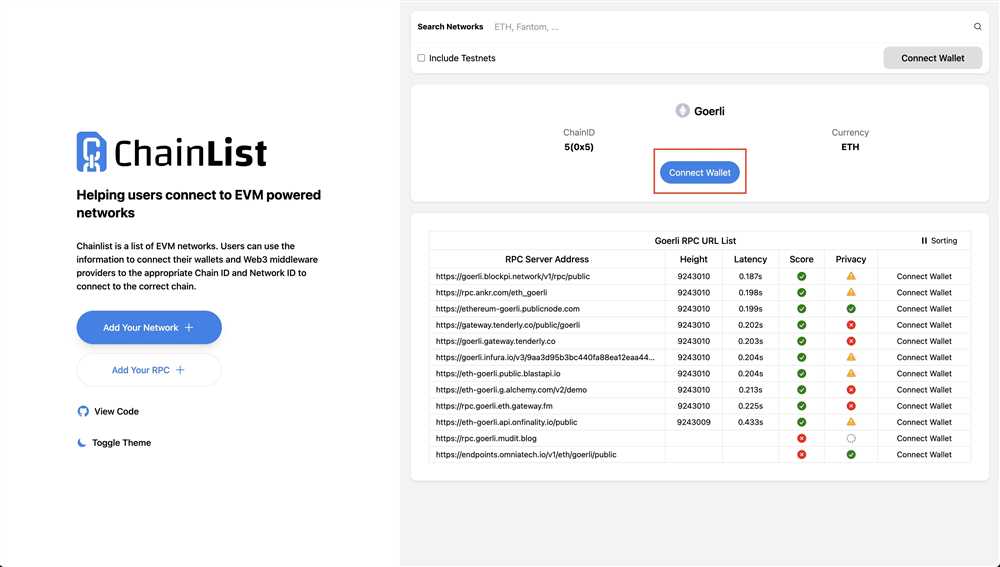
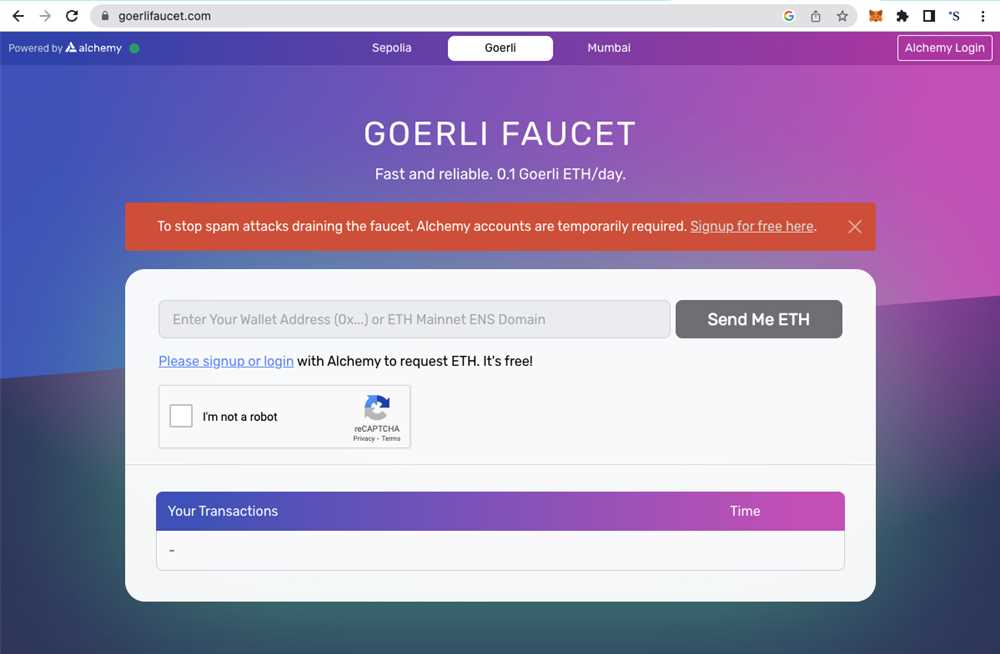
Now that you’re connected to the Goerli test network, you need to obtain some test Ether (GOETH) to use the Goerli Faucet. You can get Goerli Ether from the faucet by visiting the website or using the API. To access the Goerli Faucet website, go to https://goerli-faucet.slock.it/ and follow the instructions to receive your test Ether.
Step 4: Confirm Transaction

Once you have received your test Ether, you will need to confirm the transaction in MetaMask. You should see a notification in the MetaMask extension asking you to confirm the transaction. Review the details and click “Confirm” to proceed.
That’s it! You have successfully accessed the Goerli Faucet using MetaMask. Now you can use your test Ether to interact with dapps on the Goerli test network.
Step 1: Install MetaMask
To access the Goerli Faucet, you need to have MetaMask installed on your browser. MetaMask is a popular cryptocurrency wallet and browser extension that allows you to securely store and manage your Ethereum accounts.
Follow the steps below to install MetaMask:
1. Install MetaMask Extension
Go to the MetaMask website and click on the “Get Chrome Extension” or “Get Firefox Extension” button, depending on your browser.
Follow the installation instructions provided by your browser to add MetaMask as a browser extension.
2. Create a MetaMask Account
Once MetaMask is installed, click on the MetaMask icon in your browser’s toolbar to open the extension.
Click on the “Get Started” button and then click on “Create a Wallet”.
Create a strong password for your MetaMask account. Make sure to remember this password, as it will be needed to access your wallet in the future.
Read and accept the Terms of Use, and then click on “Create”.
MetaMask will generate a unique seed phrase consisting of 12 random words. Write down this seed phrase and keep it in a safe place. This is your backup in case you ever lose access to your MetaMask account.
Click on the words in the correct order to confirm your seed phrase, and then click on “Confirm”.
Finally, set up a new password for your account and click on “Confirm” to complete the account creation process.
With MetaMask installed and your account created, you are now ready to access the Goerli Faucet and request test ETH for the Goerli test network.
Step 2: Set up MetaMask
To access the Goerli Faucet, you will need to set up and use the MetaMask wallet. Here’s how you can do that:
- Download and install the MetaMask extension for your preferred web browser.
- Once installed, click on the MetaMask icon in your browser’s toolbar to open the extension.
- Click on “Get Started” and then “Import Wallet” if you already have a MetaMask account. Otherwise, choose “Create a Wallet”.
- If you are creating a new wallet, enter a strong password and click “Create”. Make sure to save your secret backup phrase in a safe place.
- Next, you will need to agree to the terms of service and then click “I Agree”.
- Choose “Main Ethereum Network” as your default network or select a different network from the dropdown menu.
- Click on the account icon at the top right corner and then select “Account Details”.
- Copy your account address to use it later for accessing the Goerli Faucet.
Now that you have set up MetaMask, you are ready to proceed to the next step and access the Goerli Faucet using your newly created or imported wallet.
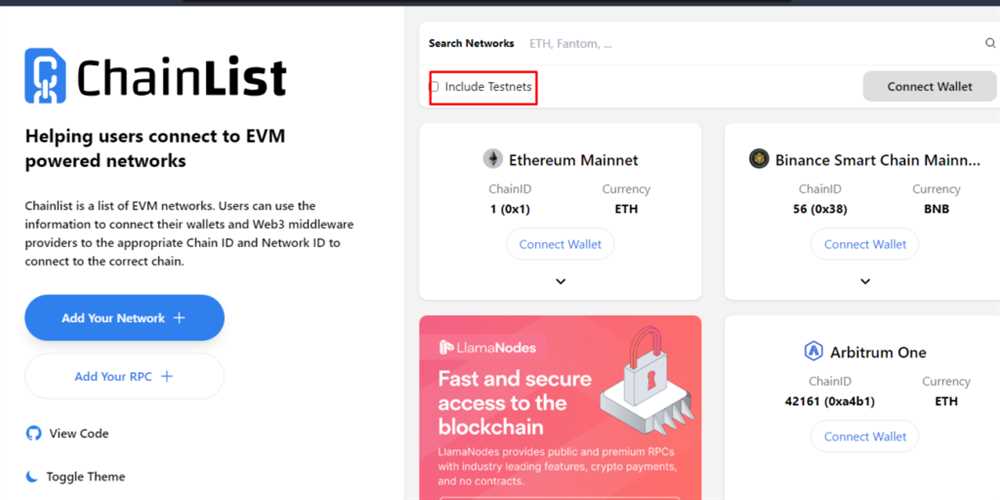
Step 3: Choose the Goerli Test Network
Once you have installed MetaMask and created your account, you need to choose the Goerli Test Network in order to access the Goerli Faucet.
To select the Goerli Test Network, follow these steps:
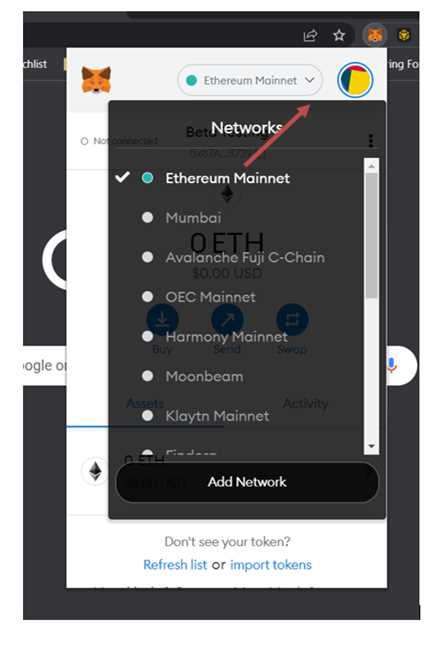
- Click on the MetaMask icon in your browser toolbar.
- A window will pop up with your MetaMask account details. At the top, you will see the network selection dropdown menu. Click on it.
- In the dropdown menu, scroll down and select “Goerli Test Network.”
- After selecting the Goerli Test Network, close the window.
Once you have chosen the Goerli Test Network, you will be able to access the Goerli Faucet and request Goerli Ether (GOETH) for testing purposes. Note that using the Goerli Test Network allows you to interact with decentralized applications (DApps) that are built on the Ethereum blockchain without spending real Ether.
Make sure you are on the Goerli Test Network every time you access the Goerli Faucet to receive test Ether.
Why Choose the Goerli Test Network?
The Goerli Test Network is a widely used Ethereum test network that closely mirrors the Ethereum mainnet. It offers a safe and reliable environment to test your applications and smart contracts before deploying them to the mainnet. The Goerli Test Network uses Goerli Ether (GOETH), which is a test version of Ether that holds no real-world value.
Network Switching Tips

It is important to remember that when using MetaMask, you need to switch your network back to the mainnet when you are done using the Goerli Test Network. Otherwise, you may inadvertently spend real Ether or interact with the wrong network, which could result in the loss of funds.
To switch back to the mainnet after using the Goerli Test Network, simply follow the same steps outlined above, but select “Ethereum Mainnet” in the network selection dropdown menu.
By properly selecting the Goerli Test Network in MetaMask, you can access the Goerli Faucet and receive test Ether to facilitate your Ethereum testing and development.
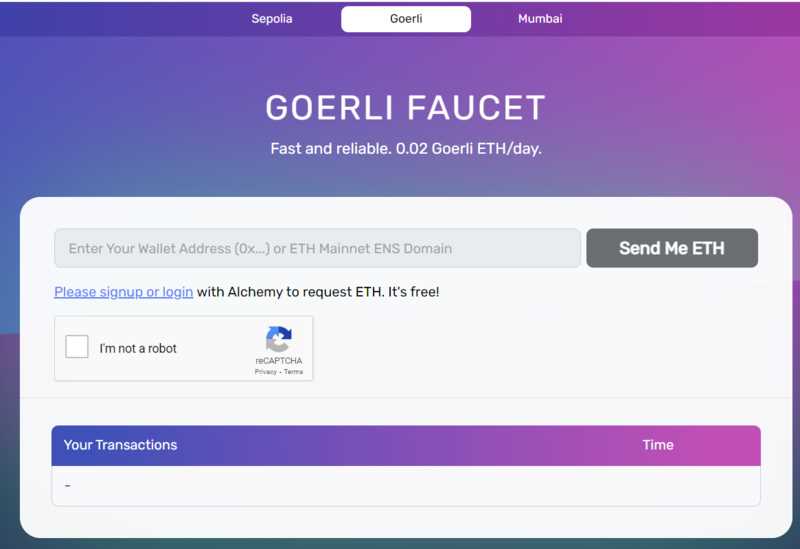
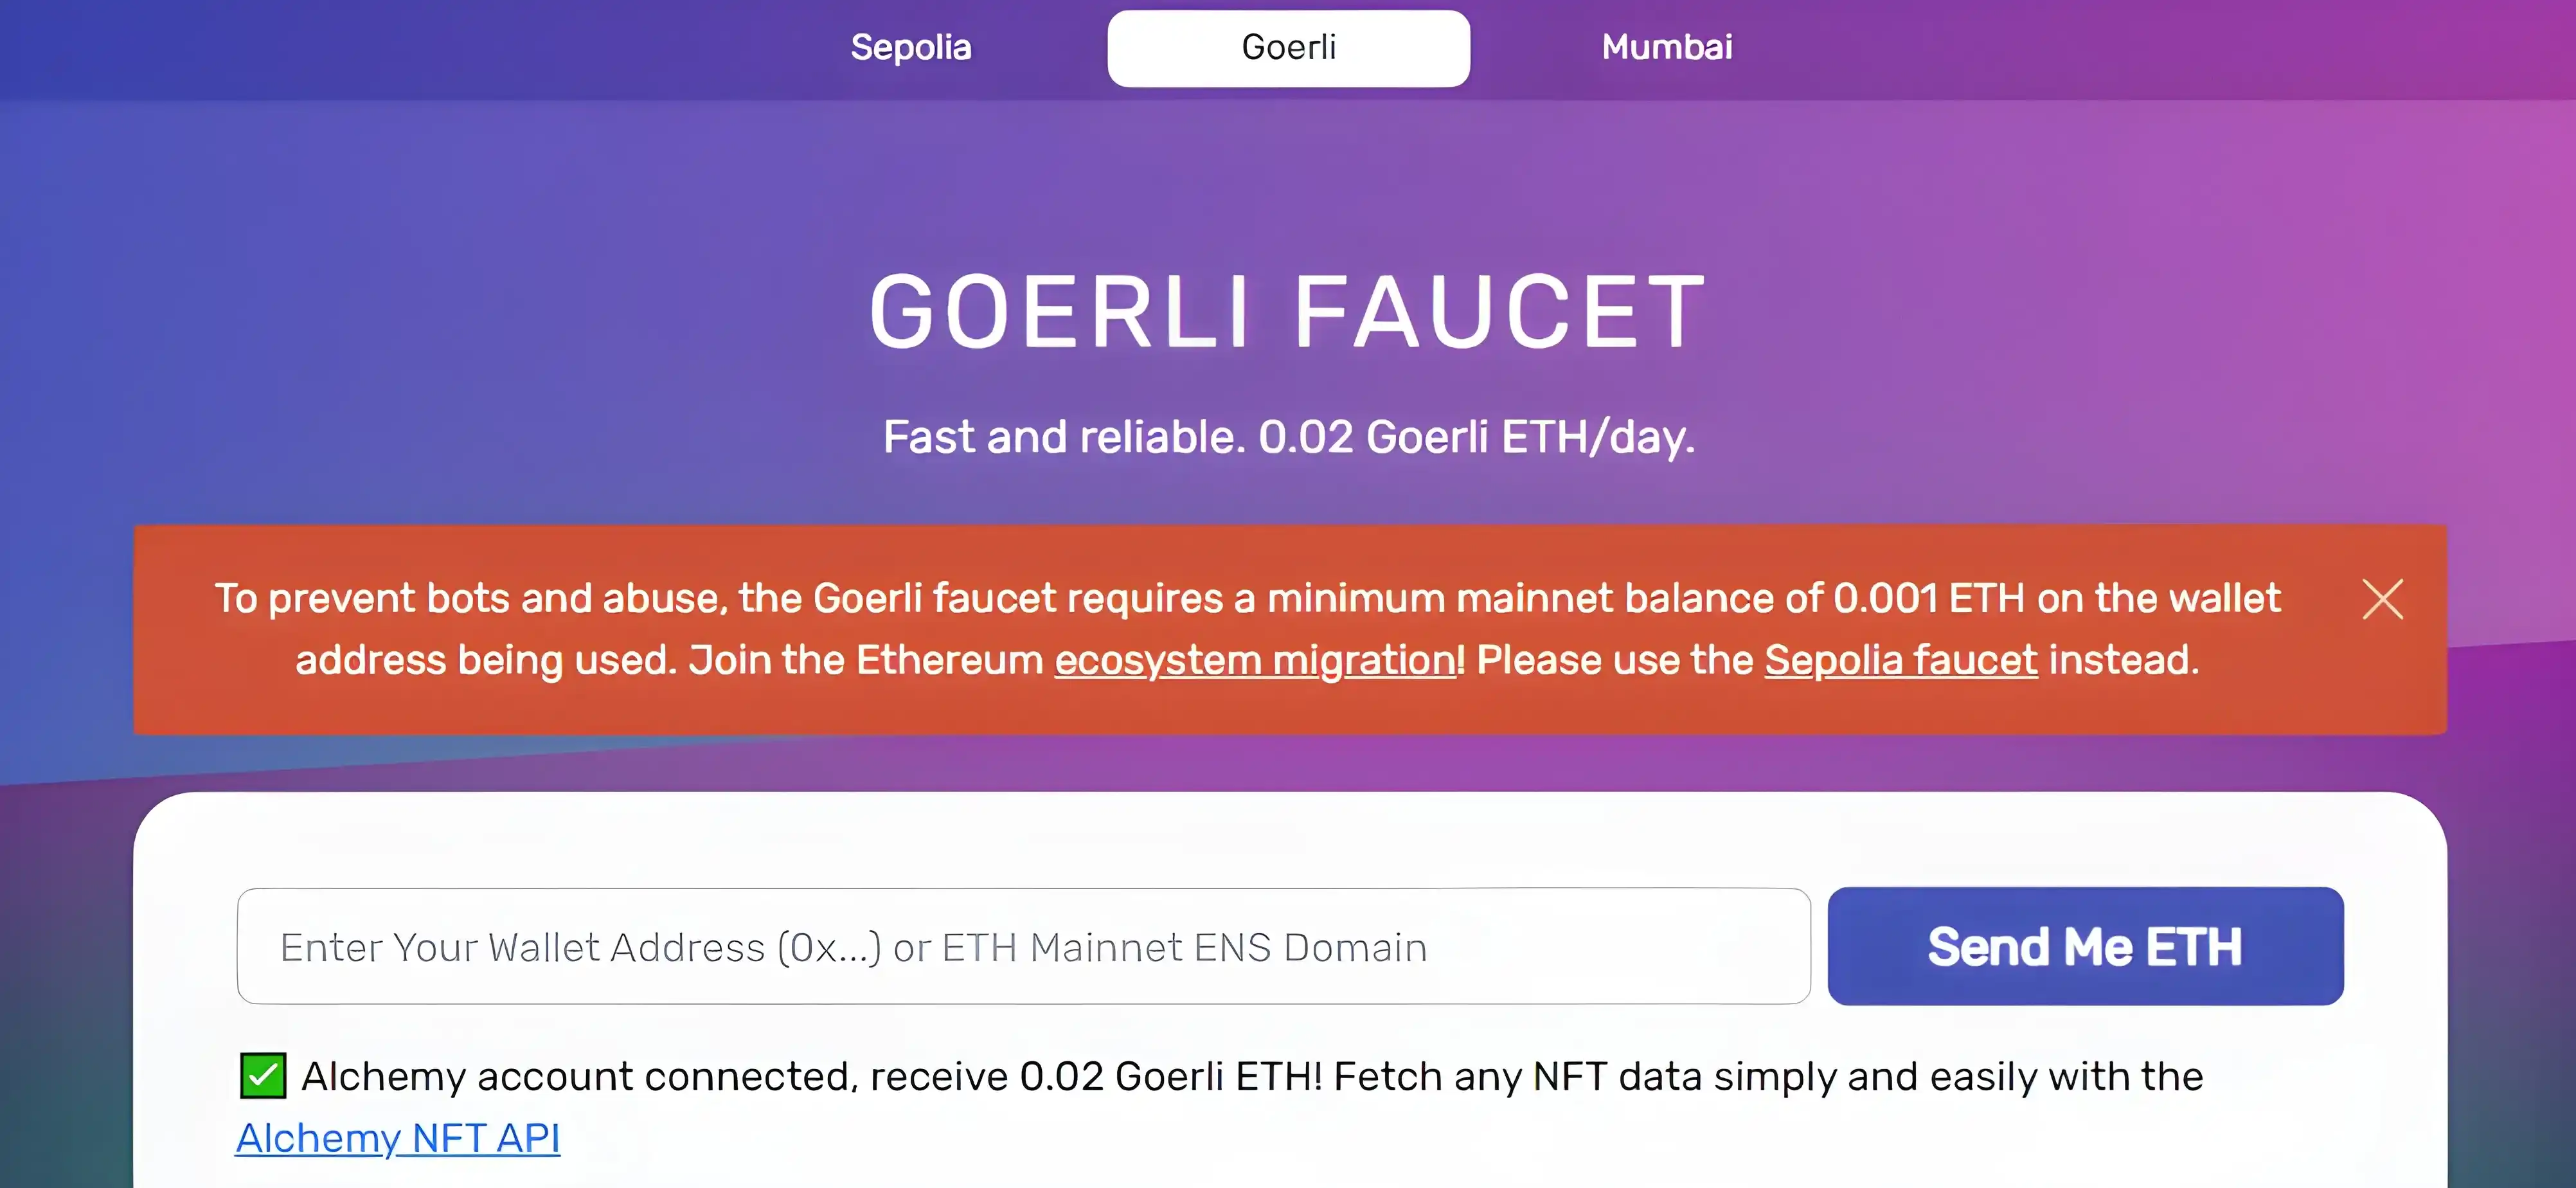
Step 4: Access the Goerli Faucet
Now that you have your MetaMask wallet set up and connected to the Goerli testnet, you can access the Goerli Faucet to get some test Ether (ETH) for free. Here’s how:
1. Open the Goerli Faucet website
Open your web browser and go to the Goerli Faucet website. You can do this by navigating to https://goerli-faucet.slock.it.
2. Authenticate with MetaMask
Once you’re on the Goerli Faucet website, you’ll see a button that says “Authenticate with MetaMask.” Click on this button to authenticate your MetaMask wallet with the faucet.
3. Request test Ether
After authenticating with MetaMask, you’ll see a form where you can request test Ether (ETH) for your Goerli wallet. Fill out the form with the amount of test Ether you want to receive and click on the “Send me test Ether!” button.
Note: The maximum amount of test Ether you can request from the Goerli Faucet is 1 ETH.
4. Wait for the transaction to confirm
Once you’ve submitted your request for test Ether, you’ll need to wait for the transaction to confirm on the Goerli testnet. This usually takes a few seconds to a couple of minutes. You can monitor the status of the transaction in the MetaMask extension.
5. Check your Goerli wallet balance
Once the transaction has confirmed, you can check your Goerli wallet balance on MetaMask. You should see the test Ether you requested in your wallet’s balance. You can now use this test Ether to interact with decentralized applications (DApps) on the Goerli testnet.
That’s it! You have successfully accessed the Goerli Faucet and obtained some test Ether for your Goerli wallet.
Frequently Asked Questions:
What is the Goerli Faucet?
The Goerli Faucet is a service that provides free testnet ETH (in this case, Goerli ETH) to developers and users for testing and experimenting with smart contracts and decentralized applications.
How can I access the Goerli Faucet?
You can access the Goerli Faucet by using the MetaMask browser extension, which allows you to interact with Ethereum-based applications. Once you have MetaMask installed and set up, you can easily access the Goerli Faucet and request testnet ETH.

+ There are no comments
Add yours