


If you’re an avid cryptocurrency user, chances are you’ve come across Metamask. Metamask is a popular browser extension wallet that allows users to interact with decentralized applications (dApps) on the Ethereum blockchain. While Metamask supports various wallets, such as Trezor and Ledger, adding a Ledger to Metamask can provide an added layer of security for your digital assets.
Ledger is a hardware wallet that stores your private keys offline, making it a secure option for managing your cryptocurrencies. By integrating your Ledger with Metamask, you can securely sign transactions and interact with dApps, all while keeping your private keys safe and protected.
In this step-by-step guide, we will walk you through the process of adding a Ledger to Metamask. By following these simple instructions, you’ll be able to unlock the full potential of your Ledger device and enhance your Metamask experience.
Step 1: Install Metamask and Connect Your Ledger
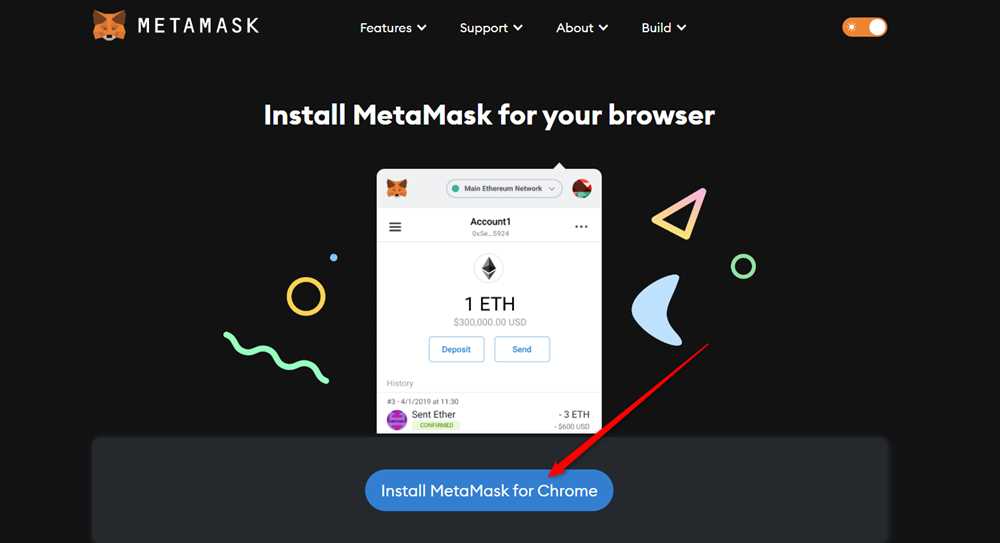
The first step is to make sure you have the Metamask extension installed on your browser. You can download it from the official Metamask website or through the Chrome Web Store. Once installed, open the extension and click on the Metamask icon in your browser toolbar.
Next, connect your Ledger device to your computer using the USB cable. Follow the instructions on your Ledger’s screen to unlock it and enter your PIN if required. Make sure your Ledger is properly connected and recognized by your computer.
Step 2: Set Up Metamask with Your Ledger
In the Metamask extension, click on the account icon at the top right corner and select “Connect Hardware Wallet” from the dropdown menu. Choose “Ledger” as your hardware wallet option.
Follow the on-screen instructions to complete the setup process. Metamask will ask you to confirm the connection with your Ledger device. Simply click the “Connect” button on both your computer screen and your Ledger device to establish the connection.
Note: Make sure your Ledger device is unlocked and the Ethereum app is open on your Ledger before confirming the connection.
Step 3: Import Your Ledger Accounts
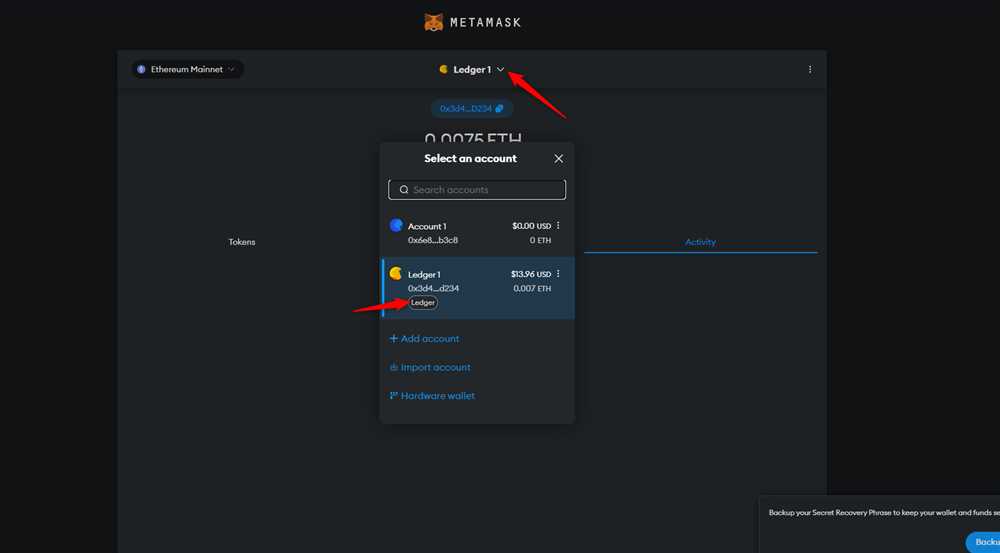
Once your Ledger is successfully connected, Metamask will automatically detect your Ledger accounts. Click on the account icon again and select “Import Account” from the dropdown menu. You will see a list of addresses associated with your Ledger.
Select the account(s) you want to add to Metamask and click “Import”. Metamask will import your Ledger accounts, and you will be able to see them listed in your Metamask account dropdown.
Congratulations! You have successfully added your Ledger to Metamask. Now, whenever you want to interact with dApps or sign transactions using Metamask, make sure your Ledger is connected and unlocked.
Final Thoughts
Integrating your Ledger with Metamask is a simple yet powerful way to enhance the security of your cryptocurrency transactions. By following this step-by-step guide, you can confidently and securely manage your digital assets while enjoying all the features Metamask has to offer.
Remember to keep your Ledger device safe and never share your private keys with anyone. Happy exploring the world of decentralized finance with your Ledger and Metamask!
Check System Requirements
Before adding a Ledger to Metamask, it is important to ensure that your system meets the necessary requirements. This will ensure a smooth and successful setup process. Here are the system requirements:
1. Operating System: Make sure you are using a compatible operating system. Metamask is available for Windows, Mac, and Linux.
2. Supported Browsers: Metamask is supported by popular web browsers such as Google Chrome, Firefox, and Brave. Make sure you have one of these browsers installed on your system.
3. Metamask Extension: Download and install the latest version of the Metamask browser extension. You can find it in the extension store of your chosen browser.
4. Ledger Device: You will need a Ledger hardware wallet device to connect to Metamask. Make sure you have a Ledger Nano S or Ledger Nano X device available.
5. USB Cable: Ensure that you have a USB cable to connect your Ledger device to your computer. Make sure the cable is in good condition and properly connected.
Once you have met these system requirements, you are ready to proceed with adding a Ledger to Metamask and enhancing the security of your cryptocurrency transactions.
Install Ledger Live App
Before you can add a Ledger to your Metamask wallet, you will need to install the Ledger Live app on your computer.
To install the Ledger Live app, follow these steps:
- Go to the official Ledger website at https://www.ledger.com/.
- Scroll down and click on the “Download” button for your operating system. Ledger Live supports Windows, macOS, and Linux.
- Once the download is complete, open the installer file.
- Follow the on-screen instructions to complete the installation process.
After the Ledger Live app is installed on your computer, you can proceed to the next step of adding your Ledger to Metamask.
Connect Ledger to Your Computer
To connect your Ledger device to your computer, follow these steps:
- Plug in one end of the USB cable into your computer.
- Take the other end of the USB cable and plug it into your Ledger device.
- Unlock your Ledger device by entering your PIN.
- Verify that your Ledger device is connected to your computer by checking the device screen. It should display “Connected” or “Allow Ledger Manager” message.
Once you have successfully connected your Ledger device to your computer, you can proceed to add it to your MetaMask wallet.
Frequently Asked Questions:
What is Metamask?
Metamask is a cryptocurrency wallet that allows users to securely store and manage their Ethereum and ERC-20 tokens.
How can I add a Ledger to Metamask?
To add a Ledger to Metamask, you need to first connect your Ledger device to your computer using a USB cable. Then, open the Metamask extension in your browser and click on the account icon in the top right corner. From the dropdown menu, select “Connect Hardware Wallet” and follow the prompts to complete the setup.
+ There are no comments
Add yours