


If you’re a cryptocurrency enthusiast, chances are you’re already familiar with Metamask. It’s a popular browser extension that allows users to easily manage their Ethereum funds and interact with decentralized applications (dApps) on the Ethereum network. However, did you know that you can also add BTC to your Metamask wallet? In this step-by-step guide, we’ll walk you through the process of adding BTC to Metamask, so you can conveniently manage your Bitcoin alongside your Ethereum.
Step 1: Install the Metamask Extension
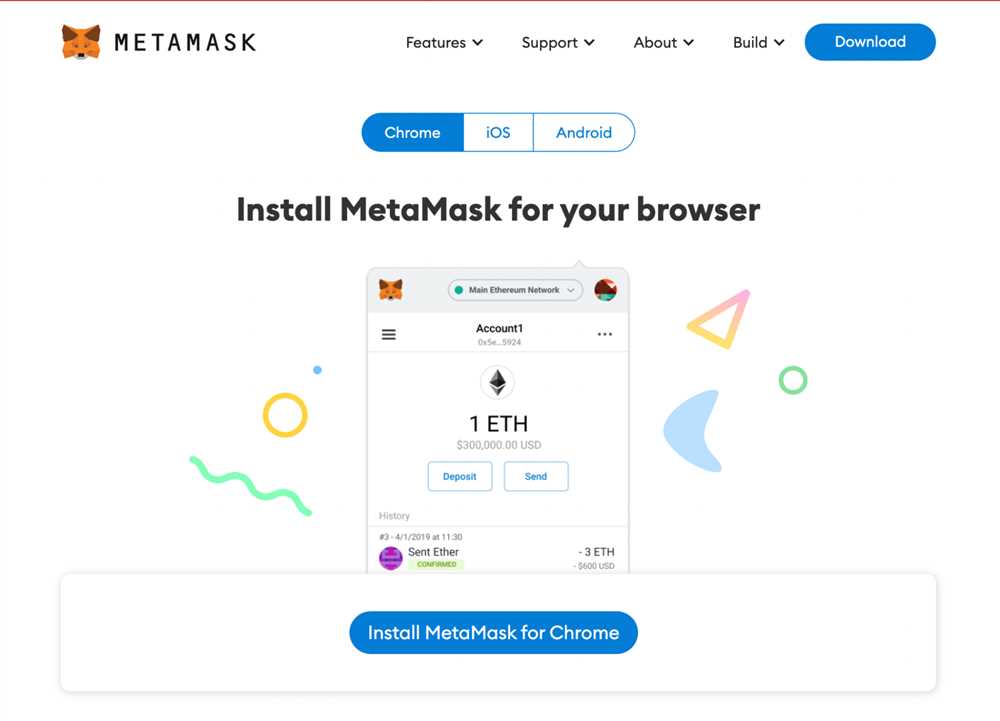
Before you can add BTC to your Metamask wallet, you’ll need to have the Metamask extension installed in your browser. You can find the extension in the Chrome Web Store or the Firefox Add-Ons marketplace. Once installed, set up your Metamask wallet by following the on-screen instructions and securely backup your seed phrase.
Step 2: Add a Custom Network
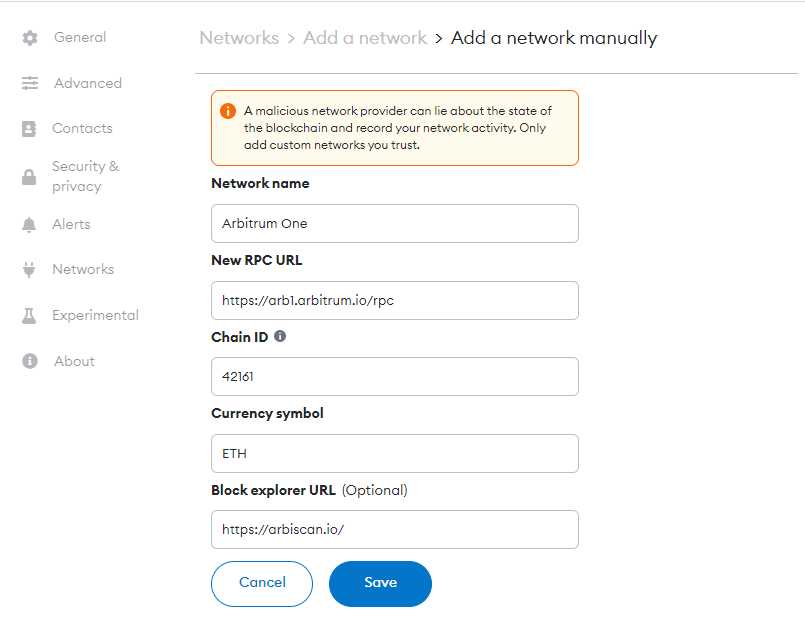
By default, Metamask only supports the Ethereum network. To add BTC to your wallet, you’ll need to add a custom network. Open your Metamask wallet and click on the network dropdown in the top right corner. Select “Custom RPC” and enter the following details:
– Network Name: BTC
– New RPC URL: Enter the URL specific to the BTC network
– Chain ID: Leave this field empty
Step 3: Import Your BTC Wallet
Once you’ve added the custom BTC network, click on the network dropdown again and select “BTC” as your active network. Next, click on the account icon in the top right corner and select “Import Account”. Enter your BTC wallet’s private key or upload your Keystore file to import your BTC wallet into Metamask.
Step 4: View and Manage Your BTC
Congratulations! You’ve successfully added BTC to your Metamask wallet. Now you can view and manage your Bitcoin funds right alongside your Ethereum funds. To view your BTC balance, click on the account icon in the top right corner and select your imported BTC wallet. You’ll be able to send, receive, and interact with BTC dApps using Metamask’s familiar interface.
Adding BTC to Metamask opens up a world of possibilities for cryptocurrency enthusiasts. With both your Ethereum and BTC funds easily accessible in one wallet, you can seamlessly navigate the decentralized landscape and take full advantage of the innovative applications being built on both networks. Start managing your BTC with Metamask today!
How to Add BTC to Metamask

Adding BTC to Metamask can be a useful feature if you want to manage your Bitcoin and other cryptocurrencies all in one place. With Metamask, you can access your BTC funds and perform transactions without having to switch between multiple wallets.
Here is a step-by-step guide on how to add BTC to Metamask:
Step 1: Install Metamask Extension
If you haven’t already, install the Metamask extension on your web browser. Metamask is available for Google Chrome, Firefox, and Brave browser. Once installed, create a new Ethereum wallet or import an existing one.
Step 2: Add Custom Token
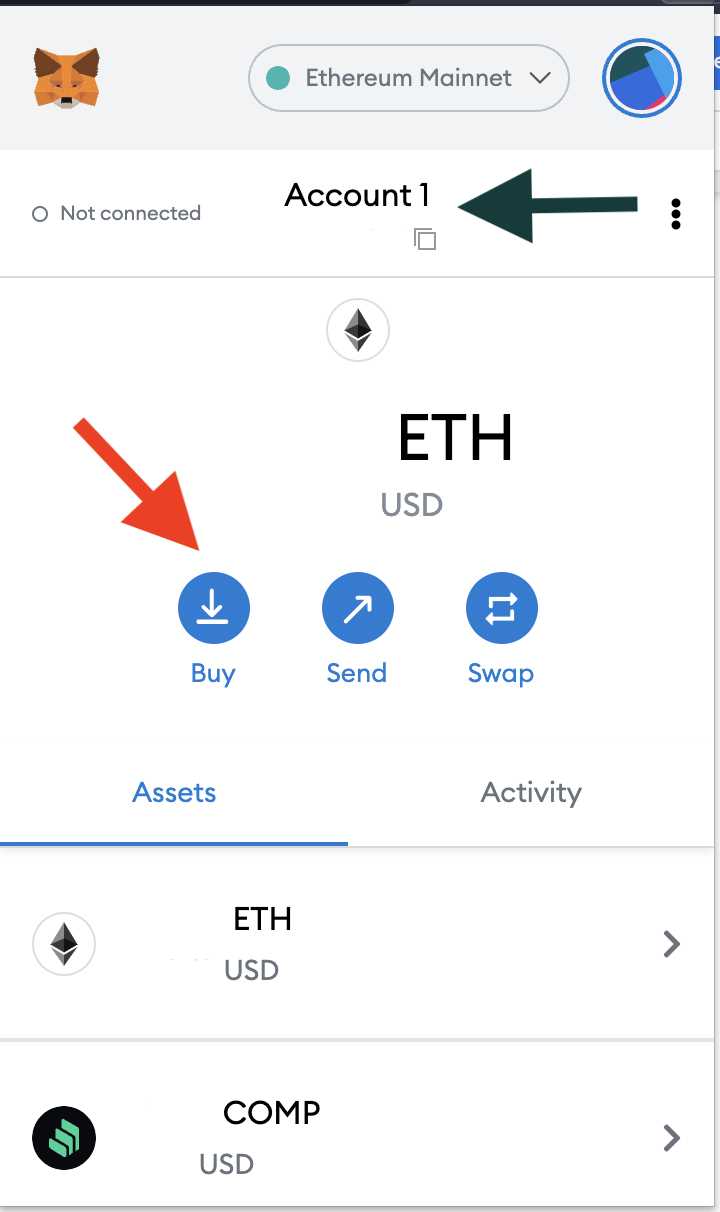
After setting up your Metamask wallet, click on the Metamask icon in your browser’s toolbar to open the wallet interface. Go to the “Assets” tab and click on “Add Token” to add a custom token.
Step 3: Enter Token Details
In the token details screen, you will need to enter the contract address of the BTC token. You can find the contract address on trusted sources like CoinMarketCap or directly from the project’s website. Set the token symbol as “BTC” and set the decimal places according to the token’s standard (typically 8 for BTC).
Step 4: Confirm and Add Token
After entering the token details, click on “Add Token” to confirm and add the BTC token to your Metamask wallet. Wait for the transaction to be processed, and you should see your BTC balance reflected in your Metamask wallet.
Step 5: Managing BTC in Metamask
Now that you have added BTC to Metamask, you can manage your BTC funds just like any other token in your wallet. You can send, receive, and watch BTC transactions directly within the Metamask interface.
Note: While Metamask allows you to add BTC as a custom token, it’s important to remember that Metamask is primarily an Ethereum wallet. When performing BTC transactions, make sure to use Metamask in combination with appropriate tools and services that support Bitcoin transactions.
By following these steps, you can add BTC to your Metamask wallet and have easy access to your Bitcoin funds alongside your Ethereum and other ERC-20 tokens.
Step 1: Create a Metamask Wallet
To add BTC to your Metamask wallet, the first step is to create a Metamask wallet if you don’t have one already.
Here’s how you can create a Metamask wallet:
- Go to the Metamask website or search for “Metamask” in your browser’s search engine.
- Click on the “Get Chrome Extension” button if you are using Google Chrome. If you are using a different browser, click on the relevant download option.
- Once the extension is installed, click on the Metamask icon in your browser’s toolbar to open the wallet.
- Click on the “Create a Wallet” button to start the wallet creation process.
- Read and accept the terms of use.
- Create a strong password to secure your wallet and click on the “Create” button.
- Download the backup seed phrase. This is a crucial step to secure your wallet in case you lose access to your device.
- Confirm your backup seed phrase by selecting each word in the order they were presented.
- Your wallet is now created and you can start using it to add BTC or other cryptocurrencies.
Note: It is highly recommended to store your backup seed phrase in a safe and secure place. This is the only way to recover your wallet in case of loss or device failure.
Step 2: Obtain BTC Address
Before you can add BTC to your Metamask wallet, you’ll need to obtain a BTC address. Here’s how to do it:
- Open your Bitcoin wallet or exchange account.
- Find the option to receive or deposit BTC.
- Click on this option to generate your BTC address.
- Depending on your wallet or exchange, you may need to select the specific type of address you want (e.g., SegWit or Legacy).
- Copy the BTC address to your clipboard.
It’s important to ensure that you copy the entire BTC address correctly to avoid any errors when transferring your BTC to your Metamask wallet.
Once you have your BTC address, you can proceed to the next step to add BTC to your Metamask wallet.
Step 3: Add BTC to Metamask
Once you have successfully set up and connected your Metamask wallet, the next step is to add BTC to your Metamask account. Here’s how you can do it:
1. Obtain a BTC address
The first thing you need to do is obtain a BTC address from a reliable source. You can use an exchange or a wallet provider to generate a BTC address for you. Make sure to choose a reputable service to ensure the security of your funds.
2. Copy your BTC address
Once you have obtained a BTC address, copy it to your clipboard. You will need to paste this address into Metamask to complete the transfer.
3. Open your Metamask wallet
Make sure you have your Metamask wallet open and logged in. If you haven’t installed Metamask yet, follow the steps outlined in the previous sections to set it up.
4. Click on the account icon
In the Metamask wallet, click on the account icon located in the top right corner of the screen. This will open a dropdown menu with various options.
5. Select “Add Token”
From the dropdown menu, select “Add Token” to initiate the process of adding BTC to your Metamask account.
6. Click on “Custom Token”
In the “Add Token” window, click on the “Custom Token” tab. This will allow you to add BTC as a custom token in Metamask.
7. Enter token details
Enter the BTC token details in the respective fields:
| Token Contract Address: | [Paste your BTC address here] |
| Token Symbol: | BTC |
| Decimals of Precision: | 8 |
8. Click on “Next”
After entering the token details, click on the “Next” button to proceed.
9. Confirm the token addition
Review the token details and click on the “Add Tokens” button to confirm the addition of BTC to your Metamask account.
Once you complete these steps, you will see the BTC token added to your list of tokens in Metamask. Now you can easily manage your BTC alongside other cryptocurrencies in your Metamask wallet.
Step 4: Verify BTC Balance

Now that you have successfully added BTC to your Metamask wallet, it’s essential to verify your BTC balance to ensure that the transaction was completed successfully. Here’s how you can do it:
- Open your Metamask wallet extension on your browser.
- Click on the account icon located at the top right corner of the wallet.
- A drop-down menu will appear, showing your wallet address and account details. Click on the “Account Details” option.
- In the account details page, scroll down until you find the “Tokens” section.
- Under the “Tokens” section, you should see an entry for BTC displaying your balance.
- If you can see your BTC balance, congratulations! Your BTC has been successfully added to your Metamask wallet.
In case you cannot see your BTC balance or if it shows zero, ensure that you have properly added the BTC token to your Metamask wallet by following the previous steps. Additionally, double-check that you have provided the correct BTC address for the transaction.
Verifying your BTC balance is crucial to confirm that your funds are safely stored in your Metamask wallet. It also allows you to keep track of your cryptocurrency holdings and make informed decisions when using your BTC for transactions or investments.
Frequently Asked Questions:
What is Metamask?
Metamask is a cryptocurrency wallet that allows users to manage their Ethereum assets and access decentralized applications (DApps).
Can I add BTC to Metamask?
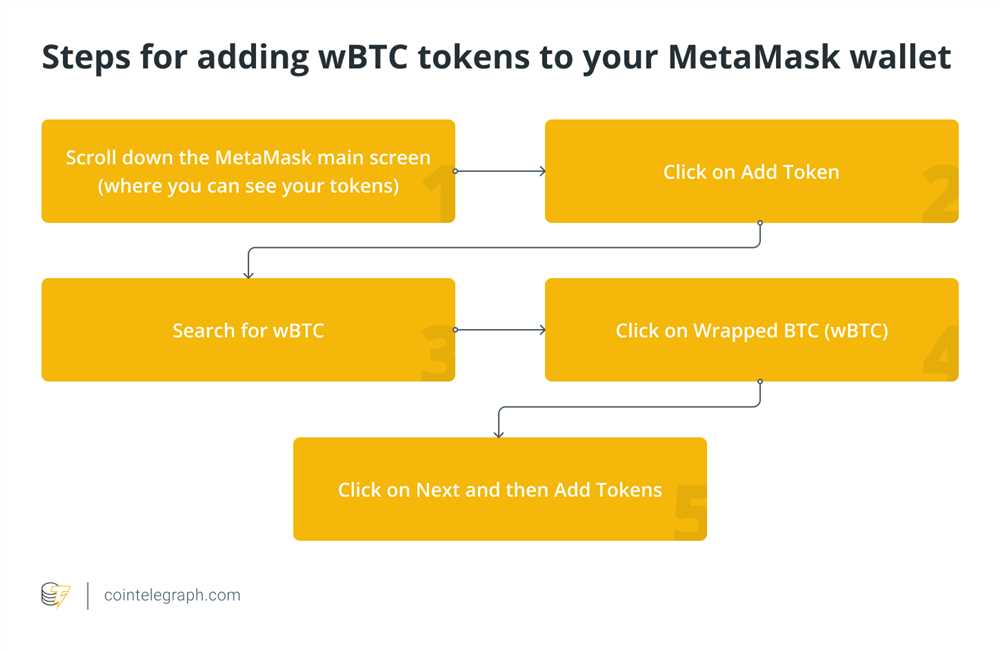
No, Metamask natively supports Ethereum-based tokens and assets. However, there are ways to add BTC indirectly using wrapped BTC (WBTC) or other tokenized versions of BTC.
How can I add BTC to Metamask using wrapped BTC?
To add BTC to Metamask using wrapped BTC, you need to find a reputable exchange or service that offers wrapped BTC. Then, you can send your BTC to the exchange, convert it to wrapped BTC, and transfer the wrapped BTC to your Metamask wallet.
What are the advantages of adding BTC to Metamask?
Adding BTC to Metamask allows you to easily manage and interact with your BTC alongside your other Ethereum assets. It gives you the flexibility to use BTC in decentralized applications and participate in the Ethereum ecosystem.
Are there any risks or considerations when adding BTC to Metamask?
When adding BTC to Metamask using wrapped BTC, it’s important to use reputable exchanges and services to ensure the security of your funds. Additionally, you should be aware of any fees or potential limitations associated with the wrapped BTC token or the exchange you’re using.

+ There are no comments
Add yours