


Metamask is a popular browser extension that serves as a digital wallet for the Ethereum blockchain. It allows users to securely store, manage, and interact with their cryptocurrencies and decentralized applications (dApps) directly from their web browser.
Adding coins to your Metamask wallet is a simple process that requires a few steps. In this guide, we will walk you through the process of adding coins to your Metamask wallet, so you can start benefiting from the exciting world of decentralized finance (DeFi).
Before we begin, it’s important to note that Metamask supports a wide range of cryptocurrencies, including but not limited to Ethereum (ETH), ERC-20 tokens, and other compatible digital assets. Make sure you have the necessary funds or assets available to add to your wallet.
Step 1: Start by downloading and installing the Metamask extension for your preferred web browser. Once installed, create a new wallet or import an existing one using your seed phrase or private key. Remember to store your seed phrase or private key in a secure location.
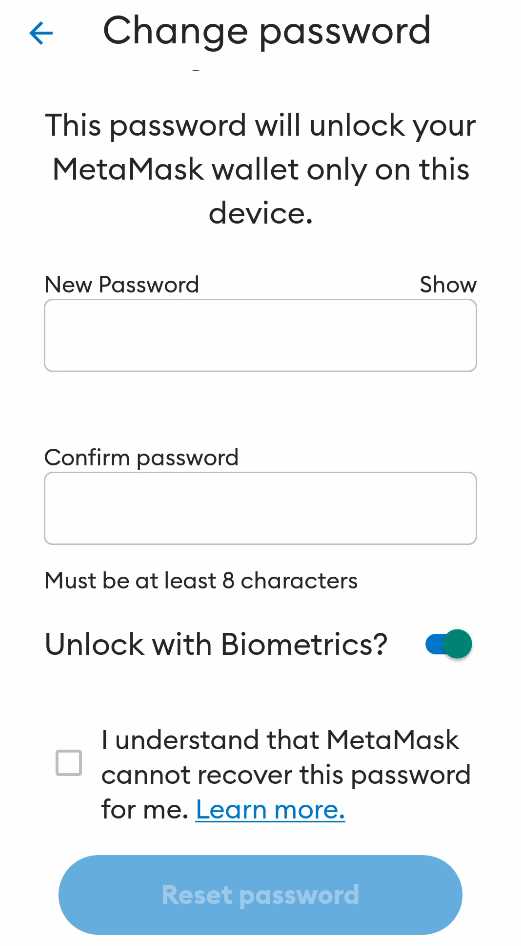
Step 2: Once you have set up your wallet, click on the Metamask icon in your browser to open the extension. You will be prompted to enter your password or use biometric authentication (if enabled).
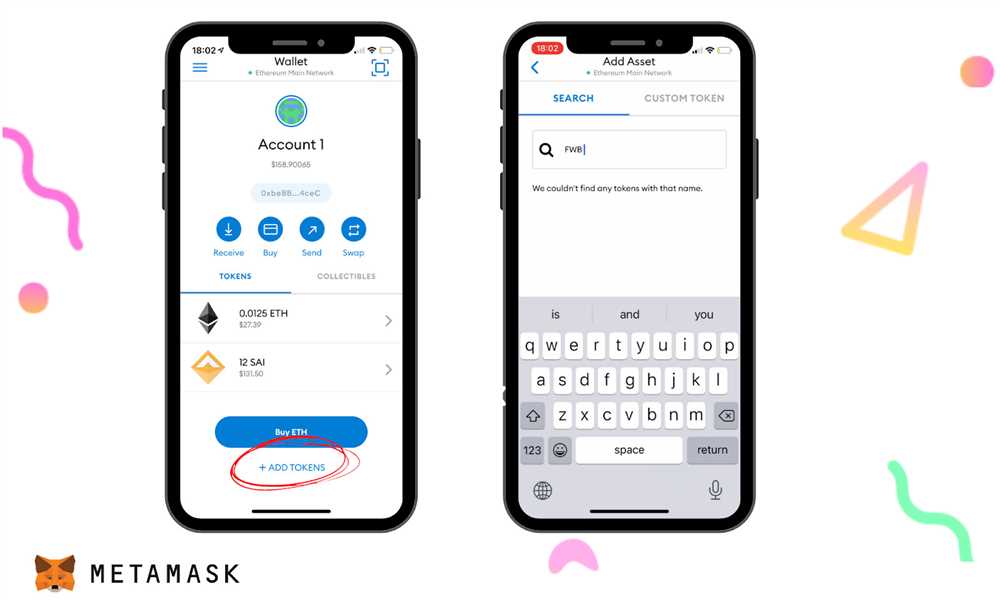
Step 3: To add coins to your Metamask wallet, you will need to find the token address or contract address of the cryptocurrency you wish to add. This information can usually be found on the project’s website or on popular cryptocurrency data platforms.
Step 4: With the token address or contract address in hand, click on the “Add Token” button in the Metamask extension. You will be prompted to enter the token address.
Step 5: After entering the token address, the Metamask wallet will automatically fetch the token’s information, including its name, symbol, and decimal places. Verify that the information is correct and click on the “Add Tokens” button to proceed.
Step 6: Congratulations! You have successfully added the desired coins to your Metamask wallet. You can now view your newly added coins by clicking on the “Assets” tab in the Metamask extension.
Adding coins to your Metamask wallet is a crucial step in exploring the world of decentralized finance. With your funds securely stored in your Metamask wallet, you can now participate in various DeFi activities, such as swapping tokens on decentralized exchanges, providing liquidity to liquidity pools, lending and borrowing assets, and much more.
Remember to exercise caution and do thorough research before adding any new coins to your wallet. Always double-check the token address and verify the legitimacy of the project before making any transactions.
How to Add Coins to Metamask Wallet: A Step-by-Step Guide

Metamask is a popular cryptocurrency wallet that allows users to store and manage their digital assets. If you’re new to cryptocurrencies and want to add coins to your Metamask wallet, this step-by-step guide will walk you through the process.
Step 1: Install the Metamask Extension
The first step is to install the Metamask extension on your web browser. Metamask is available for Google Chrome, Firefox, and Brave browsers. Visit the respective browser extension store and search for “Metamask”. Click on “Add to Chrome” (or any other browser) and follow the instructions to install the extension.
Step 2: Create a Metamask Wallet
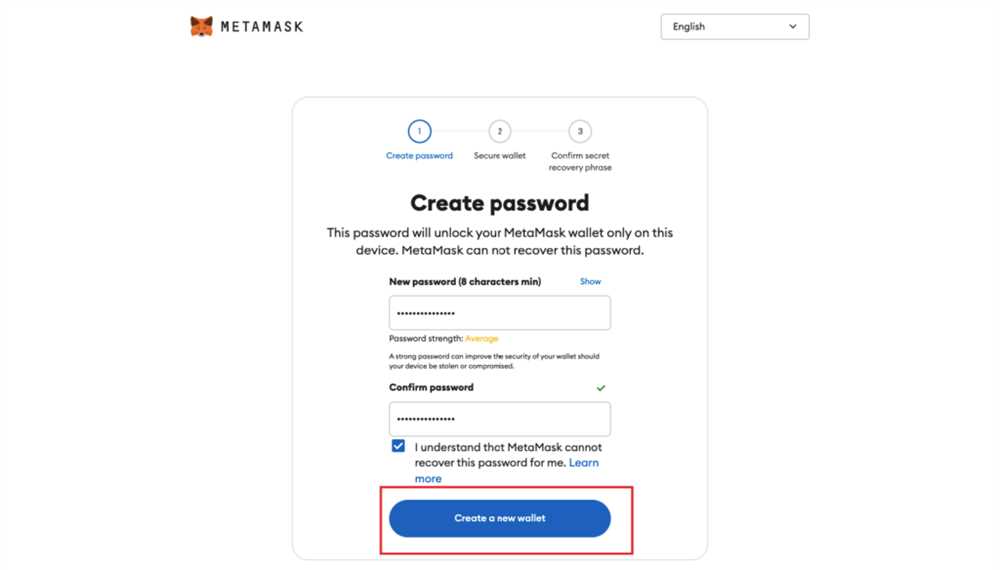
Once the extension is installed, click on the Metamask icon in your browser’s toolbar. A window will open, and you will be prompted to create a new wallet. Click on “Create a Wallet” and follow the instructions to set up your wallet, including creating a strong password and ensuring you safely store your backup phrase.
Step 3: Unlock Your Wallet
After creating your wallet, you will need to unlock it to add coins. Click on the Metamask icon and enter your password to unlock your wallet.
Step 4: Connect to a Supported Network
Metamask supports different networks, such as the Ethereum mainnet and various test networks. Make sure you are connected to the right network to add coins. Click on the network dropdown at the top of the Metamask window and select the appropriate network.
Step 5: Add Coins to Your Wallet
Now, it’s time to add coins to your Metamask wallet. There are a few ways to do this:
- Receive coins from another wallet: If you have coins in another wallet, you can send them to your Metamask wallet. Copy your wallet address from the Metamask window and use it to receive coins from another wallet or exchange.
- Import a wallet: If you already have a wallet that supports the same network as Metamask, you can import it using the wallet’s private key or JSON file.
- Buy coins: You can buy coins directly from an exchange and send them to your Metamask wallet. Ensure that you have the correct wallet address and follow the exchange’s instructions to complete the purchase.
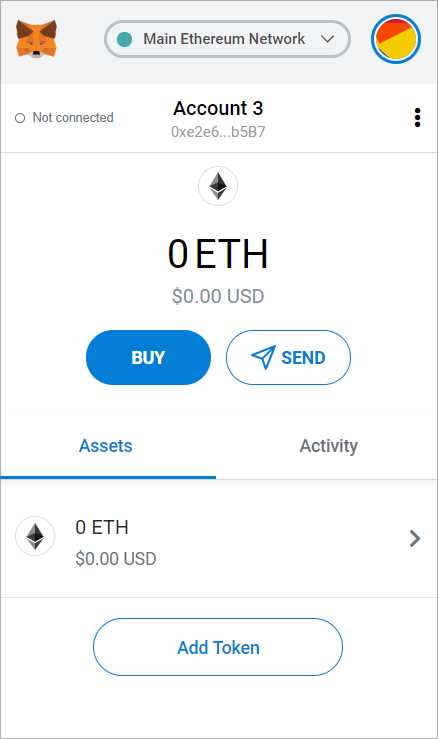
Step 6: Verify Your Coin Balance
Once you have added coins to your Metamask wallet, you can verify your balance by clicking on the Metamask icon and checking the “Assets” tab. Your newly added coins should be displayed along with their respective balances.
That’s it! You have successfully added coins to your Metamask wallet. Remember to keep your wallet and backup phrase secure to protect your digital assets.
Install Metamask Extension
To start adding coins to your Metamask wallet, you will first need to install the Metamask extension on your browser. Follow the steps below to install the extension:
- Open your browser and navigate to the extension store. If you are using Google Chrome, go to the Chrome Web Store. If you are using Mozilla Firefox, go to the Firefox Add-ons store.
- Search for “Metamask” in the extension store’s search bar.
- Click on the Metamask extension from the search results to open its extension page.
- Click on the “Add to
Create or Import a Wallet
Before you can add coins to your Metamask wallet, you’ll need to create or import a wallet. Here are the steps to get started:
Create a New Wallet
- Download the Metamask browser extension from the official website or install the mobile app on your smartphone.
- Click on the Metamask icon in your browser toolbar or open the app on your phone.
- Click on the “Create a Wallet” button.
- Set a strong password for your wallet and click “Create”. Make sure to choose a password you can remember, as it will be required to access your wallet in the future.
- Read and accept the terms and conditions.
- Metamask will generate a unique 12-word backup phrase. Write down this phrase and keep it safe.
- Confirm your backup phrase by selecting the words in the correct order.
- Congratulations! Your wallet has been created. You can now add coins to it.
Import an Existing Wallet
If you already have a Metamask wallet or another Ethereum wallet, you can import it into Metamask. Here’s how:
- Click on the Metamask icon in your browser toolbar or open the app on your phone.
- Click on the account profile icon and select “Import Account”.
- Enter the private key or JSON file of your existing wallet and click “Import”.
- If successful, your existing wallet should now be imported into Metamask, and you can start adding coins to it.
Once you have created or imported your wallet, you can proceed to the next step of adding coins to your Metamask wallet.
Add Coins to Your Wallet
Adding coins to your Metamask wallet is a simple process that allows you to easily manage and access your cryptocurrency holdings. Follow the step-by-step guide below to add coins to your wallet:
- Open Metamask on your device and make sure you are logged in.
- Click on the “Assets” tab in the Metamask wallet.
- Scroll down to find the option to “Add Token”.
- Click on “Add Token” to begin the process of adding a new coin to your wallet.
- Choose whether you want to add a token from the Ethereum mainnet or a custom token.
- If adding a token from the Ethereum mainnet, search for the token using its name, symbol, or contract address.
- Once you have found the token, click on “Next” to proceed.
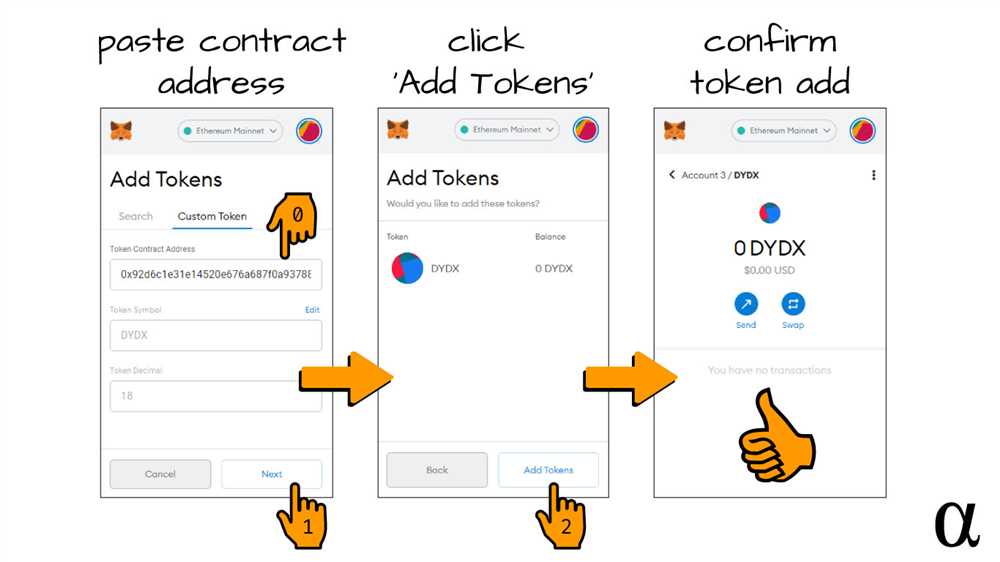
- If adding a custom token, enter the token address, symbol, and decimals.
- Click on “Add Tokens” to complete the process.
- Your new coins should now appear in your Metamask wallet under the “Assets” tab.
Adding coins to your Metamask wallet is a great way to ensure that you have easy access to your favorite cryptocurrencies. By following the steps outlined above, you can quickly and securely add coins to your wallet and start managing your digital assets.
Frequently Asked Questions:
What is Metamask wallet?
Metamask wallet is a cryptocurrency wallet that allows users to securely store, manage, and interact with their digital assets.
Where can I find the contract address of a coin?
You can find the contract address of a coin on its official website, in its whitepaper, or on cryptocurrency listing websites like CoinGecko or CoinMarketCap.
Can I add any coin to my Metamask wallet?
Yes, you can add any ERC-20 token to your Metamask wallet by entering its contract address. However, please note that the coin must be compatible with the Ethereum network.
Video:
Everything You Need to DEX Trade on Solana
How to DEPOSIT or WITHDRAW on your Metamask Wallet | App Tutorial

+ There are no comments
Add yours