


Metamask is a popular Ethereum wallet that allows users to securely store and manage their Ethereum tokens. However, with the rise of new blockchain networks, such as Polkadot, many users are looking to expand their wallet capabilities beyond just Ethereum. If you’re one of those users, you’re in luck! This simple guide will walk you through the process of adding Polkadot to your Metamask wallet.
Step 1: Install the Polkadot Extension
The first step is to install the Polkadot extension on your browser. You can find the official Polkadot extension in the Chrome Web Store or the Firefox Add-ons Store. Once you’ve found the extension, click on the “Add to Chrome” or “Add to Firefox” button to install it. Make sure to give the extension the necessary permissions it requires.
Note: The Polkadot extension is currently only available for Chrome and Firefox browsers.
Step 2: Create or Import a Polkadot Account
After installing the Polkadot extension, open it and click on the “Create Account” button. This will generate a new Polkadot account for you. If you already have a Polkadot account, you can import it by clicking on the “Import Account” button and entering your account details.
Remember to keep your account mnemonic or seed phrase safe and secure, as it is the key to accessing your Polkadot funds.
Step 3: Connect Polkadot to Metamask
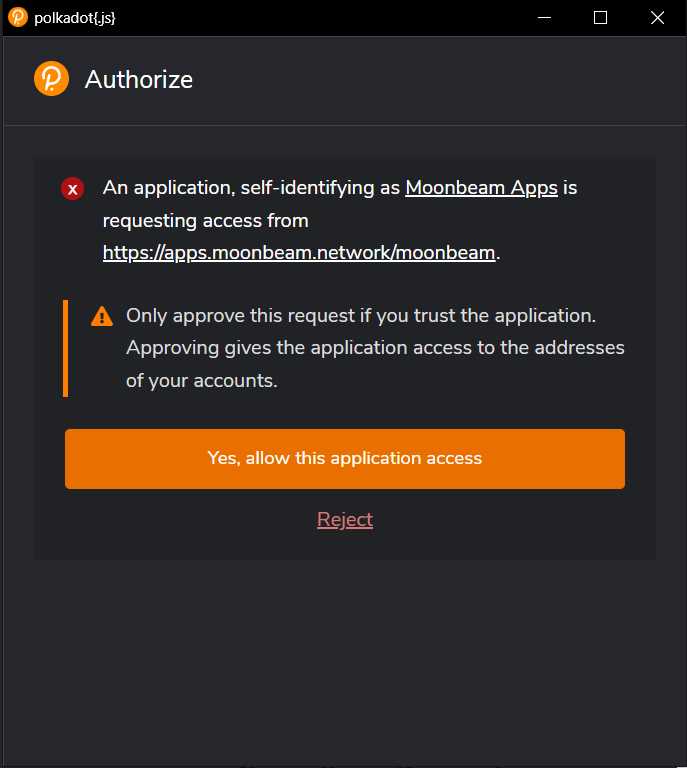
Now that you have your Polkadot account set up, it’s time to connect it to your Metamask wallet. Open Metamask and click on the account icon in the top right corner. From the dropdown menu, select “Import Account”. In the import options, choose “Polkadot” and enter your Polkadot account address. Click on the “Import” button to connect Polkadot to Metamask.
Congratulations! You have successfully added Polkadot to your Metamask wallet. You can now manage your Polkadot tokens alongside your Ethereum tokens, all in one convenient wallet.
Conclusion
By following this simple guide, you can easily expand the capabilities of your Metamask wallet and start managing your Polkadot tokens. Having both Ethereum and Polkadot in one wallet allows for greater convenience and flexibility in managing your crypto assets. So why wait? Start exploring the world of Polkadot with your Metamask wallet today!
Easy Steps to Add Polkadot to Metamask
Metamask is a popular browser extension wallet that allows users to connect to multiple blockchain networks and interact with decentralized applications (dApps). While Metamask initially supported Ethereum, it has now expanded its functionality to support other networks including Polkadot, a scalable multi-chain platform.
Step 1: Install the Metamask Extension

If you don’t have Metamask installed already, you can easily download and install it from the official Metamask website or through the browser extension store of your choice. Metamask is available for browsers such as Chrome, Firefox, and Brave.
Step 2: Create or Import a Polkadot Account
Once Metamask is installed, open the extension by clicking on the Metamask icon in your browser toolbar. If you already have an existing account, you can simply import it into Metamask by following the import account process. Otherwise, you can create a new Polkadot account directly within Metamask.
To create a new account, click on the “Create Account” button and follow the instructions to set up a new wallet. Make sure to securely store your account’s seed phrase as it is essential for account recovery.
Step 3: Connect Metamask to the Polkadot Network

With your Polkadot account set up in Metamask, the next step is to connect to the Polkadot network. To do this, click on the network selection dropdown in the Metamask extension, usually located next to your account avatar. Scroll down and select “Custom RPC” to add a custom network.
Enter the following details:
- Network Name: Polkadot
- New RPC URL: Enter the URL of a trusted Polkadot node. You can find a list of trusted nodes on the Polkadot official website.
- Chain ID: Enter the Chain ID of the Polkadot network. You can find this information on the Polkadot official website as well.
- Currency Symbol: DOT
Click on “Save” to add the Polkadot network to Metamask.
Step 4: Switch to the Polkadot Network and Start Interacting

Once the Polkadot network is added to Metamask, you can switch to it by selecting “Polkadot” from the network selection dropdown. You’ll now be able to view your Polkadot account balance and interact with Polkadot dApps directly from within Metamask.
Remember to always double-check the URLs and ensure you are connecting to trusted nodes to keep your funds and transactions secure.
That’s it! You have successfully added Polkadot to Metamask and can now enjoy seamless access to the Polkadot network and its decentralized applications.
A Guide for Beginners
If you’re new to the world of blockchain and cryptocurrencies, you might be wondering how to get started with Polkadot and Metamask. This guide is here to help!
Step 1: Install Metamask
The first thing you’ll need to do is install the Metamask browser extension. This will allow you to connect to the Polkadot network and manage your DOT tokens. Visit the Metamask website and follow the instructions to install the extension for your preferred browser.
Step 2: Create a Metamask Account
After installing Metamask, you’ll need to create an account. Open the extension in your browser and click on the “Create Account” option. Follow the prompts to set up a new account with a strong password. Make sure to write down your seed phrase and store it in a safe place, as this will be needed to access your account in case you forget your password.
Step 3: Connect to Polkadot
With your Metamask account set up, you’ll now need to connect to the Polkadot network. In the Metamask extension, click on the network dropdown and select “Custom RPC”. Then, enter the following details:
- Network Name: Polkadot
- New RPC URL: https://rpc.polkadot.io
- Chain ID: 0x0001
Click on “Save” to save the network settings. You should now be connected to the Polkadot network.
Step 4: Add DOT Tokens
To add DOT tokens to your Metamask wallet, click on the “Assets” tab in the extension. Then, click on “Add Token” and select “Custom Token”. In the token contract address field, enter: 0x0000000000000000000000000000000000000000. Metamask will automatically detect the appropriate token symbol and decimals. Click on “Next” and then “Add Tokens” to complete the process.
Step 5: Start using Polkadot with Metamask
Now that you have Polkadot added to Metamask, you can start using it! You can use Metamask to send and receive DOT tokens, interact with Polkadot decentralized applications (dApps), and more. Simply navigate to the dApp you want to use and connect your Metamask account when prompted.
That’s it! You’re now ready to start exploring the world of Polkadot with Metamask. Happy exploring!
Connect and Interact with the Polkadot Network
Once you have successfully added Polkadot to your Metamask wallet, you can now connect and interact with the Polkadot network. Here’s how you can do it:
| Action | Instruction |
|---|---|
| Connect to Polkadot Network |
|
| Switch to Polkadot Network |
|
| Interact with Polkadot Network |
With Polkadot network selected, you can now perform various actions such as:
|
By following these simple steps, you can easily connect and interact with the Polkadot network using your Metamask wallet. Happy exploring!
Frequently Asked Questions:
What is Polkadot?
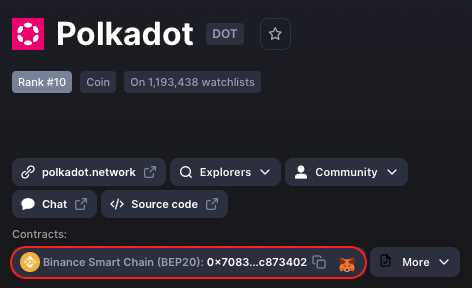
Polkadot is a multi-chain platform that allows different blockchains to interoperate and communicate with each other, enabling them to share assets and information.
Why would I want to add Polkadot to Metamask?
Adding Polkadot to Metamask allows you to connect to the Polkadot network and interact with dApps and assets built on Polkadot, expanding your options in the decentralized finance (DeFi) space.
How can I add Polkadot to Metamask?
To add Polkadot to Metamask, you need to follow a simple guide. You can find step-by-step instructions on how to add the Polkadot network to Metamask in the article “Adding Polkadot to Metamask: A Simple Guide.”
What are the benefits of adding Polkadot to Metamask?
By adding Polkadot to Metamask, you gain access to the Polkadot ecosystem, which offers a wide range of decentralized applications (dApps) and opportunities for decentralized finance (DeFi). This allows you to diversify your portfolio and explore new possibilities.
Can I use Metamask to interact with Polkadot dApps without adding Polkadot to Metamask?
No, you need to add Polkadot to Metamask in order to connect to the Polkadot network and interact with dApps built on Polkadot. Without adding Polkadot, you won’t be able to access the features and functionalities of the Polkadot ecosystem.

+ There are no comments
Add yours