


Metamask has become one of the most popular cryptocurrency wallets for managing your digital assets securely. It allows you to interact with various blockchain networks, and today we will guide you through the process of adding the Polygon Mumbai network to your Metamask wallet.
What is Polygon Mumbai?
Polygon Mumbai is a testnet developed by the Polygon team that allows developers and users to test their applications and smart contracts before deploying them to the mainnet. It is a secure and reliable network that mimics the functionalities of the main Polygon network, but with test tokens that have no real value.
Step 1: Install Metamask
If you haven’t already, the first step is to install the Metamask wallet extension in your preferred browser. Metamask is available for Chrome, Firefox, and Brave browsers. Simply search for “Metamask” in the extension marketplace of your browser and follow the installation instructions.
Step 2: Create or Import a Wallet
Once Metamask is successfully installed, open the extension and follow the prompts to either create a new wallet or import an existing one. Make sure to securely store your wallet’s seed phrase as it is the key to your funds.
Step 3: Switch to the Polygon Mumbai Network
After setting up your wallet, click on the network dropdown at the top of the Metamask extension and select “Custom RPC”. This will allow you to connect to the Polygon Mumbai network manually.
Step 4: Add Polygon Mumbai Network Details
In the Custom RPC settings, you will need to enter the following details to connect to the Polygon Mumbai network:
Network Name: Polygon Mumbai
New RPC URL: https://rpc-mumbai.maticvigil.com/
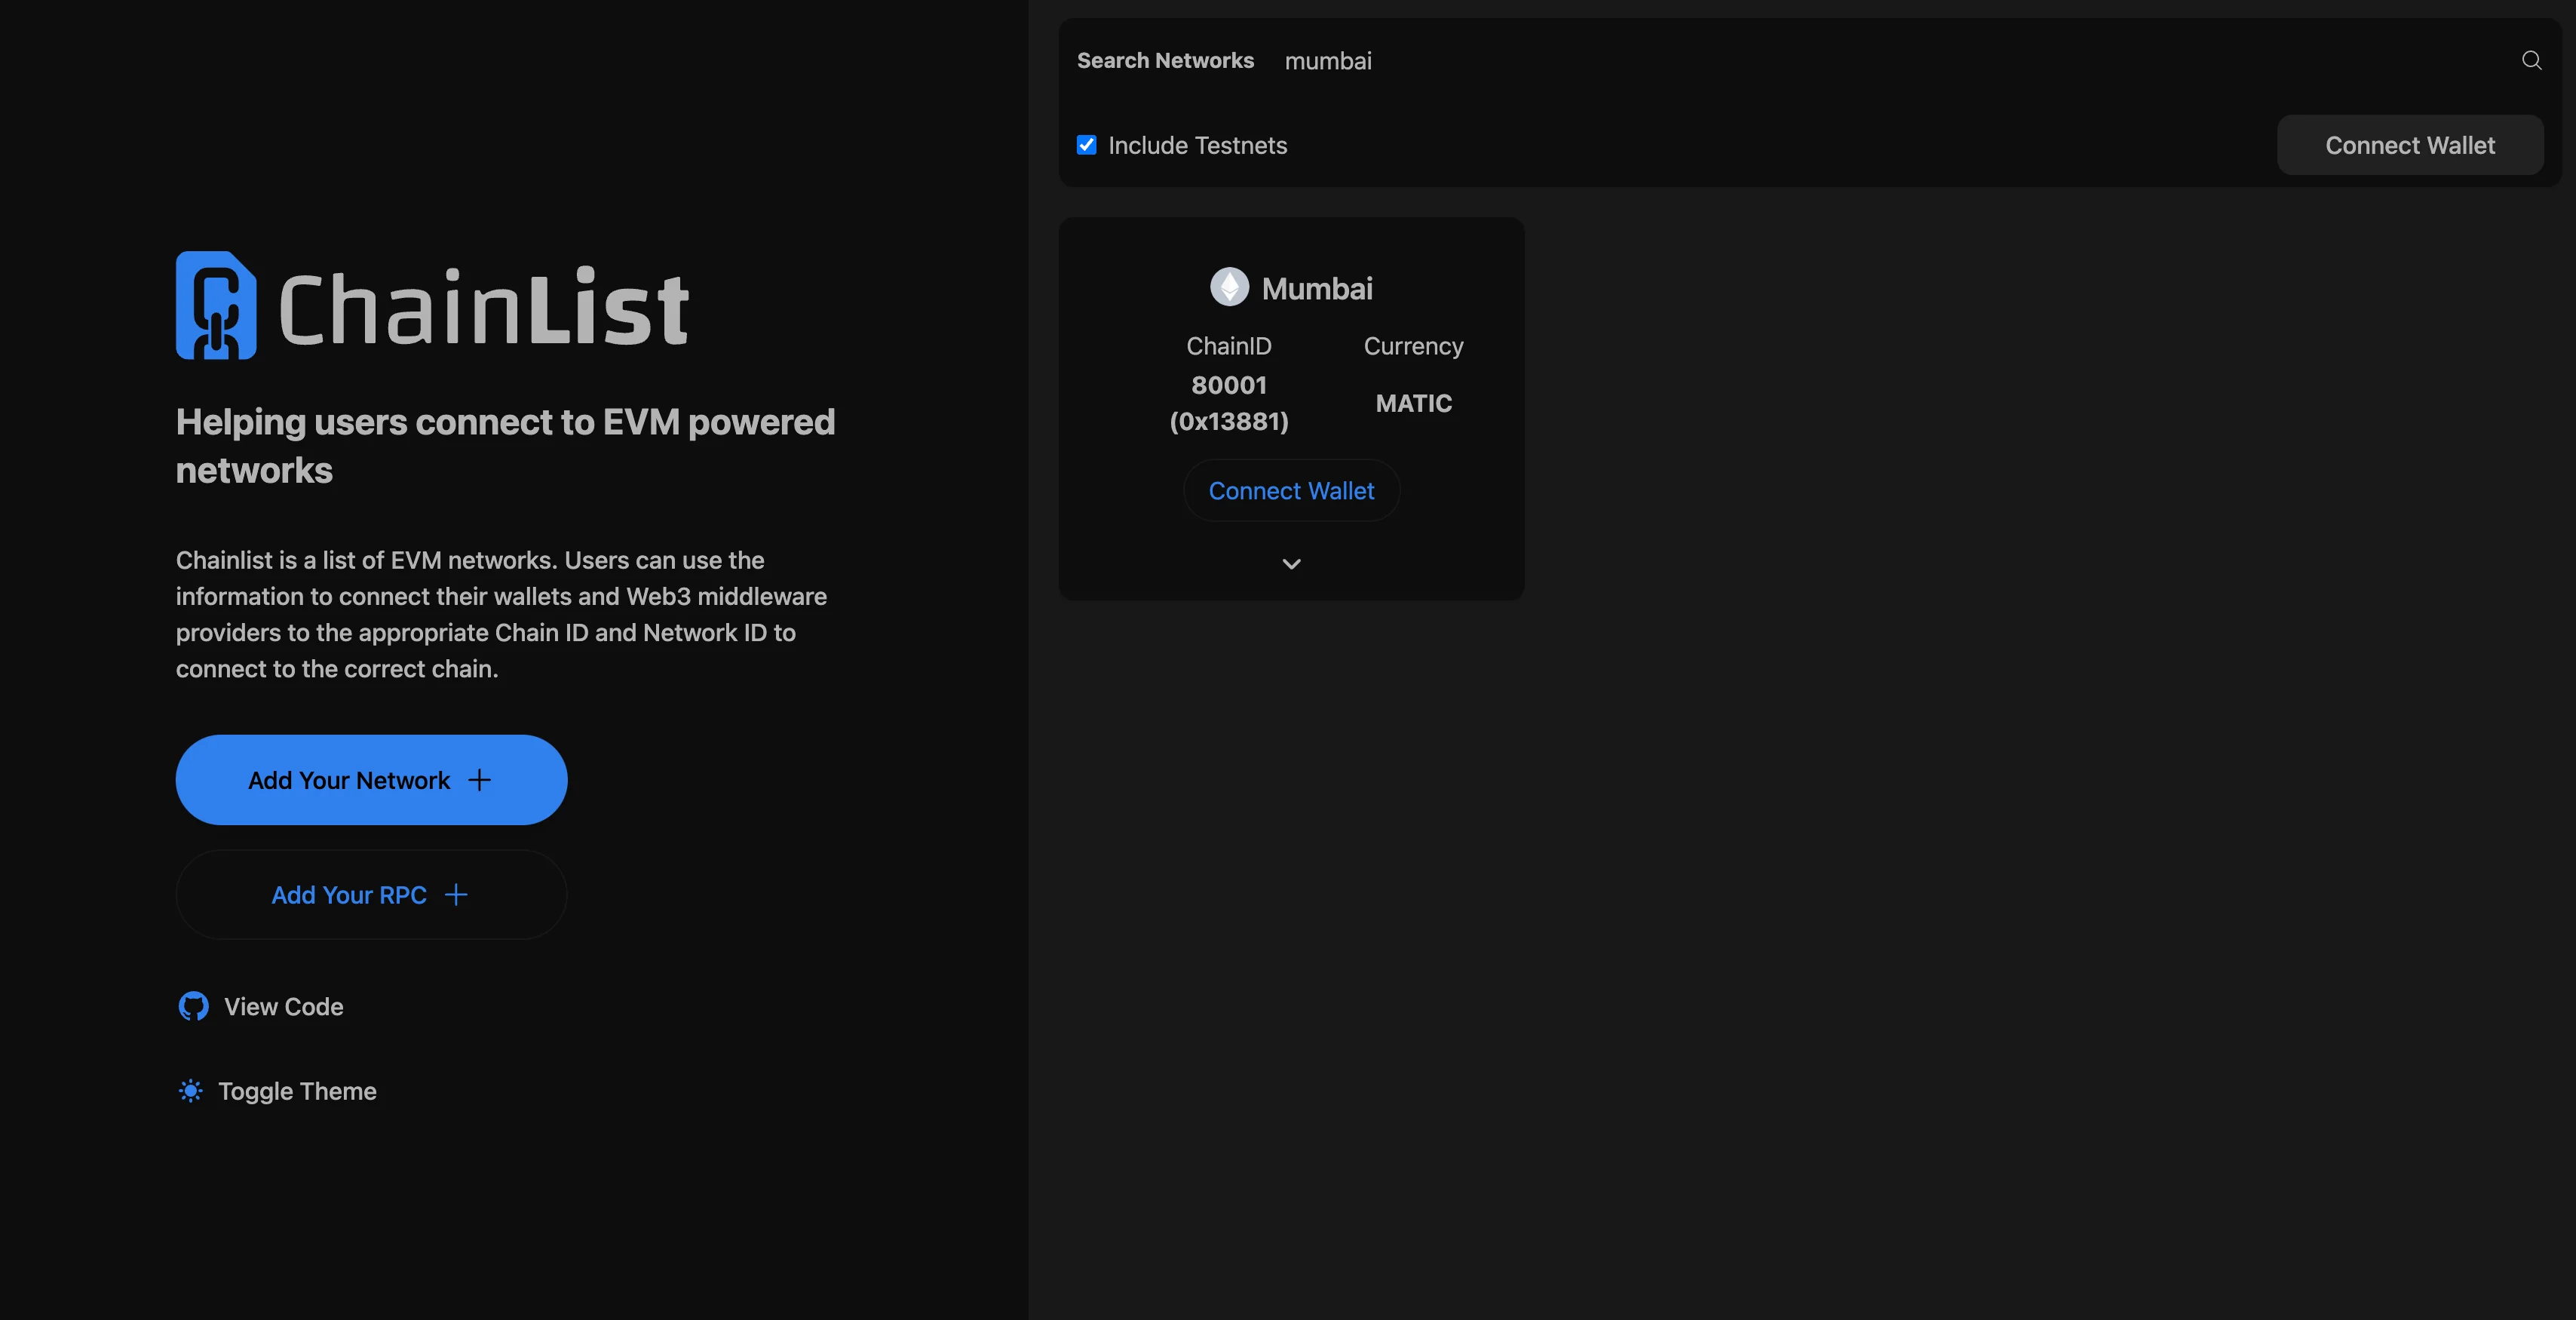
Chain ID: 80001
Symbol: MUMBAI
Block Explorer URL: https://mumbai.polygonscan.com/
Step 5: Save and Connect
After entering all the required details, click on the “Save” button to save the network configuration. You will then be redirected back to the Metamask extension, and you should see “Polygon Mumbai” as the selected network.
Congratulations! You have successfully added the Polygon Mumbai network to your Metamask wallet. You can now start interacting with dapps, deploying smart contracts, and testing your applications on the Polygon Mumbai testnet.
Disclaimer: Be cautious while transacting on testnets as the tokens used have no real value. Always double-check the network you are connected to before making any transactions.
We hope this step-by-step guide has been helpful in adding the Polygon Mumbai network to your Metamask wallet. Happy testing and enjoy the seamless experience of the Polygon Mumbai testnet!
Install Metamask Extension in your Browser
To get started with adding the Polygon Mumbai Network to Metamask, you will first need to install the Metamask extension in your browser. Follow the steps below to install Metamask:
- Open your browser and go to the Metamask website.
- Click on the “Get Chrome Extension” button if you are using Chrome, or “Get Firefox Extension” if you are using Firefox.
- You will be redirected to the Chrome Web Store or Firefox Add-ons page. Click on the “Add to Chrome” or “Add to Firefox” button to initiate the installation process.
- A pop-up window will appear asking for confirmation. Click on “Add extension” to proceed with the installation.
- After the installation is complete, the Metamask logo will appear in your browser’s toolbar.
Congratulations! You have successfully installed the Metamask extension in your browser. Now you can proceed with adding the Polygon Mumbai Network to Metamask.
Step-by-Step Guide to Adding Polygon Mumbai Network

If you want to add the Polygon Mumbai Network to your Metamask wallet, you can follow these simple steps:
- Open your Metamask wallet extension in your web browser.
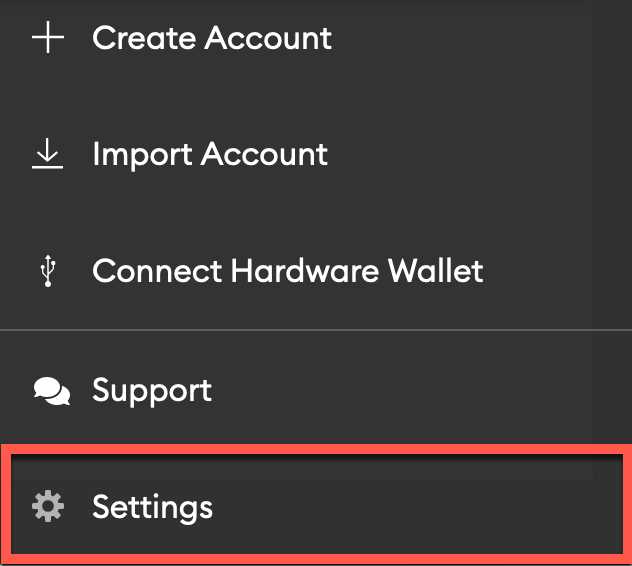
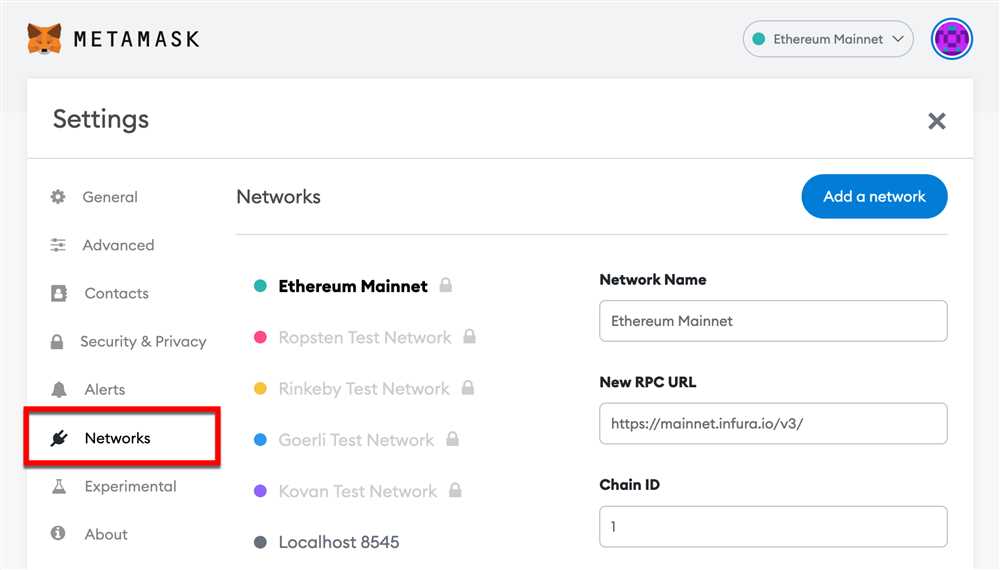
- Click on the account icon located at the top right corner of the screen and select “Settings”.
- In the “Settings” menu, click on “Networks”.
- Scroll down to the bottom of the page and click on “Add Network”.
- Enter the following details for the Polygon Mumbai Network:
- Network Name: Polygon Mumbai
- New RPC URL: https://rpc-mumbai.matic.today
- Chain ID: 80001
- Currency Symbol: MATIC
- Block Explorer URL: https://mumbai.polygonscan.com
- Click on “Save” to add the Polygon Mumbai Network to your Metamask wallet.
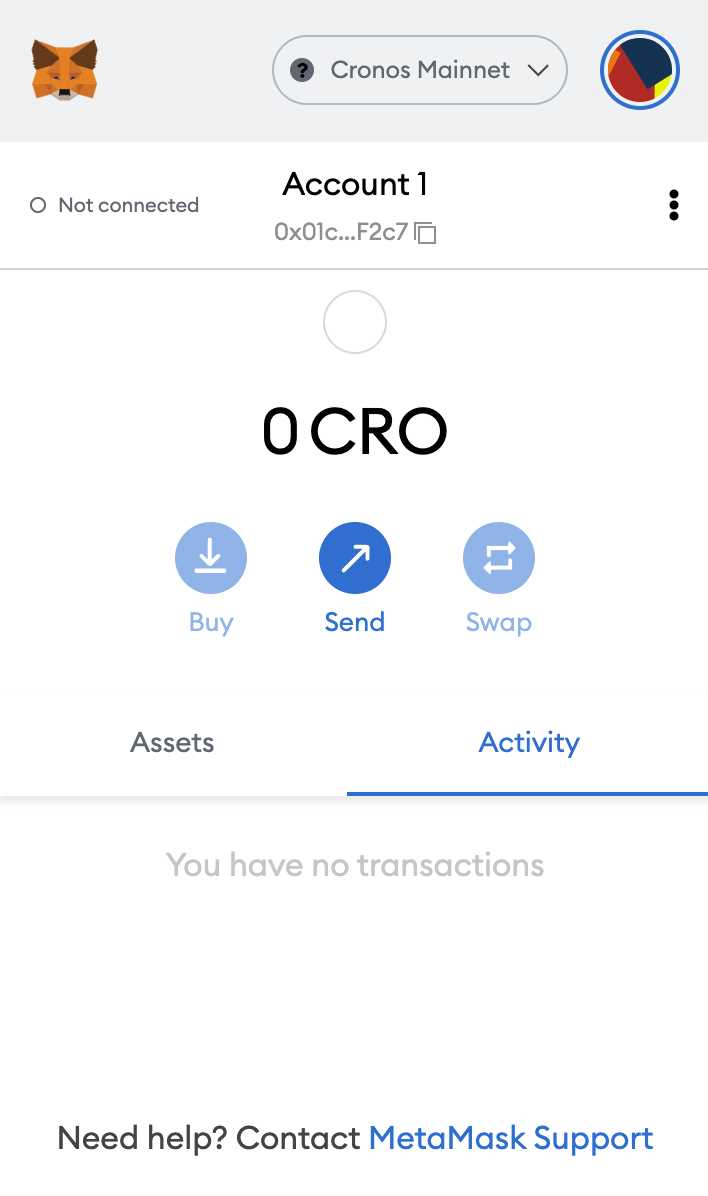
- After adding the network, you can switch to it by clicking on the network dropdown located at the top of the Metamask wallet screen and selecting “Polygon Mumbai”.
Now you have successfully added the Polygon Mumbai Network to your Metamask wallet. You can use this network to interact with dapps and projects that are built on the Polygon Mumbai Network.
Create a New Wallet in Metamask
Before you can add the Polygon Mumbai Network to your Metamask wallet, you’ll first need to create a new wallet if you don’t already have one set up. Follow the steps below to create a new wallet in Metamask:
- Download and Install Metamask: If you haven’t already, download and install the Metamask extension for your preferred web browser.
- Set Up a Password: After installing Metamask, click on the extension icon in your browser to launch it. You will be prompted to set up a new password for your wallet. Make sure to choose a strong password and keep it secure.
- Read and Accept Terms: Metamask will present you with its terms of use. Take the time to read through them, and if you agree, click on the “Accept” button to continue.
- Backup Seed Phrase: Metamask will generate a unique seed phrase consisting of 12 words. It is crucial to back up this seed phrase as it can be used to recover your wallet in case you forget your password or lose access to your device. Write down the seed phrase on a piece of paper and keep it in a secure location.
- Confirm Seed Phrase: Once you’ve written down the seed phrase, Metamask will ask you to confirm it. Select the words in the correct order to verify that you have correctly recorded the seed phrase.
- Wallet Created: After confirming the seed phrase, Metamask will notify you that your wallet has been created successfully. You can now use your newly created wallet within Metamask.
Once you have created a new wallet in Metamask, you can proceed with adding the Polygon Mumbai Network by following the further steps outlined in this guide.
Step-by-Step Guide to Adding Polygon Mumbai Network
If you want to add Polygon Mumbai Network to your Metamask wallet, follow these simple steps:
Step 1: Launch the Metamask extension on your browser.
Step 2: Click on the network dropdown at the top of the Metamask extension window.
Step 3: Scroll down and click on “Custom RPC”.
Step 4: In the “New RPC URL” field, enter the following URL:
https://rpc-mumbai.maticvigil.com
Step 5: In the “Chain ID” field, enter the number 80001.
Step 6: In the “Currency Symbol” field, enter “MATIC”.
Step 7: Click on the “Save” button to save the changes.
Step 8: Congratulations! You have successfully added Polygon Mumbai Network to your Metamask wallet. You can now use the network to interact with Polygon Mumbai-based decentralized applications.
Note: Make sure to double-check the URL, Chain ID, and Currency Symbol before saving the changes. Any errors in these fields may result in the network not functioning properly.
Switch to Polygon Mumbai Network in Metamask
Metamask is a popular cryptocurrency wallet that allows users to interact with decentralized applications (dApps) on the Ethereum blockchain. By default, Metamask is connected to the Ethereum Mainnet, but it also supports other networks, such as the Polygon Mumbai Network. Switching to the Polygon Mumbai Network in Metamask allows you to access and use dApps built on the Polygon network.
Step 1: Install and Set Up Metamask

If you haven’t already, you’ll need to install the Metamask extension for your preferred web browser. Once installed, open Metamask and create a new wallet or import an existing one using the seed phrase.
Step 2: Add the Polygon Mumbai Network
To add the Polygon Mumbai Network to Metamask, follow these steps:
- Click on the network selection dropdown in the top-right corner of the Metamask extension.
- Scroll down and click on “Custom RPC” at the bottom of the list.
- In the “New RPC URL” field, enter the following URL:
https://rpc-mumbai.matic.today - Enter a name for the network (e.g., “Polygon Mumbai” or “Matic Mumbai”).
- Optionally, you can also add the currency symbol and block explorer URL for the network.
- Click “Save” to add the Polygon Mumbai Network to Metamask.
Step 3: Switch to the Polygon Mumbai Network
To switch to the Polygon Mumbai Network in Metamask, follow these steps:
- Click on the network selection dropdown in the top-right corner of the Metamask extension.
- Select the Polygon Mumbai Network from the list of available networks.
Step 4: Connect and Interact with Polygon Mumbai dApps

Once you’ve switched to the Polygon Mumbai Network in Metamask, you can now connect and interact with dApps built on the Polygon network. You’ll be able to use your existing wallet address and interact with smart contracts on the Polygon Mumbai Network.
Remember to switch back to the Ethereum Mainnet or any other network when you’re done using the Polygon Mumbai Network in Metamask. This ensures that you’ll be interacting with the correct network for other dApps or transactions.
Table of Contents:
- Switch to Polygon Mumbai Network in Metamask
- Step 1: Install and Set Up Metamask
- Step 2: Add the Polygon Mumbai Network
- Step 3: Switch to the Polygon Mumbai Network
- Step 4: Connect and Interact with Polygon Mumbai dApps
Step-by-Step Guide to Adding Polygon Mumbai Network
In this guide, we will walk you through the process of adding the Polygon Mumbai network to your Metamask wallet.
Step 1: Install Metamask

If you haven’t already, make sure you have installed the Metamask extension in your browser. You can find the extension on the Metamask website or in the browser’s extension store.
Step 2: Create a new wallet or import an existing one
If you don’t have an existing Metamask wallet, you will need to create a new one. Follow the instructions provided by Metamask to set up a new wallet with a strong password.
If you already have a Metamask wallet, you can import it into the extension using your seed phrase or private key.
Step 3: Open Metamask and switch to the Mumbai Testnet
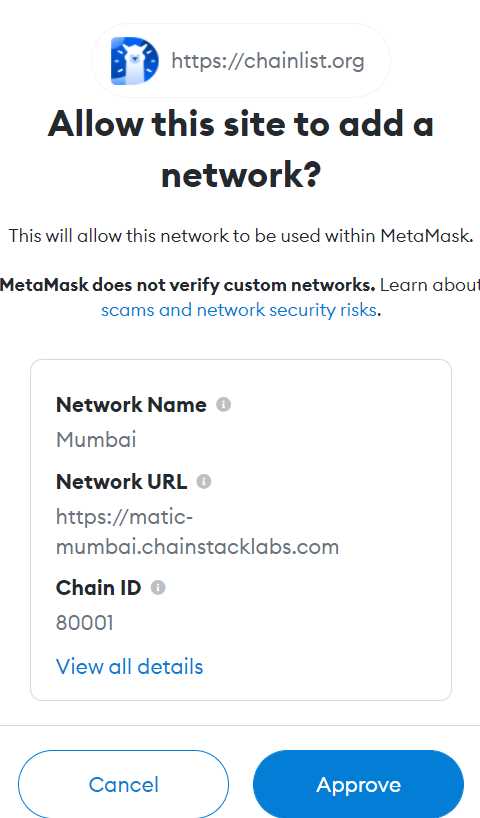
Open Metamask in your browser and click on the network dropdown menu at the top. Select “Custom RPC” from the list.
Now, you will need to enter the network details for the Polygon Mumbai Testnet:
- Network Name: Polygon Mumbai Testnet
- New RPC URL: https://rpc-mumbai.matic.today
- Chain ID: 80001
- Symbol: MUMBAI
- Block Explorer URL: https://mumbai-explorer.matic.today
Step 4: Save and connect to the Mumbai Testnet
After entering the network details, click on the “Save” button. Metamask will now connect to the Polygon Mumbai Testnet.
Step 5: Get testnet tokens
In order to interact with the Polygon Mumbai Testnet, you will need some testnet tokens. You can acquire these tokens by visiting the Polygon Mumbai faucet website using the Metamask browser.
Once you have completed these steps, you will be connected to the Polygon Mumbai Testnet and ready to start using Polygon’s network for testing and development purposes.
Frequently Asked Questions:
What is Polygon Mumbai Network?
Polygon Mumbai Network is a test network that runs on the Polygon blockchain. It is used for testing and deploying smart contracts without incurring high gas fees.
Why would I want to add the Polygon Mumbai Network to Metamask?
You would want to add the Polygon Mumbai Network to Metamask if you plan to test or develop on the Polygon blockchain. This allows you to interact with smart contracts on the Mumbai test network without switching networks.
How can I add the Polygon Mumbai Network to Metamask?
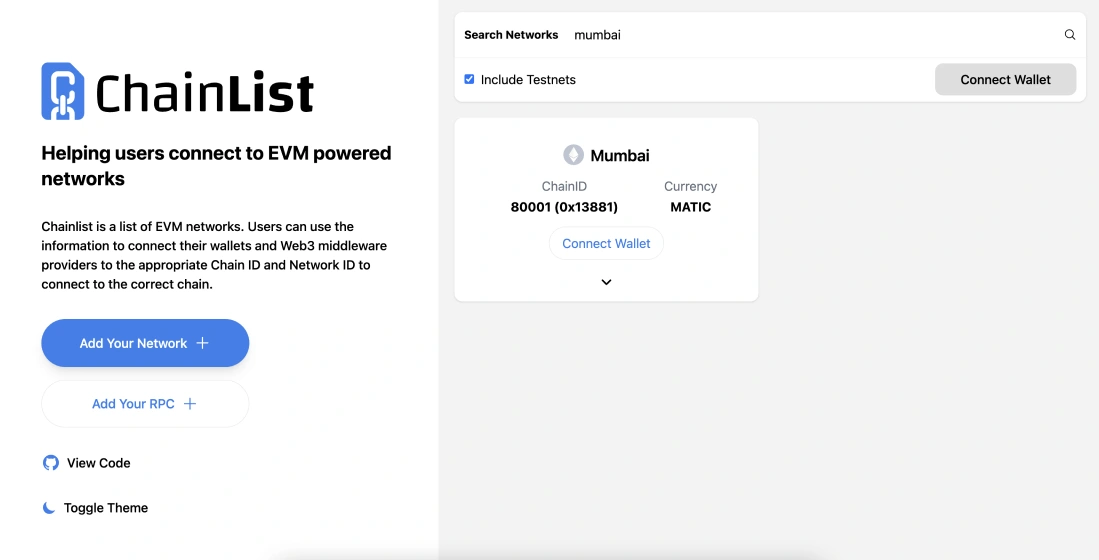
To add the Polygon Mumbai Network to Metamask, you need to open Metamask and go to the network selection dropdown. Then, click on “Custom RPC” and enter the following details: Network Name: “Polygon Mumbai”, New RPC URL: “https://rpc-mumbai.matic.today”, Chain ID: 80001, Symbol: “MATIC”. Finally, click “Save” to add the network.
Can I use the Polygon Mumbai Network for real transactions?
No, the Polygon Mumbai Network is a test network and should not be used for real transactions or storing real funds. It is only meant for testing and development purposes.
+ There are no comments
Add yours