


Metamask has become one of the most popular cryptocurrency wallets due to its user-friendly interface and secure features. One of the tokens that users are eager to add to their Metamask wallets is Shib, the native cryptocurrency of the Shiba Inu ecosystem. In this step-by-step guide, we will walk you through the process of adding Shib to your Metamask wallet.
Step 1: Install Metamask
If you haven’t installed Metamask yet, the first step is to download and install the extension for your preferred web browser. Metamask is compatible with Chrome, Firefox, Brave, and Edge. Once installed, create a new wallet or import an existing one using your secret recovery phrase.
Step 2: Access the Metamask Wallet
After installing Metamask, locate the extension and click on it to open the wallet interface. Enter your password to unlock the wallet if necessary. You should now be in your Metamask wallet dashboard.
Step 3: Add Shib to Your Assets
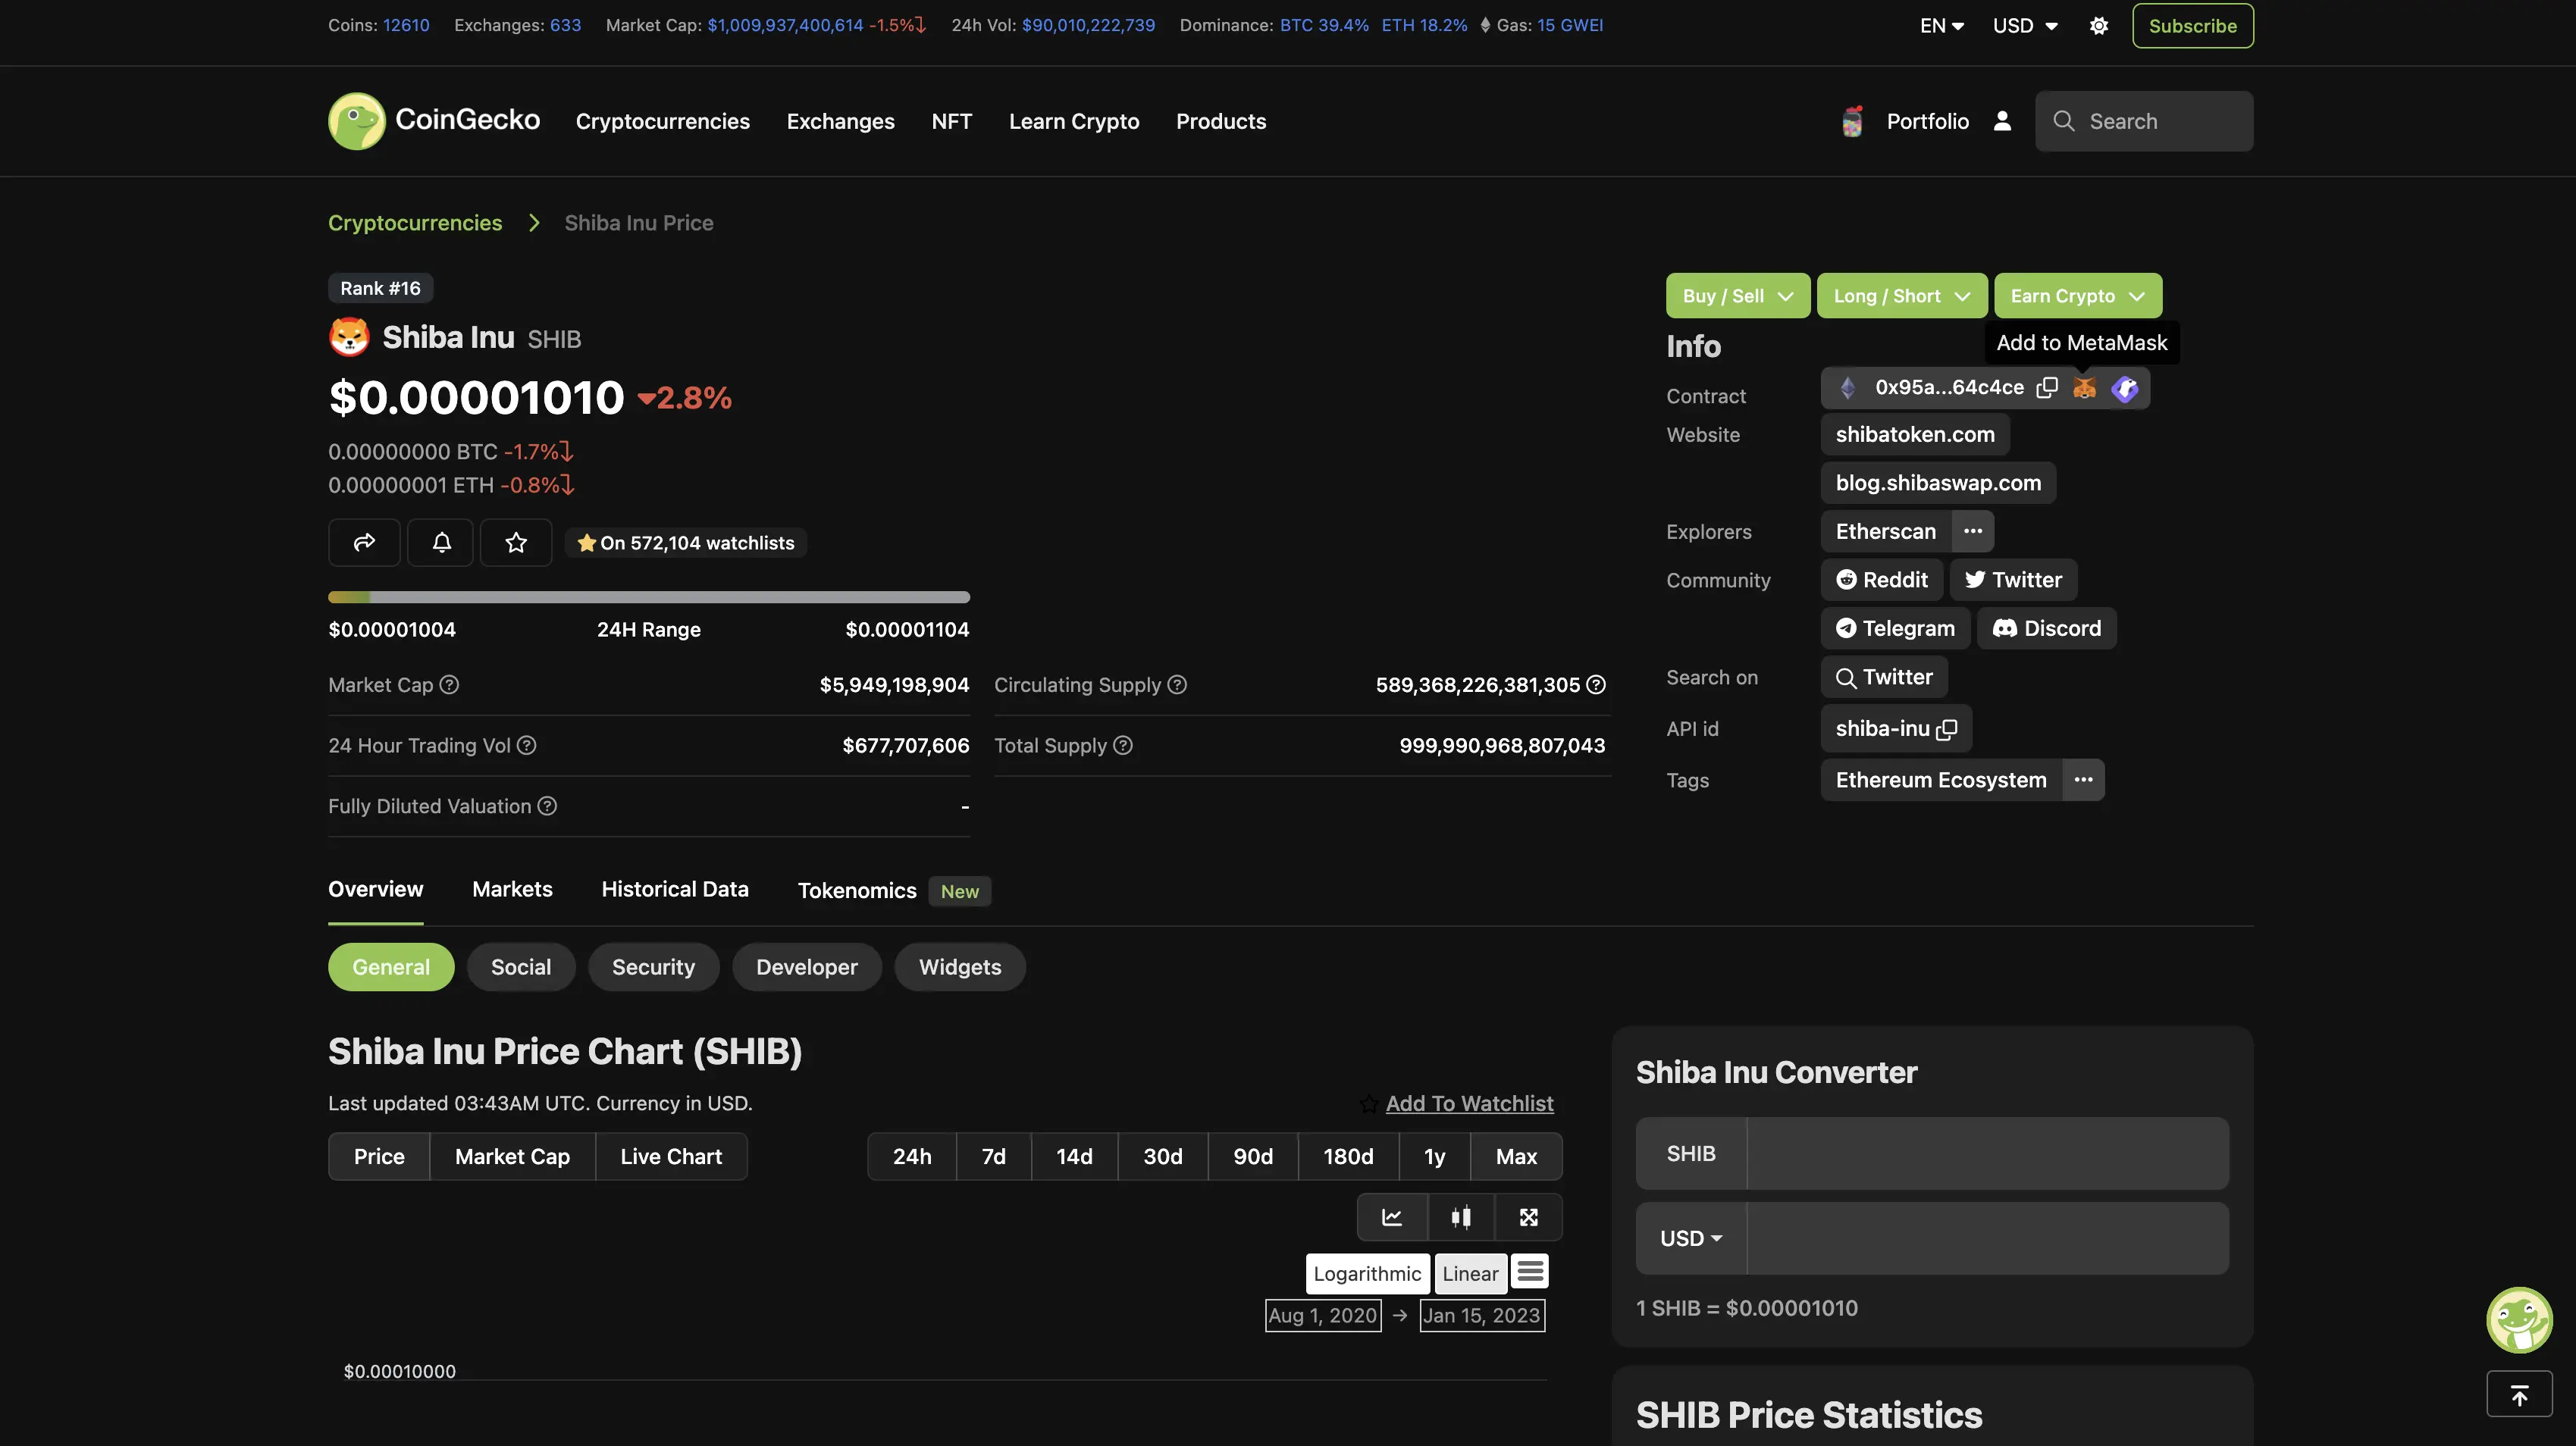
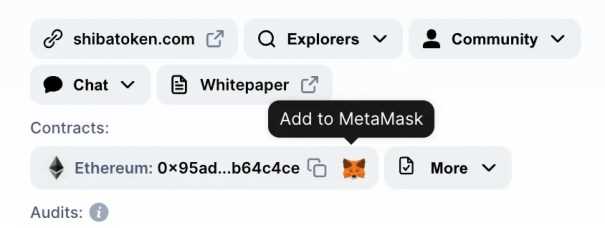
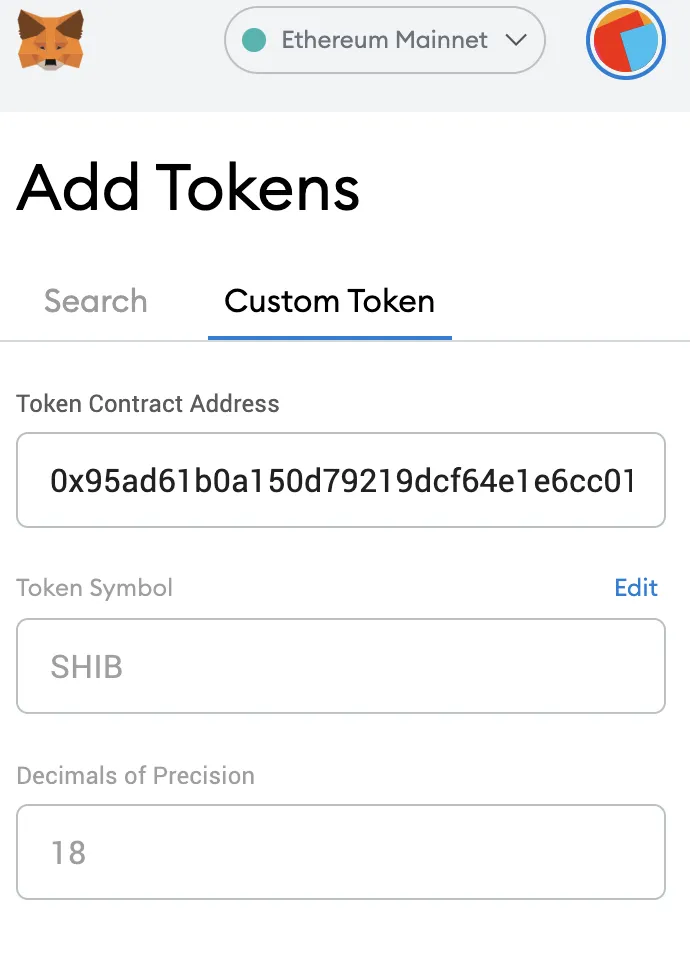
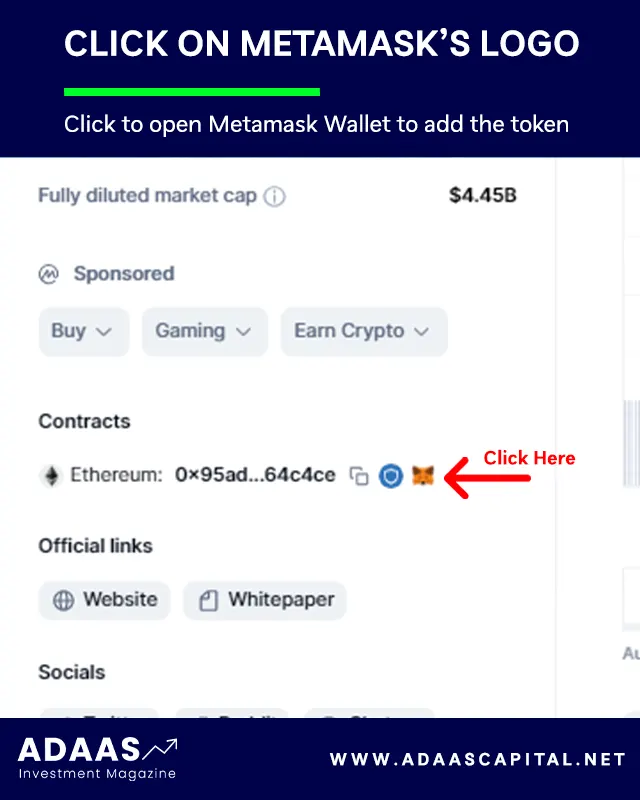
In the Metamask dashboard, click on the “Assets” tab, then select the “Add Token” button. This will open a new window where you can select the Shib token. To add Shib, you will need to copy and paste the Shib contract address: [insert Shib contract address here]. Once you have entered the contract address, click on the “Next” button.
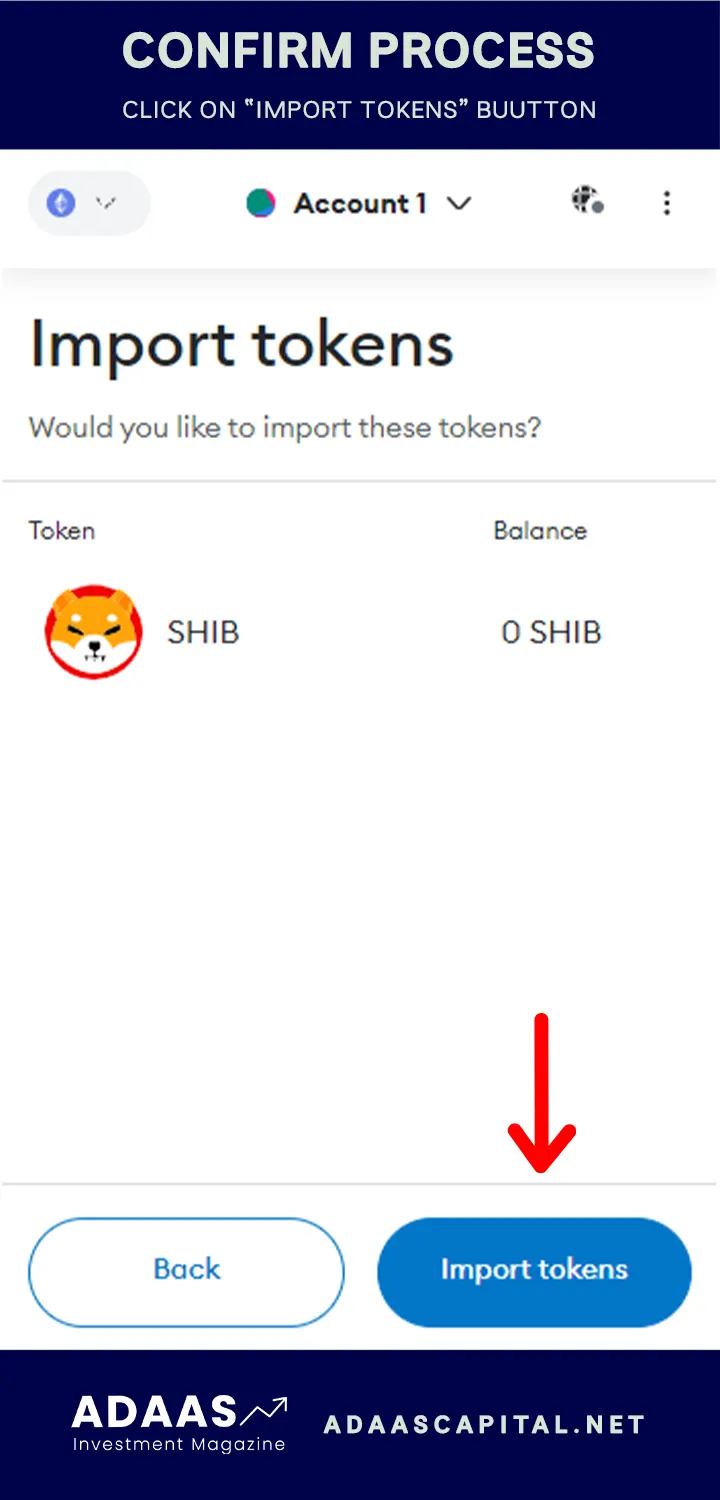
Step 4: Confirm and Add Shib
Metamask will now display the token details for Shib. Verify that the token information matches Shib, then click on the “Add Tokens” button to confirm the addition of Shib to your Metamask wallet. You may need to wait a few moments for the transaction to be processed on the blockchain.
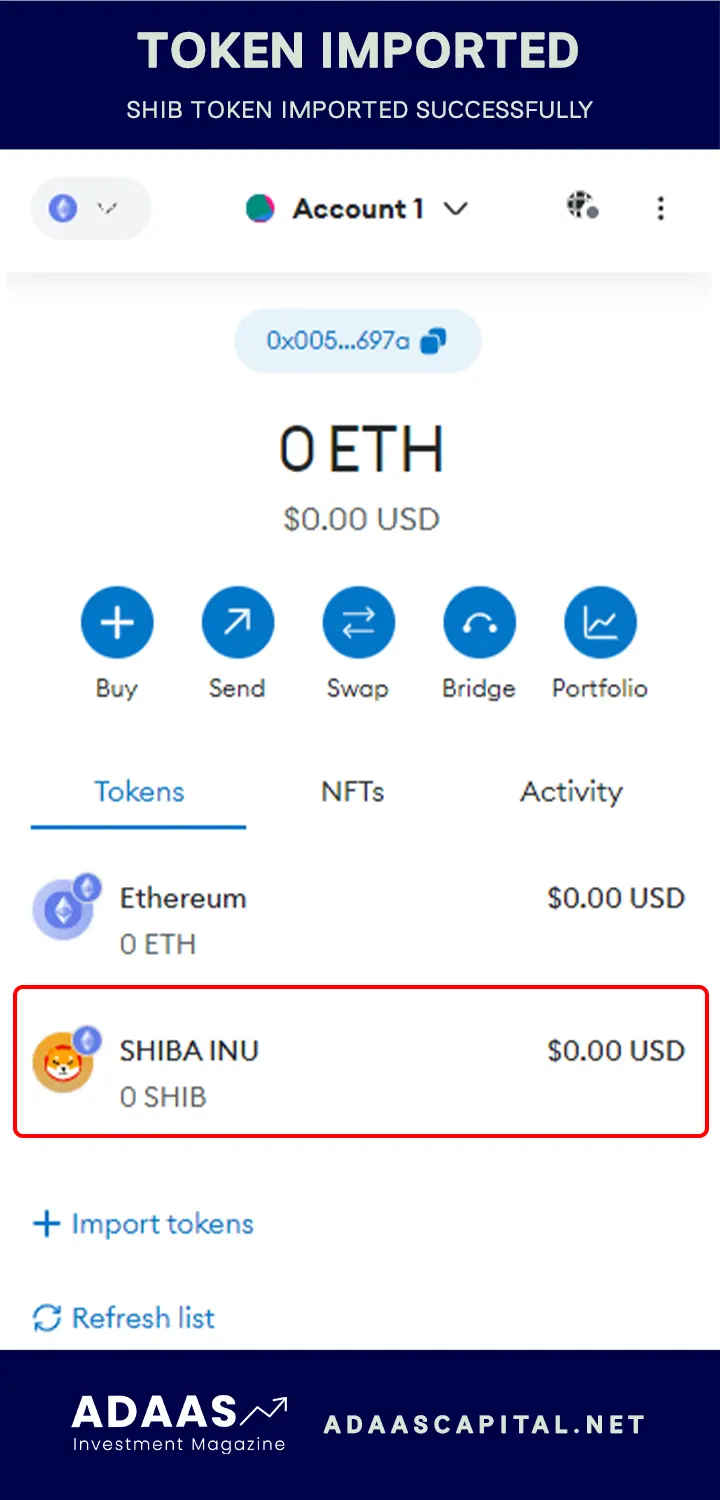
Step 5: View Your Shib Balance
Once the transaction is complete, you can go back to the Metamask dashboard and click on the “Assets” tab. Scroll down to find your Shib token, and you should see your Shib balance displayed. You can now use your Shib tokens for trading, staking, or any other activities within the Shiba Inu ecosystem.
What is Shib?

Shib is a cryptocurrency token that operates on the Ethereum blockchain. It is the native token of the Shiba Inu community, which was inspired by the popular meme cryptocurrency Dogecoin. Shib is often referred to as the “Dogecoin killer” due to its growing popularity and fanbase.
The Shiba Inu community aims to create a decentralized ecosystem where Shib holders can participate in various activities and earn rewards. One of the main objectives of the project is to make Shib a globally recognized cryptocurrency and develop its functionality beyond being a meme token.
Shib offers its users the opportunity to participate in decentralized finance (DeFi), allowing them to stake their tokens, provide liquidity, and earn passive income. The token also incorporates unique features such as the “Bone” token, which can be used to access exclusive benefits and privileges within the ecosystem.
Shib gained significant attention and recognition in the crypto market, attracting a large community of supporters and investors. Its strong presence on social media platforms like Twitter and Reddit has helped to establish its reputation as a promising cryptocurrency with a dedicated fanbase.
Overall, Shib represents an exciting and evolving project within the cryptocurrency space. It combines the appeal of a meme token with the potential for long-term growth and development, making it an intriguing asset for investors and enthusiasts alike.
What is Metamask?
Metamask is a cryptocurrency wallet and browser extension that allows users to interact with the Ethereum blockchain. It is available as a browser extension for Google Chrome, Firefox, and Brave browsers.
Metamask provides users with a secure and convenient way to manage their Ethereum accounts, send and receive Ethereum and ERC-20 tokens, and interact with decentralized applications (dApps). It acts as a bridge between the traditional web and blockchain, allowing users to seamlessly access and use blockchain-based services.
Metamask also allows users to create multiple accounts, import existing accounts, and manage their private keys, giving them full control over their funds and digital assets. It provides users with a user-friendly and intuitive interface to interact with the blockchain, making it easier for both beginners and advanced users to participate in the Ethereum ecosystem.
Key Features of Metamask:
- Secure storage of private keys: Metamask encrypts and securely stores the private keys associated with your Ethereum accounts.
- Easy account management: Metamask allows users to create and manage multiple Ethereum accounts, import existing accounts, and switch between them with ease.
- Transaction signing: Metamask provides a convenient way to sign Ethereum transactions, ensuring their security and integrity.
- DApp integration: Metamask seamlessly integrates with decentralized applications (dApps), allowing users to interact with these applications directly from their browser.
- ERC-20 token support: Metamask supports the storage and management of Ethereum-based ERC-20 tokens, allowing users to easily send, receive, and manage their token holdings.
Getting Started with Metamask:
To get started with Metamask, you can follow these steps:
- Install the Metamask browser extension for your preferred browser (Chrome, Firefox, or Brave).
- Create a new Ethereum account or import an existing one using the account seed phrase or private key.
- Securely store your account’s seed phrase or private key in a safe location.
- Set a strong password for your Metamask wallet to ensure the security of your funds.
- Explore the Ethereum ecosystem by accessing decentralized applications (dApps) and interacting with the Ethereum blockchain.
Overall, Metamask is a powerful tool that empowers individuals to securely manage their Ethereum accounts, interact with decentralized applications, and participate in the expanding world of blockchain technology.
Step 1: Install and Set Up Metamask
In order to add Shib to Metamask, you first need to install and set up the Metamask extension on your web browser.
Install Metamask
- Open your web browser and go to the Metamask website.
- Click on the “Download” button to download the Metamask extension.
- Once the download is complete, click on the downloaded file to install Metamask.
- Follow the instructions to complete the installation process.
Set Up Metamask
- Open your web browser and click on the Metamask extension icon in the toolbar.
- A new window will open, asking you to create a new wallet or import an existing one. If you don’t have a wallet, select the “Create a Wallet” option.
- Follow the instructions to set up a new wallet, including creating a strong password and agreeing to the terms of service.
- After setting up your wallet, Metamask will provide you with a unique seed phrase. This phrase is extremely important and should be kept safe. Note it down or store it securely.
- Confirm your seed phrase by entering the words in the correct order.
- Set a password for your wallet. This password will be required every time you want to access your wallet.
- Once your wallet is set up, you can customize the settings, such as changing the network or adding tokens.
Now that you have installed and set up Metamask, you are ready to proceed to the next step of adding Shib to Metamask.
Download Metamask Extension
To add Shib to Metamask, you first need to download and install the Metamask extension on your web browser.
Step 1: Choose Your Web Browser
Metamask is available for Chrome, Firefox, Brave, and Microsoft Edge. Choose the browser you prefer and navigate to their respective extension stores.
Step 2: Search for Metamask
In the extension store, search for “Metamask”. Click on the Metamask extension to access its details page.
Step 3: Add to Browser

On the Metamask extension details page, click on the “Add to [browser name]” button. This will prompt your browser to start the installation process.
Step 4: Confirm Installation
Depending on your browser, you may need to confirm the installation by clicking on “Add” or “Install”. Once confirmed, the installation process will begin.
Step 5: Set Up Metamask
After the installation is complete, you will see the Metamask icon in your browser’s toolbar. Click on the icon to open Metamask.
Step 6: Create or Import a Wallet

Follow the on-screen instructions to create a new wallet or import an existing one using your recovery phrase. Make sure to securely store your recovery phrase in a safe place.
Step 7: Set Your Password
Set a strong password for your Metamask wallet to ensure the security of your funds.
Congratulations! You have successfully downloaded and installed the Metamask extension. Now you can proceed to add Shib to your Metamask wallet.
Create Metamask Wallet
Before you can add Shib to your Metamask, you need to create a wallet on the Metamask platform. Follow the steps below to create your Metamask wallet:
1. Visit the Metamask website at https://metamask.io.
2. Click on the “Get Chrome Extension” button if you are using Google Chrome as your browser. If you are using a different browser, select the appropriate option.
3. Once the extension is installed, click on the Metamask icon in your browser’s toolbar.
4. Click on the “Create a Wallet” button.
5. Set a strong password for your wallet. Make sure to use a combination of uppercase and lowercase letters, numbers, and special characters.
6. Read and accept the terms of use.
7. Click on the “Create” button to generate your wallet.
8. Metamask will display your secret backup phrase. It is crucial to save this phrase in a safe and secure location. This phrase can be used to restore your wallet if you lose access to your device.
9. Confirm your backup phrase by selecting the words in the correct order.
10. Congratulations! Your Metamask wallet has been successfully created. You can now proceed to add Shib to your wallet.
Remember to keep your wallet password and backup phrase safe and secure. Do not share them with anyone to prevent unauthorized access to your funds.
Frequently Asked Questions:
What is Shib?
Shib is a decentralized cryptocurrency token on the Ethereum blockchain. It is also known as Shiba Inu token, named after the Japanese dog breed.
What is Metamask?
Metamask is a popular web-based cryptocurrency wallet that allows users to store, send, and receive digital assets, including Ethereum and ERC-20 tokens.
Why would I want to add Shib to Metamask?
Adding Shib to Metamask would allow you to manage and interact with your Shib tokens directly from the Metamask wallet interface, making it easier to keep track of your holdings and participate in the Shib community.
How can I add Shib to Metamask?
To add Shib to Metamask, you would need to follow a step-by-step guide. Firstly, open your Metamask wallet and click on the “Assets” tab. Then, click on the “Add Token” button and choose the “Custom Token” option. In the token contract address field, paste the contract address for Shib, which can be found on the Shib website or token tracker. Enter the token symbol and decimals as specified and click on “Next” to complete the process.
Is it safe to add Shib to Metamask?
Adding Shib to Metamask is generally safe as long as you verify the contract address and token details before adding it. However, it is important to exercise caution and be aware of potential scams or fake tokens that may attempt to impersonate Shib. Make sure to double-check the contract address and only add tokens from trusted sources.

+ There are no comments
Add yours