


Metamask is one of the most popular wallets for interacting with decentralized applications (dApps) on the Ethereum blockchain. It allows users to securely store, send, and receive ETH and ERC-20 tokens. However, with the increasing popularity of Polygon (formerly Matic Network), many users are now looking for ways to send Polygon tokens to their Metamask wallet.
Sending Polygon tokens to your Metamask wallet is a relatively straightforward process, but it does require a few extra steps compared to sending ETH or ERC-20 tokens. In this step-by-step guide, we will walk you through the process of sending Polygon tokens to your Metamask wallet.
Step 1: Add Polygon Network to Metamask
The first step is to add the Polygon network to your Metamask wallet. To do this, open your Metamask extension and click on the network selection dropdown (usually located at the top of the wallet interface). Select “Custom RPC” and enter the following details:
Network Name: Polygon
New RPC URL: https://rpc-mainnet.maticvigil.com
Chain ID: 137
Click “Save” to add the Polygon network to your Metamask wallet.
Step 2: Transfer Polygon to Your Metamask Wallet
Once you have added the Polygon network to your Metamask wallet, you will need to transfer your Polygon tokens to your wallet address. To do this, log in to your cryptocurrency exchange account or any other wallet that holds your Polygon tokens. Initiate a withdrawal or transfer and provide your Metamask wallet address as the destination.
Step 3: Confirm Transaction
After initiating the transfer, you will need to wait for the transaction to be confirmed on the Polygon blockchain. This usually takes a few minutes, but it can vary depending on network congestion. You can track the status of your transaction by copying your Metamask wallet address and searching for it on a Polygon blockchain explorer like polygonscan.com.
That’s it! Once your transaction is confirmed, you will see your Polygon tokens in your Metamask wallet balance on the Polygon network. You can now freely interact with Polygon-based dApps and take advantage of the scalability and low transaction fees that Polygon offers.
Remember that when you want to send your Polygon tokens back to a centralized exchange or another wallet, you will need to repeat the process in reverse. You will need to add the Polygon network to the wallet you are sending to and initiate a withdrawal from your Metamask wallet to the desired address.
By following these simple steps, you can easily send Polygon tokens to your Metamask wallet and start exploring the world of Polygon’s decentralized finance ecosystem.
How to Send Polygon to Metamask
In order to send Polygon to Metamask, you will need to follow these step-by-step instructions:
Step 1: Open your Metamask wallet.
Step 2: Click on the “Assets” tab.
Step 3: Under the “Assets” tab, click on the “Add Token” button.
Step 4: Select “Custom Token” from the options.
Step 5: In the “Token Contract Address” field, enter the address of the Polygon token.
Step 6: Metamask will automatically fill in the “Token Symbol” and “Decimals of Precision” fields. Click on the “Next” button.
Step 7: Review the token details and click on the “Add Tokens” button to confirm.
Step 8: Your Polygon tokens will now be visible in your Metamask wallet under the “Assets” tab.
Step 9: To send Polygon tokens, go to the “Send” tab in Metamask.
Step 10: Enter the recipient’s wallet address in the “To” field.
Step 11: Enter the amount of Polygon tokens you want to send in the “Amount” field.
Step 12: Review the transaction details and click on the “Confirm” button to complete the transaction.
Step 13: Wait for the transaction to be confirmed on the Polygon network.
Step 14: Once the transaction is confirmed, the Polygon tokens will be sent to the recipient’s wallet.
By following these steps, you will be able to send Polygon to Metamask and manage your tokens within the wallet.
Step 1: Install Metamask
To send Polygon to Metamask, first, you need to have Metamask installed on your device. Metamask is a digital wallet and browser extension that allows you to interact with the Ethereum network.
To install Metamask, follow these steps:
- Open your preferred web browser.
- Go to the official Metamask website (https://metamask.io/).
- Click on the “Get Chrome Extension” button or “Get Firefox Extension” button, depending on your browser.
- A new tab will open with the extension in the Chrome Web Store or Firefox Add-ons.
- Click on the “Add to Chrome” button or “Add to Firefox” button.
- A pop-up window will appear asking you to confirm the installation. Click on the “Add Extension” button.
- After the extension is installed, a new tab will open with the Metamask welcome screen.
- Click on the “Get Started” button.
- Create a new wallet or import an existing wallet by following the on-screen instructions.
- Set up a password and a secret backup phrase for your wallet.
- Once everything is set up, you will be taken to the main Metamask interface.
Congratulations! You have successfully installed Metamask on your device.
Step 2: Add Polygon Network
Once you have metamask installed, the next step is to add the Polygon network to your metamask wallet. Follow the steps below to do this:
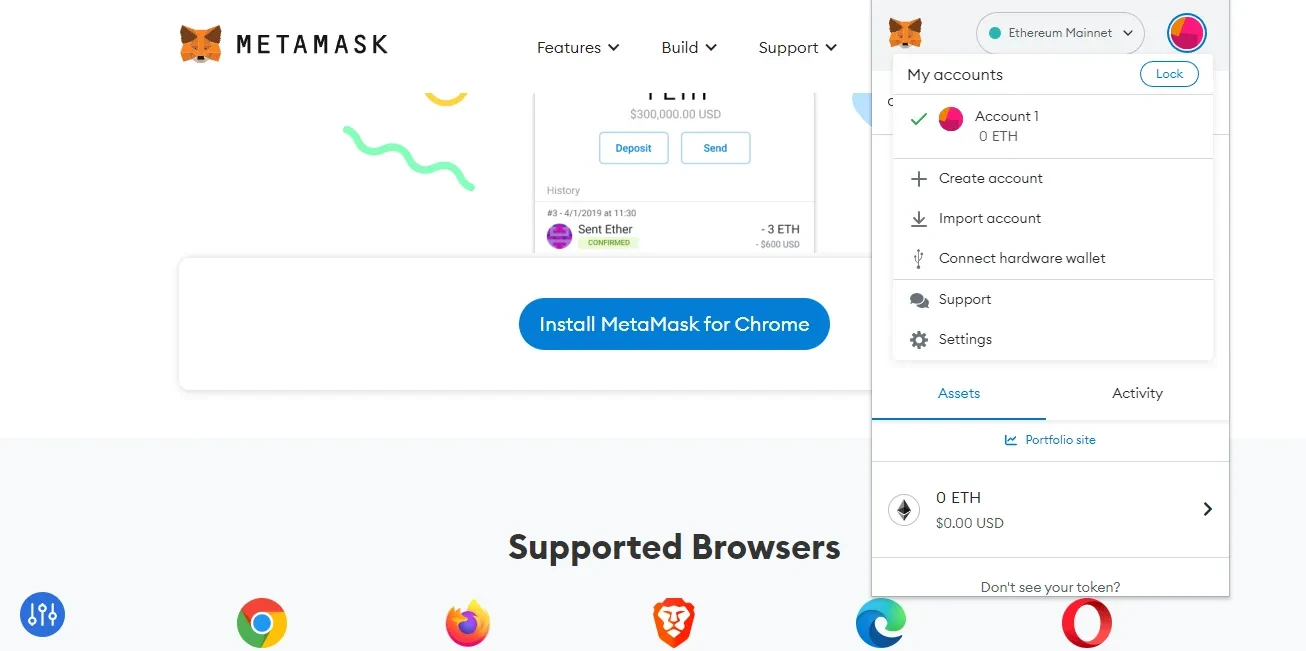
- Click on the metamask extension in your browser to open the wallet.
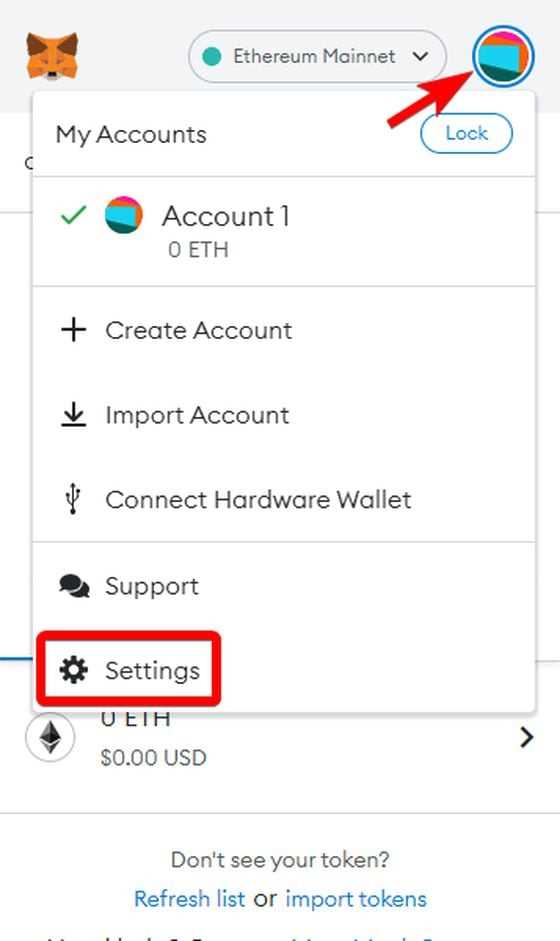
- Click on the account icon in the top right corner of the metamask wallet.
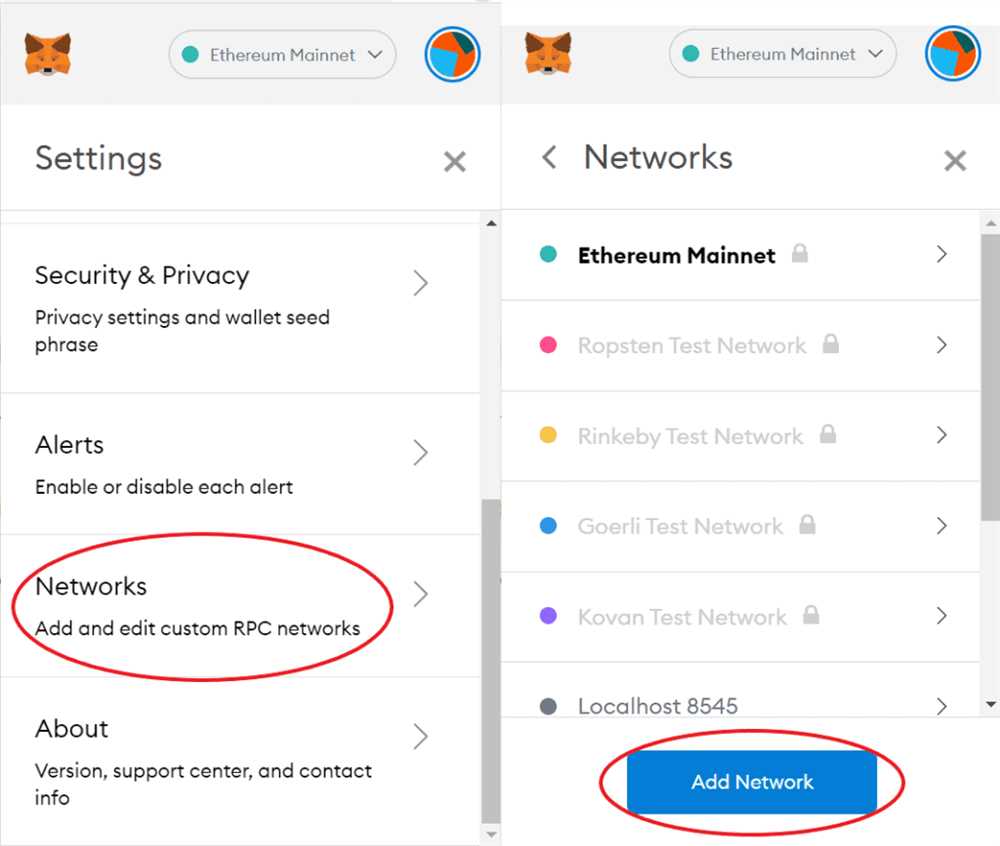
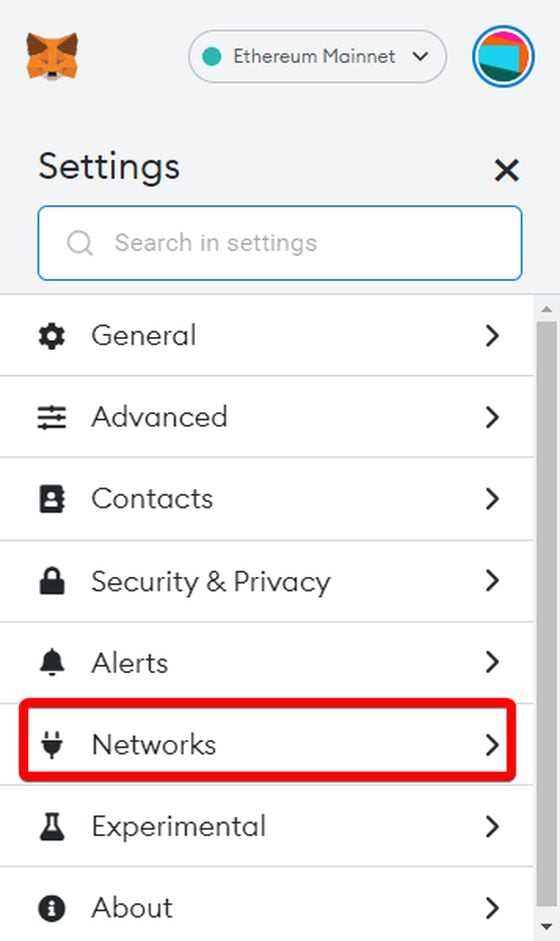
- A dropdown menu will appear. Click on “Settings”.
- In the settings menu, click on “Networks” in the left sidebar.
- Click on “Add Network” at the bottom of the networks list.
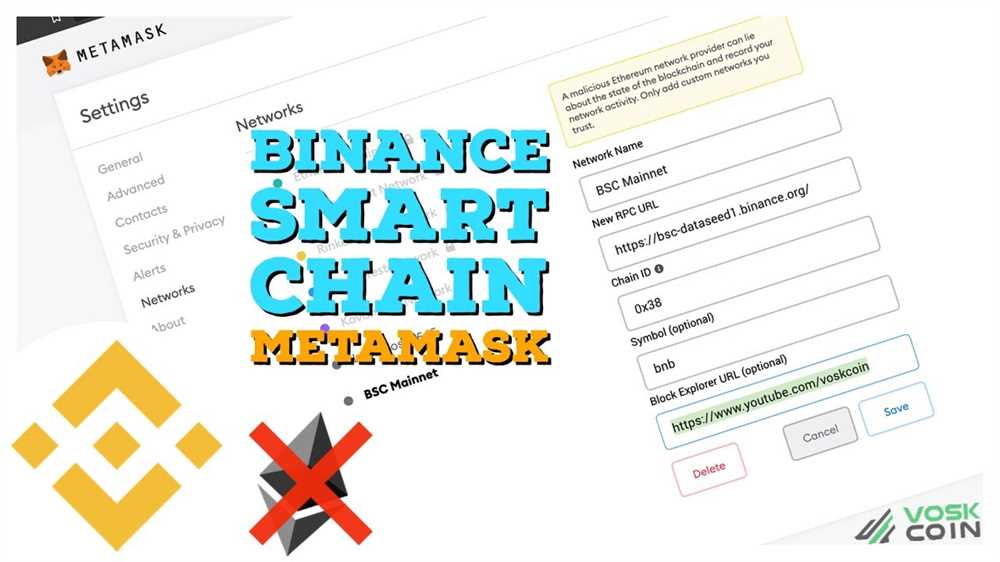
- A form will appear where you can enter the details of the Polygon network.
- Enter the following details:
Network Name: Polygon
New RPC URL: https://rpc-mainnet.maticvigil.com/ (for the Polygon mainnet) or https://rpc-testnet.maticvigil.com/ (for the Polygon testnet)
ChainID: 137 (for the Polygon mainnet) or 80001 (for the Polygon testnet)
Symbol: MATIC (for the Polygon mainnet) or MATIC (for the Polygon testnet)
Block Explorer URL: https://polygonscan.com/ (for the Polygon mainnet) or https://mumbai.polygonscan.com/ (for the Polygon testnet)
Once you have entered the details, click on “Save” to add the Polygon network to your metamask wallet.
That’s it! You have successfully added the Polygon network to your metamask wallet. Now you can start sending and receiving Polygon on the network.
Step 3: Get Polygon Tokens
To send Polygon to your Metamask wallet, you will first need to acquire Polygon tokens. Here is a step-by-step guide on how to do this:
1. Install Metamask
If you haven’t already, you will need to install the Metamask wallet extension in your browser. Visit the Metamask website and follow the instructions to install it.
2. Set up your Metamask Wallet
Once you have installed Metamask, open the extension and set up your wallet. You will need to create a strong password and agree to the terms and conditions. Make sure to securely store the seed phrase that will be provided to you, as it will be required to access your wallet in case you forget your password.
3. Add the Polygon Network
After setting up your wallet, click on the network dropdown in Metamask and select “Custom RPC”. In the fields provided, enter the following details:
Network Name: Polygon Mainnet
New RPC URL: https://rpc-mainnet.matic.network
Chain ID: 137
Symbol: MATIC
Block Explorer URL: https://polygonscan.com/
4. Transfer Ethereum to Polygon
Now that you have set up the Polygon network in Metamask, you will need to transfer some Ethereum to Polygon. There are multiple ways to do this, such as using a bridge or decentralized exchange (DEX). Follow the instructions provided by your chosen method to initiate the transfer.
5. Check your Polygon Balance in Metamask
Once the Ethereum transfer is complete, you should be able to see your Polygon tokens in your Metamask wallet. You can check your balance by clicking on the “Assets” tab in the Metamask extension and searching for “MATIC” or “Polygon”.
Now that you have acquired Polygon tokens, you are ready to proceed to the next step of sending them to Metamask.
Step 4: Send Polygon to Metamask
Once you have set up your Metamask wallet and acquired some Polygon (MATIC) tokens, you can proceed to send them to your Metamask wallet. Here are the steps to follow:
1. Open Metamask
Open the Metamask extension in your browser and make sure you are on the Main Network.
2. Click on “Assets”
On the Metamask dashboard, click on the “Assets” tab to see your wallet balance and asset holdings.
3. Select “Add Token”
In the “Assets” tab, click on the “Add Token” button.
4. Choose “Custom Token”
From the options shown, select “Custom Token” to manually input the token details.
5. Paste Token Address

Paste the contract address of the Polygon (MATIC) token in the field provided. The contract address for Polygon is 0x7D1AfA7B718fb893dB30A3aBc0Cfc608AaCfeBB0.
6. Confirm Token Details
Metamask should automatically fill in the Token Symbol and Decimals of Precision for Polygon. Verify that the details are correct and click “Next”.
7. Click “Add Tokens”
Review the confirmation screen and click “Add Tokens” to add the Polygon token to your Metamask wallet.
8. Send Polygon to Metamask
Now that you have Polygon added to your Metamask wallet, you can send your tokens to this address. Copy your Metamask wallet address and use it as the recipient address when initiating a transaction from your current wallet or exchange.
That’s it! You have successfully sent Polygon (MATIC) tokens to your Metamask wallet. You can now use these tokens for various purposes within the Polygon ecosystem.
Frequently Asked Questions:
What is Metamask?
Metamask is a browser extension and cryptocurrency wallet that allows users to securely store, send, and receive digital assets on the Ethereum network.
How do I connect Polygon to Metamask?
To connect Polygon to Metamask, you need to add the Polygon network as a custom network in your Metamask settings. You will need to enter the network details such as the network name, RPC URL, chain ID, and symbol. Once you have added the network, you can switch to the Polygon network in Metamask and start interacting with Polygon-based applications.
+ There are no comments
Add yours