


Decentralized finance, or DeFi, has become one of the most exciting and innovative areas of the blockchain industry. With the rise of DeFi, many cryptocurrency enthusiasts are looking for ways to interact with different blockchains and utilize a variety of tokens. Binance Bridge is a powerful tool that allows users to seamlessly transfer assets between different chains, such as Ethereum and Binance Smart Chain.
If you’re familiar with MetaMask, a popular Ethereum wallet, you’ll be happy to know that you can easily connect it to Binance Bridge and start transferring tokens in just a few simple steps. This step-by-step guide will walk you through the process of using Binance Bridge with MetaMask, allowing you to access a wider range of tokens and take advantage of the opportunities offered by different blockchains.
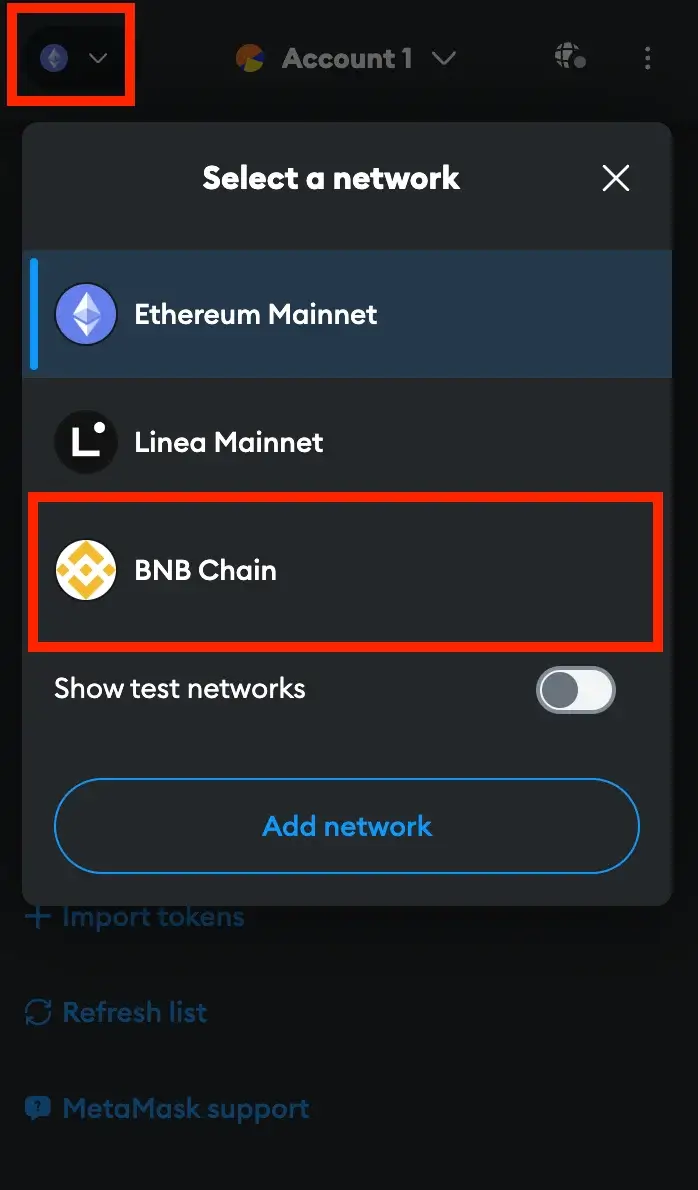
Before we dive into the specifics, it’s important to note that Binance Bridge is a decentralized application, or DApp, built on top of the Binance Smart Chain. Therefore, in order to use Binance Bridge with MetaMask, you will first need to connect your MetaMask wallet to the Binance Smart Chain network. Once your wallet is connected, you can easily transfer assets between Ethereum and Binance Smart Chain using Binance Bridge.
Now that we have the necessary background, let’s get started with the step-by-step guide on how to use Binance Bridge with MetaMask. By following these instructions, you’ll be able to unlock the full potential of DeFi and access a wider range of tokens across different blockchains.
Step 1: Install and Set Up MetaMask
To use Binance Bridge with MetaMask, you need to have MetaMask installed and properly set up on your browser. Here are the steps to install and set up MetaMask:
1. Install MetaMask Extension
First, visit the MetaMask website or go to the extension store of your browser (Chrome, Firefox, or Brave) and search for MetaMask. Click on the “Add to Chrome” button (or similar) to install the MetaMask extension.
2. Create a MetaMask Wallet
After installing MetaMask, click on the extension icon in your browser toolbar to launch MetaMask. You will be presented with options to either create a new wallet or import an existing one. Click on “Create a Wallet” to proceed.
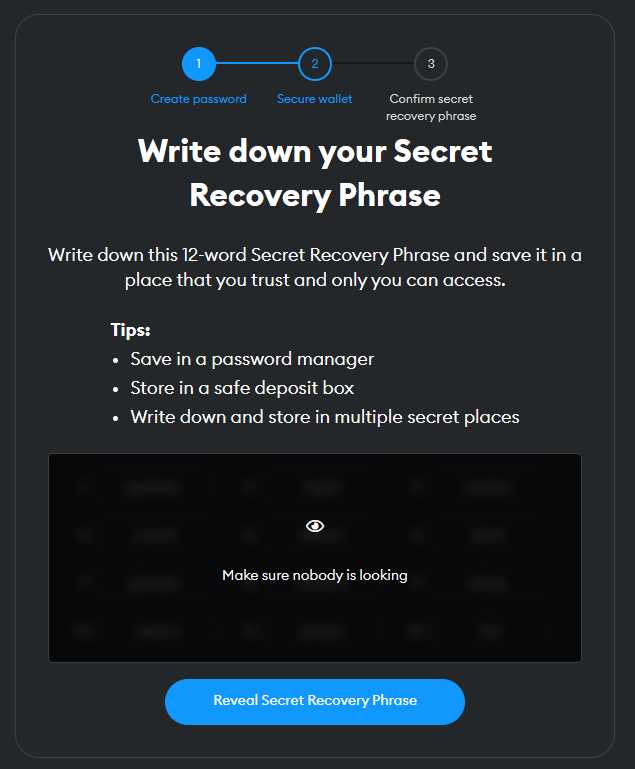
3. Set Up Your Wallet
Follow the on-screen instructions to set up your MetaMask wallet. This includes creating a strong password, accepting the terms of use, and securely storing your secret backup phrase. It’s crucial to write down and store your backup phrase in a safe place, as it can be used to recover your wallet if you ever lose access to it.
Once you have completed the setup process, you will be taken to the main MetaMask interface, where you can see your wallet address and balance. You’re now ready to connect your MetaMask wallet to Binance Bridge and start using it to swap tokens between different blockchains.
Step 2: Connect MetaMask to Binance Bridge
Once you have installed and set up MetaMask, you can connect it to Binance Bridge to start transferring tokens between Binance Smart Chain and other blockchains. Follow the steps below to connect MetaMask to Binance Bridge:
1. Open the Binance Bridge website
Visit the Binance Bridge website by typing “https://bridge.binance.org/” into your web browser’s address bar.
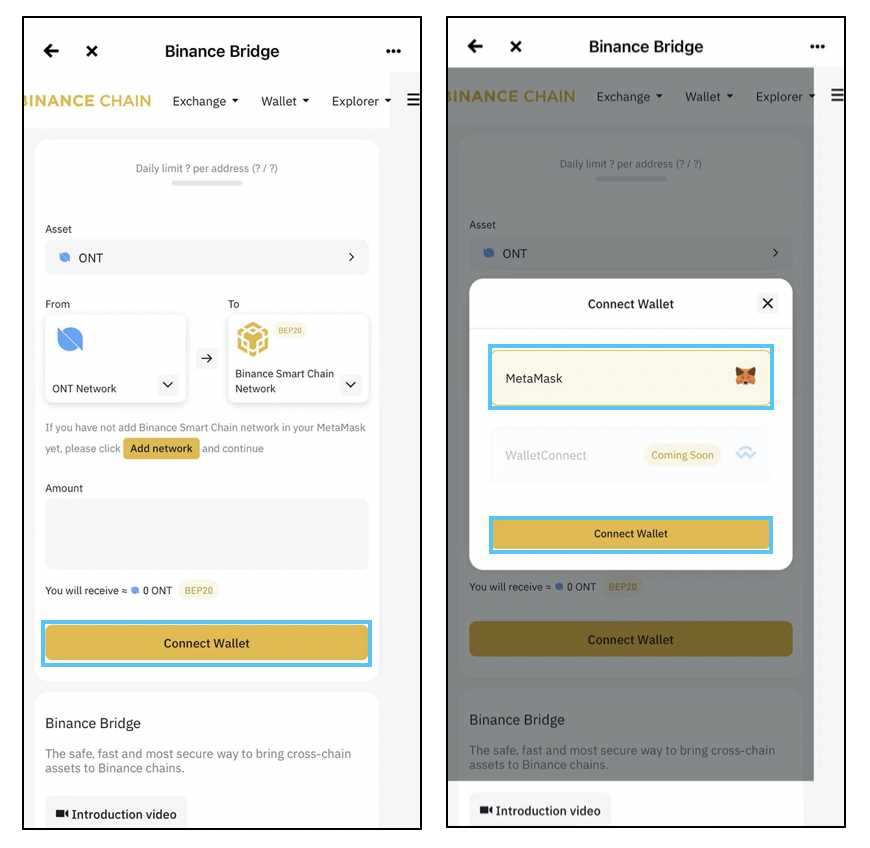
2. Click on “Connect Wallet”
On the Binance Bridge website, locate the “Connect Wallet” button and click on it.
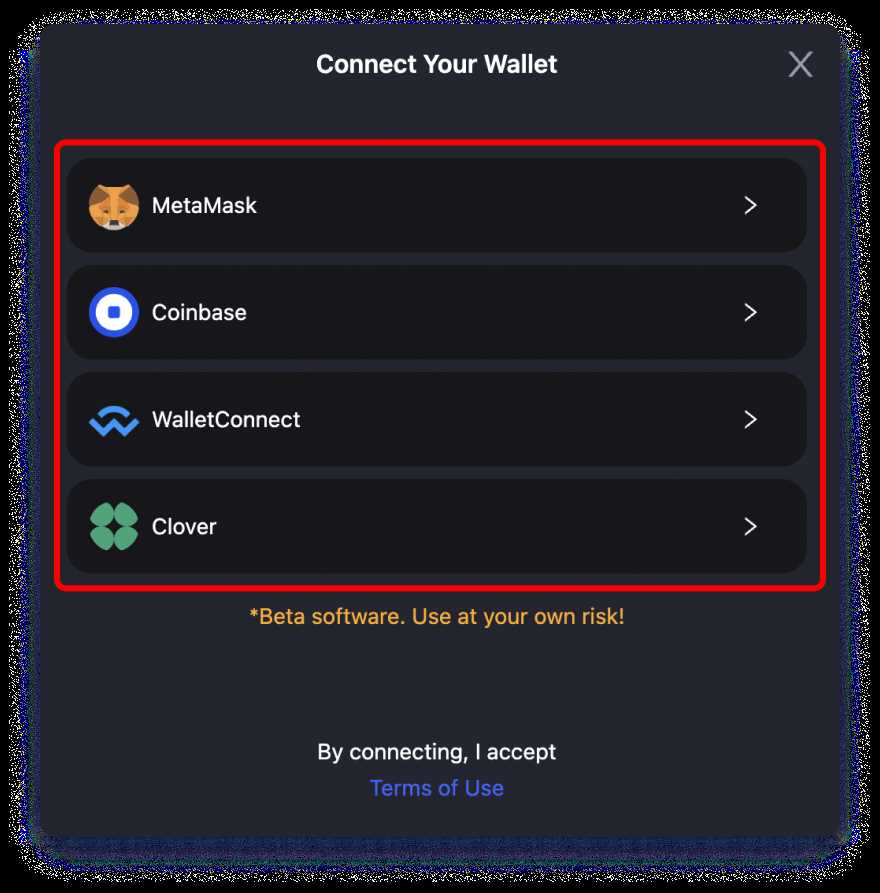
3. Select MetaMask
In the wallet selection dialog box that appears, choose “MetaMask” as your wallet.
4. Log in to MetaMask
A pop-up window will appear asking you to log in to MetaMask. Enter your MetaMask password and click “Unlock” to continue.
5. Approve bridge.binance.org
After logging in, MetaMask will prompt you to approve the connection with the Binance Bridge website. Click on “Connect” to give permission for the connection.
6. Connect successfully

If the connection is successful, MetaMask will display a confirmation message. You are now connected to Binance Bridge and ready to transfer tokens.
Step 3: Transfer Tokens with Binance Bridge
Now that you have connected your MetaMask wallet to the Binance Smart Chain network and added the Binance Bridge extension, it’s time to transfer tokens using Binance Bridge. Follow these steps to complete the transfer:
Step 3.1: Navigate to Binance Bridge
Go to the Binance Bridge website by typing “https://www.binance.org/en/bridge” in your browser’s address bar and press Enter. This will take you to the Binance Bridge interface.
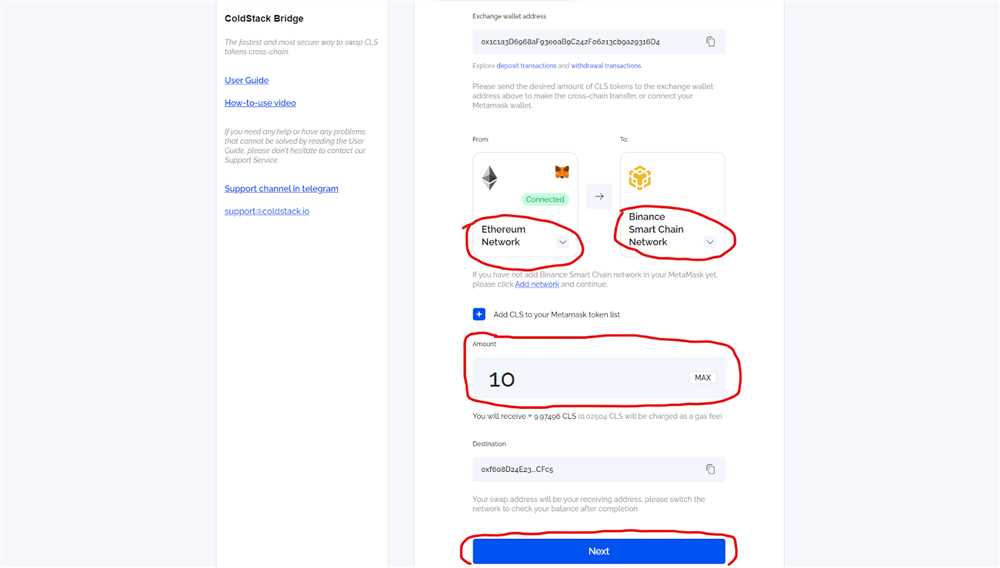
Step 3.2: Select Token to Transfer
In the Binance Bridge interface, select the token that you want to transfer from the dropdown menu. Make sure you select the correct token as the transfer cannot be reversed once completed.
Step 3.3: Enter Transfer Details
Enter the amount of tokens you want to transfer in the “Amount” field. You can choose to transfer the maximum amount available or enter a specific amount.
Next, select the destination network as “Binance Smart Chain” and enter the recipient’s address in the “Recipient” field. Make sure you enter the correct address to prevent any loss of funds.
Step 3.4: Review and Confirm Transaction
Carefully review the transfer details to ensure everything is correct. Double-check the token, amount, recipient address, and network. Once you are certain, click on the “Next” button to proceed.
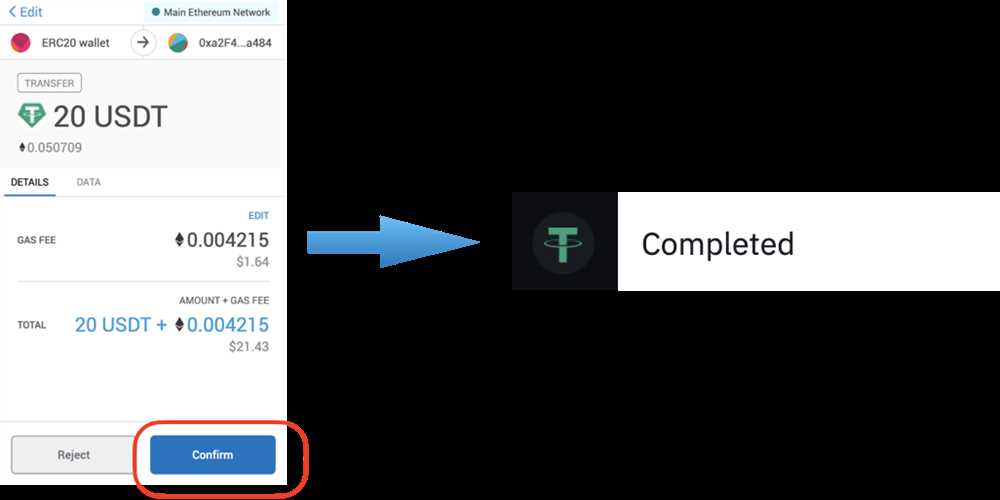
MetaMask will open a pop-up window showing the transaction details. Confirm the transaction by clicking on the “Confirm” button. You may need to pay a small transaction fee using Binance Smart Chain’s native currency, BNB.
Step 3.5: Wait for Confirmation
After confirming the transaction, you will need to wait for the transfer to be processed and confirmed on the blockchain. This may take a few minutes, so be patient.
Once the transfer is confirmed, you will see the transaction status as “Success” on the Binance Bridge interface.
Congratulations! You have successfully transferred tokens using Binance Bridge.
| Troubleshooting Tip: |
|---|
| If you encounter any issues during the transfer, make sure to check your network settings, ensure you have sufficient funds in your wallet to cover the transaction fee, and verify that the recipient address is correct. |
Frequently Asked Questions:
What is Binance Bridge?
Binance Bridge is a platform that allows users to convert cryptocurrencies between different blockchains, such as Ethereum and Binance Smart Chain.
How can I use Binance Bridge with MetaMask?
To use Binance Bridge with MetaMask, you need to connect your MetaMask wallet to the Binance Smart Chain network. Once connected, you can use Binance Bridge to transfer your Ethereum or Binance Smart Chain tokens between the two blockchains. The process involves selecting the token you want to transfer, specifying the amount, and confirming the transaction.

+ There are no comments
Add yours