


Welcome to the comprehensive tutorial on how to purchase Ethereum with MetaMask! If you’re new to the world of cryptocurrencies or simply looking to expand your digital asset portfolio, this tutorial will guide you through the process of buying Ethereum using the MetaMask wallet.
MetaMask is a widely popular and trusted cryptocurrency wallet that allows you to securely store, manage, and interact with Ethereum and other ERC-20 tokens. With its user-friendly interface, MetaMask is an excellent choice for beginners and experienced users alike.
In this tutorial, we will walk you through each step, from setting up your MetaMask wallet to making your first Ethereum purchase. Whether you’re a complete novice or a seasoned investor, you’ll find this tutorial comprehensive and easy to follow.
Please note: Before getting started, ensure you have downloaded and installed the MetaMask extension for your preferred web browser. MetaMask is currently available for Google Chrome, Mozilla Firefox, Brave, and Microsoft Edge.
So let’s dive in and master the art of purchasing Ethereum with MetaMask!
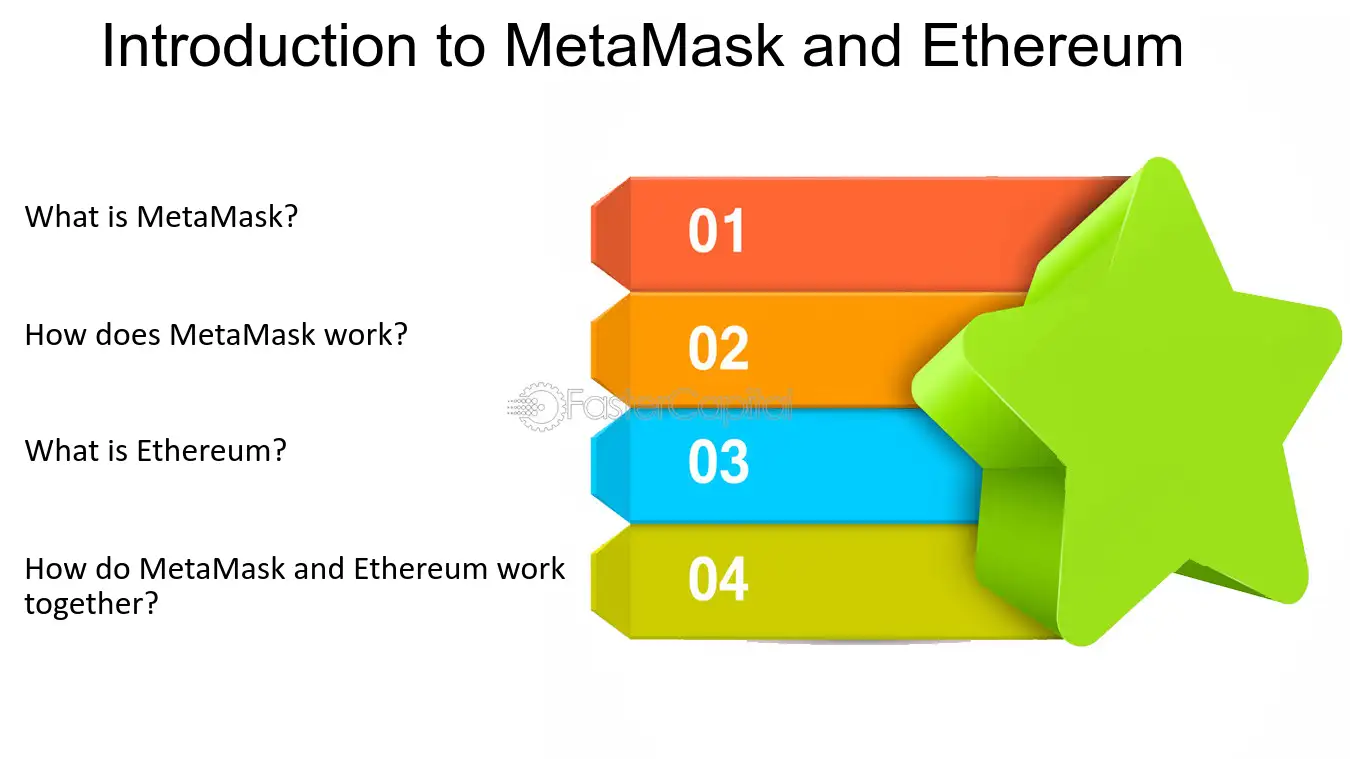
Understanding MetaMask and Ethereum
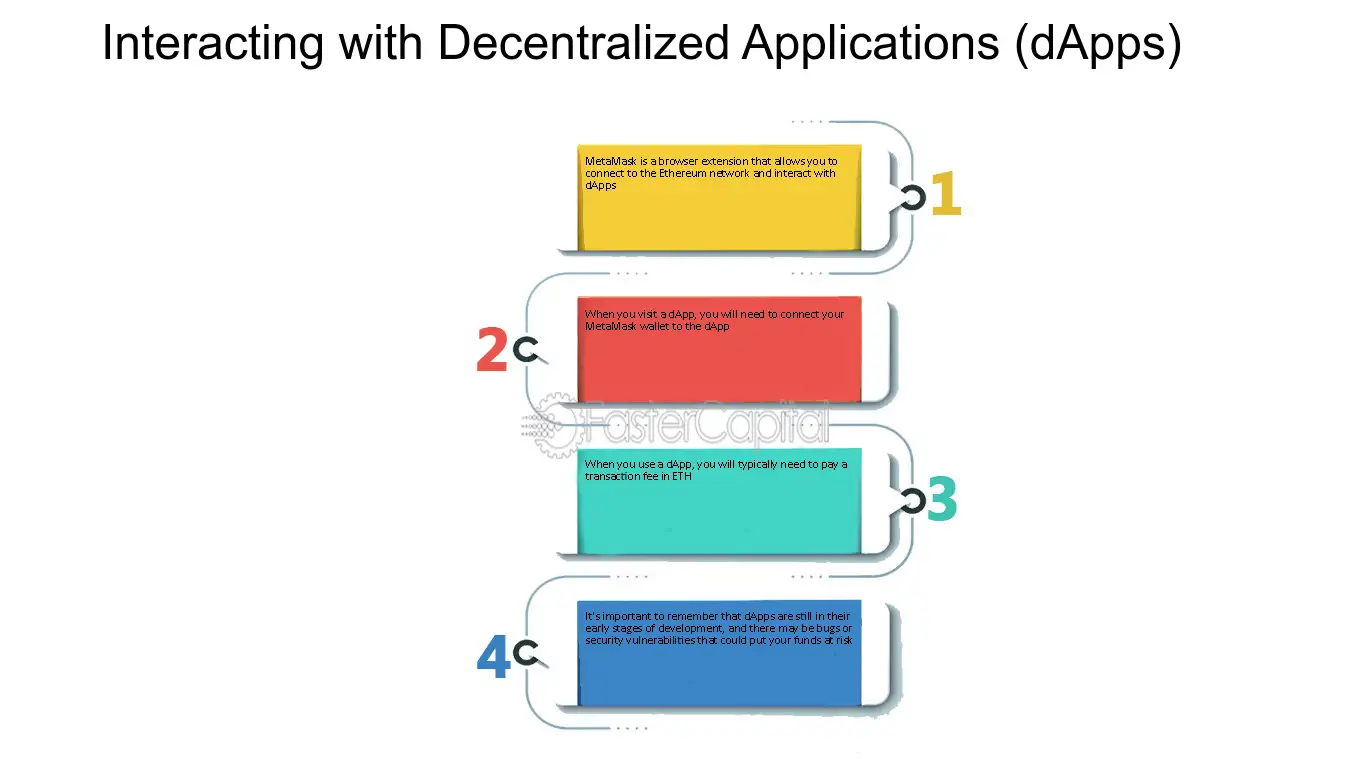
MetaMask is a browser extension that allows users to interact with the Ethereum blockchain through their web browsers. It functions as a digital wallet, allowing users to securely store, manage, and transact with their Ethereum assets.
Ethereum, on the other hand, is a decentralized blockchain platform that enables the execution of smart contracts. It is the underlying technology that powers a wide range of decentralized applications (dApps) and cryptocurrencies.
When using MetaMask, users can create accounts, manage their private keys, and sign transactions. It acts as a bridge between web applications and the Ethereum blockchain, providing a user-friendly interface to interact with the decentralized ecosystem.
Key Features of MetaMask:
1. Digital Wallet: MetaMask allows users to securely store their Ethereum and ERC-20 tokens.
2. Account Management: Users can create multiple accounts, import or export their private keys, and easily switch between different wallets.
3. Transaction Signing: MetaMask securely signs users’ transactions, ensuring that funds can only be sent with their consent.
4. Web3 Integration: MetaMask injects Web3.js into web pages, enabling developers to interact with the Ethereum blockchain and build dApps.
Ethereum and Decentralized Applications (dApps):
Ethereum is the foundation for a wide range of decentralized applications. These dApps are built on the Ethereum blockchain using smart contracts, which are self-executing contracts with the terms of the agreement directly written into the code.
dApps can be used for various purposes, including decentralized finance (DeFi), gaming, non-fungible tokens (NFTs), and more. They operate without intermediaries, providing transparency, security, and censorship resistance.
By connecting MetaMask to their browser, users can seamlessly interact with these dApps, participate in token sales, trade cryptocurrencies, and engage in decentralized finance activities.
The Role of MetaMask in Purchasing Ethereum:
MetaMask simplifies the process of purchasing Ethereum by providing an intuitive interface and seamless integration with popular decentralized exchanges (DEXs) such as Uniswap and Sushiswap. Users can connect their MetaMask wallet to these platforms, choose the desired token, and complete transactions with ease.
MetaMask also supports Ethereum wallet integrations with centralized exchanges, making it convenient to transfer funds from external platforms to MetaMask for secure storage and management.
Ensuring Security and Best Practices with MetaMask:
While MetaMask provides a user-friendly experience, it is crucial to follow security best practices to protect your digital assets:
| – Keep your MetaMask passphrase safe and do not share it with anyone. |
| – Enable two-factor authentication for an extra layer of security. |
| – Verify the authenticity of websites and dApps before interacting with them through MetaMask. |
| – Regularly check for updates and ensure you are using the latest version of MetaMask. |
By understanding MetaMask and Ethereum, users can safely participate in the decentralized ecosystem, securely storing and transacting with their Ethereum assets.
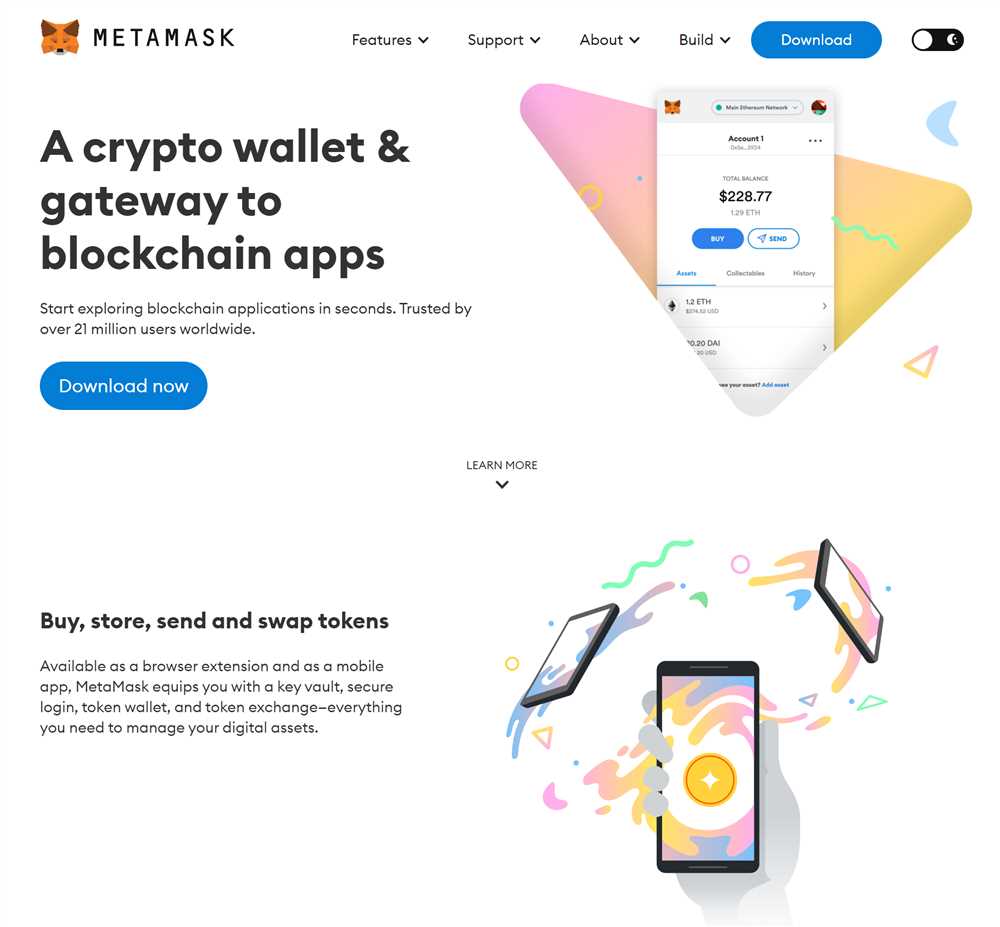
What is MetaMask?
MetaMask is a browser extension that allows users to interact with the Ethereum blockchain. It serves as a digital wallet, enabling users to store, send, and receive Ether (ETH), the native cryptocurrency of the Ethereum network. MetaMask also acts as a bridge between traditional web browsers and decentralized applications (DApps), making it easier for users to access and navigate blockchain-based applications seamlessly.
MetaMask is available for popular web browsers like Google Chrome, Firefox, and Brave. It provides users with a secure and convenient way to manage their Ethereum assets and participate in the growing ecosystem of decentralized finance (DeFi), non-fungible tokens (NFTs), and other blockchain-based applications and protocols.
One of the key features of MetaMask is its ability to generate and manage Ethereum addresses, which are necessary for receiving and sending ETH. Each address is a unique identifier that allows users to securely store and transact their digital assets on the Ethereum network.
Key Features of MetaMask:
- Secure storage and management of Ethereum addresses
- Ability to send and receive Ether (ETH)
- Integration with popular web browsers
- Support for decentralized applications (DApps)
- Compatibility with Ethereum-based tokens
Using MetaMask for Purchasing Ethereum:

MetaMask can be used to purchase Ethereum (ETH) from various cryptocurrency exchanges or platforms that support MetaMask integration. It simplifies the process of buying and managing Ethereum by providing a user-friendly interface and seamless integration with the Ethereum network.
By connecting MetaMask to a compatible exchange or platform, users can easily transfer fiat currency or other cryptocurrencies to their MetaMask wallet and then convert them into Ethereum. This enables users to take advantage of the potential benefits and opportunities offered by the Ethereum blockchain, such as investing in decentralized applications, participating in token sales, or simply holding and storing Ethereum as a digital asset.
| Advantages of Using MetaMask for Purchasing Ethereum |
|---|
| Convenient and user-friendly interface |
| Secure storage of Ethereum assets |
| Wide range of supported web browsers |
| Integration with popular cryptocurrency exchanges and platforms |
| Ability to participate in decentralized finance (DeFi) and NFT ecosystems |
What is Ethereum?
Ethereum is a decentralized blockchain platform that enables developers to build and deploy smart contracts and decentralized applications (dApps). It was proposed by Vitalik Buterin in 2013 and launched in 2015. Ethereum’s native cryptocurrency is called Ether (ETH).
Unlike Bitcoin, which is primarily a digital currency, Ethereum provides a more versatile platform. Its main feature is the ability to execute code on the blockchain, allowing for the creation of complex applications and programmable contracts.
Ethereum provides a decentralized virtual machine (EVM) that runs on a network of computers called nodes. These nodes are distributed worldwide, creating a highly resilient and censorship-resistant network.
Smart Contracts
One of the key features of Ethereum is its support for smart contracts. Smart contracts are self-executing contracts with predefined rules that are automatically enforced on the blockchain. They enable trustless interactions between parties, eliminating the need for intermediaries.
Smart contracts can be programmed to handle a wide range of applications, from financial transactions to supply chain management. They can also interact with each other, creating a complex ecosystem of interconnected smart contracts.
Decentralized Applications (dApps)
Ethereum also supports the development and deployment of decentralized applications (dApps). These are applications that run on the Ethereum blockchain and are not controlled by any single entity or point of failure.
dApps can be built to provide a wide range of services, such as decentralized finance (DeFi), gaming, social media, and more. They rely on smart contracts to handle the logic and data storage, ensuring transparency and immutability.
Ethereum has a thriving ecosystem of dApps, with popular projects like Uniswap, Aave, and CryptoKitties gaining significant traction.
In summary, Ethereum is a decentralized blockchain platform that enables the creation of smart contracts and decentralized applications. It provides a versatile and programmable platform for developers to build innovative applications and services.
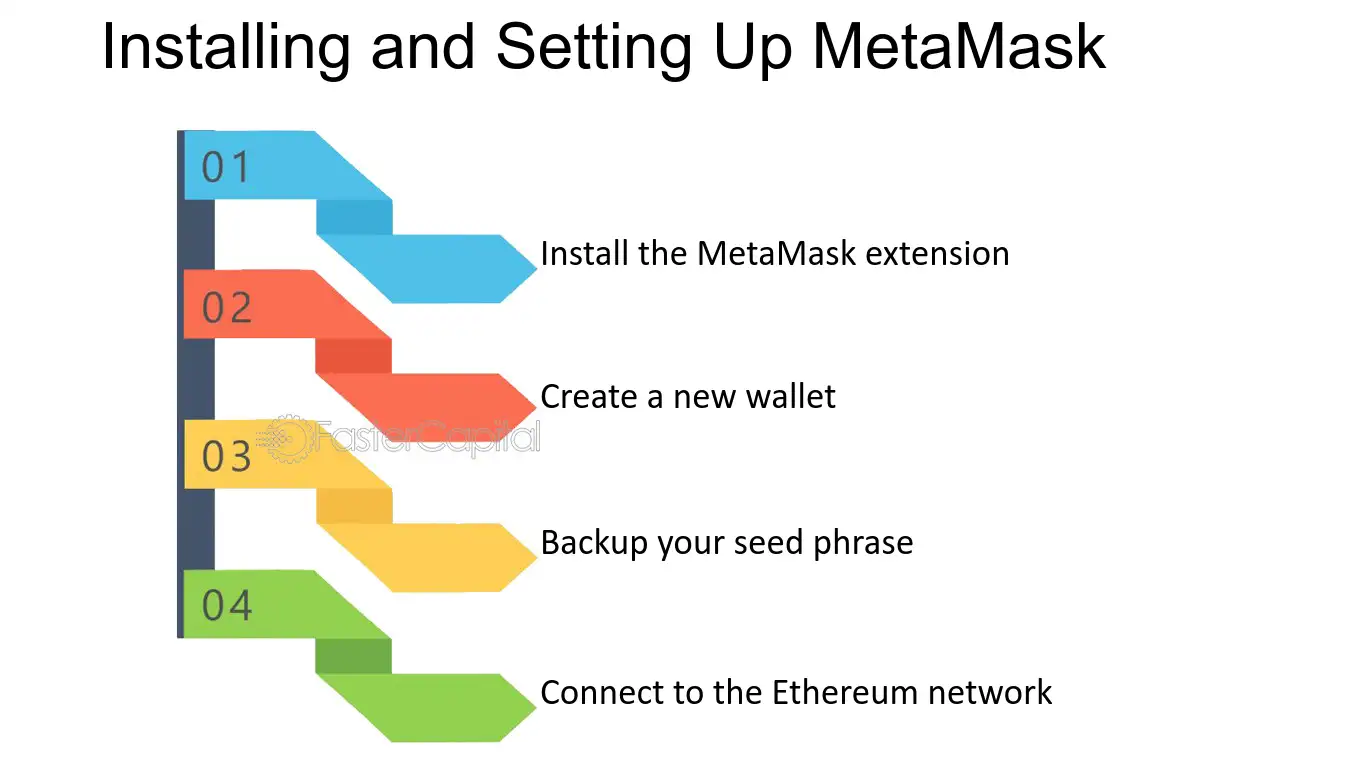
Setting Up MetaMask for Ethereum Purchases
MetaMask is a popular Ethereum wallet that allows users to store, manage, and interact with their Ethereum assets. In order to purchase Ethereum using MetaMask, you will need to first set up the wallet. Here is a step-by-step guide on how to set up MetaMask for Ethereum purchases:
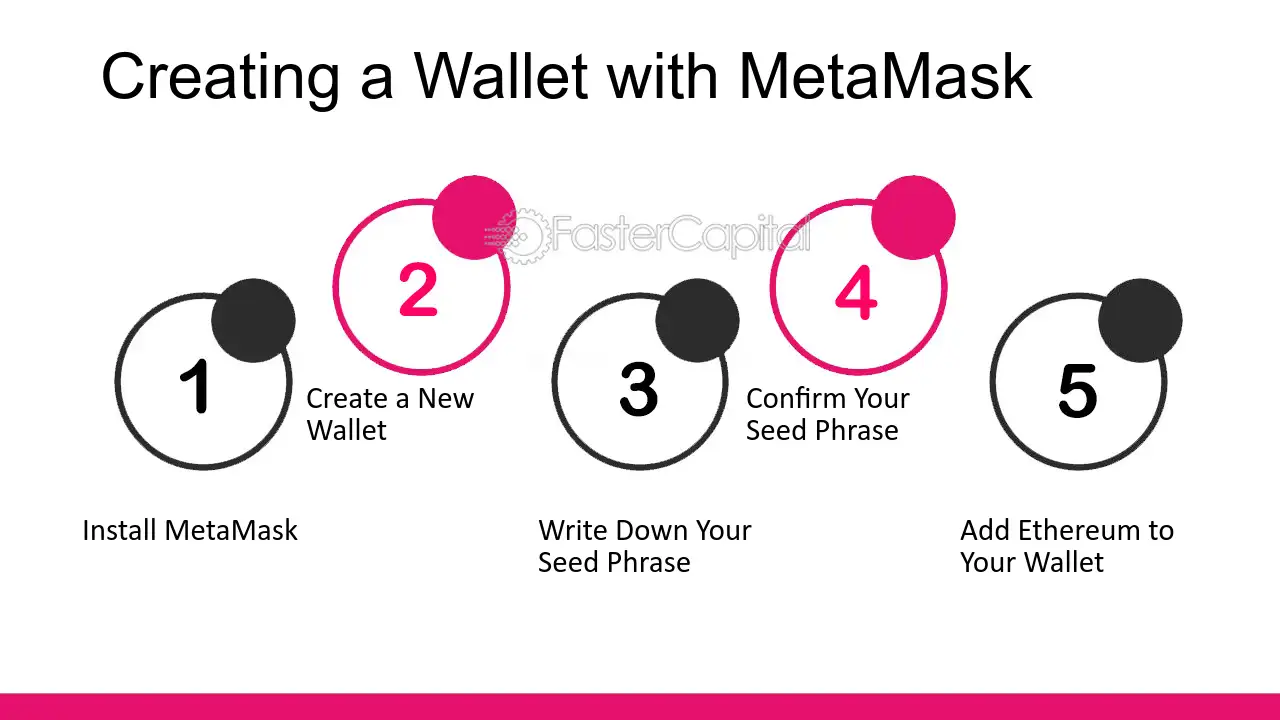
Step 1: Install the MetaMask Extension
To get started, you will need to install the MetaMask extension in your preferred web browser. MetaMask is available for Google Chrome, Firefox, and Brave browsers. Simply go to the respective browser’s extension store and search for MetaMask. Click on the “Add to Chrome” (or equivalent) button to install the extension.
Step 2: Create a New Wallet
After installing the MetaMask extension, click on the MetaMask icon that appears in your browser’s toolbar. A new tab will open with the MetaMask wallet interface. Click on the “Get Started” button to begin creating a new wallet. Follow the instructions to set up a password and generate a secret backup phrase of 12 words. It is crucial that you store this secret backup phrase in a safe and secure location, as it can be used to recover your wallet in case of loss or device failure.
Step 3: Accessing Your Wallet
Once your wallet is set up, you can access it by clicking on the MetaMask icon in your browser’s toolbar. Enter your password and click on the “Unlock” button. You will now be able to view your Ethereum address and balance in the MetaMask wallet interface.
Step 4: Connect to a Network
By default, MetaMask is set to the Ethereum mainnet. However, before making any Ethereum purchases, you may want to switch to the Ropsten test network or another Ethereum network of your choice. To do this, click on the network name displayed in the MetaMask interface and select the desired network from the dropdown menu.
Step 5: Add Funds to Your Wallet
Before purchasing Ethereum, you will need to have funds in your MetaMask wallet. To add funds, click on the “Deposit” or “Send” button in the MetaMask interface. Follow the instructions to deposit Ethereum from an external wallet or exchange into your MetaMask wallet address.
Step 6: Enjoying Purchases with MetaMask
With MetaMask set up and funded, you are now ready to start purchasing Ethereum. You can use popular cryptocurrency exchanges or decentralized finance (DeFi) platforms to buy Ethereum and send it directly to your MetaMask wallet address. Once the Ethereum is in your MetaMask wallet, you can manage it, send it, or use it for various applications and purposes in the Ethereum ecosystem.
Setting up MetaMask for Ethereum purchases is an important step to take if you plan on investing in Ethereum or utilizing Ethereum-based applications. By following the steps outlined above, you can securely set up your MetaMask wallet and begin your journey into the world of Ethereum.
Installing MetaMask
MetaMask is a browser extension that allows you to interact with the Ethereum network. To install MetaMask, follow the steps below:
- Open your web browser and go to the MetaMask website.
- Click on the “Get Chrome Extension” button if you are using Google Chrome, or the “Get Firefox Extension” button if you are using Mozilla Firefox.
- A popup will appear asking for confirmation to add the extension to your browser. Click on “Add extension” to proceed.
- Once the extension is added, you will see the MetaMask logo in your browser toolbar.
- Click on the MetaMask logo to open the extension.
- Read and accept the terms of use and privacy policy.
- Create a new MetaMask wallet by clicking on the “Create a Wallet” button.
- Choose a strong password for your wallet and click on “Create”. Make sure to store your password in a safe place.
- You will be shown your secret backup phrase. Write down this phrase and keep it in a secure location. This backup phrase can be used to restore your wallet in case you lose access to your password.
- Confirm your backup phrase by selecting the words in the correct order.
- Once your wallet is set up, you will be redirected to the main MetaMask interface.
Connecting MetaMask to the Ethereum Test Network
After installing MetaMask, you can choose to connect to the Ethereum main network or the test network. To connect to the test network:
- Click on the network dropdown in the top-right corner of the MetaMask interface.
- Select “Ropsten Test Network” to connect to the Ethereum test network.
- You are now ready to start using MetaMask to interact with Ethereum!
Creating a MetaMask Wallet

In order to purchase Ethereum and interact with decentralized applications (dApps) on the Ethereum network, you will need to create a MetaMask wallet. MetaMask is a browser extension that acts as a bridge between your web browser and the Ethereum network, allowing you to securely store and manage your Ethereum and other ERC-20 tokens.
Step 1: Install the MetaMask Extension
The first step is to install the MetaMask browser extension. You can find the extension for various web browsers such as Chrome, Firefox, and Brave by visiting the official MetaMask website or their respective extension stores. Simply follow the instructions provided to add the extension to your browser.
Step 2: Set Up Your Wallet
Once you have installed the MetaMask extension, you will be prompted to set up your wallet. Click on the MetaMask icon in your browser toolbar and then click “Get Started” on the pop-up window.
Next, you will be asked to create a new wallet or import an existing one. If you are new to MetaMask, select “Create a Wallet.” Choose a strong password for your wallet and click “Create.”
You will then be presented with a unique 12-word mnemonic phrase. This phrase is used to backup and restore your wallet, so it is important to write it down and keep it in a safe place. Click “Next” after you have securely noted down the mnemonic phrase.
The next step will ask you to confirm the mnemonic phrase by selecting the correct words in the correct order. This is a security measure to ensure that you have properly noted down the mnemonic phrase. Once you have confirmed the phrase, click “Confirm.”
Finally, you will need to set up a password for accessing your MetaMask wallet. Enter a password and click “Submit” to complete the wallet setup process.
Step 3: Fund Your Wallet
Now that your MetaMask wallet is set up, you can proceed to fund it with Ethereum. To do this, you can either purchase Ethereum from a cryptocurrency exchange and send it to your wallet address, or receive Ethereum from another wallet or exchange by providing them with your wallet address.
To find your wallet address, click on the MetaMask icon in your browser toolbar and then click on your wallet’s name. From the dropdown menu, select “Account Details.” Your wallet address will be displayed under the “Account 1” section.
Copy your wallet address and use it to receive Ethereum from the desired source. Once the Ethereum is successfully sent to your MetaMask wallet, it will be reflected in your account balance.
That’s it! You have successfully created a MetaMask wallet and funded it with Ethereum. You are now ready to start purchasing Ethereum and participating in the exciting world of decentralized finance (DeFi).
Frequently Asked Questions:
What is MetaMask and why is it important for purchasing Ethereum?
MetaMask is a digital wallet that allows users to interact with the Ethereum blockchain. It is important for purchasing Ethereum because it provides users with a secure and user-friendly platform to store, manage, and transact with their Ethereum.
Can I use MetaMask on any web browser?
Yes, MetaMask can be used on most popular web browsers including Chrome, Firefox, and Brave. It also has a mobile version available for both iOS and Android.

+ There are no comments
Add yours