


Welcome to our Metamask tutorial, where we will guide you through the process of setting up and using this popular Ethereum wallet. Metamask is a browser extension that allows you to interact with the Ethereum blockchain and manage your digital assets, making it an essential tool for any Ethereum user.
Setting up Metamask is quick and easy. First, you need to install the Metamask extension in your favorite web browser. It is available for Google Chrome, Firefox, and Brave. Once installed, you will see the Metamask icon in your browser’s toolbar. Click on the icon to get started.
When you open Metamask for the first time, you will be guided through a simple setup process. You will be asked to create a new wallet or import an existing one. We recommend creating a new wallet as it ensures your private keys are generated securely. Follow the prompts to create a strong password and save your secret backup phrase. Remember, this phrase is essential for recovering access to your wallet, so keep it safe and don’t share it with anyone!
After setting up your wallet, you can now start using Metamask to interact with the Ethereum blockchain. Metamask provides a user-friendly interface for managing your Ethereum accounts, viewing your balances, and sending and receiving Ether and ERC-20 tokens. You can also connect Metamask to various decentralized applications (dApps) and interact with smart contracts.
Metamask is packed with features that make it a powerful tool for Ethereum users. You can customize your gas fees, manage multiple accounts, and even explore decentralized finance (DeFi) platforms directly from within the wallet. With its strong security measures and easy-to-use interface, Metamask is a must-have for anyone looking to navigate the Ethereum ecosystem and participate in the decentralized web.
In conclusion, Metamask is an essential tool for Ethereum users, providing a secure and user-friendly way to interact with the Ethereum blockchain. By following this tutorial, you will be able to set up and start using Metamask in no time. So, let’s get started on this exciting journey into the world of Ethereum!
Metamask Tutorial
Welcome to this Metamask tutorial! In this tutorial, we will learn how to set up and use the popular Ethereum wallet, Metamask.
Metamask is a browser extension that allows you to interact with the Ethereum blockchain, enabling you to send, receive, and store ETH and other ERC-20 tokens. It acts as a bridge between your browser and the Ethereum network, allowing you to easily interact with decentralized applications (DApps) directly from your browser.
Installation
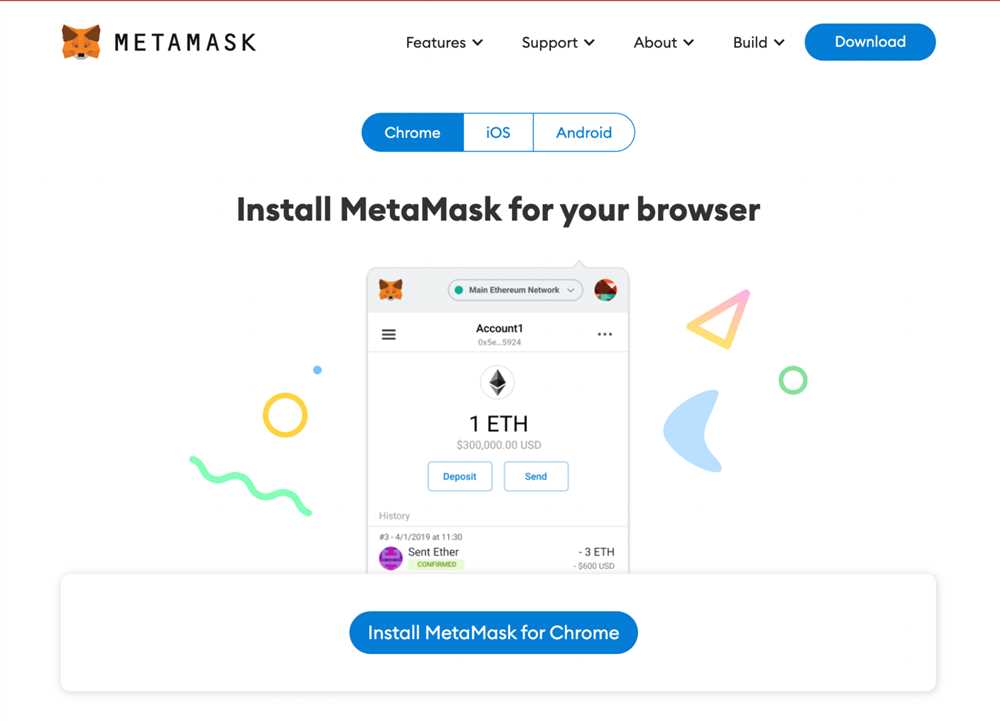
To get started, you need to first install Metamask. Metamask is available as a browser extension for Chrome, Firefox, and Brave browsers. Simply go to the extension store for your respective browser and search for “Metamask”. Click on the install button and follow the prompts to complete the installation process.
Creating a Wallet
After you have installed Metamask, click on the extension icon in your browser toolbar. This will open the Metamask popup, where you can either import an existing wallet or create a new one. Since we are starting from scratch, click on the “Create a Wallet” button to proceed.
Metamask will then generate a unique seed phrase consisting of 12 words. It is important to write down this seed phrase and keep it in a safe place, as it is the only way to recover your wallet if you ever lose access to it. Once you have written down the seed phrase, click on the “Next” button.
In the next step, you will be asked to confirm your seed phrase by selecting the words in the correct order. This is a security feature to ensure that you have properly backed up your seed phrase. Once you have confirmed your seed phrase, click on the “Confirm” button.
Lastly, you will need to set a password for your Metamask wallet. This password will be required whenever you want to access your wallet or make transactions. Choose a strong password and make sure to remember it, as there is no way to recover it if you forget. Click on the “Create” button to finish creating your wallet.
Connecting to the Ethereum Network
Now that you have created your wallet, you need to connect Metamask to the Ethereum network. By default, Metamask is set to use the Ethereum mainnet, but you can also connect to other networks like testnets or custom networks.
To connect to the Ethereum mainnet, click on the network dropdown menu in the Metamask popup and select “Main Ethereum Network”. Metamask will then connect to the mainnet and display your account balance and transaction history.
Using Metamask with DApps
Metamask is particularly useful for interacting with decentralized applications (DApps) that are built on the Ethereum network. Many DApps require you to have a Metamask wallet in order to interact with them.
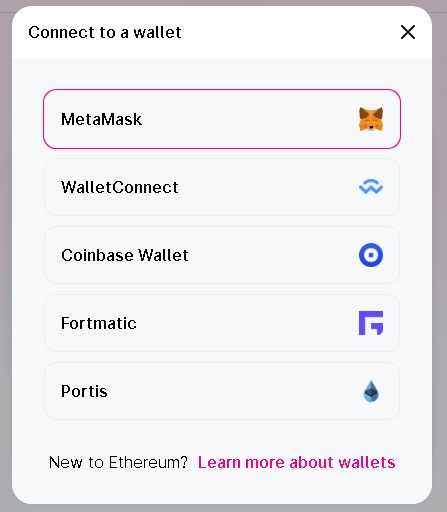
To use Metamask with a DApp, simply navigate to the DApp’s website in your browser. If the DApp requires access to your Metamask wallet, you will be prompted to connect your wallet to the DApp. Click on the “Connect” button to grant the necessary permissions.
Once your wallet is connected to the DApp, you can then perform various actions like sending and receiving tokens, interacting with smart contracts, and participating in decentralized finance (DeFi) protocols.
That’s it for this Metamask tutorial! You should now have a good understanding of how to set up and use Metamask, as well as how to connect it to the Ethereum network and use it with DApps. Happy Ethereum-ing!
Learn How to Set Up Metamask and Use the Popular Ethereum Wallet

Metamask is a popular Ethereum wallet that allows users to securely store and manage their Ethereum and ERC-20 tokens. If you’re new to Metamask, this tutorial will guide you through the process of setting up the wallet and using its key features.
Step 1: Install Metamask
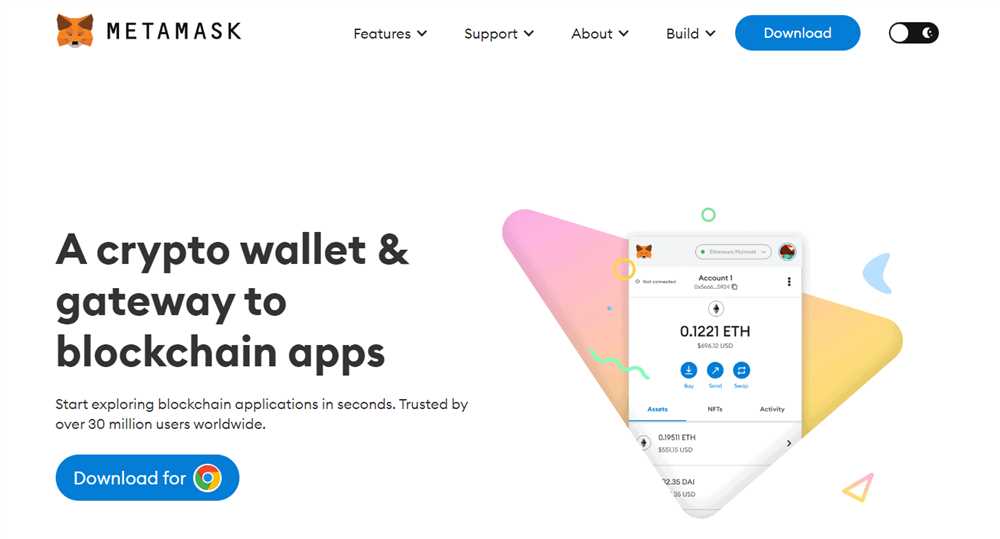
To get started, go to the Metamask website and download the wallet extension for your preferred web browser. Once the extension is installed, you’ll see the Metamask icon in your browser toolbar.
Step 2: Create a Wallet
Click on the Metamask icon and select the “Create a Wallet” option. Set a strong password for your wallet and make sure to remember it. Metamask will generate a secret backup phrase for you. Write down this phrase and keep it in a safe place. This phrase is crucial for recovering your wallet if you ever lose access to it.
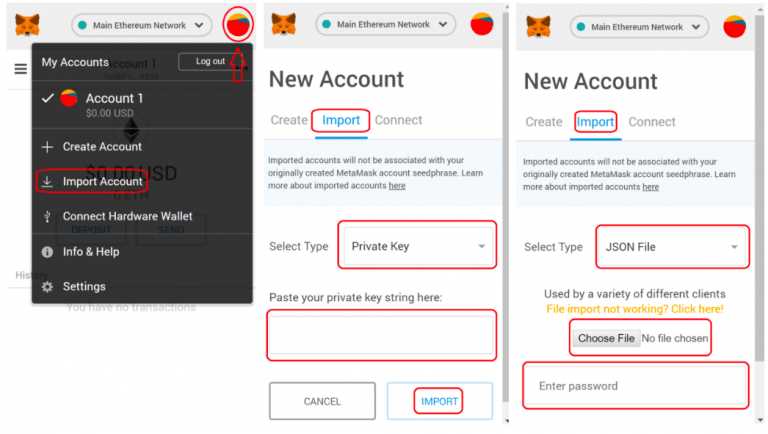
Step 3: Import or Connect a Wallet
If you already have an existing Ethereum wallet, you can import it into Metamask. Click on the Metamask icon, select the “Import Wallet” option, and follow the instructions to import your wallet using your private key or JSON file.
If you prefer, you can also connect an existing hardware wallet, such as a Ledger or Trezor, to Metamask. Simply click on the Metamask icon, select the “Connect Hardware Wallet” option, and follow the on-screen instructions to connect your device.
Step 4: Fund Your Wallet
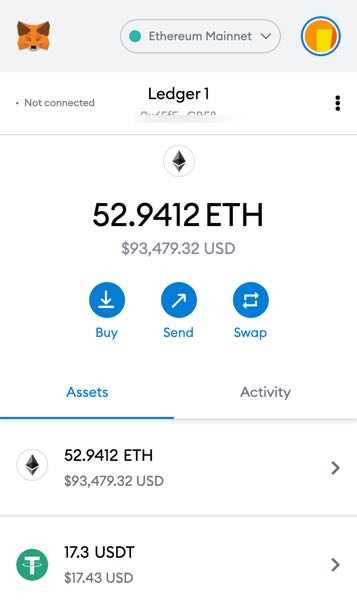
Before you can start using your Metamask wallet, you’ll need to fund it with some Ethereum. Go to an exchange or another Ethereum wallet and send some ETH to your Metamask wallet address. Once the transaction is confirmed, you’ll see the ETH balance in your Metamask wallet.
Step 5: Explore Metamask Features
Now that your wallet is set up and funded, you can start exploring the various features of Metamask. You can use Metamask to send and receive Ethereum and ERC-20 tokens, interact with decentralized applications (dApps), and participate in Ethereum-based crowdfunding campaigns (ICO or Initial Coin Offering).
Metamask also allows you to manage multiple Ethereum accounts, view your transaction history, and set custom gas fees for your transactions. Take some time to familiarize yourself with these features and customize your Metamask settings according to your preferences.
That’s it! You’ve successfully set up Metamask and can now use it as your Ethereum wallet. Remember to always keep your wallet’s backup phrase and password secure to protect your funds. Happy exploring!
What is Metamask?
Metamask is a popular Ethereum wallet that allows users to manage their Ethereum accounts, securely store their digital assets, and interact with decentralized applications (DApps) directly from their web browser. It functions as a bridge between the user’s web browser and the Ethereum blockchain, enabling seamless integration between the two.
Metamask provides users with a convenient and user-friendly interface to interact with the Ethereum network. It allows users to create and manage multiple Ethereum accounts, import existing accounts, and securely store and manage private keys. Users can easily send and receive ETH and other ERC-20 tokens, track their transaction history, and view their account balances.
One of the key features of Metamask is its ability to interact with decentralized applications (DApps). Many DApps require users to have a web3-enabled wallet like Metamask to authenticate and complete transactions. With Metamask, users can seamlessly connect their Ethereum accounts to DApps and access a wide range of decentralized services, such as decentralized finance (DeFi) platforms, decentralized exchanges (DEXs), and more.
Another important aspect of Metamask is its strong emphasis on security and privacy. Metamask operates as a non-custodial wallet, which means that users have full control over their private keys and funds. The wallet encrypts and stores private keys locally on the user’s device, ensuring that only the user has access to their funds. Additionally, Metamask supports hardware wallet integration, providing an extra layer of security for users.
In summary, Metamask is a powerful Ethereum wallet that offers a user-friendly interface, seamless integration with DApps, and robust security features. It provides users with the necessary tools to securely manage their Ethereum accounts, interact with decentralized applications, and stay in control of their digital assets.
How to Set Up and Use Metamask
If you’re new to the world of cryptocurrencies and Ethereum in particular, setting up and using Metamask can seem overwhelming. However, with the right guidance, you’ll be able to navigate this popular Ethereum wallet with ease.
1. Installation
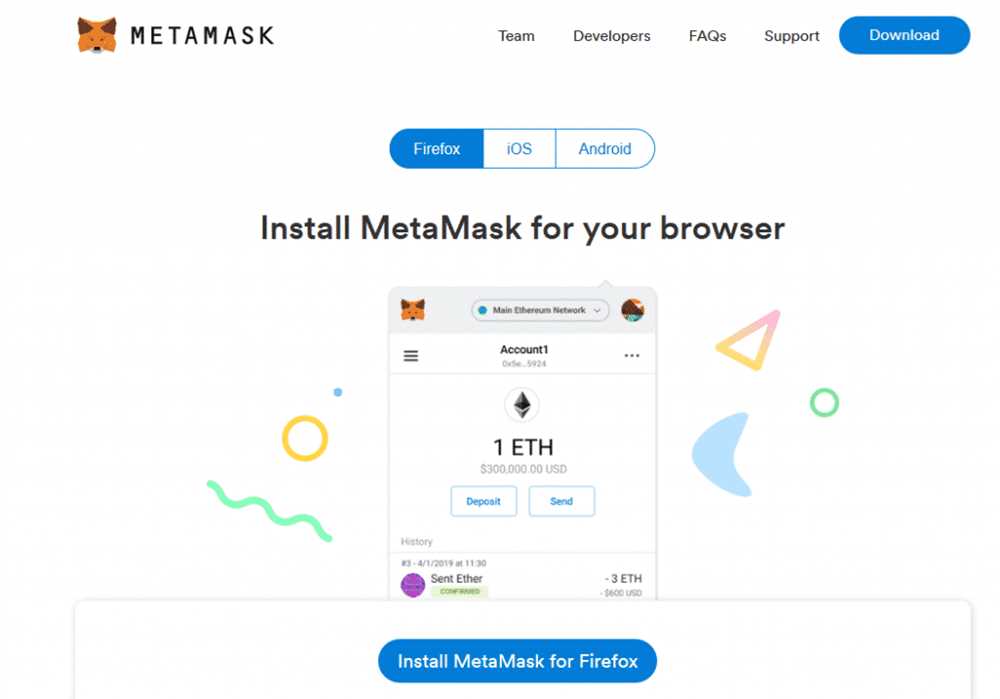
The first step to using Metamask is installing it as a browser extension. Metamask is compatible with popular browsers like Chrome, Firefox, Brave, and Edge. Simply visit the extension store for your chosen browser and search for “Metamask”. Click the “Install” button and follow the prompts to complete the installation.
2. Creating and Importing an Account
Once you have Metamask installed, open the extension and click on “Create a Wallet” to generate a new Ethereum account. Follow the instructions to set a strong password and create a backup phrase that you must save in a safe place.
If you already have an Ethereum account or want to import an existing one, click on “Import Wallet” and enter your private key or recovery phrase.
3. Connecting to Ethereum Networks
Metamask allows you to connect to different Ethereum networks such as the mainnet, testnets, and custom networks. To switch between networks, click on the network name at the top of the extension and select the desired network from the dropdown menu.
4. Managing Assets
With Metamask, you can manage Ethereum and other ERC-20 tokens. To add a token, click on “Assets” and then “Add Token”. Enter the token contract address or search for it using the provided interface. Once added, you’ll be able to view, send, and receive the token from your Metamask wallet.
5. Making Transactions
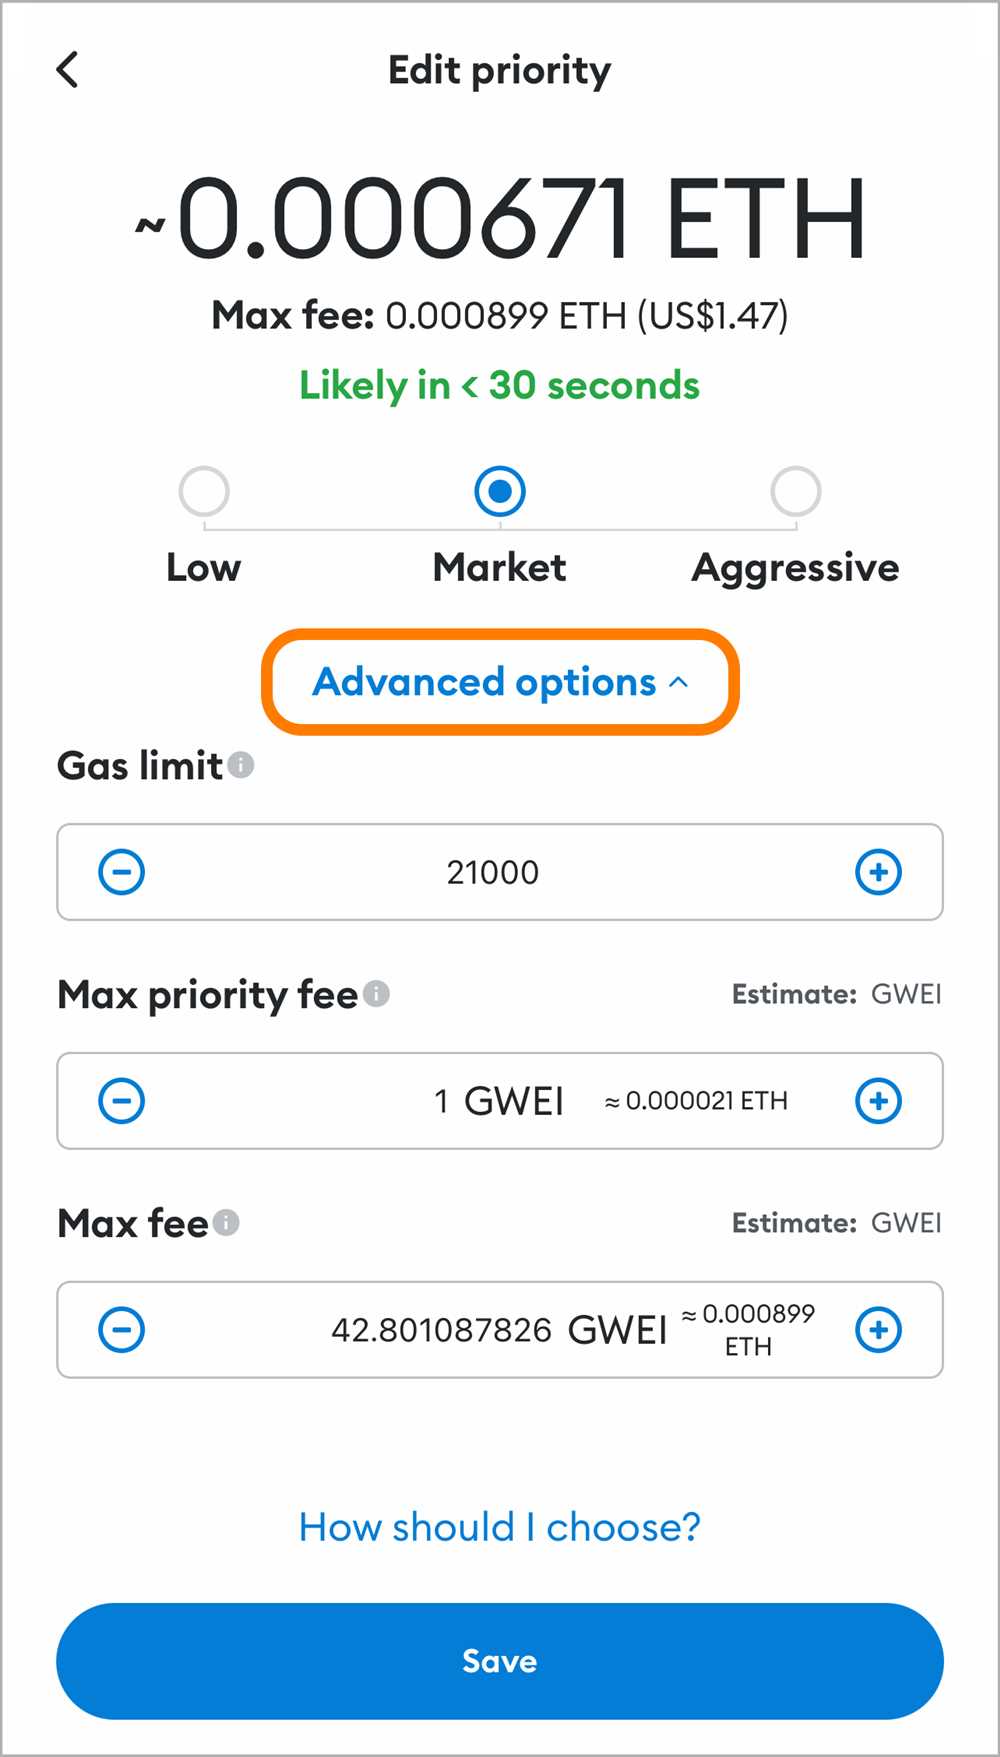
To send Ethereum or tokens from your Metamask wallet, click on the “Send” button. Enter the recipient’s address, the amount you want to send, and adjust the gas fee if necessary. Review the details and click “Confirm” to initiate the transaction.
For more advanced features and settings, explore the Metamask extension and visit the official Metamask documentation for detailed instructions on using its various functions.
By following these steps, you’ll be able to set up and use Metamask confidently, opening up a world of possibilities in the Ethereum ecosystem.
Step-by-step guide on installing and using Metamask for Ethereum transactions
Metamask is a popular Ethereum wallet that allows users to manage their Ethereum accounts and interact with Ethereum decentralized applications (dApps) directly from their browsers. In this guide, we will walk you through the process of installing and using Metamask for Ethereum transactions.
Installing Metamask
To get started with Metamask, follow these steps:
| 1. | Open your preferred web browser and go to the official Metamask website. |
| 2. | Click on the “Get Chrome Extension” button if you are using Google Chrome, or the “Get Firefox Add-on” button if you are using Mozilla Firefox. |
| 3. | Follow the on-screen instructions to add the Metamask extension to your browser. |
| 4. | Once the extension is installed, you will see the Metamask fox icon in your browser toolbar. |
| 5. | Click on the Metamask fox icon to open the Metamask wallet. |
Creating a Metamask Account
To create a new Metamask account, follow these steps:
| 1. | In the Metamask wallet, click on the “Create a Wallet” button. |
| 2. | Read and accept the terms of use. |
| 3. | Create a strong password for your Metamask account. |
| 4. | Click on the “Create” button to generate a new Ethereum account. |
| 5. | Make sure to back up your seed phrase and store it in a safe place. This seed phrase is the only way to recover your account if you lose access to your device. |
Connecting Metamask to Ethereum Mainnet
To connect Metamask to the Ethereum Mainnet, follow these steps:
| 1. | In the Metamask wallet, click on the network selector at the top of the window. |
| 2. | Select the “Ethereum Mainnet” option from the dropdown menu. |
Adding Ethereum to your Metamask Account
To add Ethereum to your Metamask account, follow these steps:
| 1. | In the Metamask wallet, click on the account icon. |
| 2. | Copy your Ethereum address. |
| 3. | Send Ethereum to your address from your exchange or another wallet. |
| 4. | Wait for the transaction to be confirmed on the Ethereum blockchain. |
Using Metamask for Ethereum Transactions
To use Metamask for Ethereum transactions, follow these steps:
| 1. | In the Metamask wallet, click on the “Send” button. |
| 2. | Enter the recipient’s Ethereum address. |
| 3. | Enter the amount of Ethereum you want to send. |
| 4. | Adjust the gas fees according to your preferences. |
| 5. | Click on the “Next” button. |
| 6. | Review the transaction details and click on the “Confirm” button to send the Ethereum. |
That’s it! You have now installed and set up Metamask, created a Metamask account, connected to the Ethereum Mainnet, added Ethereum to your account, and performed Ethereum transactions using Metamask. Enjoy using Metamask for your Ethereum needs!
Frequently Asked Questions:
What is Metamask?
Metamask is a popular Ethereum wallet and browser extension that allows users to interact with decentralized applications (dApps) and securely manage their Ethereum assets.
How can I set up Metamask?
To set up Metamask, you first need to install the Metamask browser extension. Once installed, click on the Metamask icon in your browser’s toolbar and follow the prompts to create a new wallet. Make sure to write down and securely store your seed phrase, as it is the only way to recover your wallet.
Can I use Metamask on mobile devices?
Yes, Metamask is available as a mobile app for both iOS and Android. You can download it from the App Store or Google Play Store and set it up using the same steps as the desktop version.
What are the benefits of using Metamask?
Using Metamask has several benefits. It provides a user-friendly interface for interacting with dApps, allows for easy management of Ethereum assets, and offers enhanced security features such as password protection and encryption. Additionally, Metamask integrates seamlessly with popular decentralized exchanges and other Ethereum-based services.
Is Metamask free to use?
Yes, Metamask is free to use. However, keep in mind that there may be transaction fees associated with using the Ethereum network, such as gas fees for executing smart contracts or transferring ETH. These fees are not imposed by Metamask, but are necessary for the operation of the Ethereum network.
+ There are no comments
Add yours