


If you’re looking to explore the world of decentralized finance (DeFi) or participate in the booming ecosystem of the Avalanche network, setting up and using Metamask is a crucial step. Metamask is a popular web extension wallet that allows users to interact with decentralized applications (dApps) and manage their digital assets securely.
Setting up Avalanche network on Metamask is relatively easy and requires just a few simple steps. First, ensure that you have Metamask installed in your web browser. If you don’t already have it, you can download it from the official website and set it up in a matter of minutes.
Once you have Metamask installed, open the extension and create a new wallet or import an existing one. Make sure to securely back up your wallet’s seed phrase as it is the only way to recover your account in case of loss or device change. With your wallet set up, you can now connect it to the Avalanche network.
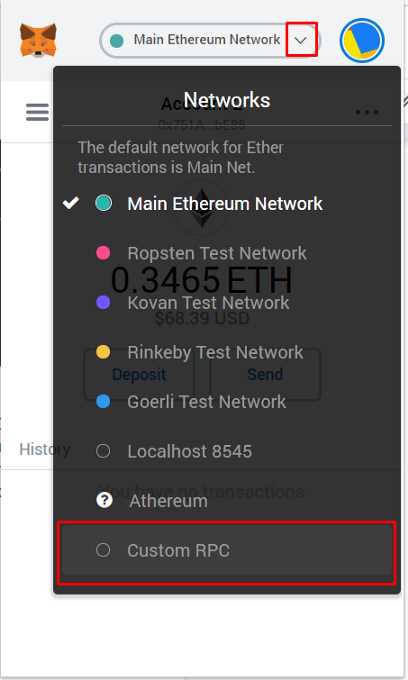
To connect Metamask to the Avalanche network, click on the network dropdown menu located at the top of the extension interface. Select “Custom RPC” and a new form will appear. Fill in the following network details:
- Network Name: Avalanche
- New RPC URL: https://api.avax.network/ext/bc/C/rpc
- ChainID: 43114
- Symbol: AVAX
- Block Explorer URL: https://cchain.explorer.avax.network/
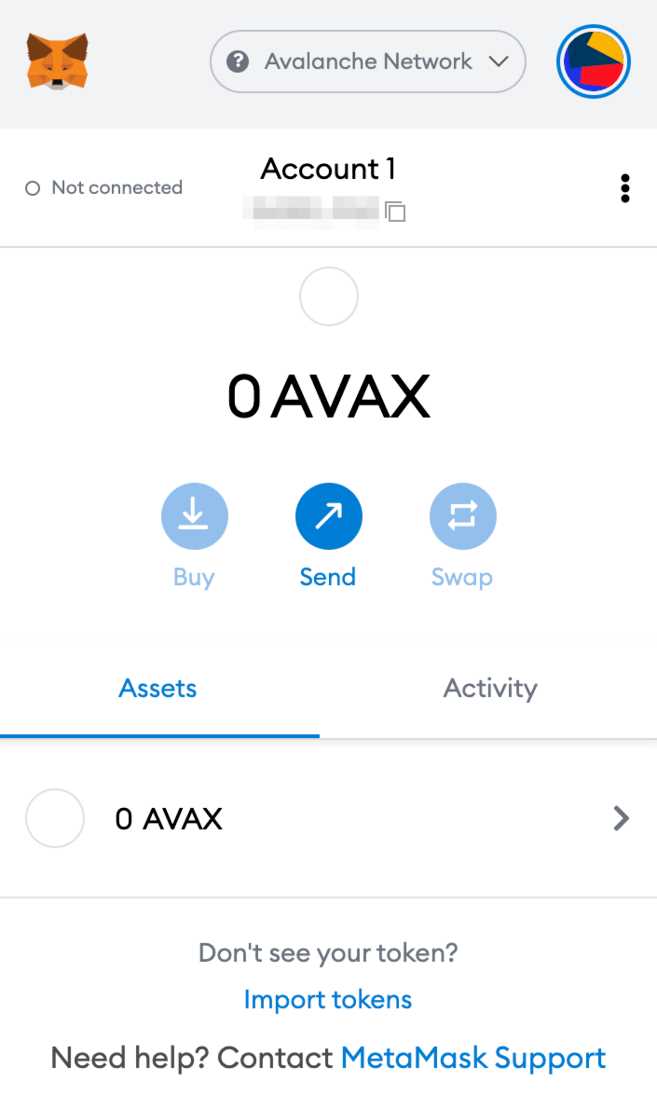
Click “Save” to add the Avalanche network to your Metamask. You should now see the Avalanche network listed in the network dropdown menu. Select it, and you’re ready to start interacting with dApps and managing your assets on the Avalanche network.
Using Avalanche network with Metamask opens up a world of opportunities in the DeFi space. You can participate in liquidity pools, yield farming, or invest in various decentralized applications. Make sure to always exercise caution, do thorough research, and only invest what you can afford to lose.
Overall, setting up and using Avalanche network with Metamask is a relatively straightforward process that can greatly enhance your DeFi experience. Follow these steps, and you’ll be well on your way to exploring the exciting world of Avalanche and decentralized finance.
Step-by-Step Guide: Setting Up and Using Avalanche Network with Metamask
Metamask is a popular web3 wallet that allows users to interact with decentralized applications (dApps) on the Ethereum network. However, with the growing popularity of Avalanche, it is now possible to set up and use the Avalanche network with Metamask. This step-by-step guide will walk you through the process of configuring Metamask to work with Avalanche.
Step 1: Install Metamask

If you haven’t done so already, you will need to install the Metamask browser extension. Metamask is available for Google Chrome, Firefox, and Brave browsers. Simply search for “Metamask” in your preferred browser’s extension store and follow the installation instructions.
Step 2: Create or Import a Wallet
Once Metamask is installed, you will need to create a new wallet or import an existing one. If you are creating a new wallet, Metamask will prompt you to set a password and provide you with a secret backup phrase. It is crucial to save this backup phrase in a secure place, as it is the only way to recover your wallet if you lose access to your device.
If you already have a Metamask wallet, you can import it by clicking on the “Import Wallet” button and entering your secret backup phrase.
Step 3: Switch to the Avalanche Network
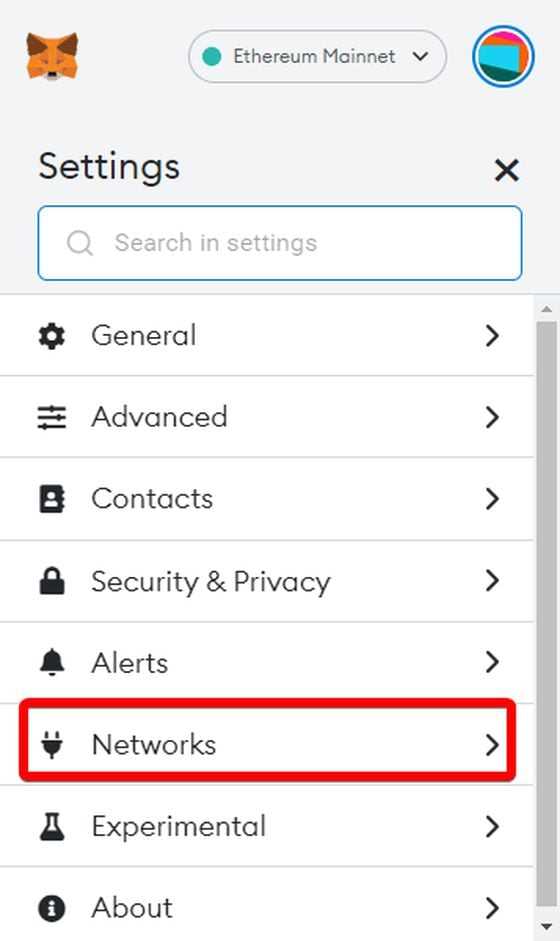
By default, Metamask is set to the Ethereum Mainnet. To switch to the Avalanche network, click on the network selection dropdown at the top of the Metamask interface. From the dropdown menu, select “Custom RPC” to manually configure a network.
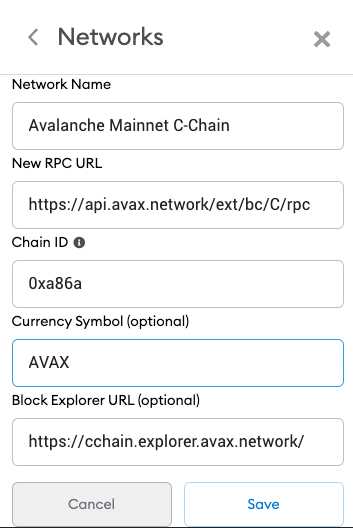
In the “New Network” configuration screen, enter the following details:
- Network Name: Avalanche
- New RPC URL: https://api.avax.network/ext/bc/C/rpc
- Chain ID: 43114
- Symbol: AVAX
After filling in these details, click on the “Save” button to add the Avalanche network to Metamask.
Step 4: Test the Avalanche Network
To ensure that you have successfully configured Metamask to work with the Avalanche network, you can try accessing a dApp on Avalanche. Visit a dApp that runs on Avalanche and click on any available options or features. If Metamask prompts you to confirm transactions or sign messages, it means that you are connected to the Avalanche network and ready to use it with Metamask.
Congratulations! You have now successfully set up and configured Metamask to work with the Avalanche network. You can now enjoy seamless interactions with Avalanche-based dApps using the familiar Metamask interface.
Installing Metamask and Creating an Account
Installing Metamask is the first step towards setting up and using the Avalanche network. Follow these simple steps to install Metamask and create a new account:
- Go to the official Metamask website at https://metamask.io.
- Click on the “Download” button to download the Metamask extension for your browser.
- Once the download is complete, a new tab will open in your browser.
- Click on the “Install” button to install Metamask.
- After the installation is complete, a new icon will appear in your browser toolbar.
- Click on the Metamask icon to launch the extension.
- Click on the “Create a Wallet” button on the welcome screen.
- Read and accept the terms of use by clicking on the “Accept” button.
- Create a strong password for your Metamask account and click “Create”.
- Metamask will generate a unique 12-word mnemonic phrase. Make sure to write it down and keep it in a safe place.
- Confirm your mnemonic phrase by selecting the words in the correct order.
- Congratulations! You have successfully installed Metamask and created a new account.
Now that you have Metamask set up, you can start using the Avalanche network for decentralized finance and other blockchain applications.
Connecting Metamask to Avalanche Network
To connect your Metamask wallet to the Avalanche network, you will need to follow these steps:
- Make sure you have the latest version of Metamask installed and set up on your web browser.
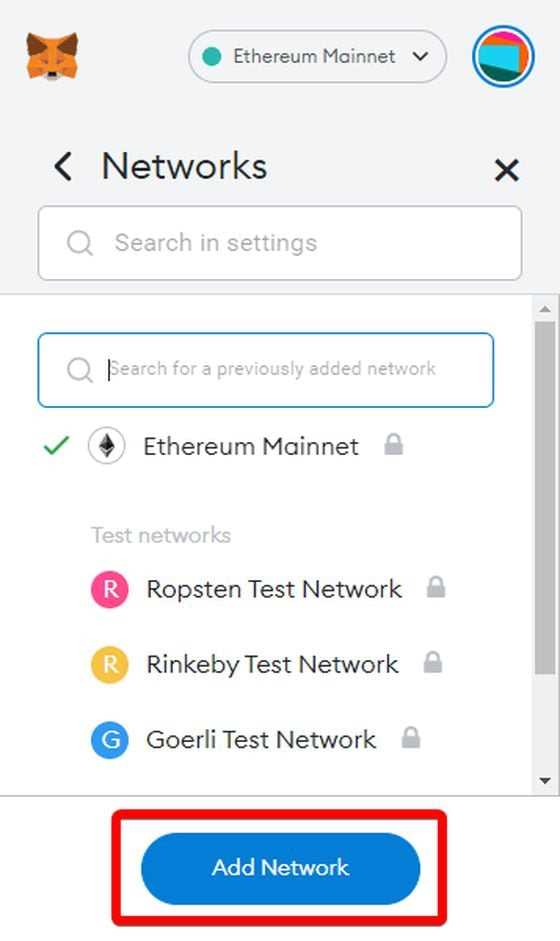
- Open your Metamask wallet and click on the network selection button located at the top of the app, next to your account balance.
- A dropdown menu will appear. Click on the “Custom RPC” option at the bottom of the menu.
- In the “New RPC URL” field, enter the Avalanche network RPC URL. For the main Avalanche network, use the following URL: https://api.avax.network/ext/bc/C/rpc
- Enter a name for the network in the “Network Name” field, such as “Avalanche” or “AVAX”.
- Click “Save” to add the Avalanche network to your Metamask wallet.
After completing these steps, Metamask should be connected to the Avalanche network. You can now use your Metamask wallet to interact with dApps and perform transactions on the Avalanche network.
Switching Networks
If you want to switch back to the Ethereum network or connect to a different network, you can do so by following these steps:
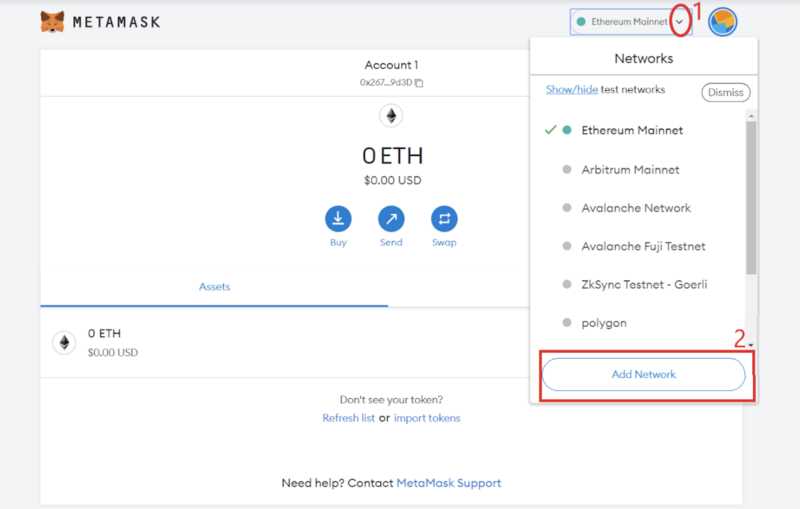
- Open your Metamask wallet and click on the network selection button.
- From the dropdown menu, select the network you want to switch to.
Metamask will then switch to the selected network, allowing you to interact with dApps and perform transactions on that network.
Using Metamask on Avalanche Network

Metamask is a popular browser extension that allows users to interact with decentralized applications (dApps) on various blockchain networks. It provides a user-friendly interface and a secure way to manage cryptocurrency wallets. In this guide, we will walk you through the process of setting up and using Metamask on the Avalanche network.
Installing Metamask
To use Metamask on the Avalanche network, you first need to install the Metamask extension in your browser. Here’s how:
- Open your browser and go to the official Metamask website.
- Click on the “Get Chrome Extension” button if you are using Google Chrome or “Get Firefox Extension” if you are using Mozilla Firefox.
- Follow the prompts to install the extension.
- Once installed, you will see the Metamask icon in your browser’s toolbar.
Connecting Metamask to the Avalanche Network
After installing Metamask, you need to connect it to the Avalanche network. Here’s how:
- Click on the Metamask icon in your browser’s toolbar to open the extension.
- If you already have a Metamask account, click on the account icon and select “Import Account” to import your existing wallet.
- If you don’t have a Metamask account, click on the “Create a Wallet” button to create a new wallet. Follow the prompts and securely store your seed phrase.
- Once you have set up or imported your wallet, click on the network selection dropdown at the top of the Metamask window.
- Scroll down and select “Custom RPC” to add a custom network.
- In the “Network Name” field, enter “Avalanche” or any name of your choice.
- In the “New RPC URL” field, enter the RPC URL for the Avalanche network. For example, “https://api.avax.network/ext/bc/C/rpc”.
- Leave the “Chain ID” field empty.
- Click on “Save” to add the Avalanche network to Metamask.
Once you have successfully connected Metamask to the Avalanche network, you can start using it to interact with dApps and manage your assets on Avalanche.
Remember to always double-check the URL and ensure you are using the official websites and trusted sources when dealing with cryptocurrencies.
Frequently Asked Questions:
What is Avalanche Network?
Avalanche Network is a decentralized platform that uses a consensus algorithm called Avalanche to achieve high scalability and low transaction fees.
How do I set up Metamask for Avalanche Network?
To set up Metamask for Avalanche Network, first install the Metamask extension on your browser. Then, click on the Metamask extension icon, select “Custom RPC” in the network dropdown, and enter the Avalanche Network details.
What is the RPC URL for Avalanche Network?
The RPC URL for Avalanche Network is typically https://api.avax.network/ext/bc/C/rpc.
Can I use Avalanche Network with other Ethereum wallets?
Yes, you can use Avalanche Network with other Ethereum wallets that support custom RPC networks. You will need to add the Avalanche Network details, such as the RPC URL and chain ID, in the settings of the wallet.

+ There are no comments
Add yours