


If you’re a cryptocurrency enthusiast, you’ve likely heard about Avalanche and its C-Chain. With its high scalability and low transaction fees, Avalanche has quickly gained popularity among users and developers. In this step-by-step tutorial, we’ll show you how to unlock the power of Avax C-Chain using the widely popular Metamask wallet.
Metamask is a browser extension wallet that allows you to interact with decentralized applications (DApps) on the Avalanche network and other blockchain platforms. It provides a user-friendly interface and secure storage for your crypto assets. By following this tutorial, you’ll be able to seamlessly connect your Metamask wallet to the Avax C-Chain, unlocking a world of possibilities for decentralized finance (DeFi), gaming, and more.
To begin, make sure you have the Metamask extension installed in your preferred web browser. If you haven’t installed it yet, simply search for “Metamask” in your browser’s extension store and follow the installation instructions. Once installed, create a new Metamask wallet or import an existing one using your seed phrase or private key. It’s important to note that you should never share your seed phrase or private key with anyone, as it grants access to your funds.
With your Metamask wallet ready, the next step is to connect it to the Avalanche network. Open the Metamask extension and click on the network selection dropdown menu, usually located at the top of the Metamask window. From the list of available networks, select “Custom RPC” to manually add a new network. In the network settings, enter the following details:
Network Name: Avalanche C-Chain
New RPC URL: https://api.avax.network/ext/bc/C/rpc
Chain ID: 43114
Symbol: AVAX
Block Explorer URL: https://cchain.explorer.avax.network/
After entering the network details, click “Save” to add the Avalanche C-Chain network to your Metamask wallet. You’ll now see the network listed in the dropdown menu. Select the Avalanche C-Chain network, and your Metamask wallet will be connected to the Avax C-Chain. You’re now ready to explore and interact with the exciting world of Avalanche decentralized applications.
With your Metamask wallet connected to Avax C-Chain, you can participate in various DeFi protocols, including decentralized exchanges (DEXs), yield farming, and lending platforms. You can also play blockchain-based games and collect unique digital assets. The possibilities are endless, and the Avax C-Chain coupled with Metamask opens up a whole new universe of opportunities in the crypto space.
What is Avax C-Chain?
Avax C-Chain, also known as the Avalanche C-Chain, is a blockchain network that provides fast and low-cost transactions. It is built on the Avalanche consensus protocol, which is designed to provide high throughput and low latency. Avax C-Chain is a layer 1 network that allows for the creation of decentralized applications (DApps) and the execution of smart contracts.
One of the key features of Avax C-Chain is its interoperability with the Ethereum Virtual Machine (EVM). This means that developers can use existing Ethereum tools and frameworks to build and deploy applications on Avax C-Chain. It also allows for the easy transfer of assets between the Avax C-Chain and Ethereum networks.
Avax C-Chain uses the native AVAX token as its native currency. AVAX can be used for transaction fees, staking, and governance within the network. The Avax C-Chain network also supports the creation of other tokens, providing a means for developers to create and manage their own digital assets.
Overall, Avax C-Chain offers a scalable and efficient solution for decentralized applications. Its compatibility with the Ethereum ecosystem and its low transaction costs make it an attractive option for developers and users alike.
Why Use Metamask with Avax C-Chain?
Metamask is a popular browser extension that allows users to access decentralized applications (dApps) and interact with different blockchain networks. Avax C-Chain, on the other hand, is a fast and scalable blockchain network built on top of the Avalanche platform. By combining Metamask with Avax C-Chain, users can unlock a range of benefits and opportunities.
1. Seamless Access to Avax C-Chain dApps
Metamask provides a user-friendly interface for accessing and interacting with Avax C-Chain decentralized applications (dApps). With Metamask installed, users can easily connect to Avax C-Chain and seamlessly access a variety of dApps, ranging from decentralized exchanges (DEXs) to lending platforms, gaming applications, and more.
2. Enhanced Security
Metamask offers a secure and convenient way to manage private keys and interact with Avax C-Chain. Instead of having to manually enter private keys or mnemonic phrases, Metamask securely stores this information and encrypts it with a password set by the user. This reduces the risk of user error and potential compromises, making it a safer option for managing your Avax C-Chain assets.
3. Multi-Network Support
Metamask supports multiple blockchain networks, including Avax C-Chain. This means users can easily switch between different networks without needing to install separate wallets or browser extensions. It provides a unified interface for managing assets and interacting with various dApps across different blockchain ecosystems.
4. Simplified Token Management
Metamask allows users to easily manage and interact with their Avax C-Chain tokens. It provides a simple and intuitive interface for adding and removing tokens, tracking balances, and initiating transactions. This streamlines the token management process and makes it more accessible for users of all levels of experience.
In conclusion, using Metamask with Avax C-Chain offers a seamless and secure way to access and interact with decentralized applications on the network. It provides enhanced security, multi-network support, and simplified token management, making it a valuable tool for anyone looking to explore the potential of Avax C-Chain and participate in the decentralized finance (DeFi) ecosystem.
Step-by-Step Tutorial

Follow these simple steps to unlock the power of Avax C-Chain with Metamask:
- Install the Metamask extension on your browser.
- Create a new wallet or import your existing wallet into Metamask.
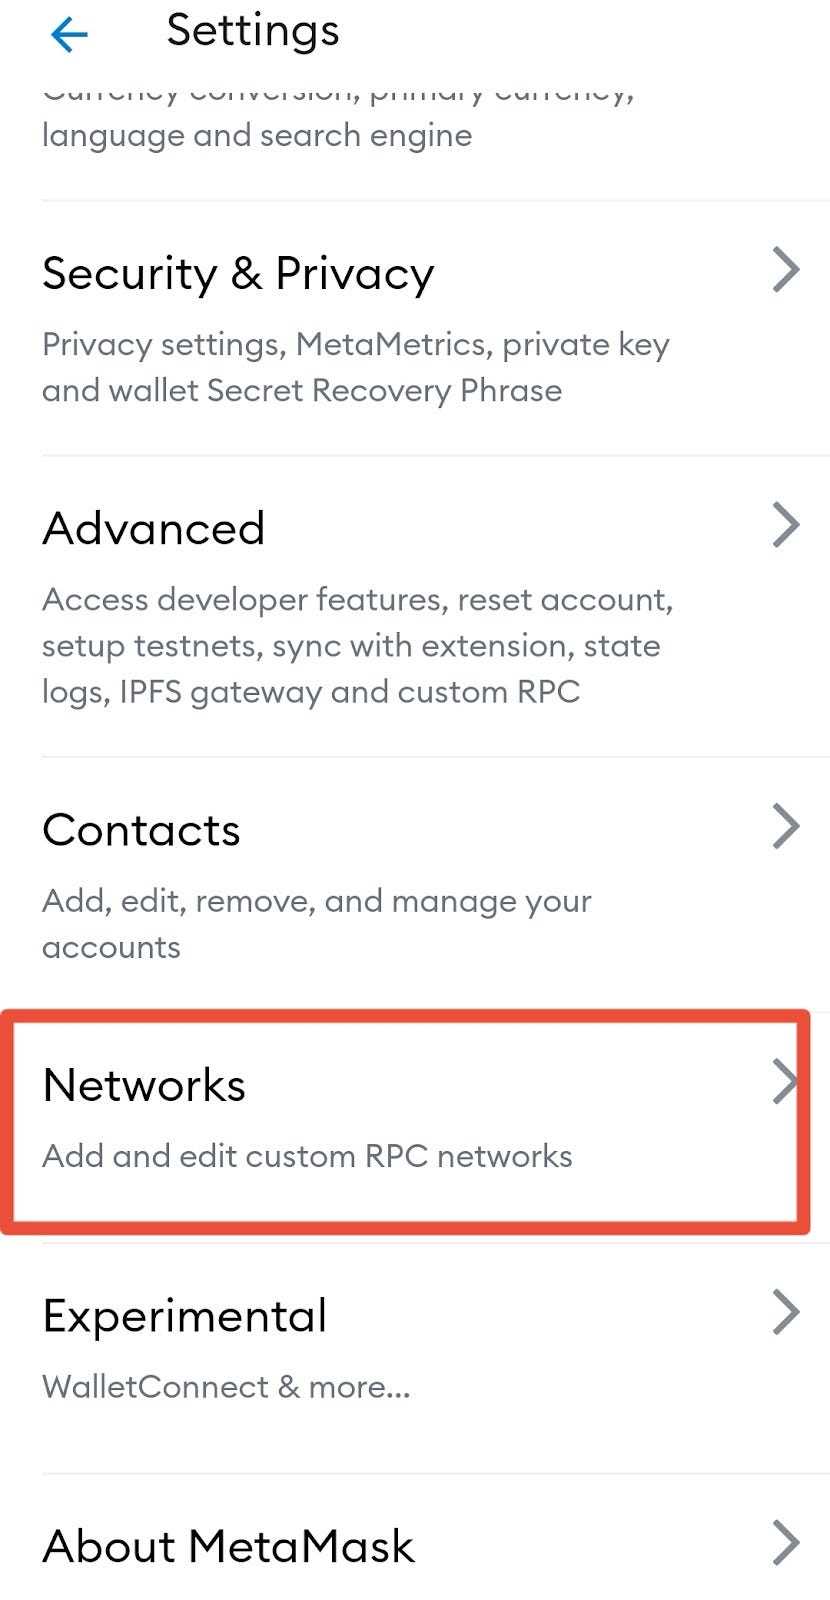
- Click on the Metamask icon in your browser toolbar and select “Settings”.
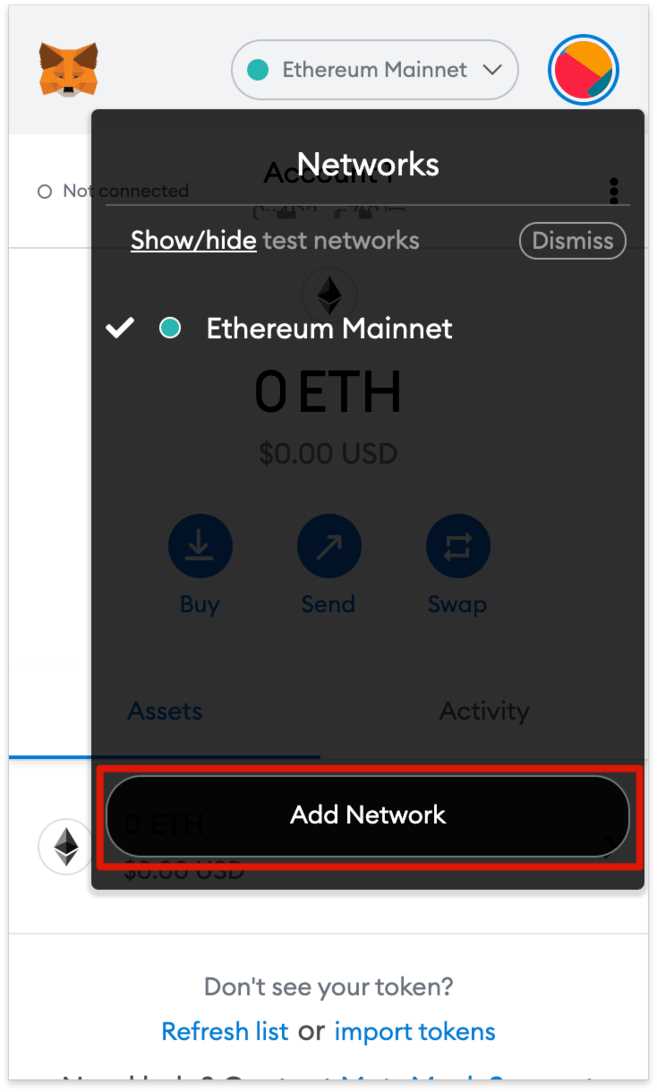
- In the settings menu, click on “Networks”.
- Click on “Add Network” to add a custom network.
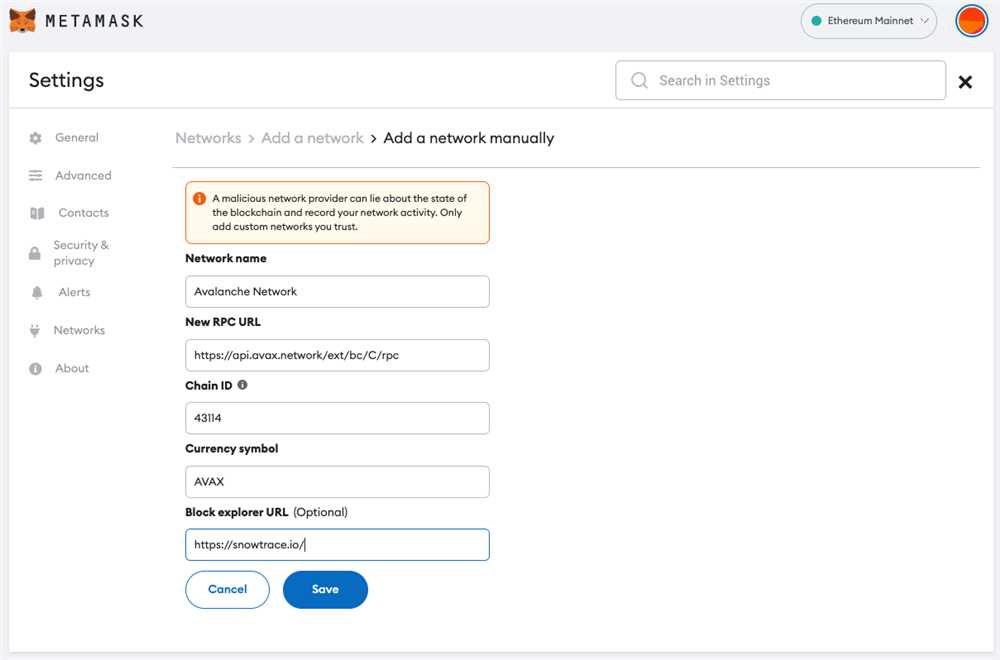
- Fill in the following details for the custom network:
– Network Name: Avax C-Chain
– New RPC URL: https://api.avax.network/ext/bc/C/rpc
– ChainID: 43114
– Symbol: AVAX
– Block Explorer URL: https://cchain.explorer.avax.network/
- Click on “Save” to save the custom network configuration.
- Switch to the Avax C-Chain network by selecting it from the network dropdown in Metamask.
- You are now connected to the Avax C-Chain network and can start exploring and interacting with Avax C-Chain dapps.
By following these step-by-step instructions, you can easily unlock the power of Avax C-Chain with Metamask and begin using and benefiting from the features of the Avax C-Chain network.
Step 1: Installing Metamask
In order to unlock the power of Avax C-Chain, you will need to install the Metamask browser extension. Metamask is a popular cryptocurrency wallet that allows you to interact with decentralized applications (DApps) on the Avax network.
1. Install Metamask
To install Metamask, follow these steps:
- Open your preferred web browser (Chrome, Firefox, or Brave) and go to the Metamask website.
- Click on the “Get Chrome Extension” button if you are using Chrome, or the “Get Firefox Add-on” button if you are using Firefox.
- Once the extension is installed, you will see the Metamask fox icon in your browser toolbar.
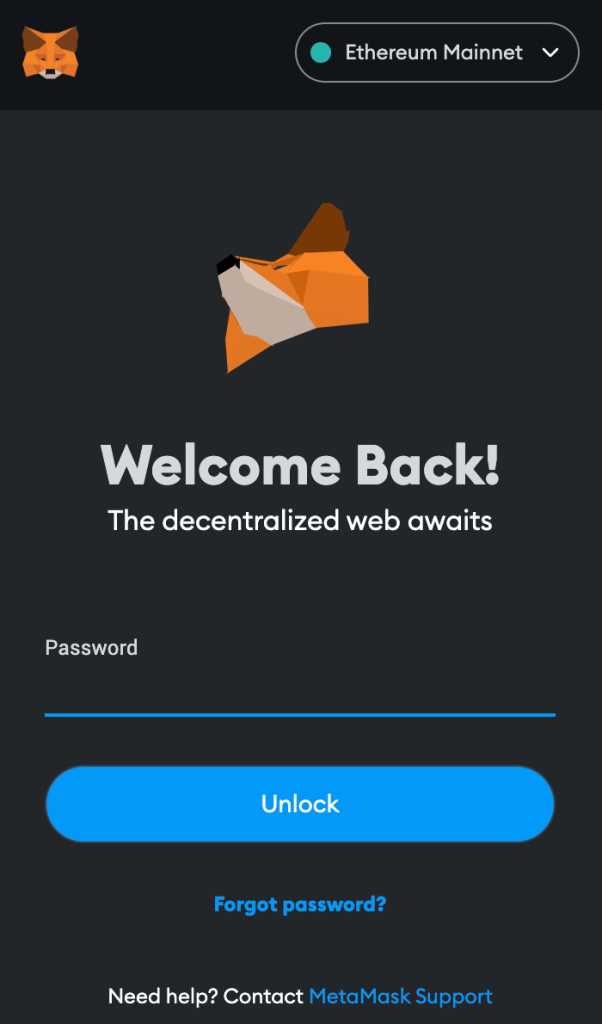
- Click on the Metamask icon to open the extension.
- Click “Get Started” on the welcome screen.
- You will be presented with the terms of service, read them and click “Accept” if you agree.
- Create a new wallet by choosing a strong password and clicking “Create”. Make sure to store your password in a safe place, as it cannot be recovered if lost.
- Metamask will generate a unique secret backup phrase, also known as a seed phrase. Write down this phrase and keep it safe. This phrase can be used to restore your wallet if necessary.
- Confirm your seed phrase by selecting the words in the correct order.
- Your Metamask wallet is now created and ready to use!
2. Connect Metamask to the Avax C-Chain
After installing Metamask, you will need to connect it to the Avax C-Chain network. Follow these steps:
- Click on the network dropdown at the top of the Metamask extension.
- Scroll down and click on “Custom RPC”.
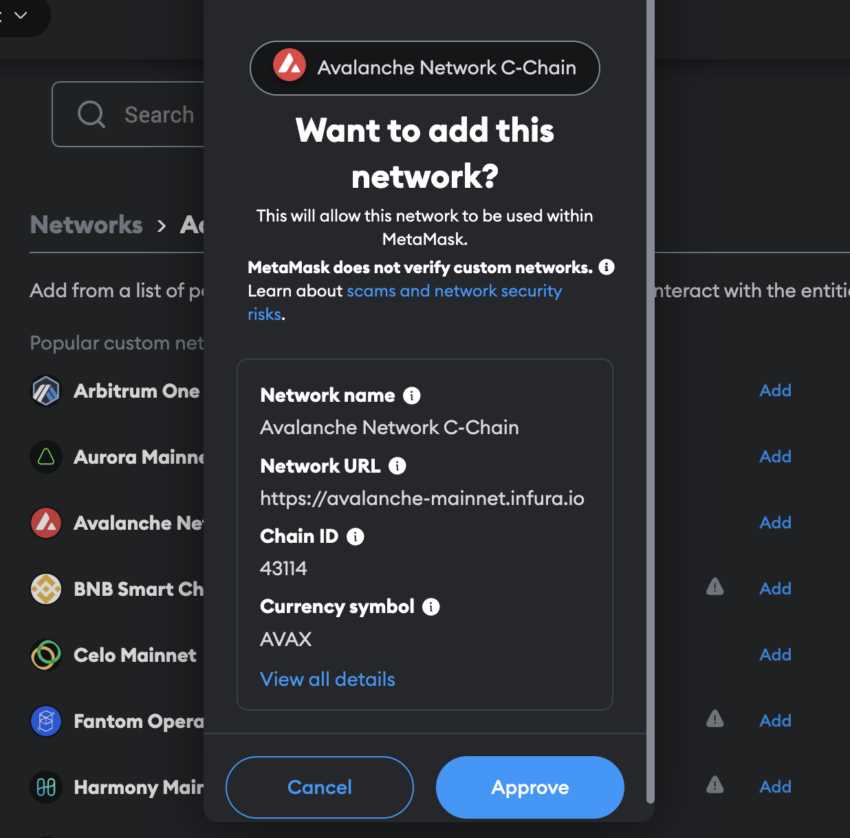
- In the “New Network” form, enter the following details:
Network Name: Avax C-Chain New RPC URL: https://api.avax.network/ext/bc/C/rpc ChainID: 43114 Symbol (optional): AVAX Block Explorer URL (optional): https://cchain.explorer.avax.network/ - Click “Save” to add the Avax C-Chain network to Metamask.
- You will now see “Avax C-Chain” as an available network option in the Metamask network dropdown. Select it to connect to the Avax C-Chain.
Congratulations! You have successfully installed Metamask and connected it to the Avax C-Chain. You are now ready to unlock the power of Avax and start exploring decentralized applications on the network.
Step 2: Creating a New Wallet
Once you have installed the MetaMask extension on your browser, you can proceed to create a new wallet. Follow these simple steps to get started:
Step 1: Launch MetaMask
Click on the MetaMask icon that appears in your browser’s toolbar. A pop-up window will appear, introducing you to MetaMask.
Step 2: Get Started
Click on the “Get Started” button to begin the wallet creation process.
Step 3: Terms of Use
Read through the Terms of Use carefully and click on the “Accept” button if you agree with them.
Step 4: Create a Wallet
Click on the “Create a Wallet” button to start creating your new wallet. You will be asked to create a password for your wallet, which should be strong and unique.
Note: Remember to store this password in a secure place as you will need it to access your wallet in the future.
Step 5: Backup Secret Phrase
During the wallet creation process, you will be presented with a secret phrase. This phrase is crucial for recovering your wallet if you ever lose access to it. Note it down and keep it in a safe place, as anyone with access to this phrase can access your wallet.
Caution: Do not share this phrase with anyone and make sure to keep it private.
Step 6: Confirm Secret Phrase
After noting down your secret phrase, you will be asked to confirm it by selecting the words in the correct order. This step ensures that you have correctly noted down your secret phrase, preventing any future issues with accessing your wallet.
Tip: Take your time to carefully select the words in the correct order to ensure accurate confirmation.
Step 7: Wallet Created
Congratulations! You have successfully created your new MetaMask wallet. You will be provided with a wallet address and the option to download a backup file. Make sure to keep this information safe, as it is crucial for accessing and managing your wallet.
Now that you have created your wallet, you can proceed to connect it to the Avalanche C-Chain and start using its powerful features.
Step 3: Connecting to the Avax C-Chain Network
Before you can start using the Avax C-Chain network with Metamask, you need to connect your wallet to the network. Here’s how:
- Open the Metamask extension in your browser and make sure you’re on the main screen.
- Click on the network selection dropdown, where it says “Ethereum Mainnet” by default.
- In the dropdown menu, scroll down until you find “Custom RPC” and click on it.
- In the “Custom RPC” section, you’ll see a form where you need to enter the Avax C-Chain network details.
- Fill in the following information:
- Network Name: Avax C-Chain
- New RPC URL: https://api.avax.network/ext/bc/C/rpc
- Chain ID: 43114
- After entering the details, click on the “Save” button to save the network settings.
- Once the network is saved, you’ll see Avax C-Chain as an option in the network selection dropdown.
- Click on Avax C-Chain to switch your wallet to the Avax C-Chain network.
Congratulations! You have successfully connected your Metamask wallet to the Avax C-Chain network. You can now start using Avax C-Chain for your transactions and interactions with dApps on Avalanche.
Frequently Asked Questions:
Why should I use Avax C-Chain?
Avax C-Chain is a powerful and scalable blockchain network that offers fast transaction speeds and low fees. It also supports a wide range of decentralized applications (dApps) and allows for cross-chain interoperability, making it an ideal choice for developers and users alike.

+ There are no comments
Add yours