


If you’re looking to integrate blockchain technology into your website, Ethereum is undoubtedly one of the most popular choices. With its smart contract capabilities and wide range of decentralized applications (DApps), Ethereum offers endless possibilities for developers and businesses alike.
One of the key tools for interacting with the Ethereum network is Metamask. Built as a browser extension, Metamask allows users to securely manage their Ethereum accounts, sign transactions, and interact with DApps directly from their web browsers. By implementing Metamask Connect on your website, you can provide a seamless and secure experience for users looking to interact with your Ethereum-powered features.
In this guide, we will walk you through the process of integrating Metamask Connect into your website, allowing your users to connect their Ethereum accounts and perform transactions without ever leaving your platform. Whether you’re building a decentralized marketplace, a blockchain-based game, or any other Ethereum-powered application, this guide will provide you with the necessary steps to harness the full potential of Metamask Connect.
Throughout this guide, we will cover everything you need to know, from installing Metamask on your browser to handling transactions and interacting with smart contracts. By the end, you’ll have a thorough understanding of how to implement Metamask Connect and unlock the power of Ethereum for your website.
Harnessing the Potential of Metamask Connect:

Metamask Connect is a powerful tool that allows you to integrate Ethereum transactions into your website. By leveraging the capabilities of Metamask, you can enable your users to interact with decentralized applications and make secure transactions on the Ethereum blockchain.
Implementing Metamask Connect on your website opens up a world of possibilities for your users. They can securely manage their Ethereum accounts, sign transactions, and interact with smart contracts directly from your platform.
When you integrate Metamask Connect, you provide your users with a seamless experience. They can easily connect their Ethereum wallets to your website and initiate transactions with just a few clicks.
To get started with Metamask Connect, you need to follow a few simple steps. First, ensure that your website supports the necessary Ethereum functionality, such as interacting with smart contracts or querying blockchain data. Next, you need to install the Metamask Connect browser extension and set up an Ethereum wallet. Once your wallet is set up, you can initialize Metamask Connect in your website code and start integrating Ethereum transactions.
Benefits of Metamask Connect:
1. Seamless integration: Metamask Connect provides a smooth user experience, making it easy for your users to connect their Ethereum wallets and perform transactions on your website.
2. Enhanced security: By utilizing Metamask Connect, you ensure that all transactions and interactions are encrypted and secured by the Ethereum blockchain. This adds an extra layer of security to your users’ accounts and ensures that their funds are protected.
3. Wide user adoption: Metamask is widely used in the Ethereum community and has a large user base. By integrating Metamask Connect, you tap into this existing user base and make your website more accessible to Ethereum users.
4. Compatibility with decentralized applications: Metamask Connect allows your users to interact with decentralized applications seamlessly. They can participate in token sales, use decentralized exchanges, and engage with other Ethereum-based services directly from your website.
Overall, by harnessing the potential of Metamask Connect, you can empower your users and enable them to take full advantage of the Ethereum ecosystem. Whether you are building a decentralized application or a blockchain-based marketplace, implementing Metamask Connect is a crucial step towards creating a seamless and user-friendly experience.
A Guide to Implementing Ethereum Transactions on Your Website
Are you looking to integrate Ethereum transactions into your website? With the help of Metamask Connect, you can easily enable your users to send and receive Ethereum directly from your website. In this guide, we will walk you through the steps to implement Ethereum transactions on your website.
Step 1: Install Metamask Connect
The first step is to install the Metamask Connect extension in your web browser. Metamask Connect is available for popular browsers like Chrome, Firefox, and Brave. Once installed, create a new Ethereum wallet or import an existing one.
Step 2: Connect Metamask to Your Website
After installing Metamask Connect, you need to establish a connection between Metamask and your website. To do this, you need to enable the Ethereum provider in your web application code and request the user’s permission to access their Ethereum account.
Once the user grants permission, Metamask will inject the Ethereum provider object into your web application, allowing you to interact with the user’s Ethereum account.
Step 3: Implementing Ethereum Transactions
Now that you have connected Metamask, you can start implementing Ethereum transactions on your website. To initiate a transaction, you need to construct a transaction object specifying the recipient address, the amount to be sent, and any additional data.
Next, you will need to sign the transaction using the user’s private key stored in Metamask. Once the transaction is signed, you can submit it to the Ethereum network using the web3 JavaScript library or any Ethereum-compatible library.
It’s important to handle transaction confirmation and error messages gracefully to provide a smooth user experience. Metamask will prompt the user to confirm the transaction and will display any error messages if the transaction fails.
Step 4: Monitoring Transaction Status
After submitting the transaction, it’s important to monitor its status to provide feedback to the user. You can use the Ethereum transaction hash to check if the transaction has been mined and confirmed by the network. Once the transaction is confirmed, you can update the user interface to reflect the successful completion.
Additionally, you can listen for events emitted by the smart contracts involved in the transaction to provide real-time updates to the user.
Step 5: Security Considerations
When implementing Ethereum transactions on your website, security is of utmost importance. Make sure to follow best practices, such as validating user input, sanitizing data, and protecting private keys.
It’s recommended to use HTTPS on your website to ensure a secure connection between the user and your server. This helps prevent man-in-the-middle attacks and ensures the integrity of the transaction data.
In conclusion, implementing Ethereum transactions on your website using Metamask Connect can provide a seamless and secure experience for your users. By following the steps outlined in this guide and considering security best practices, you can harness the full potential of Ethereum for your website.
Why You Should Utilize Metamask Connect
Metamask Connect is an essential tool for any website looking to integrate Ethereum transactions. Here are a few reasons why you should consider utilizing Metamask Connect:
1. Seamless Integration: Metamask Connect provides a seamless integration process, making it easy for users to connect their Ethereum accounts to your website. With just a few clicks, users can securely interact with your web application.
2. Enhanced Security: Metamask Connect adds an extra layer of security to your website by utilizing the Ethereum network’s decentralized infrastructure. This helps protect user transactions from malicious attacks and ensures that funds are safely transferred.
3. Increased Trust: By implementing Metamask Connect, you show your users that you value their security and trust. Users are more likely to engage with a website that offers Metamask Connect as it establishes a sense of reliability and legitimacy.
4. Access to a Large User Base: Metamask Connect has a significant user base that extends across the Ethereum ecosystem. By integrating Metamask Connect, you gain access to this existing user base, providing more opportunities for user engagement and growth.
5. Simplified User Experience: Metamask Connect simplifies the user experience by eliminating the need for users to manually enter their Ethereum address or private key. This streamlined process encourages users to engage and transact on your website, enhancing user satisfaction.
By utilizing Metamask Connect, you can harness the power of Ethereum transactions on your website, providing a secure and user-friendly experience for your users. Whether you’re building a decentralized application or implementing blockchain functionalities, Metamask Connect is the go-to solution for seamless integration.
Getting Started with Metamask Connect
If you want to take advantage of the power of Ethereum transactions on your website, using Metamask Connect is a great way to get started. Metamask Connect is a browser extension that allows users to interact with the Ethereum blockchain and sign transactions securely.
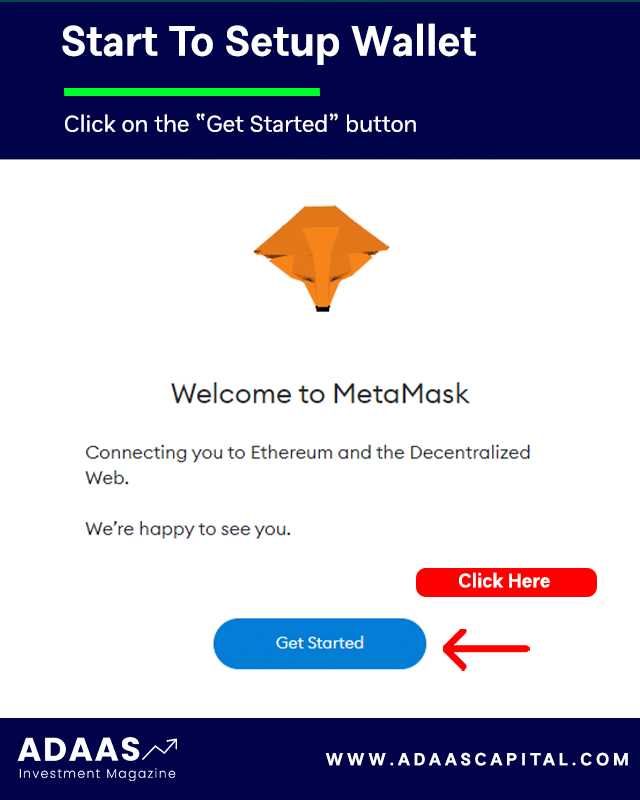
1. Install Metamask
The first step is to install the Metamask extension in your preferred web browser. Metamask is available for Google Chrome, Mozilla Firefox, and Brave. Simply search for “Metamask” in your browser’s extension store and follow the installation instructions.
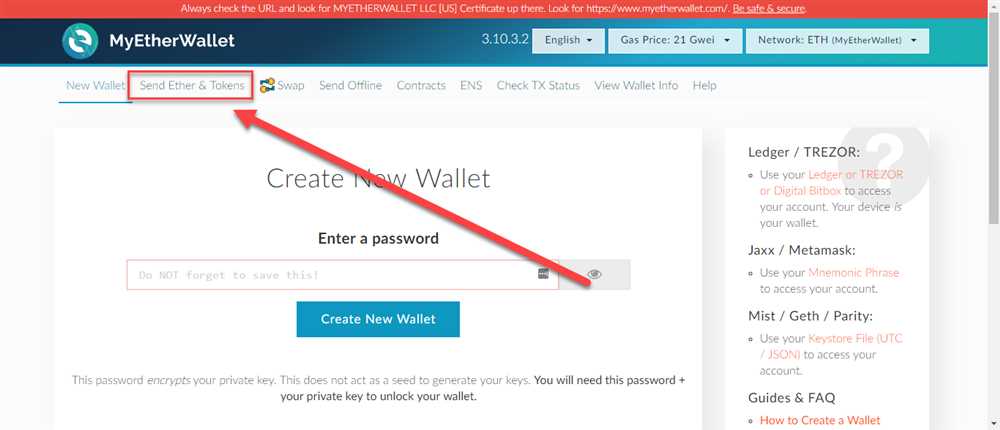
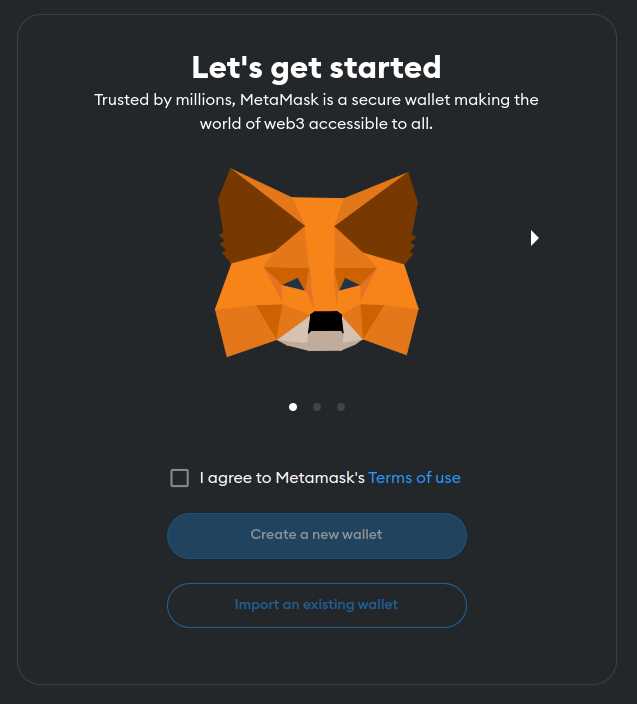
2. Create a Wallet
Once the extension is installed, you’ll need to create a new wallet. Click on the Metamask icon in your browser’s toolbar and follow the instructions to create a new wallet. Make sure to keep your recovery phrase seed safe, as it will be needed to restore your wallet in case of device loss or failure.
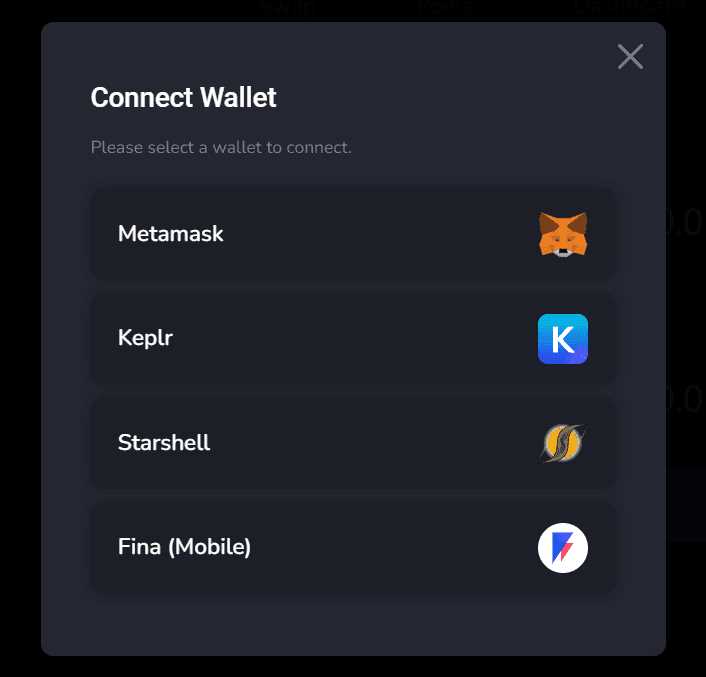
3. Connect Your Wallet
With your wallet created, you can connect it to your website. Metamask Connect provides a simple JavaScript API that allows you to interact with the user’s wallet. You can use this API to request the user’s address, sign transactions, and more.
To connect the user’s wallet, you’ll need to prompt the user to connect their wallet and ask for their permission to access their Ethereum address. Once the user approves, you’ll be able to interact with their wallet using the Metamask API.
Note: Make sure to handle cases where the user doesn’t have Metamask installed or declines the connection request. You should provide alternative methods for users to access your website’s features in these cases.
4. Implement Ethereum Transactions
Now that you have the user’s wallet connected, you can start implementing Ethereum transactions on your website. You can use the Metamask API to send transactions, query blockchain data, and interact with smart contracts.
To send a transaction, you’ll need to provide the user’s wallet address, the recipient’s address, the amount of Ether to be sent, and any additional transaction data. The user will then be prompted by Metamask to review and confirm the transaction.
Note: The user will need to have enough Ether in their wallet to cover the transaction fee, also known as gas.
With these steps, you can get started with Metamask Connect and unlock the power of Ethereum transactions for your website. Remember to test your implementation thoroughly and provide clear instructions to your users to ensure a smooth and user-friendly experience.
Step-by-Step Guide to Implementing Ethereum Transactions
Implementing Ethereum transactions on your website can be a powerful way to interact with the Ethereum blockchain and enable your users to perform various actions, such as sending and receiving Ether or interacting with smart contracts. In this step-by-step guide, we will walk you through the process of implementing Ethereum transactions on your website using MetaMask Connect.
Step 1: Install MetaMask Connect
The first step is to install the MetaMask Connect extension in your browser. MetaMask Connect is a popular Ethereum wallet that allows users to manage their Ethereum accounts and interact with the Ethereum network directly from their browser. You can find the MetaMask Connect extension in the Chrome Web Store, Firefox Add-ons, or other supported browsers.
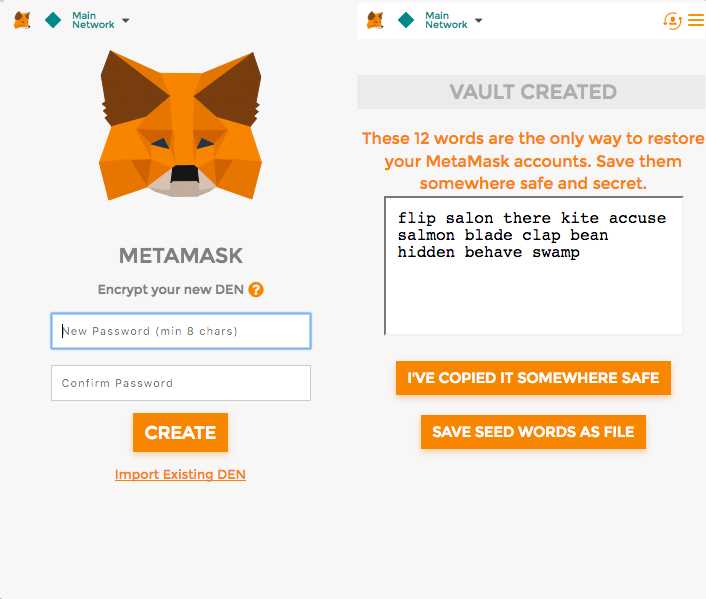
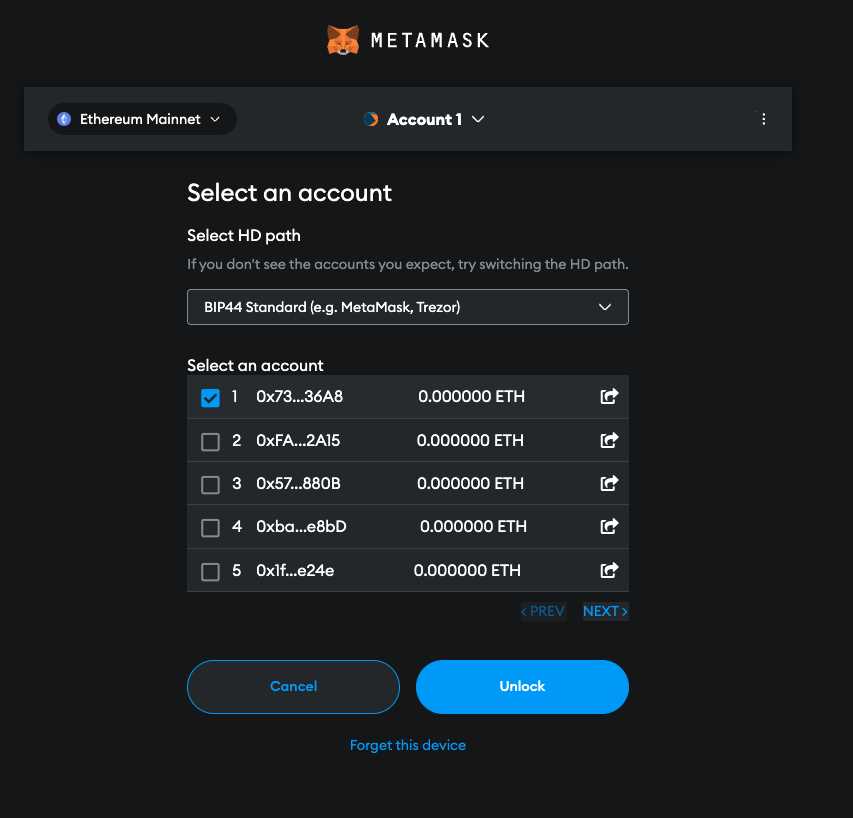
Step 2: Set Up MetaMask Connect
Once you have installed MetaMask Connect, click on the extension icon in your browser toolbar to open the MetaMask interface. Follow the on-screen instructions to set up a new MetaMask account or import an existing one using your seed phrase or private key. Make sure to securely store your seed phrase or private key, as it is essential for accessing your Ethereum funds.
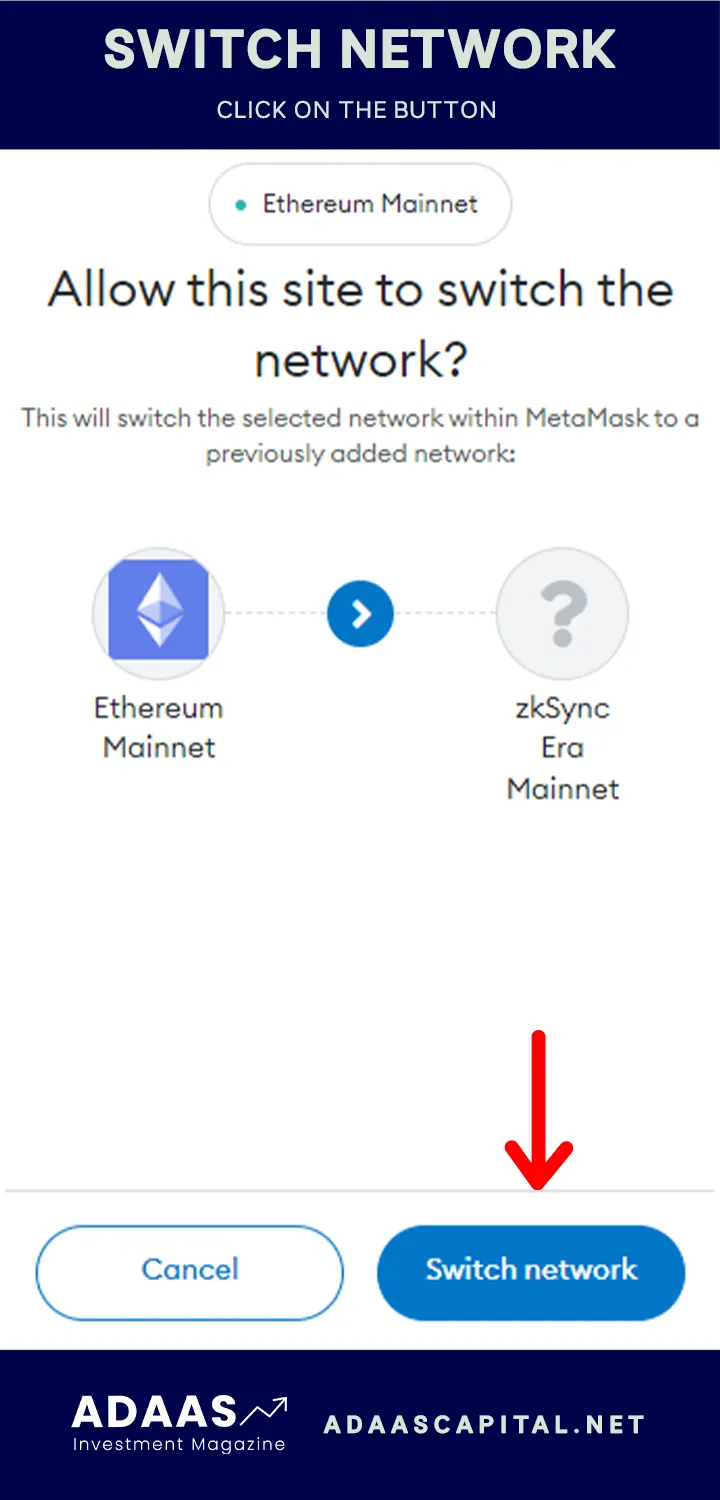
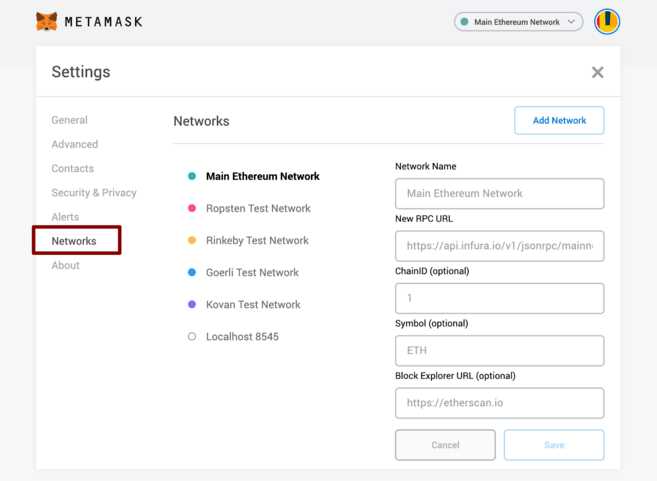
Step 3: Connect to the Ethereum Network
After setting up MetaMask, you will need to connect to the Ethereum network. Click on the network dropdown in the MetaMask interface and select the desired Ethereum network. MetaMask supports various networks, including the Ethereum mainnet, testnets such as Ropsten or Rinkeby, as well as custom networks.
Step 4: Enable Ethereum Transactions on Your Website
To enable Ethereum transactions on your website, you will need to integrate the MetaMask Connect API. The MetaMask Connect API allows you to interact with the MetaMask extension and initiate Ethereum transactions programmatically. You can find a detailed guide on how to integrate the MetaMask Connect API in the MetaMask documentation.
Step 5: Display Account Balance and Transaction History
Once you have implemented Ethereum transactions on your website, you can enhance the user experience by displaying the account balance and transaction history. You can use the MetaMask Connect API to retrieve the user’s account balance and transaction history and display it on your website. This provides transparency and allows users to track their Ethereum transactions directly from your website.
Implementing Ethereum transactions on your website opens up a world of possibilities for interacting with the Ethereum blockchain. Whether you are building a decentralized application, an online marketplace, or a blockchain-based game, integrating Ethereum transactions using MetaMask Connect can greatly enhance the functionality and user experience of your website.
Frequently Asked Questions:
What is Metamask Connect?
Metamask Connect is a browser extension that allows users to interact with the Ethereum blockchain directly from their browsers. It provides a secure way to manage Ethereum accounts, sign transactions, and interact with decentralized applications (dApps).
How can I implement Ethereum transactions on my website using Metamask Connect?
To implement Ethereum transactions on your website using Metamask Connect, you can first check if the extension is installed in the user’s browser by checking for the presence of the window.ethereum object. Then, you can request the user’s permission to connect to their Ethereum account and retrieve their address. Once the connection is established, you can use the web3 library or a similar tool to interact with the Ethereum blockchain and perform transactions.
Is Metamask Connect secure?
Yes, Metamask Connect is considered secure. It uses cryptography to protect users’ private keys and provides a user-friendly interface for interacting with the Ethereum blockchain. However, it is important to note that users should always exercise caution and keep their private keys and seed phrases safe to prevent unauthorized access to their accounts.
Are there any limitations to using Metamask Connect?
While Metamask Connect is a powerful tool for interacting with the Ethereum blockchain, it does have some limitations. For example, it is currently only available as a browser extension and may not be compatible with all browsers. Additionally, some users may be reluctant to install browser extensions or grant permission to connect their Ethereum accounts to external websites due to security concerns. It is important to consider these limitations when implementing Ethereum transactions on your website using Metamask Connect.
+ There are no comments
Add yours