


As the world of cryptocurrency continues to evolve and gain traction, it is important for investors to understand the ins and outs of managing their digital assets. One crucial aspect of managing cryptocurrency is transferring them between different wallets and platforms. In this step-by-step guide, we will walk you through the process of transferring your crypto assets from MetaMask to Coinbase.
MetaMask is a popular browser extension wallet that allows users to manage their Ethereum-based tokens. Coinbase, on the other hand, is one of the largest and most reputable cryptocurrency exchanges in the world. By transferring your assets from MetaMask to Coinbase, you can take advantage of Coinbase’s robust trading features and security measures.
Before you begin the transfer process, it is important to ensure that you have both a MetaMask wallet and a Coinbase account. If you haven’t set up these accounts yet, make sure to do so by following the respective sign-up processes on their websites. Once you have both accounts, you are ready to proceed with the transfer.
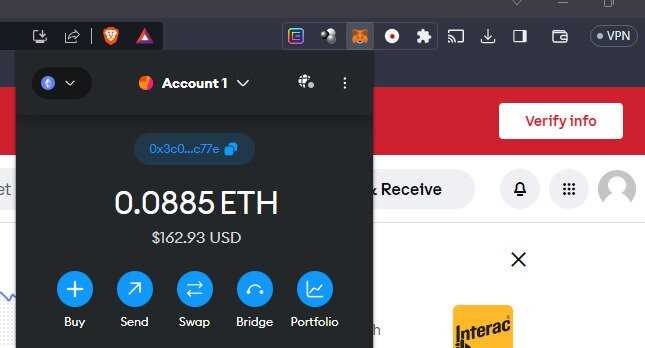
The first step is to open your MetaMask wallet. Make sure you are on the main screen that displays your account balance and recent transactions. Click on the “Send” button to initiate a transfer. You will be prompted to enter the recipient’s address.
Next, you need to open your Coinbase account. Once you are logged in, navigate to the wallet section of the platform. Look for the cryptocurrency that you want to transfer from MetaMask and click on the “Receive” button. This will display your Coinbase wallet address, which you need to copy to proceed with the transfer.
What is MetaMask?
MetaMask is a popular cryptocurrency wallet and browser extension that allows users to store, send, and receive digital assets. It serves as a bridge between the Ethereum blockchain and web applications, providing users with a convenient way to interact with decentralized applications (DApps).
With MetaMask, users can create multiple Ethereum accounts, manage their private keys, and easily switch between different networks, such as the Ethereum mainnet and testnets like Ropsten or Kovan.
Main Features of MetaMask:
- Wallet and Account Management: MetaMask allows users to securely store their private keys and easily manage their Ethereum accounts.
- DApp Browser: Users can browse and interact with decentralized applications directly within the MetaMask extension.
- Transaction Signing: When users initiate transactions on DApps, MetaMask securely signs these transactions, ensuring the integrity and security of the process.
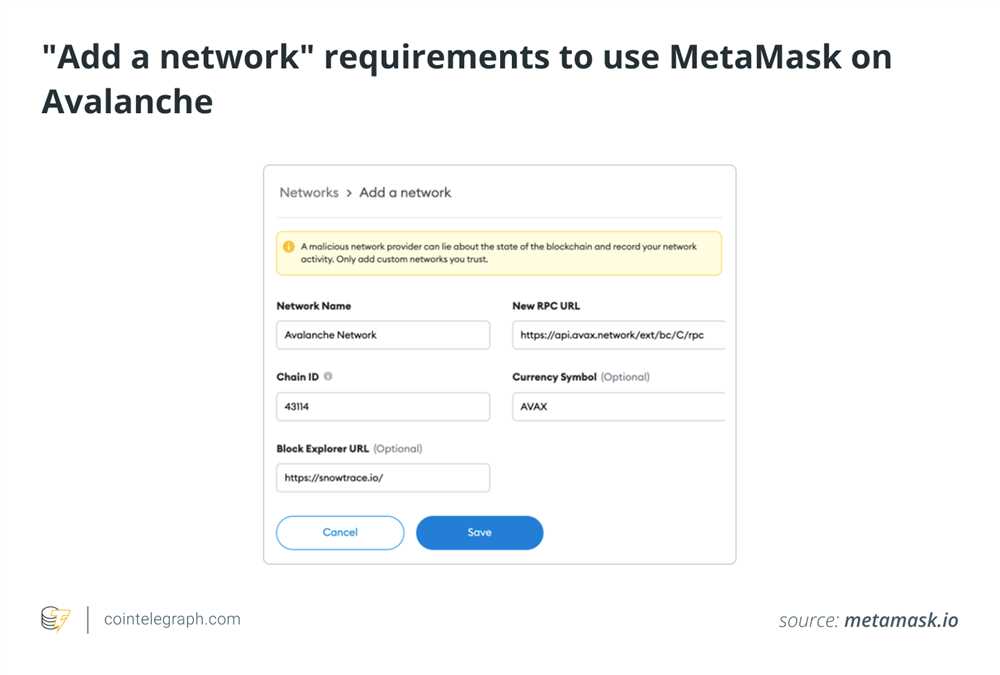
- Network Customization: MetaMask supports various Ethereum networks, including the mainnet, testnets, and custom networks.
- Token Management: Users can add custom Ethereum tokens to their MetaMask wallet, view token balances, and easily send or receive tokens.
MetaMask provides users with a user-friendly and secure way to interact with the Ethereum blockchain and access the growing ecosystem of decentralized applications.
Step 1: Create a Coinbase Account
Before you can transfer your crypto assets from MetaMask to Coinbase, you’ll need to create an account on the Coinbase platform. Coinbase is one of the most well-known and trusted cryptocurrency exchanges, making it a popular choice for buying, selling, and storing digital assets.
Why Choose Coinbase?
There are several reasons why Coinbase is a great option for transferring your crypto assets:
- Established Reputation: Coinbase has been around since 2012 and has built a strong reputation in the crypto community.
- User-Friendly Interface: Coinbase provides a user-friendly interface, making it easy for both beginners and experienced traders to navigate the platform.
- Security Measures: Coinbase prioritizes security and employs various measures to protect your funds, including strong encryption, 2-factor authentication, and cold storage for the majority of their crypto assets.
- Regulatory Compliance: Coinbase operates in compliance with applicable laws and regulations, providing peace of mind for users.
Creating a Coinbase Account

To create a Coinbase account, follow these steps:
- Visit the Coinbase website at www.coinbase.com.
- Click on the “Get started” button located on the top right corner of the website.
- Fill in the required information, including your name, email address, and password. Make sure to choose a strong password that includes a combination of letters, numbers, and symbols.
- Agree to the terms of service and privacy policy.
- Complete the captcha verification to prove that you’re not a robot.
- Click on the “Create account” button to proceed.
- You will receive a verification email in the email address provided. Click on the verification link to verify your Coinbase account.
- Once your account is verified, you can log in to your Coinbase account and start exploring the platform.
It’s important to note that Coinbase may require additional identity verification steps, depending on your location and the level of verification you choose. This is to comply with KYC (Know Your Customer) regulations and prevent fraud.
Now that you have created your Coinbase account, you are ready to proceed to the next step: connecting your MetaMask wallet to your Coinbase account.
Step 2: Install and Set up MetaMask
In order to transfer your crypto assets from MetaMask to Coinbase, you will need to install and set up the MetaMask wallet. Follow the steps below to get started:
1. Install MetaMask Extension
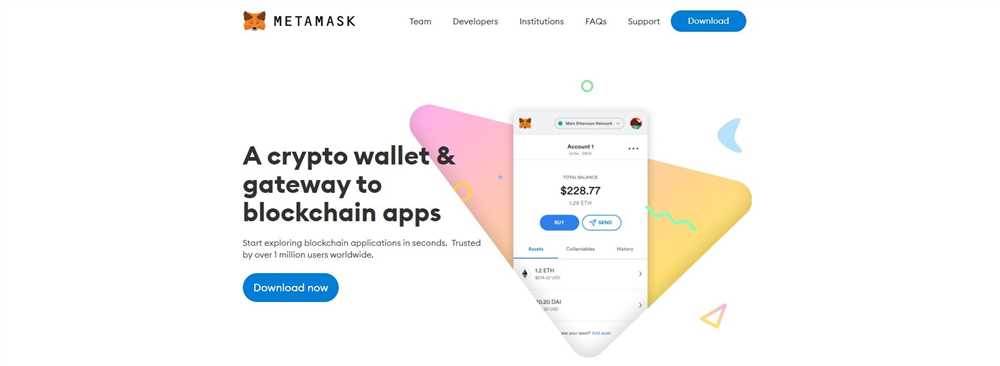
The first step is to install the MetaMask extension on your web browser. Visit the MetaMask website (https://metamask.io/) and download the extension for your preferred browser.
2. Create a MetaMask Wallet
After installing the MetaMask extension, click on the MetaMask icon in your browser toolbar. Then, click on “Get Started” and select “Create a Wallet”.
Follow the instructions to create a strong password and agree to the terms of use.
3. Backup Your MetaMask Wallet
It is important to back up your MetaMask wallet to prevent loss of funds. Click on your account avatar in the top right corner of the MetaMask extension and select “Settings”. Then, click on “Security & Privacy” and choose “Export Account”. Follow the prompts to save your wallet seed phrase in a secure location.
Important: Never share your wallet seed phrase with anyone, as it gives full access to your funds.
4. Connect MetaMask to Coinbase
Now that your MetaMask wallet is set up, you need to connect it to Coinbase. Log in to your Coinbase account and go to the “Settings” page. Select “Connected Wallets” and click on “Connect Wallet”. Choose MetaMask from the options and follow the prompts to complete the connection.
With MetaMask installed and set up, you are ready to proceed to the next step: transferring your crypto assets from MetaMask to Coinbase.
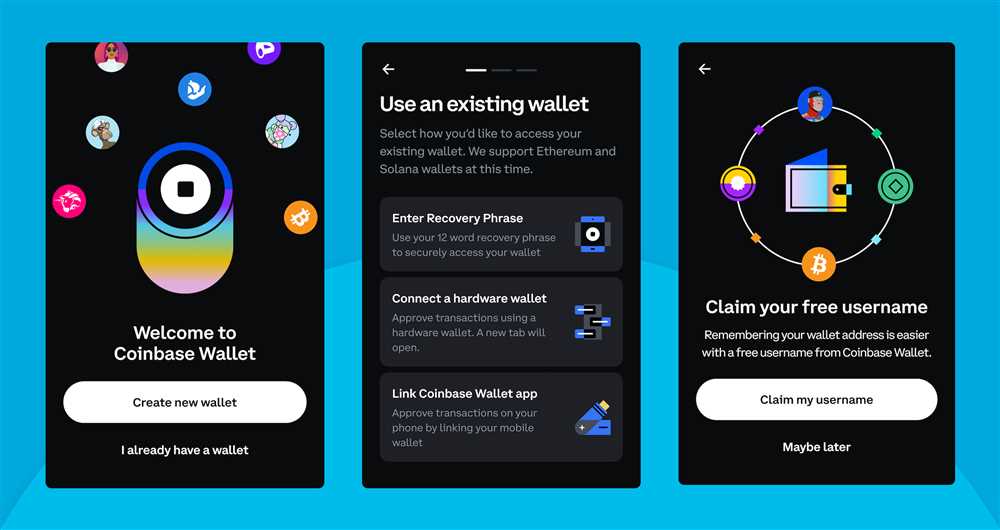
Step 3: Connect MetaMask to Coinbase
Before you can transfer your crypto assets from MetaMask to Coinbase, you’ll need to connect your MetaMask wallet to your Coinbase account. Here’s how to do it:
- Make sure you’re logged into both your MetaMask wallet and your Coinbase account.
- In MetaMask, click on the account icon in the top right corner and select “Connect to Coinbase.”
- A new window will pop up, asking you to grant permission for MetaMask to connect to Coinbase. Click “Connect” to proceed.
- Once connected, you may be prompted to verify your identity on Coinbase. Follow the instructions provided to complete the verification process.
- Once your MetaMask wallet is connected to Coinbase, you’ll see a confirmation message on both platforms.
Now that your MetaMask wallet is connected to Coinbase, you’re ready to proceed to the next step and initiate the transfer of your crypto assets.
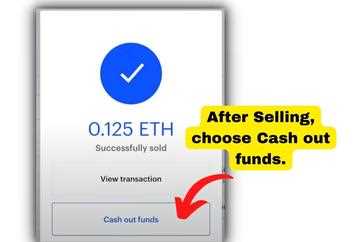
Step 4: Transfer Crypto Assets from MetaMask to Coinbase
Once you have successfully connected your MetaMask wallet to Coinbase, you can proceed to transfer your crypto assets from MetaMask to Coinbase. This step is important if you want to exchange or sell your assets on Coinbase or simply store them in your Coinbase wallet.
Here are the steps to transfer your crypto assets:
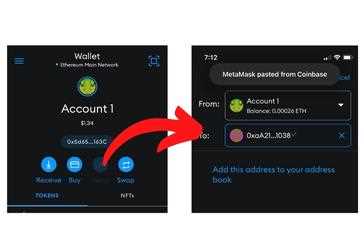
- Open your MetaMask wallet and make sure you are in the account that holds the assets you want to transfer.
- Click on the “Send” button in MetaMask.
- In the “Recipient Address” field, paste the Coinbase wallet address where you want to send your assets.
- Enter the amount of assets you want to transfer.
- Review the transaction details and double-check that the recipient address is correct.
- Click on the “Next” or “Confirm” button to proceed with the transfer.
- Wait for the transaction to be confirmed on the Ethereum network. This may take a few minutes depending on network congestion.
- Once the transaction is confirmed, you can verify the transfer on Coinbase by checking your wallet balance.
It is important to note that there may be network fees associated with transferring assets from MetaMask to Coinbase. These fees are typically paid in Ethereum (ETH) and vary depending on network congestion. Make sure you have enough ETH in your MetaMask wallet to cover these fees.
Always double-check the recipient address before confirming the transfer to ensure your assets are sent to the intended destination. Once the transfer is complete, you can proceed to use your assets on Coinbase or store them securely in your Coinbase wallet.
Frequently Asked Questions:
What is MetaMask?
MetaMask is a cryptocurrency wallet and browser extension that allows users to interact with decentralized applications (dApps) on the Ethereum blockchain. It serves as a bridge between your web browser and the Ethereum network, allowing you to securely manage and transfer your crypto assets.
Why would I want to transfer my crypto assets from MetaMask to Coinbase?
There could be several reasons for transferring your crypto assets from MetaMask to Coinbase. One reason could be that you want to sell or trade your assets on Coinbase’s exchange platform. Additionally, you might prefer holding your assets on Coinbase for security reasons, as they have a robust infrastructure and insurance coverage. It ultimately depends on your personal preferences and trading needs.
What are the steps to transfer crypto assets from MetaMask to Coinbase?
Transferring crypto assets from MetaMask to Coinbase involves a few simple steps. First, ensure that you have both MetaMask and Coinbase accounts set up and connected to your browser. Then, navigate to MetaMask and click on the asset you want to transfer. Click the “Send” button, enter your Coinbase wallet address, specify the amount, and confirm the transaction. Finally, wait for the confirmation and verify the transfer in your Coinbase account.

+ There are no comments
Add yours