


Metamask is a popular Ethereum wallet that allows users to securely store, manage, and interact with their Ethereum assets. However, if you’re looking to expand your crypto horizons beyond Ethereum, you might be wondering how to add other chains to Metamask. In this step-by-step guide, we will walk you through the process of adding the Gnosis chain to Metamask.
Step 1: Install and Set Up Metamask
If you haven’t already, start by installing the Metamask extension in your preferred browser. Once installed, open Metamask and set up a new wallet or import an existing one using your recovery phrase. Make sure you have some ETH in your wallet to cover gas fees for transactions.
Step 2: Access Metamask Settings
To add a new chain to Metamask, click on the Metamask icon in your browser’s toolbar and select “Settings” from the dropdown menu. This will open the Metamask settings page.
Step 3: Add Gnosis Chain
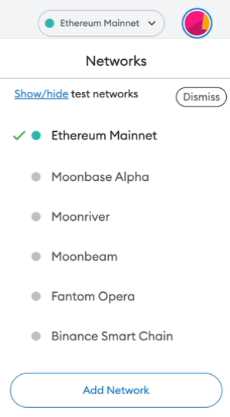
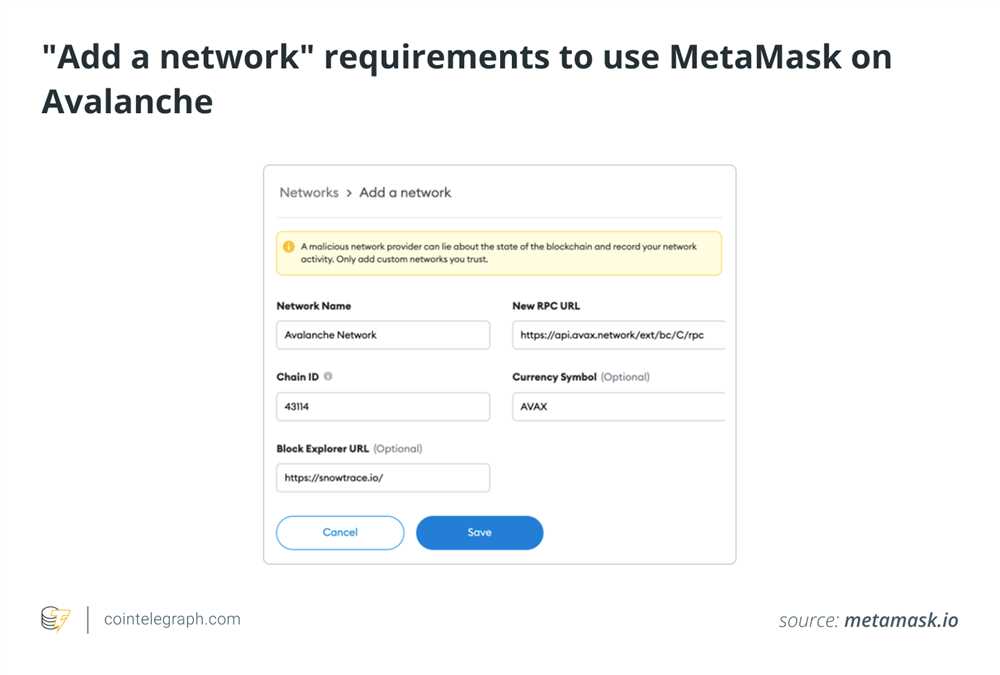
In the Metamask settings page, click on the “Networks” tab. Scroll down and click on the “Add Network” button. Here, you’ll need to enter some details to add the Gnosis chain.
Network Name: Enter a name for the new network, such as “Gnosis” or “Gnosis Chain”.
New RPC URL: Enter the RPC URL for the Gnosis chain. You can usually find this information on the Gnosis website or documentation.
Chain ID: Enter the Chain ID for the Gnosis chain. Again, this information can typically be found on the Gnosis website or documentation.
Currency Symbol: Enter the symbol for the native currency of the Gnosis chain, such as “GNO”.
Block Explorer URL: Enter the URL for the block explorer of the Gnosis chain, so you can easily explore and verify transactions.
Step 4: Save and Switch Networks
After entering the necessary information, click on the “Save” button to add the Gnosis chain to Metamask. Once saved, you can switch to the Gnosis chain by selecting it from the network dropdown menu in Metamask.
Congratulations! You’ve successfully added the Gnosis chain to Metamask. Now you can seamlessly interact with Gnosis and its native assets using the familiar Metamask interface.
Step 1: Install Metamask Extension
The first step in adding Gnosis Chain to Metamask is to install the Metamask extension on your web browser. Metamask is a cryptocurrency wallet and browser extension that allows you to interact with decentralized applications (dapps) and manage your digital assets.
To install Metamask, follow these steps:
- Open your web browser and go to the Metamask website.
- Click on the “Get Chrome extension” button if you are using Google Chrome, or the “Get Firefox extension” button if you are using Mozilla Firefox.
- A pop-up window will appear, asking if you want to add the extension to your browser. Click on the “Add to Chrome” or “Add to Firefox” button.
- The Metamask extension will start downloading and installing automatically.
- Once the installation is complete, you will see the Metamask icon in the top right corner of your browser. Click on the icon to open Metamask.
- A welcome screen will appear. Click on the “Get Started” button.
- Read and accept the Metamask terms of use.
- Create a new wallet by clicking on the “Create a Wallet” button. You will be prompted to create a password for your wallet.
- After creating your password, Metamask will generate a secret backup phrase consisting of 12 random words. Write down this backup phrase and keep it in a safe place. This phrase is the only way to recover your wallet if you lose access to your device.
- Confirm your backup phrase by selecting the words in the correct order.
- Finally, set a unique nickname for your wallet and choose your preferred display currency.
- Congratulations! You have successfully installed Metamask and created your wallet.
Now that you have Metamask installed, you can proceed to the next step and add Gnosis Chain to your wallet.
Step 2: Adding Gnosis Chain Network
Once you have successfully installed the MetaMask extension in your browser, the next step is to add the Gnosis Chain network to your MetaMask wallet. The Gnosis Chain network is a layer 2 Ethereum scaling solution that aims to provide faster and cheaper transactions compared to the main Ethereum network.
To add the Gnosis Chain network, follow the steps below:
- Click on the MetaMask extension icon in your browser to open the MetaMask wallet.
- Click on the profile icon on the top right corner of the MetaMask wallet and select “Settings” from the dropdown menu.
- In the Settings menu, click on “Networks” tab.
- Scroll down to the bottom of the Networks tab and click on “Add Network”.
- In the “Network Name” field, enter “Gnosis Chain” or any name you prefer.
- In the “New RPC URL” field, enter “https://gnosis-chain-rpc.diamondnetwork.io”
- Leave the “Chain ID” field empty as it will automatically populate.
- In the “Currency Symbol” field, enter “GNO” or any symbol you prefer.
- In the “Block Explorer URL” field, enter “https://gnosischain-explorer.diamondnetwork.io”
- Click on the “Save” button.
Once you have added the Gnosis Chain network, you will see it listed in the Networks tab of the MetaMask wallet. You can now select the Gnosis Chain network from the dropdown menu and start using it for your transactions.
Step 3: Connecting to Gnosis Chain Network
After successfully adding Gnosis Chain to your Metamask wallet, the next step is to connect to the Gnosis Chain network.
Follow these instructions to connect:
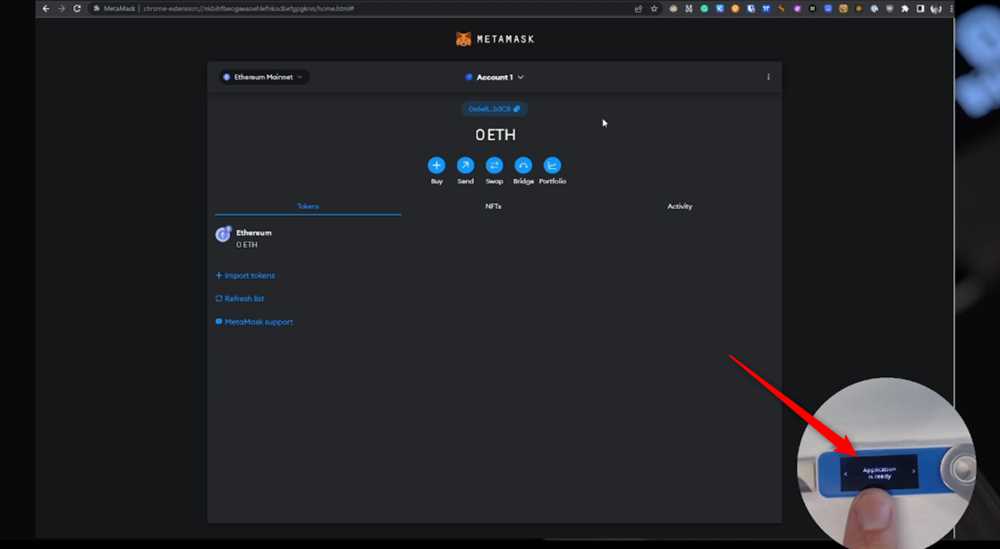
1. Open the Metamask extension in your browser and make sure you’re on the main page.
2. Click on the network switcher dropdown located at the top of the Metamask extension.
3. Scroll down to the bottom of the list and click on the “Custom RPC” option.
4. In the “Custom RPC” settings, enter the following details:
Network Name: Gnosis Chain
New RPC URL: Enter the Gnosis Chain RPC URL here
Chain ID: Enter the Gnosis Chain ID here
Symbol: GNO
Block Explorer URL: Enter the Gnosis Chain block explorer URL here
5. Click on the “Save” button to save the network settings.
6. Once the settings are saved, click on the network switcher dropdown again and select the “Gnosis Chain” network.
That’s it! You have successfully connected to the Gnosis Chain network. You can now start using Gnosis Chain on your Metamask wallet.
Frequently Asked Questions:
What is Gnosis chain?
Gnosis Chain is a layer 2 decentralized exchange built on Ethereum that aims to provide fast and affordable trading without sacrificing security and decentralization.
Why should I add Gnosis Chain to my Metamask?
Adding Gnosis Chain to Metamask allows you to directly interact with Gnosis Chain’s decentralized exchange and trade on the platform using your Metamask wallet.
Where can I find Gnosis Chain’s RPC URL and Chain ID?
Gnosis Chain’s RPC URL and Chain ID can be found on the Gnosis Chain website or in their documentation. You can also reach out to the Gnosis Chain team for assistance in finding this information.
+ There are no comments
Add yours