


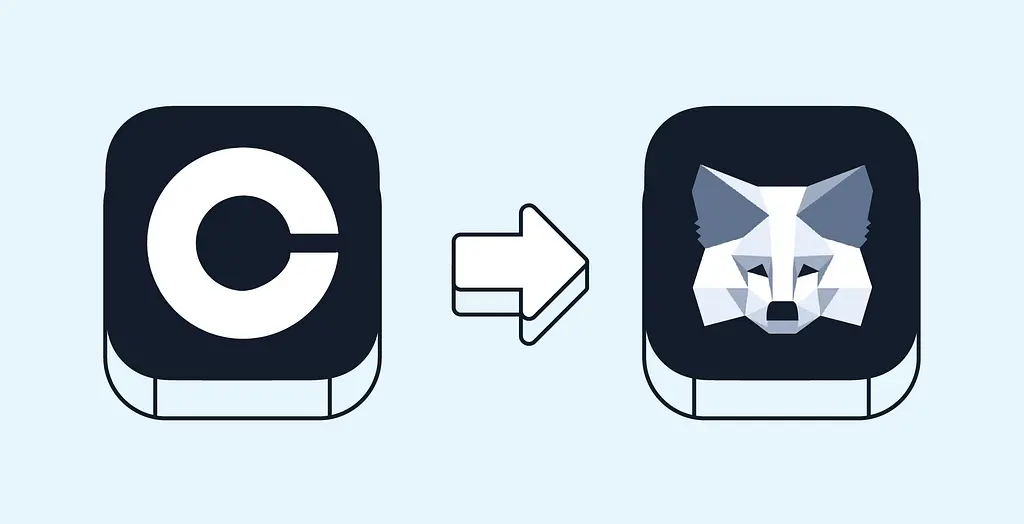
Are you looking to securely transfer your assets from Coinbase to your MetaMask wallet? Look no further! In this ultimate guide, we will walk you through the step-by-step process of transferring your coins and tokens from Coinbase to MetaMask.
MetaMask is a popular Ethereum wallet that allows you to store, send, and receive Ethereum and other ERC-20 tokens. By transferring your assets to MetaMask, you gain full control over your funds and can easily participate in the decentralized finance (DeFi) ecosystem.
Before we dive into the transfer process, make sure you have both a Coinbase and MetaMask account. If you don’t have one, don’t worry! We will guide you through the account creation process for both platforms. Once you have your accounts set up, you’re ready to begin the transfer!
Transferring your assets from Coinbase to MetaMask is a two-step process. First, you need to withdraw your assets from Coinbase to your MetaMask wallet address. Then, you need to manually add the tokens to your MetaMask wallet to see and manage them. Don’t worry, we’ll guide you through each step with detailed instructions and screenshots.
Ready to take control of your assets? Let’s get started!
Step-by-Step Instructions for Transferring Your Coinbase Assets to MetaMask Wallet
Transferring your assets from Coinbase to MetaMask Wallet allows you to have full control over your digital assets and participate in decentralized finance (DeFi) platforms. Follow the steps below to successfully transfer your Coinbase assets to your MetaMask Wallet.
Step 1: Install MetaMask Wallet
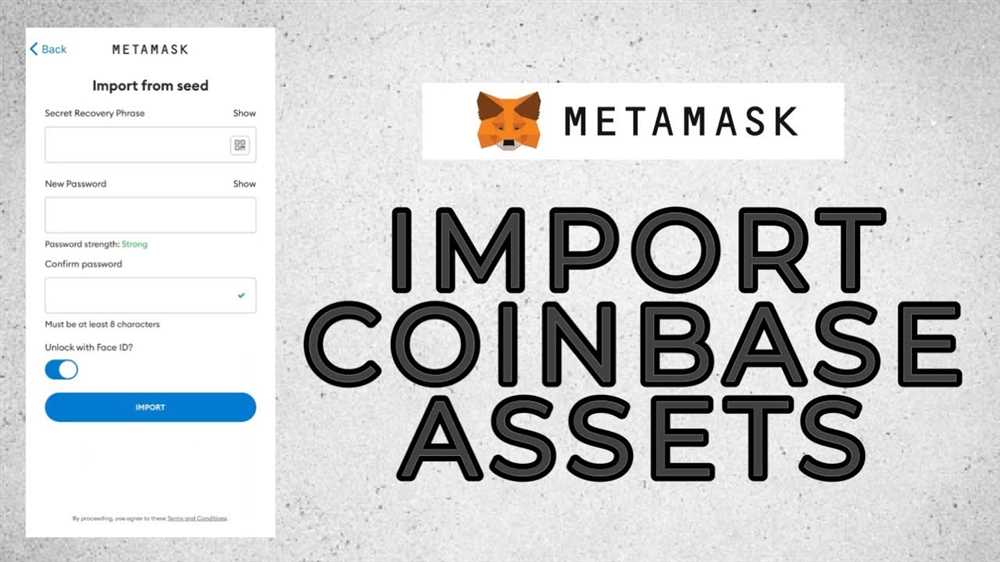
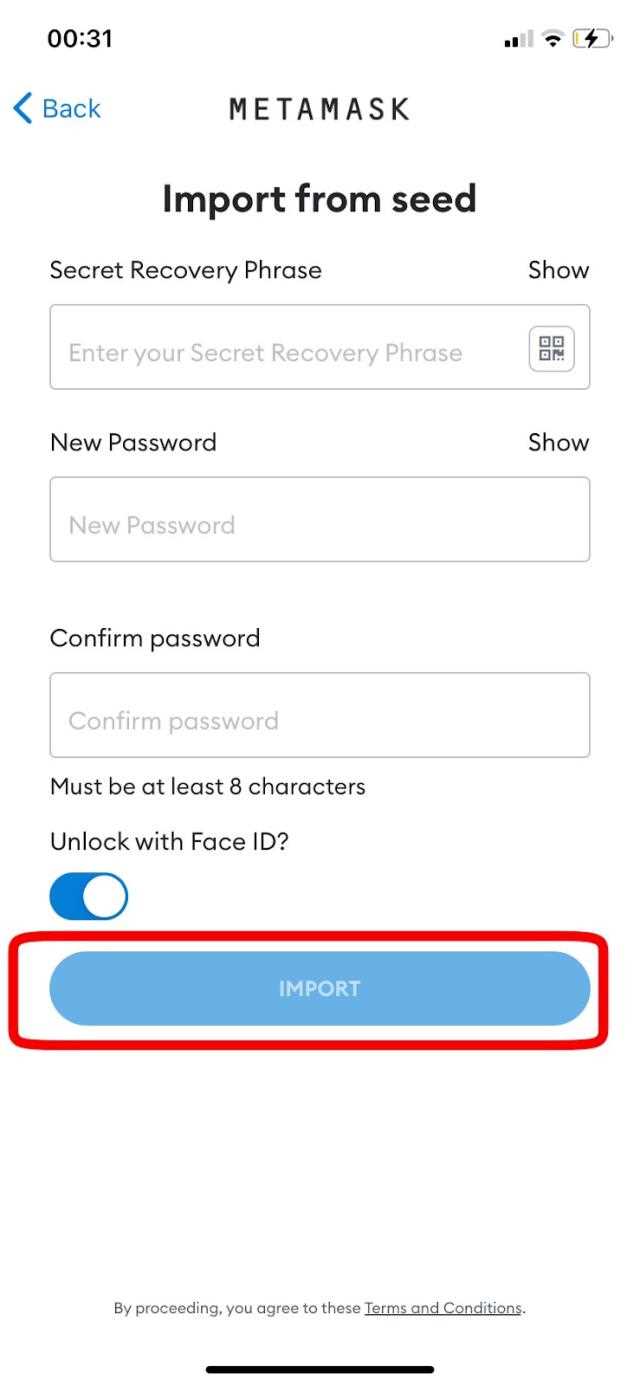
If you haven’t already, install the MetaMask Wallet extension for your preferred web browser. You can find the MetaMask Wallet extension in the Chrome Web Store or the Firefox Add-ons marketplace. Once installed, create a new wallet or import an existing one.
Step 2: Obtain Your MetaMask Wallet Address
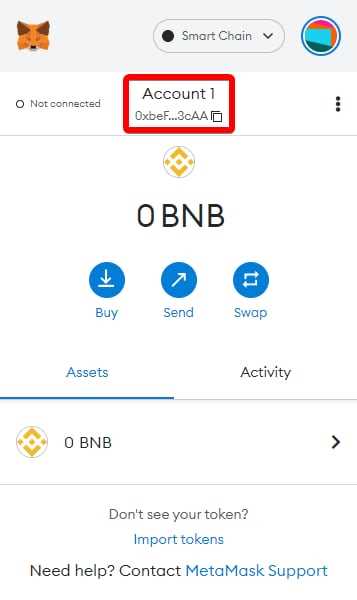
After setting up your MetaMask Wallet, copy your wallet address. You can find your wallet address by clicking on the account icon in the MetaMask Wallet extension. Make sure to double-check the address to ensure accuracy.
Step 3: Log in to Coinbase
Log in to your Coinbase account using your username and password.
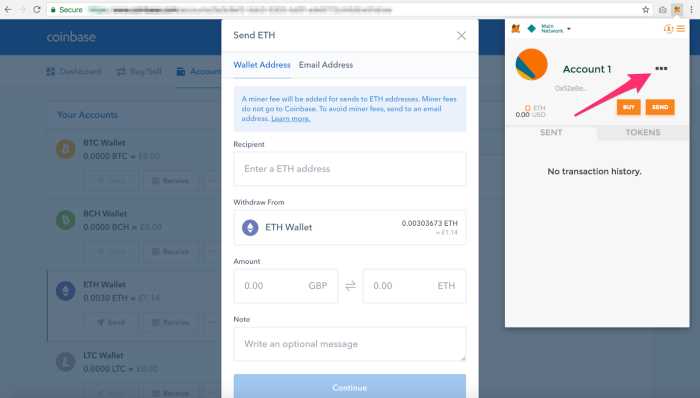
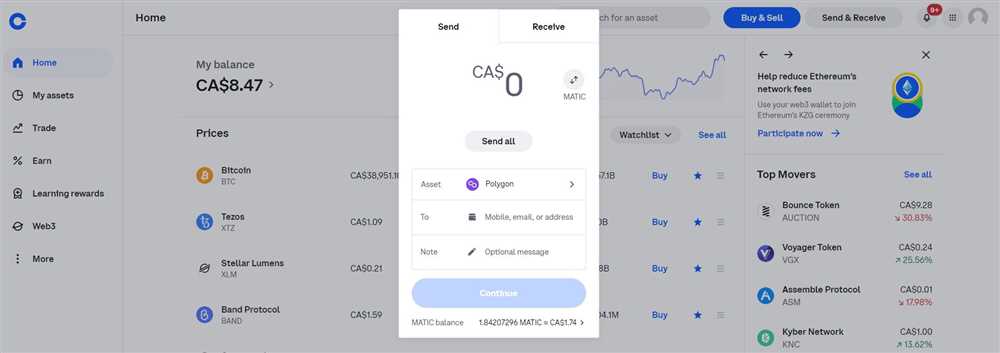
Step 4: Navigate to the “Send” Option
In the Coinbase dashboard, locate and click on the “Send” option. This will allow you to send your assets from Coinbase to another wallet.
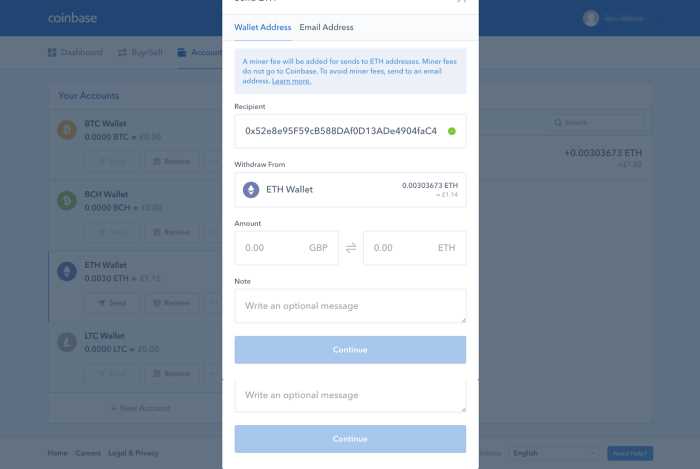
Step 5: Enter Your MetaMask Wallet Address
In the “Recipient” field of the Coinbase “Send” page, paste the MetaMask Wallet address that you obtained in Step 2. Make sure to double-check the address to avoid any mistakes.
Step 6: Choose the Assets and Amount
Select the specific assets you want to transfer from Coinbase to MetaMask Wallet. Enter the amount you wish to transfer and review the transaction details. Be mindful of any network fees that may apply.
Step 7: Confirm and Send
Once you have reviewed the transaction details and ensured everything is accurate, click on the “Send” or “Confirm” button to initiate the transfer. Coinbase will process the transaction and send your assets to your MetaMask Wallet.
Once the transfer is complete, you will be able to see your assets in your MetaMask Wallet. Congratulations! You have successfully transferred your Coinbase assets to your MetaMask Wallet, providing you with full control over your digital assets in a secure and decentralized manner.
Important Points to Consider Before Transferring Your Coinbase Assets
Before transferring your assets from Coinbase to your MetaMask Wallet, there are several important points to consider:
1. Security
Ensure that you have secured your MetaMask Wallet with a strong password and enabled two-factor authentication (2FA) to protect your funds from potential security threats.
2. Verification
Make sure that your MetaMask Wallet is verified and connected to a reputable and trusted exchange. Your wallet should be fully authenticated to avoid any potential issues during the transfer process.
3. Fees
Take into account the fees associated with transferring your assets from Coinbase to MetaMask. Coinbase may charge a withdrawal fee, and MetaMask may have gas fees associated with the transaction on the Ethereum network.
4. Compatibility
Ensure that the assets you wish to transfer from Coinbase are compatible with MetaMask. MetaMask supports various Ethereum-based tokens, so it’s essential to confirm if the tokens you hold on Coinbase can be transferred to your MetaMask Wallet.
5. Double-check Wallet Addresses
Before initiating the transfer, carefully check and verify the wallet addresses. Any mistake in the wallet address can result in a loss of funds, as transactions on the blockchain are irreversible. Always double-check and triple-check the addresses to avoid any errors.
6. Transfer Limits
Be aware of any transfer limits imposed by Coinbase or MetaMask. Some platforms may have restrictions on the amount you can transfer at once or within a specific time frame. Understanding these limits will help you plan your transfer effectively.
7. Transaction Speed
Consider the transaction speed when transferring assets. The Ethereum network’s transaction times can fluctuate depending on network congestion and gas fees. It’s essential to allow for sufficient time for the transfer to complete.
By keeping these important points in mind, you can ensure a smooth and secure transfer of your Coinbase assets to your MetaMask Wallet.
Tips for a Smooth Transfer Process from Coinbase to MetaMask Wallet
Transferring assets from Coinbase to MetaMask Wallet can be a seamless process if you follow these tips:
1. Check Network Compatibility
Before initiating the transfer, ensure that both Coinbase and MetaMask Wallet are on the same network. The most commonly used network is Ethereum, but there are other options as well. Make sure to select the compatible network to avoid any transfer issues.
2. Verify Account Details
Double-check the account details, including the wallet address, before initiating the transfer. A single character error in the wallet address can result in the loss of your assets. Take the time to carefully copy and paste the address to minimize the risk of mistakes.
3. Consider Gas Fees
Gas fees are required for every transaction on the Ethereum network. These fees can fluctuate based on network congestion and transaction complexity. It’s important to consider the gas fees and ensure you have enough funds in your Coinbase account to cover these fees.
4. Start with a Small Test Transfer
If you’re transferring a large amount of assets, it’s a good idea to start with a small test transfer first. This will allow you to confirm that the transfer process is working correctly before moving a significant amount of funds. It’s always better to be safe than sorry.
5. Enable Two-Factor Authentication
Take the extra step to enable two-factor authentication on both your Coinbase and MetaMask Wallet accounts. This adds an extra layer of security and helps protect your assets from unauthorized access.
6. Keep a Record of the Transaction
After completing the transfer, make sure to keep a record of the transaction details for future reference. This includes the transaction ID, date, and amount transferred. Having this information readily available can be helpful for tracking purposes or in case of any disputes.
By following these tips, you can ensure a smooth transfer process from Coinbase to MetaMask Wallet and have peace of mind knowing that your assets are securely stored.
| Tips for a Smooth Transfer Process from Coinbase to MetaMask Wallet |
|---|
| Check Network Compatibility |
| Verify Account Details |
| Consider Gas Fees |
| Start with a Small Test Transfer |
| Enable Two-Factor Authentication |
| Keep a Record of the Transaction |
Common Issues and Troubleshooting Tips When Transferring Coinbase Assets to MetaMask Wallet
Transferring your assets from Coinbase to your MetaMask wallet can sometimes experience issues or encounter obstacles along the way. Here are some common problems you may encounter and troubleshooting tips to help you resolve them:
1. Incorrect Wallet Address
One common issue is entering the wrong wallet address when transferring assets. Double-check the recipient address in MetaMask to ensure it matches the address provided by Coinbase. Even a single character mistake can result in the loss of your assets.
2. Insufficient Gas Fee
If your asset transfer is not going through, it might be due to insufficient gas fees. MetaMask uses gas fees to process transactions on the Ethereum network. Make sure you have enough ETH in your MetaMask wallet to cover the gas fees for the transfer.
3. Slow Transaction Confirmation
Transactions on the Ethereum network can sometimes be slow, resulting in delayed confirmation. If your transfer is taking longer than expected, you can check the transaction status on the Ethereum blockchain explorer. Patience might be required, especially during times of high network congestion.
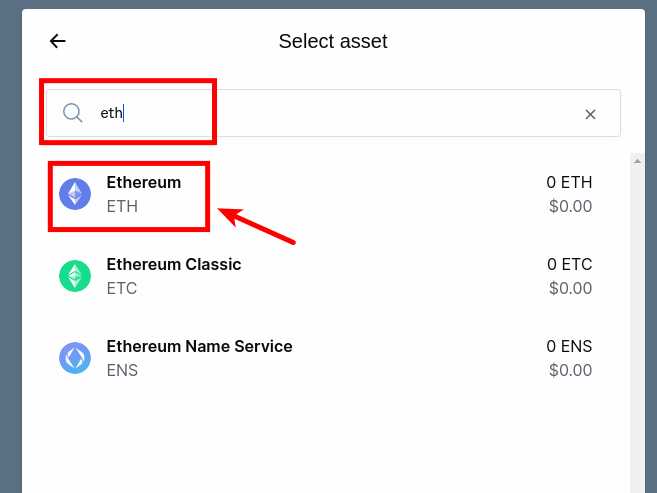
4. Unsupported Tokens
MetaMask may not support some tokens by default. If you are transferring a token that is not natively supported, you might need to add the token manually to your MetaMask wallet. Refer to MetaMask’s documentation or support channels for instructions on how to add custom tokens.
5. Incorrect Network Selection
Ensure that you have selected the correct network in MetaMask. If you are transferring assets from Coinbase to an Ethereum-based wallet, make sure you are on the Ethereum network in MetaMask. Transferring assets on the wrong network will result in failed transactions.
6. Contact Coinbase or MetaMask Support

If you have tried all troubleshooting tips and are still facing issues with transferring your assets, it is recommended to reach out to Coinbase or MetaMask support. They can help you diagnose and resolve any technical problems you may be experiencing.
Keep in mind that cryptocurrency transfers are irreversible, and it is crucial to exercise caution and double-check all the details before initiating any transactions.
Frequently Asked Questions:
Can I transfer all types of assets from Coinbase to MetaMask Wallet?
You can transfer most types of assets from Coinbase to MetaMask Wallet, including cryptocurrencies like Bitcoin, Ethereum, and many others. However, there might be some assets that are not supported or have specific requirements for transferring. It’s always a good idea to check the specific details for each asset before attempting to transfer.
Are there any fees for transferring assets from Coinbase to MetaMask Wallet?
Yes, there are fees associated with transferring assets from Coinbase to MetaMask Wallet. Coinbase charges a network fee for each transaction, which varies depending on the asset and current network conditions. Additionally, MetaMask may also charge a small gas fee for processing the transfer. It’s recommended to check the current fee structure on both platforms before initiating the transfer.
How long does it take to transfer assets from Coinbase to MetaMask Wallet?
The transfer time can vary depending on network congestion and the specific asset being transferred. In general, transferring assets from Coinbase to MetaMask Wallet can take anywhere from a few minutes to several hours. It’s important to be patient and check the status of the transaction on both platforms to ensure it has been successfully completed.
+ There are no comments
Add yours