


Metamask is a popular cryptocurrency wallet that allows users to securely store, manage, and interact with Ethereum and ERC-20 tokens. One of the key steps in using Metamask is transferring Ethereum (ETH) to the wallet. In this article, we will explore efficient methods to transfer ETH to Metamask, ensuring a smooth and hassle-free process.
Method 1: Direct Transfer from Exchange
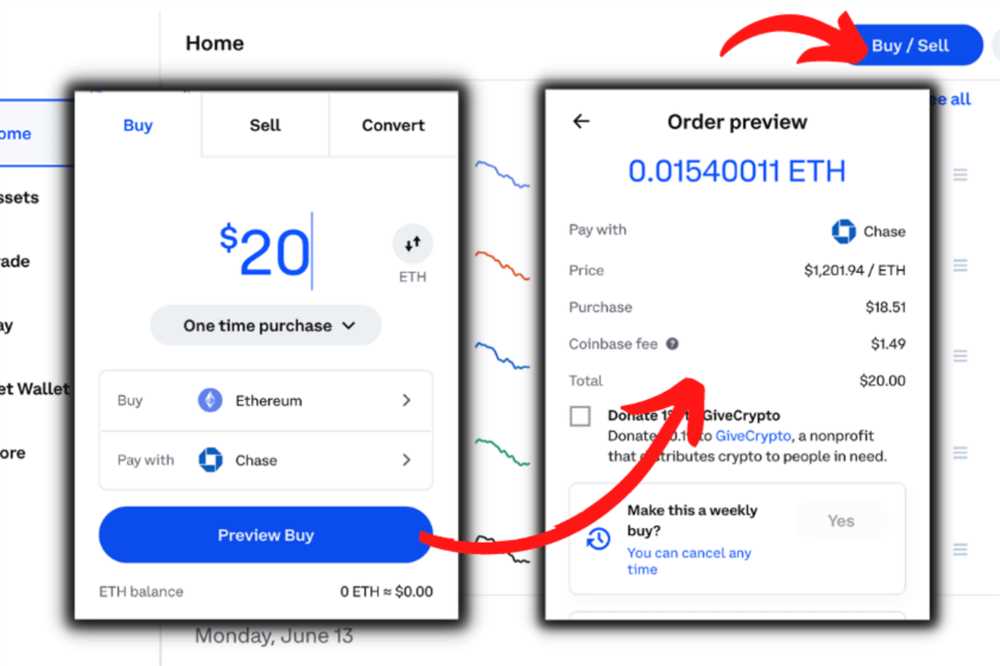
The simplest way to transfer ETH to Metamask is by directly transferring it from a cryptocurrency exchange. Most exchanges provide an option to withdraw ETH to an external wallet, and Metamask can be considered an external wallet. To do this, simply navigate to the “Withdraw” or “Send” section of the exchange, enter your Metamask wallet address, and specify the amount of ETH you wish to transfer. Confirm the transaction and wait for the transfer to complete.
Method 2: Send ETH from Another Wallet
If you already have ETH stored in another wallet, you can easily send it to Metamask. First, open your current wallet and locate the option to send ETH. Enter your Metamask wallet address as the recipient, specify the amount of ETH you want to transfer, and confirm the transaction. The ETH will be sent from your current wallet to Metamask, and you can access it from within the Metamask interface.
Method 3: Using a Decentralized Exchange
If you prefer to use a decentralized exchange (DEX) to acquire ETH, you can transfer the ETH directly to your Metamask wallet. DEX platforms like Uniswap and SushiSwap allow users to connect their Metamask wallet and trade cryptocurrencies directly. Simply connect your Metamask wallet to the DEX platform, select the desired pair (e.g., ETH/USDT), and initiate the transaction. The ETH will be automatically transferred to your Metamask wallet upon completion of the trade.
Now that you are aware of these efficient methods to transfer ETH to Metamask, you can easily start using your Metamask wallet for various Ethereum-based activities, including decentralized applications, token swapping, and more. Remember to double-check the accuracy of the wallet address before initiating any transfer and be cautious of potential phishing attempts to ensure the security of your assets.
Send ETH from Exchange to Metamask

To send ETH from an exchange to Metamask, follow these steps:
- Login to your exchange account and navigate to the withdrawal page.
- Select Ethereum (ETH) as the cryptocurrency you want to withdraw.
- Enter your Metamask wallet address in the recipient address field. Make sure to double-check the address to ensure accuracy.
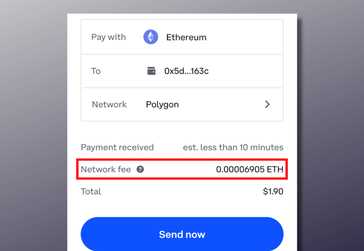
- Specify the withdrawal amount. Take note of any network fees associated with the withdrawal.
- Review the transaction details to ensure everything is correct.
- Click on the “Confirm” or “Withdraw” button to initiate the withdrawal.
- Wait for the transaction to be processed on the exchange side. This may take some time depending on the exchange’s processing speed.
- Once the transaction is processed, you will receive a confirmation email or notification from the exchange.
- Open your Metamask wallet and check the transaction history to make sure the ETH has been successfully transferred.
It’s important to note that the transaction time and fees may vary depending on the exchange and the current network congestion. Always double-check the recipient address before initiating any withdrawal to avoid any potential loss of funds.
Use WalletConnect to Transfer ETH

WalletConnect is another popular method to transfer ETH to your MetaMask wallet. It allows you to connect your MetaMask wallet to various decentralized applications and facilitates secure and efficient transactions.
Here are the steps to transfer ETH using WalletConnect:
- Open your MetaMask wallet and click on the browser extension to access the wallet interface.
- Find the decentralized application or exchange platform that supports WalletConnect integration.
- Click on the WalletConnect option provided by the application.
- A QR code or deep link will be displayed.
- Open your mobile wallet that supports MetaMask and select the WalletConnect option.
- Scan the QR code or click on the deep link to establish a connection between your MetaMask wallet and the decentralized application.
- You will be prompted to confirm the transaction details, including the amount of ETH to transfer and the recipient’s address.
- Review the information and click on the confirm button to submit the transfer.
- Depending on the network congestion and gas fees, the transaction may take a few moments to be confirmed.
- Once the transaction is confirmed, the ETH will be transferred from your wallet to the recipient’s wallet.
Using WalletConnect offers a convenient and secure way to transfer ETH to your MetaMask wallet. It allows you to interact with various decentralized applications using your mobile wallet, ensuring a seamless user experience.
Benefits of Using WalletConnect
1. Enhanced security: WalletConnect uses end-to-end encryption to establish a secure connection between your wallet and the decentralized application.
2. Convenience: WalletConnect eliminates the need for manual address copy-pasting and transaction signing, providing a seamless user experience.
3. Compatibility: WalletConnect is supported by various wallets and decentralized applications, making it easy to connect and transfer ETH.
Conclusion
WalletConnect is a reliable and efficient method for transferring ETH to your MetaMask wallet. By leveraging this technology, you can securely interact with decentralized applications and complete transactions seamlessly. Make sure to verify the details of the transaction before confirming to ensure accuracy.
Transfer ETH using QR Code
Another efficient method to transfer ETH to Metamask is by using a QR code. This method allows you to quickly and easily transfer funds without having to manually type in the recipient’s address.
Here’s how you can transfer ETH using a QR code:
- Open your Ethereum wallet on Metamask.
- Click on the “Send” button to initiate the transfer.
- On the recipient’s wallet or exchange, locate the QR code for receiving ETH.
- Using your smartphone or another device with a camera, scan the QR code.
- Confirm the transaction details, such as the recipient’s address and the amount of ETH to send.
- Click on the “Send” button to complete the transfer.
Transferring ETH using a QR code is not only convenient but also reduces the risk of human error when entering the recipient’s address manually. It is especially useful when transferring funds to mobile wallets or in-person transactions.
Important: Always double-check the transaction details before confirming the transfer. Once the transaction is confirmed, it cannot be reversed.
Note: This method requires a device with a camera and a compatible QR code scanner.
Transfer ETH from Another Wallet to Metamask

Metamask is a popular Ethereum wallet that allows users to manage their ETH and interact with decentralized applications (dApps). If you have ETH stored in another wallet and want to transfer it to Metamask, you can follow these steps:
Step 1: Open Metamask
Open your Metamask browser extension or mobile app and make sure you are logged in to your account.
Step 2: Copy your Metamask address
In Metamask, click on your wallet address to copy it to your clipboard. This is the address where you will be sending your ETH.
Step 3: Log in to your other wallet
Open your other wallet, whether it is a hardware wallet, another browser extension, or a mobile wallet app, and make sure you are logged in to your account.
Step 4: Initiate the transfer
Find the option to send or transfer Ethereum in your wallet. Enter your Metamask address as the recipient, and specify the amount of ETH you want to transfer. Review the details and confirm the transaction.
Step 5: Confirm the transfer
Once you have confirmed the transfer in your other wallet, the ETH will be sent to your Metamask address. It may take a few minutes for the transaction to be confirmed on the Ethereum network.
Step 6: Check your Metamask balance
Go back to your Metamask wallet and check your balance to confirm that the ETH has been transferred successfully. You should see the new ETH balance reflected in your account.
Note: Depending on the congestion of the Ethereum network, the transfer may take longer to complete. You can check the status of your transaction by using a block explorer like Etherscan.
By following these steps, you can transfer ETH from another wallet to your Metamask wallet and continue managing your funds and engaging with dApps using Metamask’s user-friendly interface.
Frequently Asked Questions:
What is Metamask?
Metamask is a digital wallet and a browser extension that allows users to interact with the Ethereum blockchain. It enables users to store, send, and receive Ethereum and other ERC-20 tokens.
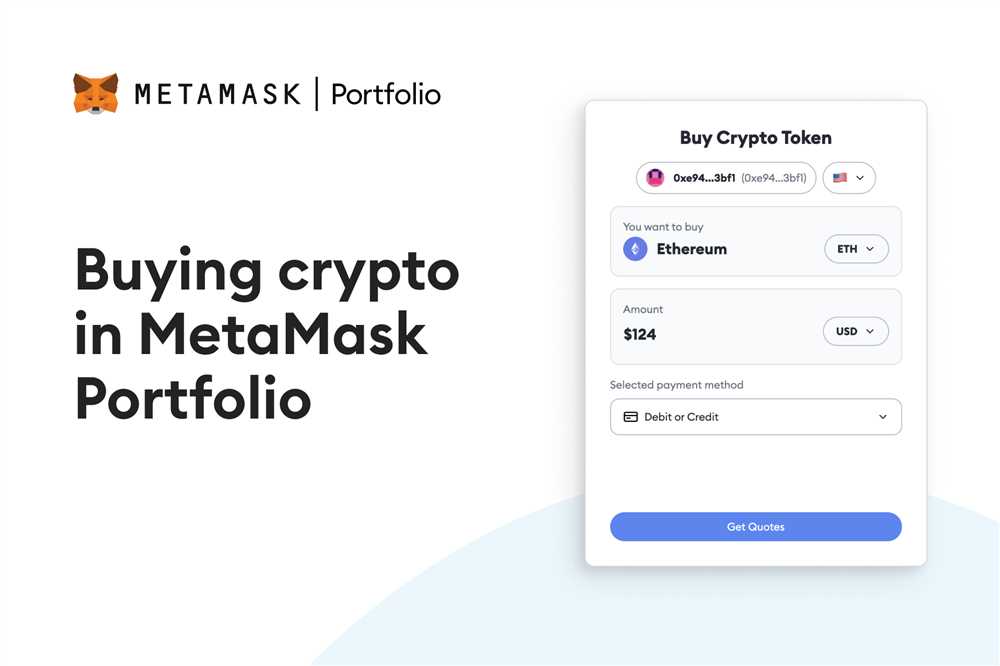
Can I transfer Ethereum to Metamask?
Yes, you can transfer Ethereum to Metamask by following a few simple steps. First, open your Metamask wallet and copy the address. Then, go to your external wallet or exchange platform and initiate a transaction by entering the Metamask address as the recipient. Confirm the transaction and wait for the Ethereum to be transferred to your Metamask wallet.

+ There are no comments
Add yours