


Metamask is a popular cryptocurrency wallet that allows users to securely store, send, and receive digital assets. It also serves as a gateway to various decentralized applications (dApps) on the Ethereum blockchain. Binance.us, on the other hand, is a leading cryptocurrency exchange in the United States.
If you are an avid user of both Metamask and Binance.us, you might be wondering if there is a way to connect the two platforms for a more seamless experience. Good news! Connecting your Binance.us account to your Metamask wallet is indeed possible, and it’s not as complicated as you might think.
In this step-by-step guide, we will walk you through the process of connecting your Binance.us account to your Metamask wallet, allowing you to easily transfer funds between the two platforms and take advantage of the functionalities they offer.
Before we begin, make sure you have both a Binance.us account and the Metamask extension installed on your preferred web browser. Once you have everything set up, let’s get started on the journey of connecting Binance.us to Metamask!
Step 1: Creating a Binance.us account

To connect Binance.us to your Metamask wallet, you first need to create an account on Binance.us. Follow these steps to get started:
1. Visit the Binance.us website: Open your preferred web browser and go to the official website of Binance.us.
2. Click on “Register”: Look for the “Register” button on the homepage and click on it.
3. Fill in the registration form: Provide the required information in the registration form, including your email address and password. Make sure to choose a strong password to ensure the security of your account.
4. Agree to the terms and conditions: Read through the terms and conditions of Binance.us and agree to them by checking the box.
5. Complete the verification process: Follow the prompts to verify your email address and complete the necessary verification steps. This may include providing additional personal information for identity verification purposes.
6. Set up two-factor authentication (2FA): Enable two-factor authentication for an added layer of security. This can usually be done through an app on your mobile device, such as Google Authenticator or Authy.
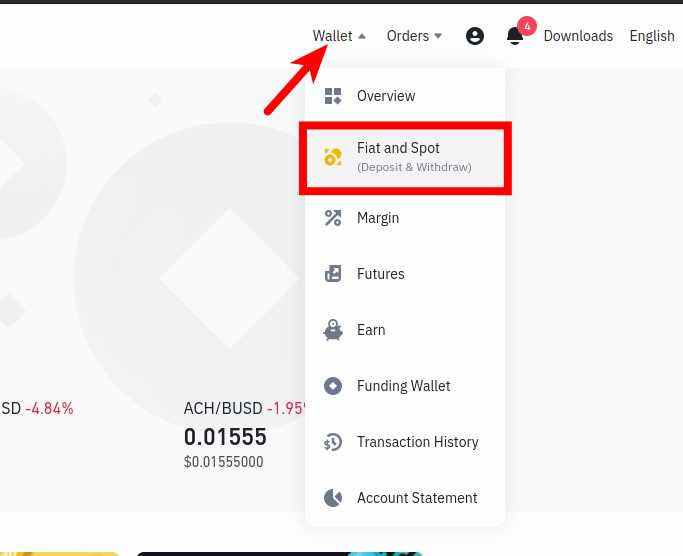
7. Fund your Binance.us account: Once your account is verified and set up, you can proceed to deposit funds into your Binance.us account. This will be necessary to make trades and transactions.
Congratulations! You have successfully created a Binance.us account. The next step is to connect it to your Metamask wallet, which will allow you to manage your assets and execute trades directly from your wallet.
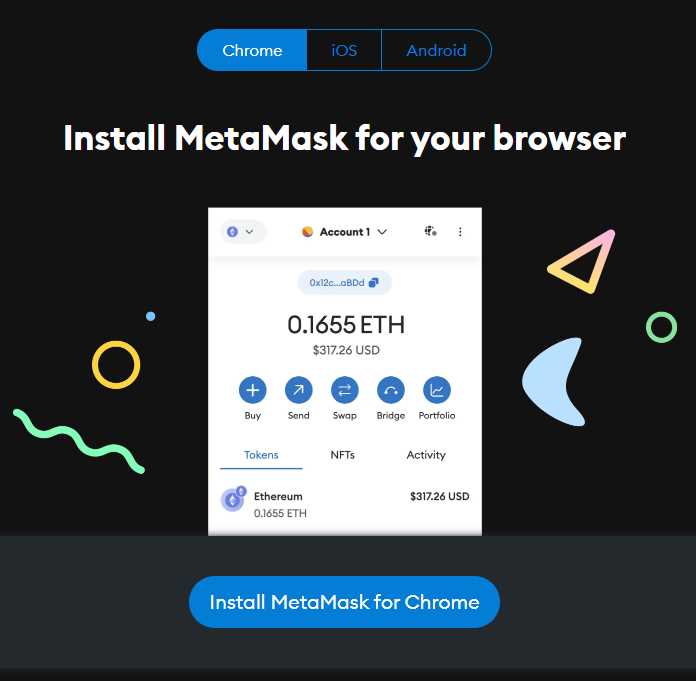
Step 2: Installing the Metamask Wallet extension
The next step in connecting Binance.us to your Metamask Wallet is to install the Metamask Wallet extension. Follow the steps below to complete this process:
1. Open your web browser
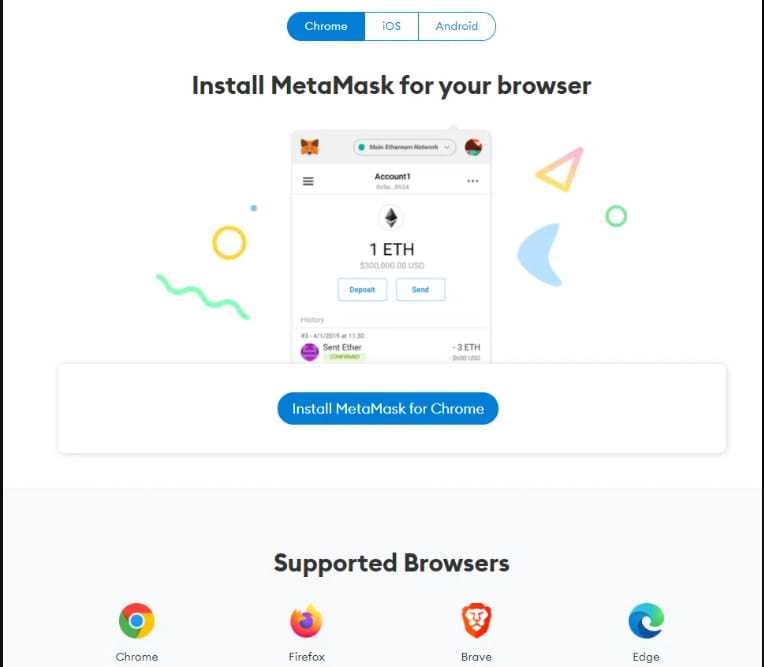
Launch your preferred web browser on your computer. Metamask Wallet is compatible with major web browsers including Google Chrome, Mozilla Firefox, Brave, and Microsoft Edge.
2. Go to the Metamask website
Visit the official website of Metamask by typing “https://metamask.io/” in the address bar of your web browser. Press Enter to load the website.
3. Install the extension
On the Metamask website, look for the “Get Chrome Extension” or “Get Firefox Extension” button and click on it. This will redirect you to the respective extension store for your browser.
4. Add the extension to your browser
Click on the “Add to Chrome” or “Add to Firefox” button to add the Metamask Wallet extension to your web browser. A pop-up window may appear asking for confirmation. Click “Add extension” to proceed.
5. Set up your Metamask Wallet
Once the extension is added to your browser, a new tab will open automatically with the Metamask setup. Click on the “Get Started” button to begin the setup process.
6. Create a new wallet or import an existing one
You will be presented with two options: “Create a Wallet” or “Import Wallet.” Choose one based on your situation. If you are new to Metamask, select “Create a Wallet” and follow the instructions to set up a new wallet. If you already have a Metamask wallet, select “Import Wallet” and follow the prompts to import it.
7. Backup your seed phrase
Metamask will generate a seed phrase, which is a series of words that can be used to restore your wallet. It’s crucial to write down and securely store this seed phrase. Follow the instructions provided by Metamask to do this.
8. Set up a password
Create a strong and secure password for your Metamask Wallet. This password will be required whenever you make transactions or access your wallet. Enter a password and confirm it when prompted.
9. Complete the setup process
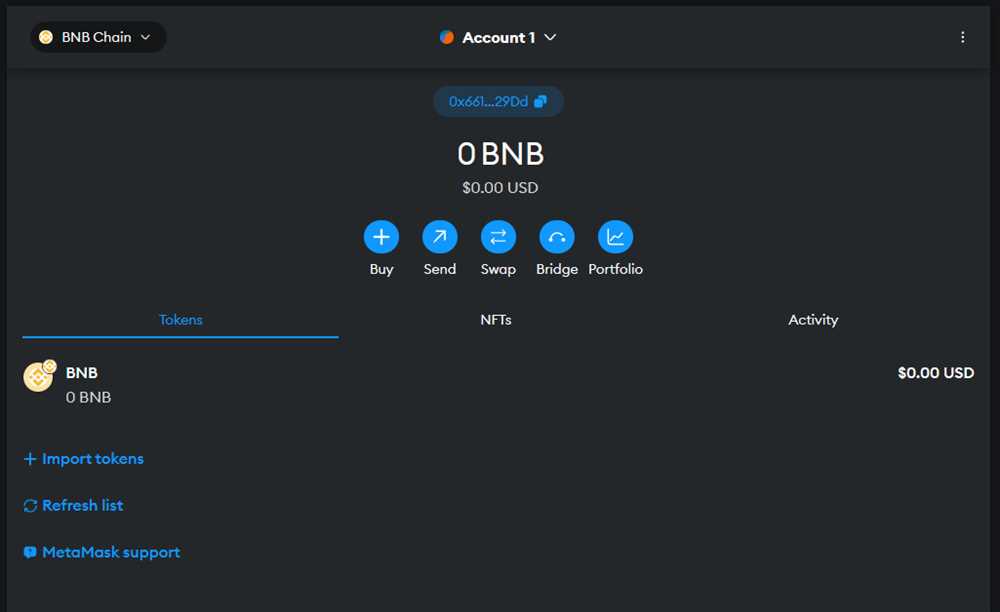
Once you have chosen a password, your Metamask Wallet setup is complete. You will be directed to your wallet dashboard, which will display your account address, balance, and other relevant information. Your wallet is now ready to be connected to Binance.us.
| Previous Step | Next Step |
| Step 1: Creating a Binance.us account | Step 3: Adding Binance.us to Metamask Wallet |
Step 3: Adding Binance Smart Chain network to Metamask
Now that you have created your Binance.us account and set up your Metamask wallet, it’s time to connect them. The next step is to add the Binance Smart Chain network to your Metamask.
Follow these steps to add the Binance Smart Chain network:
Step 1: Open your Metamask wallet extension in your web browser.
Step 2: Click on the network selection dropdown at the top of the Metamask window.
Step 3: Scroll down to the bottom and click on “Custom RPC”.
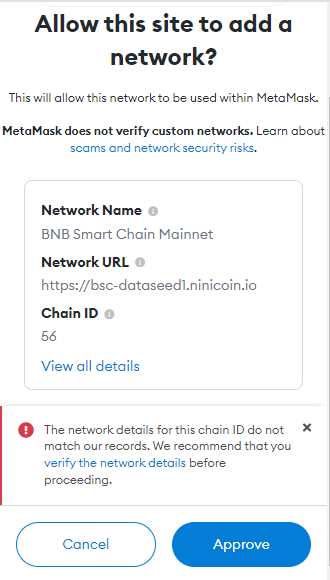
Step 4: In the “New Network” window that appears, enter the following details:
Network Name: Binance Smart Chain
New RPC URL: https://bsc-dataseed.binance.org/
ChainID: 56
Symbol: BNB
Block Explorer URL: https://bscscan.com
Make sure to double-check that you have entered the correct details.
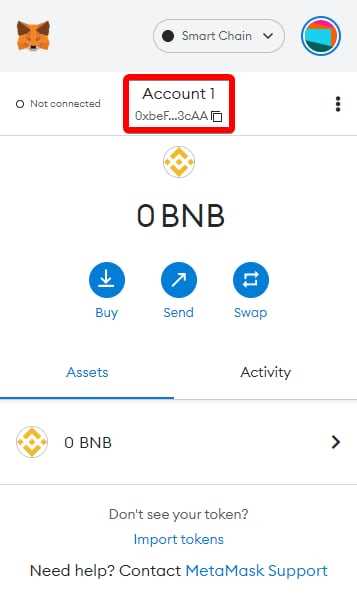
Step 5: Click “Save” to add the Binance Smart Chain network to your Metamask.
That’s it! You have successfully added the Binance Smart Chain network to your Metamask wallet. Now you can proceed with connecting your Binance.us account to Metamask and start trading on Binance using your Metamask wallet.
Note: Make sure to have some ETH in your Metamask wallet to cover transaction fees on the Binance Smart Chain network.
Stay tuned for the next step on how to connect your Binance.us account to Metamask!
Step 4: Connecting Binance.us to Metamask Wallet
Once you have successfully set up your Metamask wallet and created a Binance.us account, you can now connect your Binance.us account to your Metamask wallet. Follow the steps below:
Step 1:
Open the Metamask extension in your browser and click on the account icon located at the top right corner of the screen.
Step 2:
From the account dropdown menu, select “Connect Hardware Wallet”.
Step 3:
Click on the “Ledger” option as Binance.us supports integration with Ledger devices.
Step 4:
Connect your Ledger device to your computer and follow the instructions on the screen to access your wallet using your Ledger device.
Step 5:
Once your Ledger device is connected and your wallet is unlocked, you can click on the “Connect Wallet” button.
With these steps, you have successfully connected your Binance.us account to your Metamask wallet. Now, you can enjoy seamless access to your Binance.us account through your Metamask wallet.
Frequently Asked Questions:
What is Binance.us?
Binance.us is a cryptocurrency exchange platform that allows users to buy, sell, and trade various digital currencies.
What is Metamask Wallet?
Metamask Wallet is a cryptocurrency wallet that allows users to securely store and manage their digital assets. It also acts as a browser extension that allows users to interact with decentralized applications (dapps) on the Ethereum blockchain.

+ There are no comments
Add yours