


Are you a beginner in the world of cryptocurrencies and interested in connecting Fantom to Metamask? Look no further! In this step-by-step guide, we will walk you through the process of connecting Fantom to Metamask so that you can seamlessly manage your Fantom assets.
Step 1: Install Metamask
The first step is to install the Metamask browser extension. Metamask is a popular cryptocurrency wallet that allows users to store, manage, and interact with various cryptocurrencies. Simply go to the Metamask website, download the extension, and add it to your browser.
Step 2: Set up a Metamask Account
Once Metamask is installed, open the extension and follow the instructions to set up a new account. Make sure to securely save your seed phrase, as it will be essential for accessing and restoring your account.
Step 3: Connect to the Fantom Network
Now it’s time to connect your Metamask account to the Fantom network. Open the Metamask extension and click on the network dropdown. Select “Custom RPC” and a form will appear where you can enter the Fantom network details.
Step 4: Enter Fantom Network Details
In the form, enter the following details to connect to the Fantom network:
Network Name: Fantom Opera
RPC URL: https://rpcapi.fantom.network
Chain ID: 250
Symbol: FTM
Block Explorer URL: https://ftmscan.com/
Step 5: Confirm and Connect
Double-check the details you entered, and once you are certain they are correct, click on “Save” to connect to the Fantom network. Metamask will now be connected to the Fantom network, and you will be able to manage your Fantom assets within the extension.
Congratulations! You have successfully connected Fantom to Metamask. Now you can enjoy the benefits of managing your Fantom assets directly from the Metamask extension. Happy trading! Remember to always stay updated with the latest security practices to ensure the safety of your cryptocurrencies.
Setting Up Metamask
To connect Fantom to Metamask, you will first need to set up the Metamask wallet on your browser. Follow these steps to get started:
Step 1: Install Metamask Extension
Go to the official Metamask website: https://metamask.io/. Download and install the Metamask extension for your preferred browser (Chrome, Firefox, or Brave). Once installed, you will see the Metamask icon in your browser’s toolbar.
Step 2: Create a New Wallet
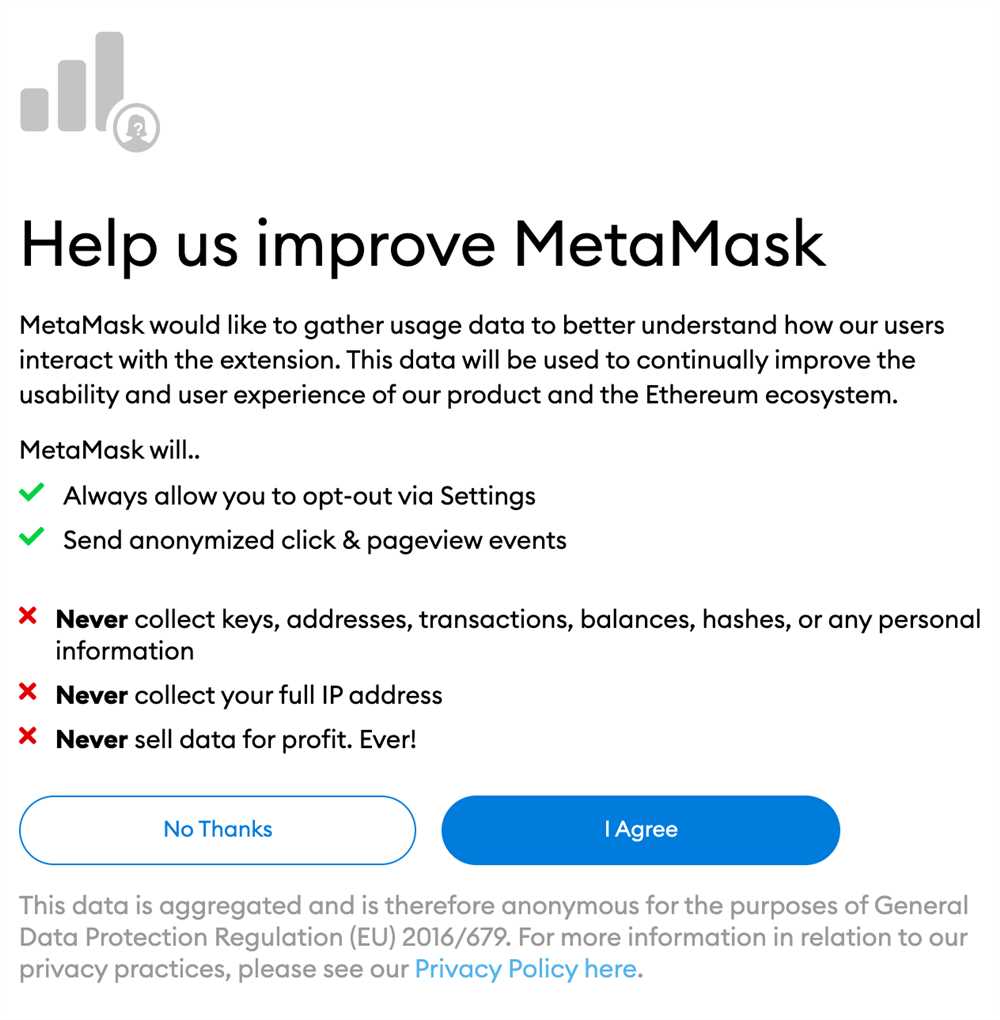
Click on the Metamask icon and a pop-up window will appear. Click on “Get Started” to create a new wallet. You will be asked to agree to the terms of service. After reading, click on “Accept” to continue.
Next, you will be prompted to either create a new wallet or import an existing one. Since you are setting up Metamask for the first time, select “Create a Wallet”.
Enter a secure password for your wallet and click on “Create”. Make sure to use a strong password and keep it secure. Confirm your password on the next screen.
Metamask will then show you a seed phrase, which is a set of 12 or 24 words that can be used to recover your wallet. Write down these words in the correct order and keep them in a safe place. This seed phrase is critical, as it can be used to access your wallet in case you forget your password or lose your device.
Once you have saved your seed phrase, you will be asked to confirm it by selecting the correct words in the original order. This is a security measure to ensure that you have correctly saved your seed phrase.
Step 3: Connect to the Fantom Network
With your wallet created, it’s time to connect it to the Fantom network. Click on the network selection dropdown in the Metamask extension and select “Custom RPC”.
In the RPC URL field, enter the Fantom network URL: https://rpc.ftm.tools. Enter “Fantom” as the network name, and set the chain ID to “250”. Finally, click on “Save” to save the network settings.
Step 4: Import Wallet to Metamask
If you already have an existing wallet that you want to use with Metamask, click on the Metamask icon and select “Import Wallet” instead of creating a new one.
Enter your seed phrase in the correct order and follow the on-screen prompts to import your wallet into Metamask.
Congratulations! You have successfully set up Metamask and connected it to the Fantom network. You can now start using Metamask to interact with the Fantom ecosystem and perform various transactions.
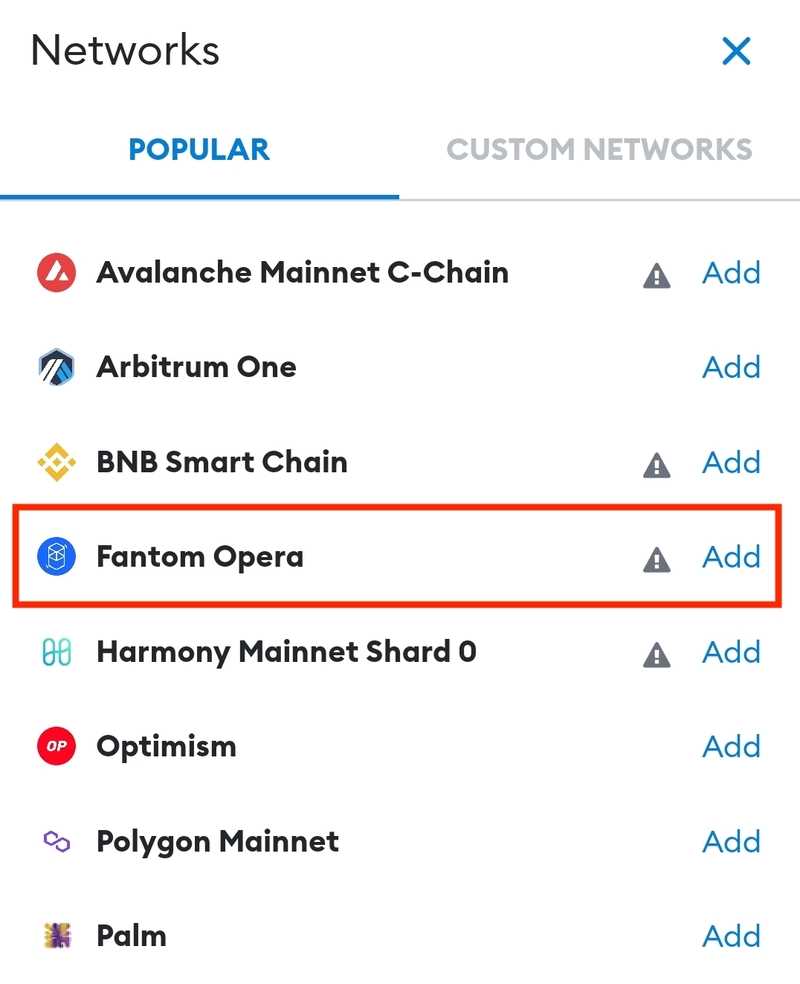
Adding a Custom Network
If you want to connect Fantom to Metamask, you’ll need to add a custom network configuration. Follow these steps to do so:
Step 1: Open Metamask
First, make sure you have the Metamask extension installed and click on the Metamask icon in your browser to open the wallet.
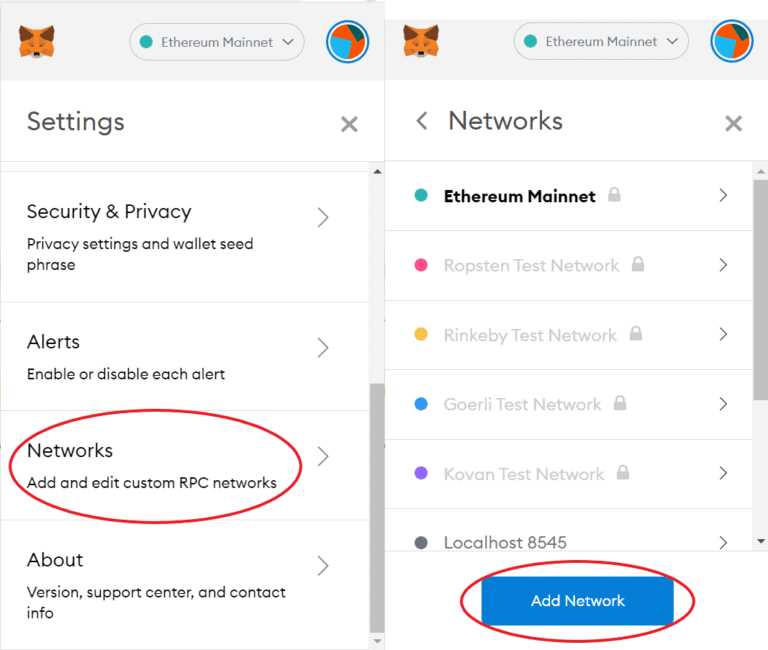
Step 2: Access Network Configuration
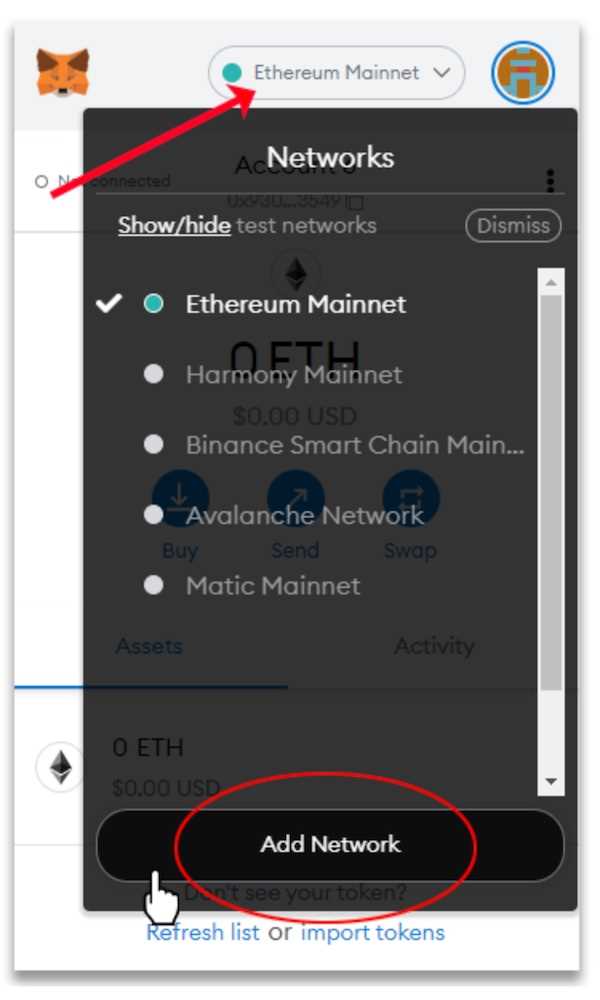
Once you have Metamask open, click on the network dropdown, which is usually located at the top of the wallet interface. From the dropdown menu, select “Custom RPC”.
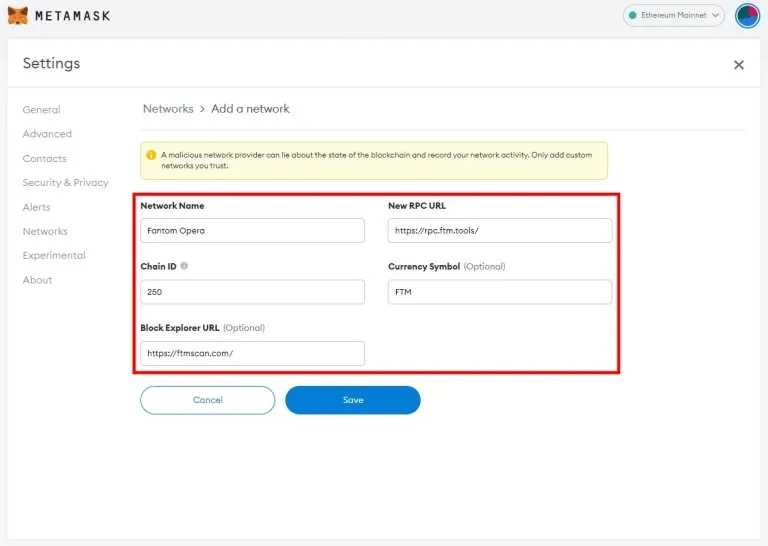
Step 3: Fill in Network Details
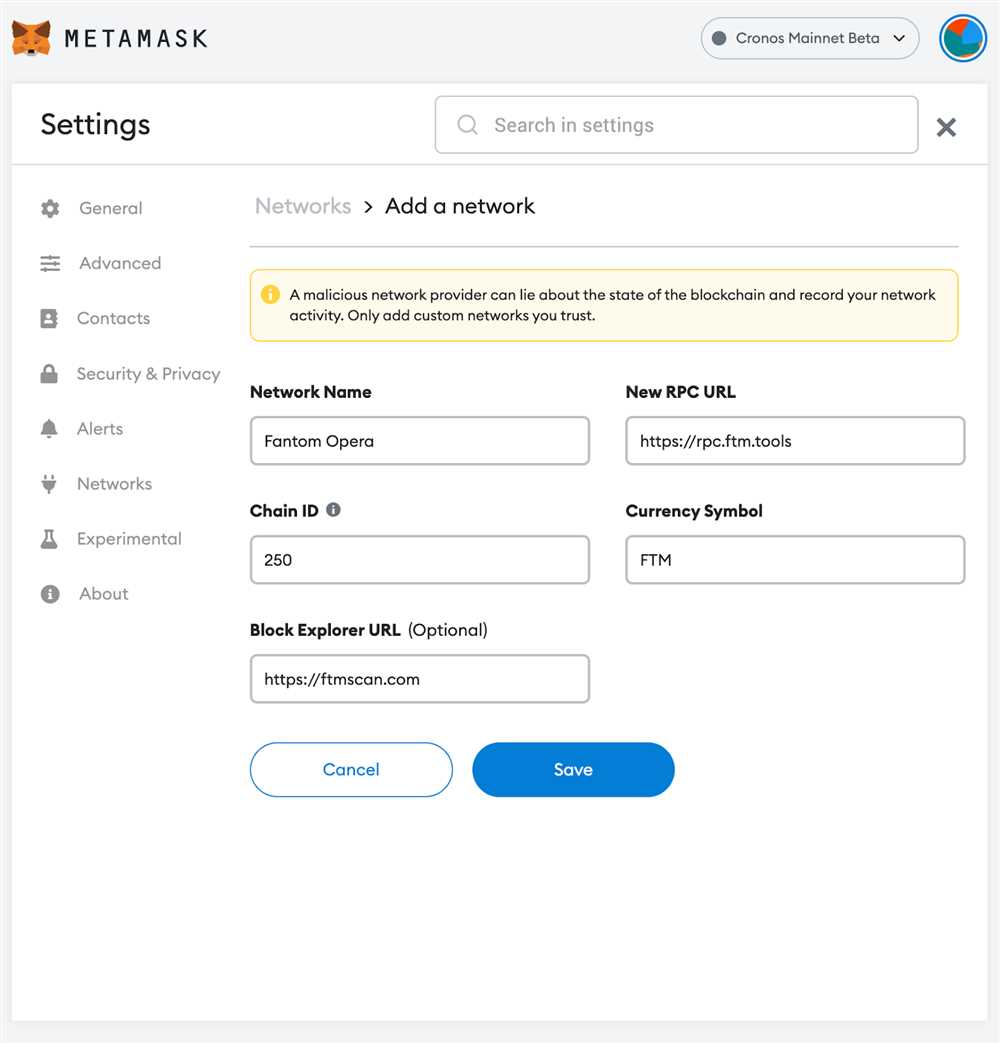
After selecting “Custom RPC”, a form will appear where you can fill in the details for the Fantom network. Use the following information:
Network Name: Fantom Opera
New RPC URL: https://rpcapi.fantom.network
Chain ID: 250
Currency Symbol: FTM
Make sure you double-check that the information is correct before proceeding.
Step 4: Save and Connect
Once you have filled in the network details, click on the “Save” button. Metamask will now connect to the Fantom network.
Now you can use your Metamask wallet to interact with decentralized applications (dApps) on the Fantom network.
Note: The steps outlined above are for adding a custom network to Metamask. It’s important to exercise caution when interacting with any blockchain network and ensure that you are using trusted sources for network configuration.
Getting Started with Fantom
Welcome to Fantom, a fast and scalable blockchain platform! If you’re new to Fantom, this guide will help you get started and connect Fantom to your Metamask wallet.
Step 1: Install Metamask

The first step is to install the Metamask extension on your web browser. Metamask is a popular cryptocurrency wallet that allows you to connect to various blockchains, including Fantom.
Step 2: Create a Fantom Wallet
Once you have Metamask installed, open the extension and click on the “Get Started” button. Follow the prompts to create a new wallet or import an existing one. Make sure to securely store your wallet’s seed phrase, as it is the key to accessing your funds.
Step 3: Connect Fantom to Metamask
After creating your wallet, click on the Metamask icon in your browser’s toolbar to open the extension. In the Metamask menu, click on the network selection dropdown and select “Custom RPC”.
In the “New RPC URL” field, enter the Fantom Opera network’s RPC URL: https://rpc.fantom.network. Set the chain ID to 250, and enter a suitable name for the network, such as “Fantom Opera”. Click “Save” to connect Metamask to Fantom.
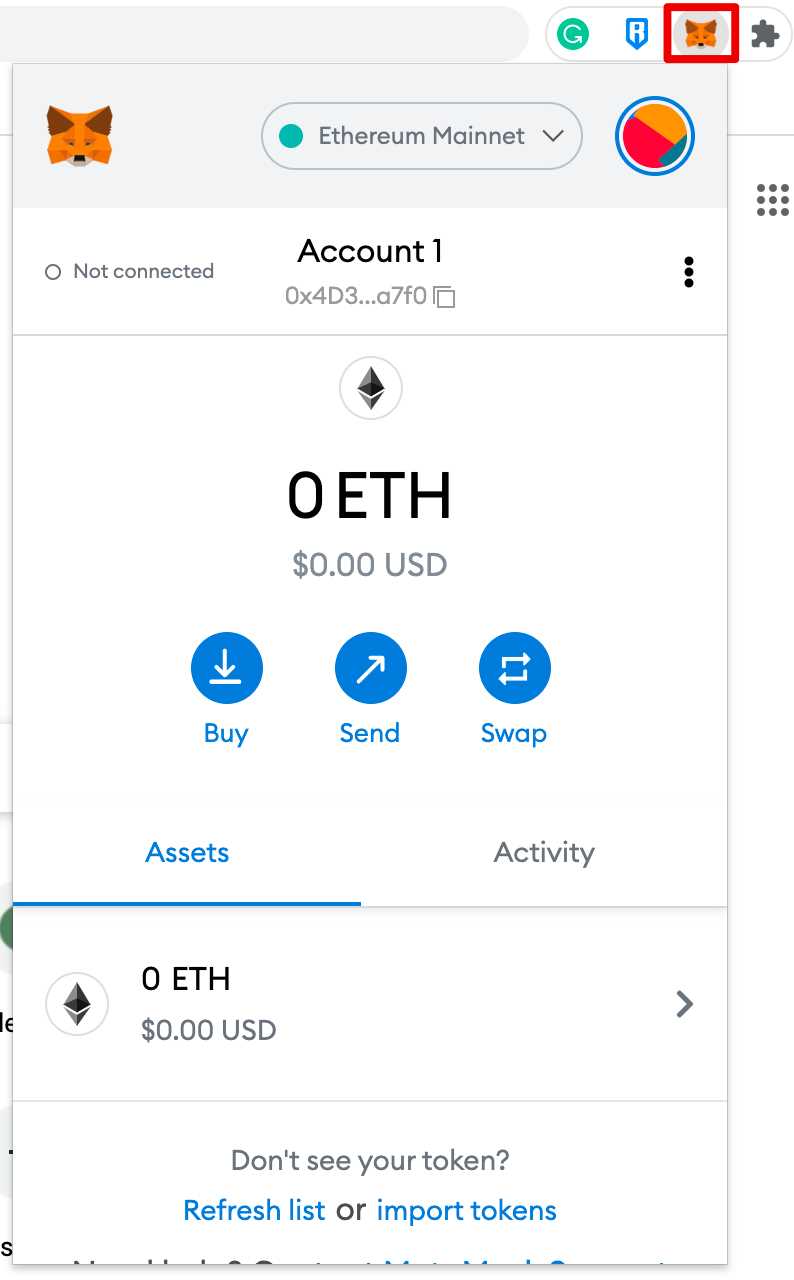
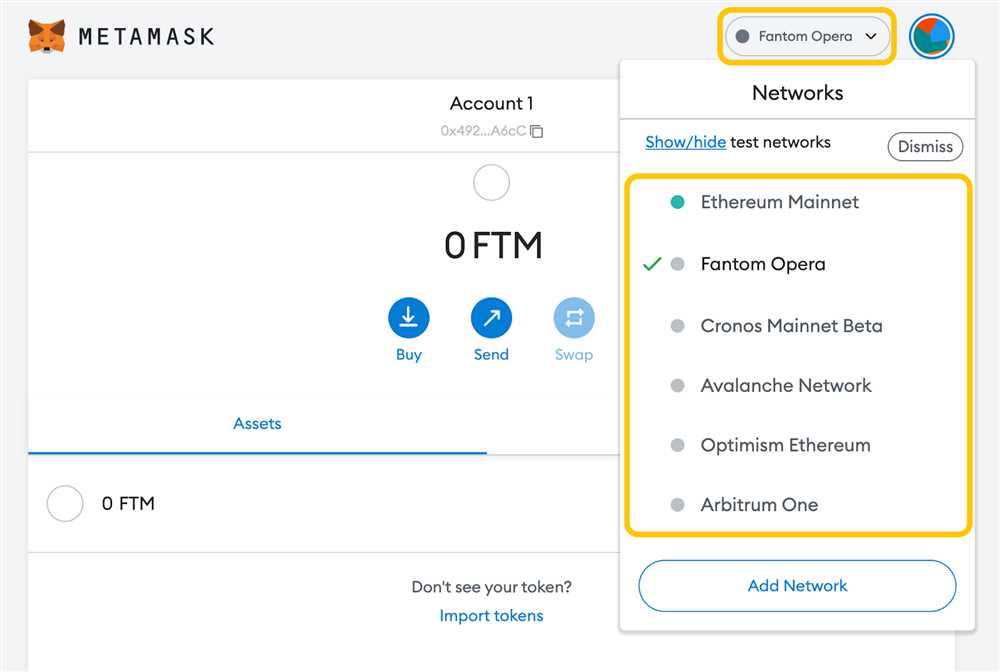
Step 4: Add FTM Tokens to Metamask
To see your FTM tokens in Metamask, click on the Metamask icon in your browser’s toolbar to open the extension and select your Fantom Opera network. Then, click on the “Assets” tab and search for “FTM”. Click “Add” to add FTM tokens to your Metamask wallet.
Congratulations! You have successfully connected Fantom to Metamask. You can now send and receive FTM tokens and interact with decentralized applications built on the Fantom network.
Remember to always exercise caution when handling cryptocurrencies and be mindful of the security of your wallet.
Connect Fantom to Metamask
Metamask is a popular cryptocurrency wallet that allows users to interact with decentralized applications (dApps). By connecting Fantom to Metamask, users can easily access and transfer their Fantom tokens.
Step 1:
Make sure you have the Metamask extension installed on your web browser. If you don’t have it, you can download it from the official Metamask website and follow the installation instructions.
Step 2:
Open Metamask and click on the network dropdown menu. Select “Custom RPC” to manually add the Fantom network.
Step 3:
In the “New RPC URL” field, enter the Fantom network’s RPC URL: https://rpc.ftm.tools. Set the Chain ID to 250 and enter “FTM” as the currency symbol.
Step 4:
Click on “Save” to add the Fantom network to your Metamask wallet.
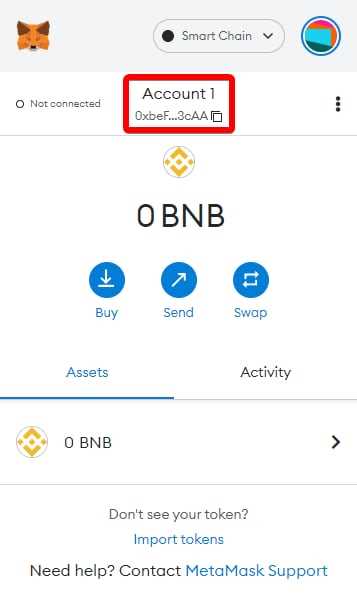
Step 5:
Now that you have added the Fantom network to Metamask, you can connect your Fantom wallet. Click on the Metamask extension in your browser and select the account you want to connect.
Step 6:
Once you have selected your account, you will see the option to “Connect to Fantom”. Click on it to initiate the connection.
Step 7:
Metamask will redirect you to the Fantom wallet application. Approve the connection request and authorize the connection.
Step 8:
Congratulations! You have successfully connected Fantom to Metamask. You can now use Metamask to access and manage your Fantom tokens.
Remember to always exercise caution when interacting with cryptocurrencies. Make sure to double-check addresses and transaction details to avoid any potential scams or mistakes.
Connecting Fantom to Metamask is a straightforward process that allows you to access your Fantom tokens with the convenience of the Metamask wallet. Enjoy exploring the world of decentralized finance (DeFi) on the Fantom network!
Frequently Asked Questions:
What is the RPC URL for the Fantom network?
The RPC URL for the Fantom network is: https://rpc.ftm.tools/

+ There are no comments
Add yours