


Welcome to the fascinating world of Ethereum! Whether you’re a seasoned investor or just getting started, navigating the world of cryptocurrency can be a daunting task. And when it comes to sending Ethereum, you might find yourself feeling a bit lost. But fear not! In this beginner’s guide, we’ll walk you through the process of sending Ethereum from Coinbase to Metamask, giving you the confidence to make your first successful transaction.
Before we dive in, let’s get acquainted with the key players. Coinbase is one of the most popular cryptocurrency exchanges out there, providing an easy and secure platform for buying, selling, and storing various cryptocurrencies, including Ethereum. On the other hand, Metamask is a digital wallet that allows you to manage your Ethereum and interact with decentralized applications (dApps) on the Ethereum network. Both Coinbase and Metamask are user-friendly platforms, making them perfect for beginners.
Now that you know the basics, let’s walk through the step-by-step process of sending Ethereum from Coinbase to Metamask. First, you’ll need to create an account on Coinbase and go through their verification process. Once your account is set up and verified, you can easily buy Ethereum using your preferred payment method. Coinbase will then store your Ethereum in their secure wallet until you’re ready to move it to Metamask.
Next, it’s time to set up your Metamask wallet. Simply download the Metamask browser extension and follow the prompts to create a new wallet. Make sure to securely store your recovery phrase as it will be your key to accessing your wallet in case of any mishaps. Once your wallet is set up, you’ll be provided with a unique Ethereum address, which acts as your personal identifier on the Ethereum network.
With your Coinbase and Metamask wallets ready, it’s time to send your Ethereum. Log in to your Coinbase account and navigate to the “Accounts” tab. Locate your Ethereum wallet and click on the “Send” button. You’ll be prompted to enter the recipient’s Ethereum address, which in this case, is your unique Metamask address. Double-check that the address is correct to avoid any potential loss of funds. Finally, enter the amount of Ethereum you wish to send, review the details, and confirm the transaction. Voila! You’ve successfully sent Ethereum from Coinbase to Metamask.
Mastering the art of sending Ethereum is an essential skill for any cryptocurrency enthusiast. With this beginner’s guide, you now have the knowledge and confidence to navigate the process seamlessly. Remember to always double-check the addresses and amount when making transactions, as the cryptocurrency world can be unforgiving. Now go forth and explore the vast possibilities that Ethereum and decentralized finance have to offer!
Mastering the Art of Sending Ethereum
As a beginner in the world of Ethereum, sending and receiving cryptocurrency may seem like a daunting task. However, with the right knowledge and tools, you can easily navigate this process and become a master of sending Ethereum.
Understanding Ethereum Addresses
Before you can send Ethereum, you need to have a recipient address. Ethereum addresses are unique identifiers that are used to receive funds. They are similar to bank account numbers in the traditional banking system.
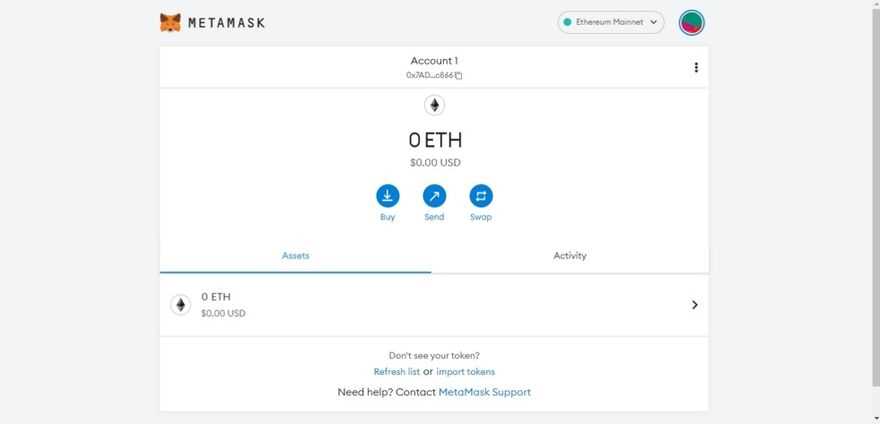
To obtain your Ethereum address, you can use a wallet like Metamask. Metamask is a popular wallet that allows you to securely store and manage your Ethereum. Once you have installed Metamask, you can generate an Ethereum address to receive funds.
Sending Ethereum from Coinbase
If you are using Coinbase to buy or hold Ethereum, you can easily send your funds to another Ethereum address like the one generated by Metamask.
To send Ethereum from Coinbase, follow these steps:
- Log in to your Coinbase account.
- Click on the “Accounts” tab.
- Locate your Ethereum wallet.
- Click on the “Send” button.
- Enter the recipient’s Ethereum address.
- Specify the amount of Ethereum you want to send.
- Double-check the address and amount.
- Click on the “Send” button to initiate the transaction.
Note: It is important to double-check the recipient’s address before sending Ethereum to ensure that the funds are going to the intended recipient. Once the transaction is initiated, it cannot be reversed.
Confirming the Transaction
After you have initiated the transaction, it will be broadcasted to the Ethereum network for confirmation. This process may take some time, depending on the network congestion and the gas fees you have set.
Once the transaction is confirmed, the Ethereum will be sent from your Coinbase wallet to the recipient’s address. You can track the progress of the transaction using the transaction hash provided by Coinbase.
Overall, sending Ethereum is a straightforward process that can be mastered with a little practice. By understanding Ethereum addresses, using wallets like Metamask, and following the necessary steps on Coinbase, you can become comfortable with sending Ethereum and take full advantage of the benefits of this cryptocurrency.
Remember, always exercise caution and do thorough research before engaging in any cryptocurrency transactions.
A Complete Beginner’s Guide

Welcome to the world of Ethereum! If you’re new to this exciting blockchain technology, you’re in the right place. In this beginner’s guide, we’ll walk you through the process of sending Ethereum from Coinbase to Metamask, step by step.
Step 1: Set Up Your Coinbase Account
If you don’t already have a Coinbase account, you’ll need to create one. Visit the Coinbase website and sign up for a new account. Once your account is set up, you’ll be able to buy, sell, and store Ethereum.
Step 2: Install Metamask
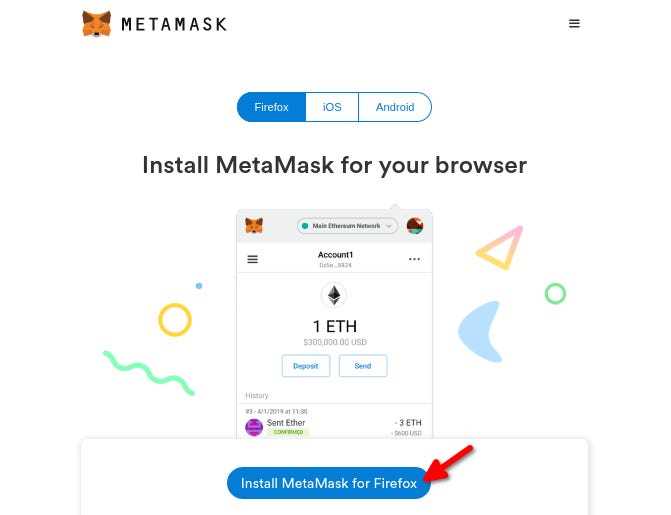
Now that you have your Coinbase account, it’s time to set up your Metamask wallet. Metamask is a browser extension that allows you to interact with Ethereum decentralized applications. Visit the Metamask website and follow the installation instructions for your preferred browser.
Step 3: Connect Metamask to Coinbase
Once Metamask is installed, open the extension and set up a new wallet. Be sure to securely store your recovery passphrase, as this will be your only way to access your wallet if you forget your password.
Next, connect your Metamask wallet to your Coinbase account. In Coinbase, go to the “Settings” section and select “Linked Accounts”. From there, choose “Connect” under the Metamask option and follow the prompts to authorize the connection.
Step 4: Transfer Ethereum from Coinbase to Metamask
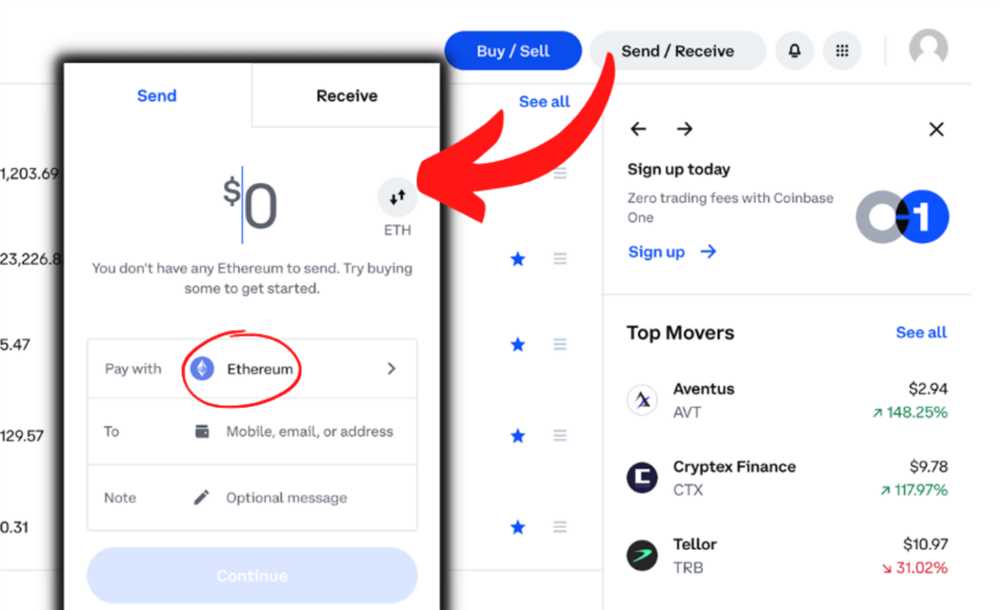
Now that everything is set up, it’s time to transfer your Ethereum from Coinbase to Metamask. In Coinbase, go to the “Accounts” section and select your Ethereum wallet. Then, click on the “Send” button and enter your Metamask wallet address as the recipient.
Double-check that the address is correct before confirming the transaction. Once you confirm, the Ethereum will be sent from your Coinbase wallet to your Metamask wallet. Depending on network congestion, it may take a few minutes for the transaction to be processed.
Step 5: Start Using Your Ethereum on Metamask
Congratulations! You’ve successfully sent Ethereum from Coinbase to Metamask. Now you can start using your Ethereum to interact with decentralized applications, participate in token sales, and more.
Remember to always keep your wallet credentials secure and be cautious when interacting with unknown websites or contracts. The decentralized nature of Ethereum provides great opportunities, but it also requires responsibility and vigilance on your part.
Enjoy exploring the world of Ethereum!
Step-by-Step Instructions from Coinbase to Metamask
Follow these simple steps to send Ethereum from Coinbase to your Metamask wallet:
-
Create a Metamask Wallet
- Download and install the Metamask extension for your browser.
- Click on the Metamask icon in your browser toolbar.
- Follow the on-screen instructions and create a new wallet. Remember to store your seed phrase in a safe place.
- Set a password for your wallet and complete the setup process.
-
Copy Your Metamask Address
- Click on the Metamask icon in your browser toolbar.
- Click on the account dropdown and select the account you want to receive the Ethereum.
- Click on the “…” icon next to your account address and select “Copy Address to Clipboard”.
-
Sign in to Coinbase
- Go to the Coinbase website and sign in to your account.
- Click on the “Accounts” tab and select your Ethereum wallet.
- Click on the “Send” button.
-
Enter the Metamask Address
- Go back to your Metamask wallet and click on the “…” icon next to your account address.
- Select “Copy Address to Clipboard” to copy your Metamask address.
- Go back to the Coinbase website and paste your Metamask address into the “Recipient” field.
-
Enter the Amount and Confirm
- Enter the amount of Ethereum you want to send to your Metamask wallet.
- Verify the transaction details and double-check the recipient address.
- Click on the “Continue” button to proceed.
-
Confirm the Transaction
- Review the transaction details one last time.
- Enter your Coinbase account password or two-factor authentication code to confirm the transaction.
- Click on the “Send” button to initiate the transaction.
Congratulations! You have successfully sent Ethereum from Coinbase to your Metamask wallet. You can now use your Ethereum in any decentralized application (dApp) that is compatible with Metamask.
Understanding the Process and Security Measures
When it comes to sending Ethereum from Coinbase to Metamask, it’s important to have a clear understanding of the process and take necessary security measures. Here’s a step-by-step guide to help you navigate through this process:
Step 1: Generate an Ethereum Wallet on Metamask
The first step is to set up a wallet on Metamask. Install the Metamask browser extension and follow the instructions to generate a new Ethereum wallet. Remember to securely backup your seed phrase as it will be necessary for recovering your wallet if needed.
Step 2: Create an Account on Coinbase
If you don’t already have an account on Coinbase, create one by providing the necessary information. Coinbase is a popular cryptocurrency exchange platform that allows you to buy, sell, and store Ethereum.
Step 3: Link Your Metamask Wallet to Coinbase
In order to send Ethereum from Coinbase to Metamask, you need to link your Metamask wallet to your Coinbase account. Go to the settings or account section on Coinbase and select the option to add an external wallet. Enter your Metamask wallet address to link it with your Coinbase account.
Step 4: Enable Two-Factor Authentication
For added security, enable two-factor authentication on both Coinbase and Metamask. This extra layer of security helps to protect your funds from unauthorized access.
Step 5: Initiate the Ethereum Transfer

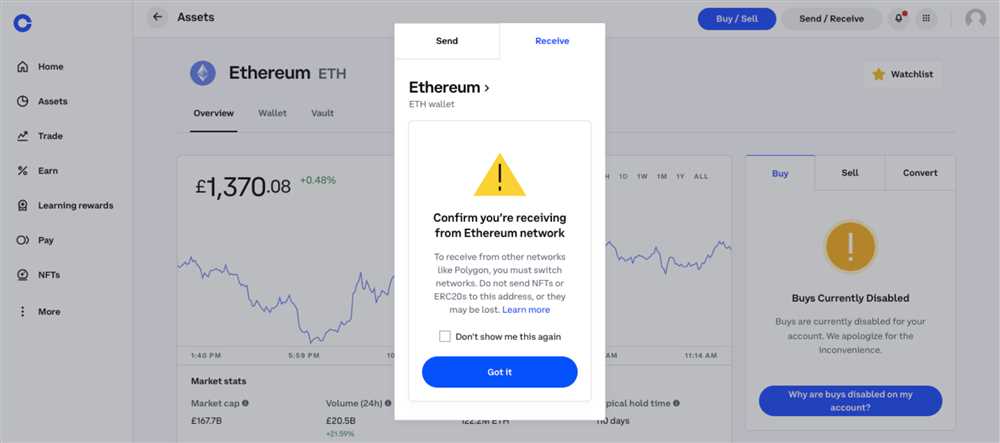
Now you’re ready to send Ethereum from Coinbase to Metamask. On Coinbase, go to the “Send” section and enter your Metamask wallet address as the recipient. Enter the amount you want to transfer and confirm the transaction. Coinbase may charge a small network fee for the transfer.
Once the transaction is initiated, it will take some time for the Ethereum to be transferred to your Metamask wallet. You can check the status of the transaction on the Ethereum blockchain using a block explorer.
Step 6: Double-Check the Transaction Details
Before confirming the transaction, double-check all the details to ensure everything is correct. Verify the recipient address, the amount to be transferred, and any associated fees. This will help to prevent any mistakes that could lead to irreversible loss of funds.
Remember: Transferring Ethereum from Coinbase to Metamask requires caution and attention to detail. Always double-check the addresses and be cautious of potential phishing attempts or scams.
Step 7: Keep Your Wallet and Seed Phrase Secure
After the Ethereum transfer is complete, make sure to keep your Metamask wallet and seed phrase in a secure location. Avoid sharing your seed phrase with anyone and consider storing it offline. This will help to protect your funds from unauthorized access or accidental loss.
Step 8: Stay Informed on Security Best Practices
As the cryptocurrency industry evolves, new security risks and best practices may emerge. Stay informed by following reputable sources of information and keep up-to-date with the latest security measures recommended by Metamask, Coinbase, and other trusted platforms.
By understanding the process and taking necessary security measures, you can safely send Ethereum from Coinbase to Metamask and enjoy the benefits of using these platforms for your cryptocurrency transactions.
Tips and Best Practices for a Smooth Experience
1. Double-check the address: Before sending any Ethereum, always double-check the recipient’s address. A single typo can result in the loss of your funds.
2. Use gas price estimators: Gas prices on the Ethereum network can fluctuate, so it’s important to use gas price estimators to ensure your transaction gets processed in a timely manner.
3. Set appropriate gas limits: The gas limit determines the maximum amount of gas that can be used in a transaction. Setting it too low may result in a failed transaction, while setting it too high could waste your funds.
4. Keep your private key secure: Your private key is like a password to your Ethereum wallet. Make sure to keep it secure and never share it with anyone.
5. Enable two-factor authentication: Adding an extra layer of security to your Ethereum wallet by enabling two-factor authentication can help prevent unauthorized access.
6. Stay aware of phishing attempts: Be cautious of phishing attempts, where scammers try to trick you into revealing your private key or other sensitive information. Always double-check the website you’re using and be wary of suspicious links.
7. Regularly backup your wallet: Backing up your Ethereum wallet ensures that you won’t lose your funds if something unexpected happens to your device.
8. Stay up to date with security best practices: Ethereum technology is constantly evolving, so staying informed about the latest security best practices can help protect your assets.
9. Start with small test transactions: If you’re new to sending Ethereum, it’s a good idea to start with small test transactions to familiarize yourself with the process before sending larger amounts.
10. Reach out for help when needed: If you encounter any issues or have questions, don’t hesitate to reach out to the support team of the platform or wallet you’re using. They’re there to help you have a smooth experience with Ethereum.

+ There are no comments
Add yours