


If you’re a crypto enthusiast, you’re probably familiar with Coinbase, the popular cryptocurrency exchange. But did you know that you can also connect your Coinbase Wallet to MetaMask? This powerful combination allows you to seamlessly manage your digital assets and interact with decentralized applications (dApps) on the Ethereum blockchain.
MetaMask is a browser extension that serves as a bridge between your Coinbase Wallet and the Ethereum network. It not only provides a secure way to store your ether and ERC-20 tokens but also acts as a gateway to the world of decentralized finance (DeFi).
In this guide, we will walk you through the step-by-step process of connecting your Coinbase Wallet to MetaMask. Whether you’re a beginner or an experienced user, this guide has got you covered. So, grab your Coinbase Wallet and let’s get started!
The Complete Guide:
Welcome to our complete guide on how to connect your Coinbase wallet to MetaMask! If you are new to the world of cryptocurrencies, this guide will walk you through the process step by step.
Step 1: Create a Coinbase Wallet
If you don’t have a Coinbase wallet yet, the first step is to create one. Visit the Coinbase website and sign up for an account. Follow the instructions to set up your wallet.
Step 2: Install the MetaMask Extension
Once you have your Coinbase wallet set up, the next step is to install the MetaMask extension on your browser. MetaMask is a digital wallet that allows you to manage your cryptocurrencies securely.
Step 3: Connect Coinbase to MetaMask
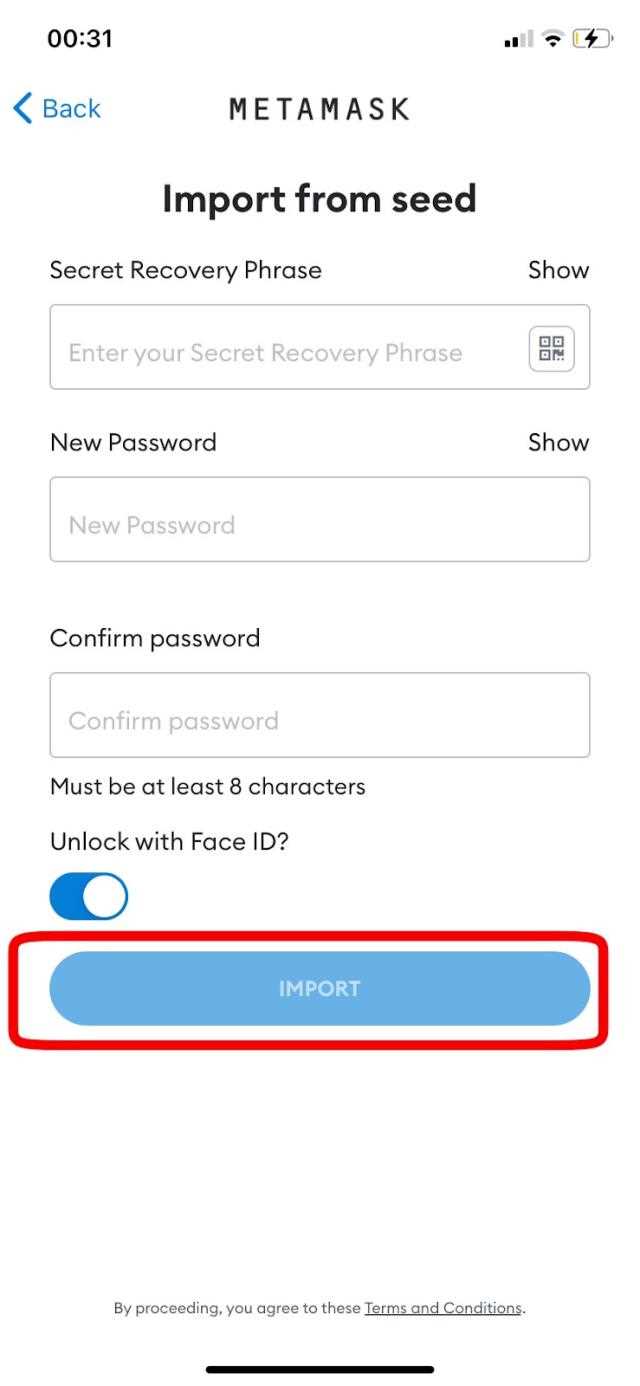
After installing the MetaMask extension, open it and click on the “Import Wallet” button. You will be prompted to enter your Coinbase wallet’s seed phrase. This is a 12-word phrase that acts as a backup for your wallet. Enter the seed phrase and click “Import” to connect your Coinbase wallet to MetaMask.
Step 4: Select Your Network
Once your Coinbase wallet is connected to MetaMask, you need to select the network you want to use. Click on the network dropdown and choose the network you want to connect to. If you’re not sure which network to choose, consult the project or website you’re interacting with.
Step 5: Use Your Coinbase Wallet with MetaMask
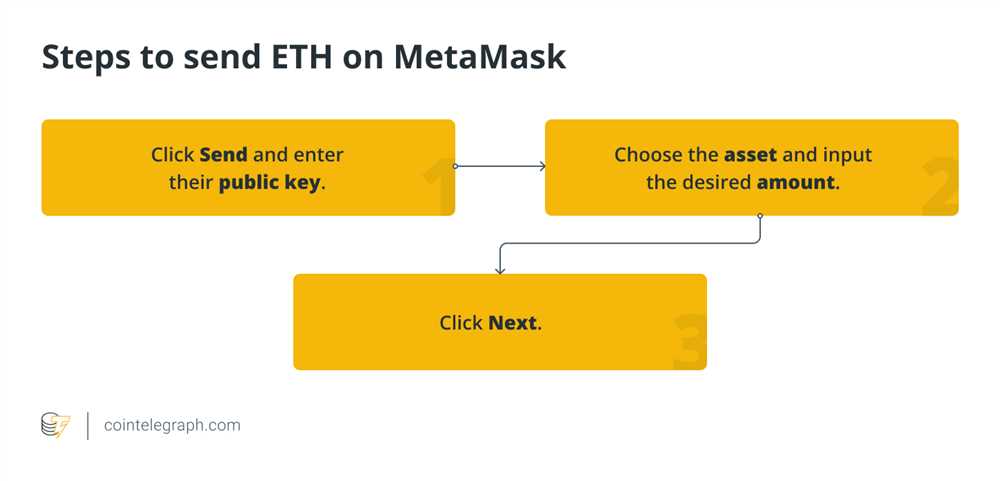
Once you have successfully connected your Coinbase wallet to MetaMask, you can start using it to manage your cryptocurrencies. You’ll be able to send and receive tokens, interact with decentralized applications (dApps), and more.
Note: Make sure to keep your seed phrase and MetaMask password safe and secure. If anyone gets access to these, they can potentially steal your funds.
Congratulations! You have successfully connected your Coinbase wallet to MetaMask. Now you’re ready to explore the exciting world of cryptocurrencies and decentralized finance.
Connecting Your Coinbase Wallet
To connect your Coinbase Wallet to MetaMask, follow these steps:
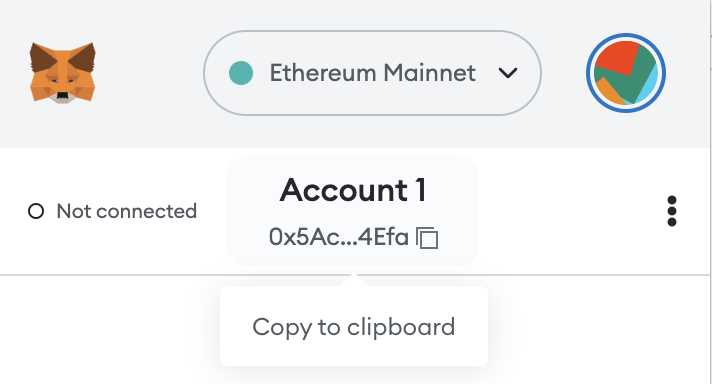
- Open the MetaMask extension in your browser.
- Click on the account icon in the top right corner and select “Connect Wallet” from the dropdown menu.
- Choose “Coinbase Wallet” as your connection method.
- A QR code will appear on your screen. Open your Coinbase Wallet app on your mobile device.
- In the Coinbase Wallet app, tap on the “QR Code” option to scan the QR code displayed on your computer screen.
- Once the QR code is scanned, your Coinbase Wallet will be connected to MetaMask.
You can now use your Coinbase Wallet to interact with decentralized applications and manage your digital assets on the Ethereum blockchain through MetaMask.
To MetaMask
To connect your Coinbase wallet to MetaMask, follow these steps:
- Make sure you have both the MetaMask extension and Coinbase wallet installed on your browser.
- Open the MetaMask extension and click on the account icon on the top right corner.
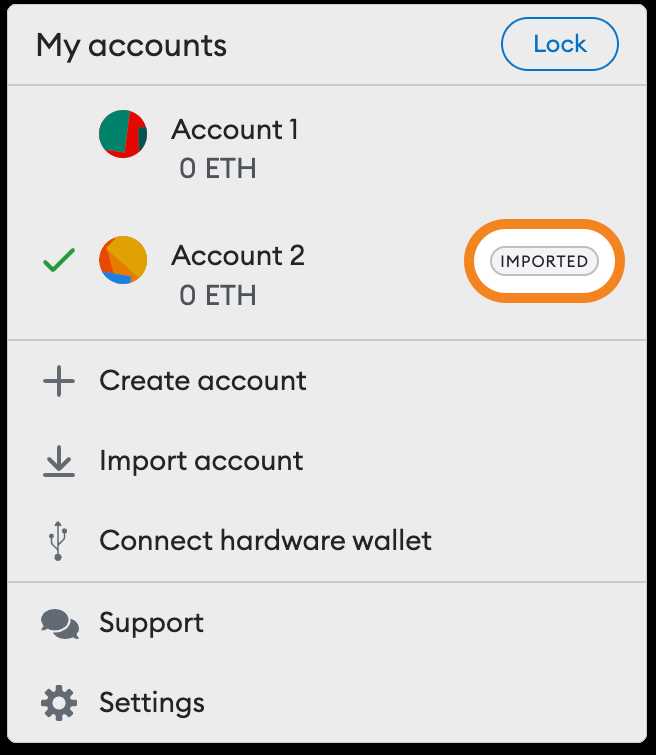
- Select “Import Account” from the drop-down menu.
- In the Coinbase wallet app, go to the settings and select “Export Wallet” or “Private Key”.
- Copy the private key or seed phrase provided by the Coinbase wallet.
- Go back to MetaMask and paste the private key or seed phrase into the input field.
- Click on “Import” to import your Coinbase wallet into MetaMask.
- Your Coinbase wallet should now be connected to MetaMask, and you will see your wallet balance and transaction history.
Remember to keep your private key or seed phrase safe and never share it with anyone. This is your access to your funds and should be kept confidential.
Why Connect Your Coinbase Wallet
Connecting your Coinbase wallet to MetaMask offers a range of benefits and additional functionality that can enhance your cryptocurrency trading and management experience. Here are some reasons why you might want to connect your Coinbase wallet to MetaMask:
Enhanced Security
By linking your Coinbase wallet to MetaMask, you can take advantage of MetaMask’s robust security features, such as the ability to set up multiple layers of encryption and secure your funds with a unique password. This additional level of security helps protect your assets and reduce the risk of unauthorized access.
Convenient Account Management
Connecting your Coinbase wallet to MetaMask allows you to easily manage and view all your cryptocurrency assets in one place. You can access and monitor your Coinbase holdings alongside any other wallets or accounts you have connected to MetaMask, providing a streamlined experience for tracking and managing your digital currencies.
Expanded Trading Options
With your Coinbase wallet connected to MetaMask, you can take advantage of the wide range of decentralized finance (DeFi) applications and platforms available on the Ethereum blockchain. This opens up a world of possibilities for trading, lending, borrowing, and earning interest on your digital assets.
Interoperability
Connecting your Coinbase wallet to MetaMask allows you to seamlessly interact with various Ethereum-based decentralized applications (DApps) and smart contracts. Whether you’re participating in a decentralized exchange, joining a liquidity pool, or earning staking rewards, integrating your Coinbase wallet with MetaMask ensures you can easily access and utilize these services.
| Benefits of Connecting Your Coinbase Wallet to MetaMask: |
|---|
| Enhanced Security |
| Convenient Account Management |
| Expanded Trading Options |
| Interoperability |
To MetaMask
If you already have MetaMask installed on your browser, connecting your Coinbase wallet to MetaMask is a simple process. Here’s how to do it:
Step 1: Open MetaMask
Open your browser and click on the MetaMask extension. If you don’t have MetaMask installed, you can download and install it from the official MetaMask website.
Step 2: Import Coinbase Wallet

In the MetaMask extension, click on the account icon and select “Import Account”. Choose the option to import using a seed phrase or private key.
Now, open your Coinbase Wallet and go to the settings. Select “Wallet” and then “Advanced”. Under “Accounts & Keys”, click on “Export” and write down the seed phrase or private key provided.
Go back to the MetaMask extension and enter the seed phrase or private key in the designated field. Follow the on-screen instructions to complete the import process.
Step 3: Connect Coinbase Wallet

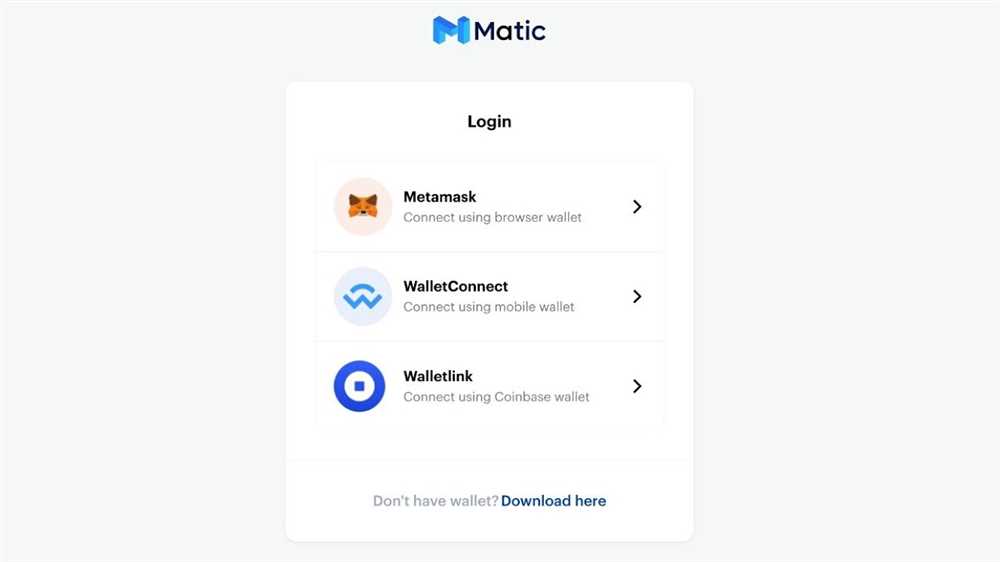
Once the import is complete, go to the account icon in the MetaMask extension and click on “Connect Wallet”. Select “Coinbase Wallet” from the list of options.
A pop-up will appear asking you to connect your Coinbase Wallet. Click “Connect” to establish the connection.
Congratulations! You have successfully connected your Coinbase wallet to MetaMask. You can now use your Coinbase wallet within the MetaMask extension.
Step-by-Step Instructions:
Follow these simple steps to connect your Coinbase wallet to MetaMask:
- Open the Coinbase application or go to the Coinbase website and log in to your account.
- Once logged in, locate and click on the “Settings” tab.
- In the settings menu, choose the “Wallets & Addresses” option.
- Under the “Wallets” section, find your Coinbase wallet and click on it.
- Scroll down and look for the “Connect to MetaMask” button and click on it.
- A popup window will appear asking if you want to connect your Coinbase wallet to MetaMask. Click “Connect” to proceed.
- If you already have the MetaMask extension installed, it will automatically detect and connect to your Coinbase wallet.
- If you don’t have MetaMask installed, you will be prompted to install the extension. Follow the instructions provided to complete the installation process.
- Once MetaMask is installed and connected to your Coinbase wallet, you can access your wallet’s funds and transactions directly through MetaMask.
That’s it! You have successfully connected your Coinbase wallet to MetaMask. Now you can enjoy the benefits of using MetaMask to manage your cryptocurrency assets.
Frequently Asked Questions:
What is Coinbase Wallet?
Coinbase Wallet is a mobile cryptocurrency wallet that allows users to store, manage, and exchange various cryptocurrencies, such as Bitcoin, Ethereum, and more.
How do I connect my Coinbase Wallet to MetaMask?
To connect your Coinbase Wallet to MetaMask, you first need to have both the Coinbase Wallet and MetaMask installed on your device. Then, open MetaMask and choose the “Import Wallet” option. Enter your Coinbase Wallet recovery phrase and follow the prompts to complete the connection process.
+ There are no comments
Add yours