


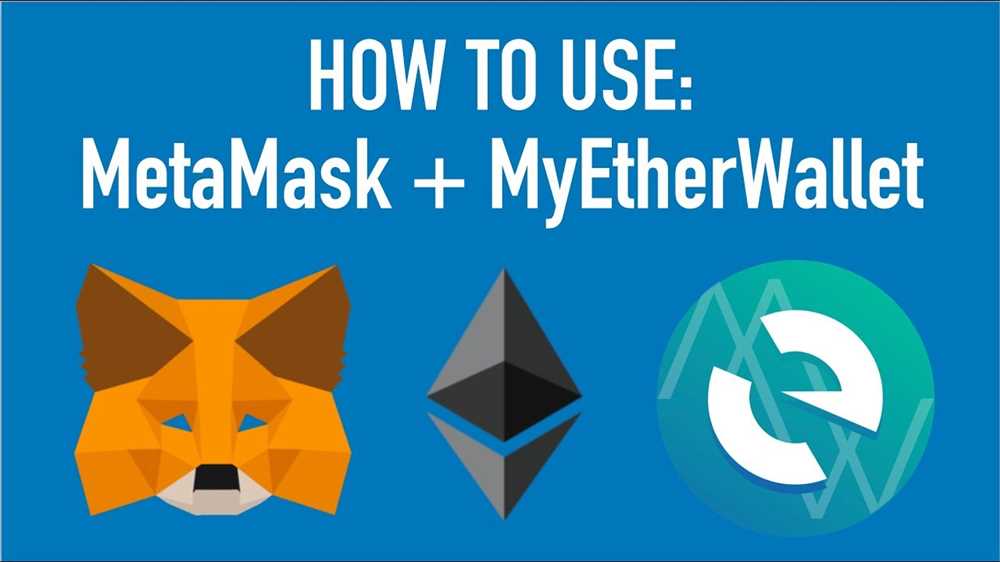
If you are an Ethereum user, you have probably heard of both MyEtherWallet and MetaMask. These two popular tools have become essential for anyone looking to manage their Ethereum wallet and interact with decentralized applications (DApps). In this comprehensive guide, we will take you through everything you need to know about using MyEtherWallet with MetaMask.
First, let’s start with MyEtherWallet (MEW). It is a free, open-source, client-side interface for creating and managing Ethereum wallets. It allows users to generate new wallets, send and receive Ether and ERC-20 tokens, interact with smart contracts, and more. MEW is known for its user-friendly interface and strong emphasis on security.
On the other hand, MetaMask is a browser extension for Google Chrome, Firefox, and Brave that allows users to interact with Ethereum DApps directly from their web browsers. It serves as a bridge between your browser and the Ethereum blockchain, enabling you to securely connect to DApps without needing to run a full Ethereum node. It also acts as a digital wallet for storing Ether and ERC-20 tokens.
Now that we have a basic understanding of both tools, let’s dive into how to use MyEtherWallet with MetaMask. The first step is to install the MetaMask browser extension and create a new MetaMask wallet. Once your wallet is set up, you can access it by clicking on the MetaMask logo in your browser toolbar.
A Complete Guide to Using MyEtherWallet with MetaMask

Are you looking to navigate the world of cryptocurrency by using MyEtherWallet with MetaMask? Look no further, as this complete guide will walk you through the process step by step.
Step 1: Install MetaMask
First things first, you’ll need to install the MetaMask browser extension. Visit the MetaMask website and follow the instructions to add the extension to your preferred browser.
Step 2: Create a Wallet on MyEtherWallet
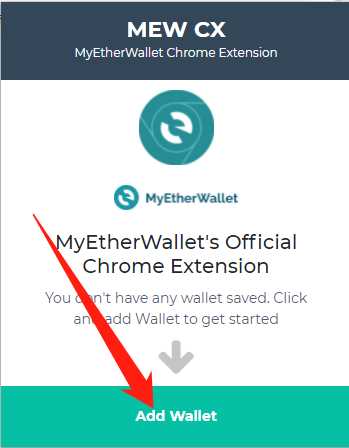
Once you have MetaMask installed, go to the MyEtherWallet website and click on “Create a New Wallet”. Follow the prompts to set up your wallet by selecting a secure password and downloading your keystore file.
Step 3: Connect MetaMask to MyEtherWallet
Now it’s time to connect MetaMask with MyEtherWallet. Open the MetaMask extension in your browser and click on the account icon. Select “Import Account” and choose the option to import via the keystore file. Locate the keystore file you downloaded in Step 2 and enter your password.
Step 4: Access Your Wallet
You’re almost there! To access your wallet through MyEtherWallet, select the “Access My Wallet” option. Choose MetaMask from the list of options and click on “Connect to MetaMask”. Confirm the connection in MetaMask and you’ll be able to view your account balance and make transactions on MyEtherWallet.
Step 5: Sending Transactions
With your MyEtherWallet connected to MetaMask, you can now send transactions. Enter the recipient’s address, specify the amount you want to send, and adjust the gas price if necessary. Review the transaction details and click on “Send Transaction” to complete the process.
Step 6: Security Tips
Remember to keep your MetaMask password and keystore file safe. Enable two-factor authentication for added security. Be cautious of phishing attempts and always double-check the website’s URL before entering any sensitive information.
Now that you have a complete guide to using MyEtherWallet with MetaMask, you’re ready to navigate the world of cryptocurrency with confidence. Enjoy the benefits of decentralized finance and explore the various possibilities that await you!
Getting Started with MyEtherWallet and MetaMask
MyEtherWallet(MEW) and MetaMask are two popular tools used for interacting with the Ethereum blockchain. By combining the power of these tools, users can easily manage their Ethereum wallets and perform various transactions.
Step 1: Install MetaMask
To get started, the first thing you need to do is install the MetaMask extension in your web browser. MetaMask is available for Google Chrome, Firefox, and Brave browsers.
Step 2: Create a Wallet
Once you have MetaMask installed, open the extension and click on the “Create a Wallet” button. Follow the on-screen instructions to set up a secure password and backup your seed phrase.
Step 3: Access MyEtherWallet
Visit the MyEtherWallet website and click on the “Access MyEtherWallet” button. On the next page, select “Access My Wallet” and then choose “Software” as the wallet option.
Step 4: Connect MetaMask to MyEtherWallet

In the MyEtherWallet interface, select “Access My Wallet” and then choose “MetaMask” as the access method. Click on the “Connect to MetaMask” button and follow the prompts to grant permission.
Step 5: Manage Your Wallet
Once you have connected MetaMask to MyEtherWallet, you can now manage your Ethereum wallet using the features available in MyEtherWallet’s interface. You can view your account balance, send and receive funds, and interact with Ethereum-based decentralized applications.
| Tips: |
|---|
| Remember to keep your MetaMask password and seed phrase secure, as they provide access to your Ethereum wallet. |
| Always double-check the recipient address when sending funds to avoid any mistakes. |
| Make sure to keep your web browser and MetaMask extension up to date to ensure the security of your wallet. |
Creating a MyEtherWallet Account and Importing It to MetaMask

If you are new to the world of cryptocurrency and want to get started with Ethereum, one of the first things you will need is a wallet to store your ether. MyEtherWallet is a popular choice for creating and managing Ethereum wallets. Here’s how to get started:
- Go to the MyEtherWallet website at https://www.myetherwallet.com.
- Click on “Create a New Wallet” to start the account creation process.
- Choose a strong password for your wallet. Make sure it is unique and secure, as losing your password can result in permanent loss of access to your funds.
- Download the keystore file. This file contains your encrypted private key and should be stored in a safe and secure location. Do not share this file with anyone.
- Backup your mnemonic phrase. This is a list of words that can be used to restore access to your wallet if you lose your password. Again, make sure to store this in a safe and secure location.
- After completing the above steps, you will be able to access your MyEtherWallet account.
- Next, you will need to import your MyEtherWallet account into MetaMask:
- Install the MetaMask browser extension for your preferred browser.
- Open the MetaMask extension and click on “Get Started”.
- Agree to the terms of service, and set up a new password for your MetaMask account.
- Click on “Import Wallet” to import your MyEtherWallet account.
- Select the option to import using a JSON or keystore file, and locate the keystore file you downloaded earlier.
- Enter the password for your MyEtherWallet account when prompted.
- Click on “Import” and wait for the import process to complete.
- Your MyEtherWallet account is now imported into MetaMask, and you can access your funds and interact with Ethereum dapps using the MetaMask extension.
Remember to always keep your wallet information secure and backup your private keys or mnemonic phrase in multiple secure locations. With your MyEtherWallet account imported into MetaMask, you can enjoy the benefits of both platforms and easily manage your Ethereum holdings.
Sending and Receiving Ether with MyEtherWallet and MetaMask
Once you have set up your MyEtherWallet and connected it to MetaMask, you can start sending and receiving Ether. Here’s how:
Sending Ether

To send Ether using MyEtherWallet and MetaMask, follow these steps:
- Open MyEtherWallet and make sure MetaMask is connected.
- Click on the “Send Ether & Tokens” tab.
- Enter the recipient’s address in the “To Address” field.
- Specify the amount of Ether you want to send in the “Amount to Send” field.
- Choose the currency you want to use from the drop-down menu.
- Click on the “Generate Transaction” button.
- Review the transaction details and make sure everything is correct.
- Click on the “Send Transaction” button.
- Confirm the transaction in MetaMask.
- Wait for the transaction to be confirmed and included in the blockchain.
Once the transaction is confirmed, the Ether will be sent to the recipient’s address.
Receiving Ether
To receive Ether using MyEtherWallet and MetaMask, follow these steps:
- Open MyEtherWallet and make sure MetaMask is connected.
- Click on the “View Wallet Info” tab.
- Click on the account address you want to receive Ether to.
- Copy the account address.
- Share the copied address with the person who wants to send you Ether.
Once the person sends Ether to your account address, it will be credited to your account.
Remember to always double-check the address you are sending Ether to and make sure it is correct. Transactions on the blockchain are irreversible, so if you send Ether to the wrong address, you may lose it permanently.
| Term | Definition |
|---|---|
| MyEtherWallet | An open-source, client-side interface for creating and managing Ethereum wallets. |
| MetaMask | A browser extension that allows you to interact with decentralized applications on the Ethereum blockchain. |
| Ether | The cryptocurrency of the Ethereum blockchain. |
| Blockchain | A digital ledger of all transactions in a decentralized network. |
Security Tips for Using MyEtherWallet and MetaMask

When using MyEtherWallet and MetaMask, it is important to keep in mind a few security tips to protect your funds and personal information. Here are some key tips to follow:
1. Use strong, unique passwords: Create a strong and unique password for both your MyEtherWallet and MetaMask accounts. Avoid using common words or easy-to-guess combinations. Consider using a password manager to securely store your passwords.
2. Enable two-factor authentication: Enable two-factor authentication (2FA) for both MyEtherWallet and MetaMask. This adds an extra layer of security by requiring a second form of verification, such as a code sent to your mobile device, in addition to your password.
3. Be cautious of phishing attempts: Be vigilant and watch out for phishing attempts. Always double-check the URL of the website you are visiting to ensure it is the official MyEtherWallet or MetaMask website. Avoid clicking on suspicious links or providing your private key or seed phrase to anyone.
4. Update your software: Keep both MyEtherWallet and MetaMask updated with the latest versions to ensure you have the latest security patches and features. Regularly check for updates and install them promptly.
5. Use hardware wallets: Consider using a hardware wallet, such as Ledger or Trezor, for added security. Hardware wallets store your private keys offline, providing an extra layer of protection against online threats.
6. Backup your wallets: Regularly backup your MyEtherWallet and MetaMask wallets, and store the backup in a secure location. This will ensure that you can recover your funds in case of loss or theft.
7. Avoid public Wi-Fi networks: When accessing your MyEtherWallet or MetaMask accounts, avoid using public Wi-Fi networks, as they can be insecure and prone to attacks. Instead, use a secure and trusted network to minimize the risk of data interception.
8. Verify transactions before confirming: Always double-check the details of a transaction before confirming it. Verify the recipient address and the amount being sent to ensure you are sending funds to the intended recipient.
By following these security tips, you can enhance the security of your MyEtherWallet and MetaMask accounts and protect your funds from potential threats.
Frequently Asked Questions:
What is MyEtherWallet?
MyEtherWallet is a free, open-source, client-side interface for creating and managing Ethereum wallets. It allows users to generate and store their private keys securely, as well as to interact with the Ethereum blockchain by sending and receiving Ether and ERC20 tokens.
What is MetaMask?
MetaMask is a browser extension and a software wallet that allows users to interact with the Ethereum blockchain. It acts as a bridge between the user’s browser and the Ethereum network, allowing for seamless integration with decentralized applications (dApps) and the ability to securely manage Ethereum assets.
Can I use MyEtherWallet with MetaMask?
Yes, you can use MyEtherWallet with MetaMask. By connecting your MetaMask wallet to MyEtherWallet, you can easily access your Ethereum assets and interact with the blockchain using MyEtherWallet’s features and functionalities.

+ There are no comments
Add yours