


Metamask is a popular cryptocurrency wallet that allows you to securely store and manage your digital assets. Adding coins to your Metamask wallet is a straightforward process that can be done in a few simple steps. In this guide, we will walk you through the process of adding coins to Metamask.
Step 1: Install and set up Metamask
The first step is to install the Metamask extension for your web browser and set up your wallet. You can find the Metamask extension in the Chrome Web Store or the Firefox Add-ons marketplace. Once you have installed the extension, create a new wallet and securely back up your seed phrase.
Step 2: Open Metamask and click on “Add Token”
After setting up your wallet, open the Metamask extension and click on the account icon in the top right corner. From the drop-down menu, select “Add Token”.
Step 3: Enter the token contract address
In the “Add Token” window, you will see three tabs: “Search”, “Custom Token”, and “Popular Token”. If the token you want to add is a popular token, you can search for it in the “Search” tab. If it is not a popular token, switch to the “Custom Token” tab and enter the token contract address.
Step 4: Verify and add the token
After entering the token contract address, Metamask will automatically fetch the token symbol and decimal places. Verify that the information is correct and click on “Next”. In the next window, click on “Add Tokens” to add the token to your Metamask wallet.
It’s important to note that adding tokens to Metamask requires you to have a small amount of Ethereum (ETH) in your wallet to cover the gas fees. Gas fees are the fees required to process transactions on the Ethereum network. Make sure you have enough ETH in your wallet before adding tokens.
By following these simple steps, you can easily add coins to your Metamask wallet. Once the tokens are added, you can manage them, view your balance, and send/receive them using Metamask’s user-friendly interface.
A Step-by-Step Guide on How to Add Coins to Metamask
Metamask is a popular cryptocurrency wallet that allows users to manage their digital assets securely. If you’re new to Metamask and want to add coins to your wallet, follow these step-by-step instructions:
- Open the Metamask extension or app on your device.
- If you already have an existing wallet, enter your password or use your biometric authentication to log in. If you don’t have a wallet yet, create a new one by following the on-screen prompts.
- Once you’re logged in, click on the “Assets” tab located at the bottom of the screen.
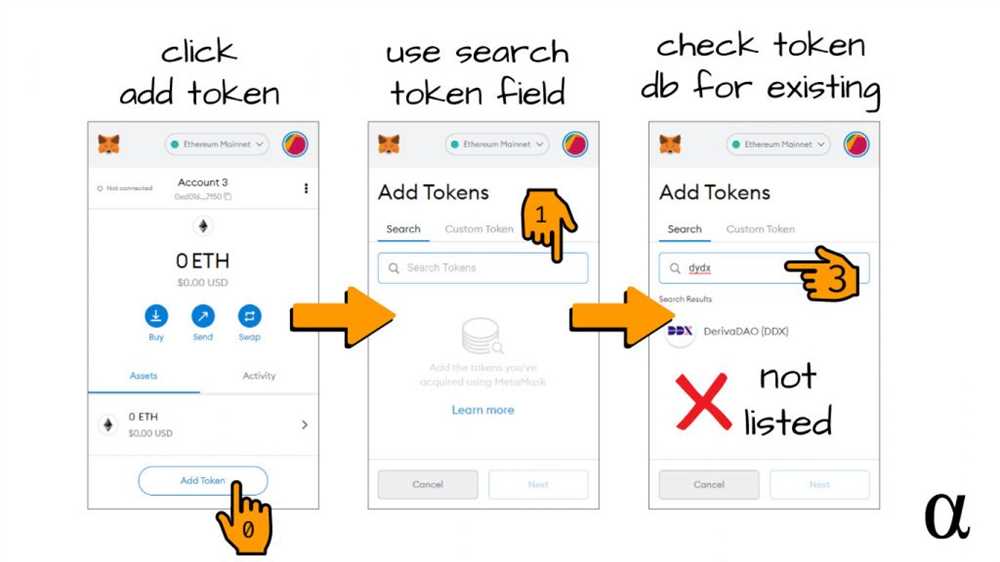
- On the “Assets” page, you’ll see a list of supported cryptocurrencies. Click on “Add Token” to add a specific coin to your wallet.
- In the “Add Token” section, you have two options: “Search” or “Custom Token”.
- If the coin you want to add is listed under “Search”, simply type the name or symbol of the coin in the search bar, and Metamask will automatically detect and display it. Click on the coin you want to add, and then click “Next”.
- If the coin you want to add is not listed, you’ll need to use the “Custom Token” option. Click on “Custom Token”, and you’ll be prompted to enter the contract address, token symbol, and decimal places for the coin. Obtain this information from the project’s official website or trusted sources. Once you’ve entered the details, click “Next”.
- Review the coin details and make sure everything is correct. Once you’re satisfied, click on “Add Tokens”.
- Wait for a moment while Metamask adds the coin to your wallet. Once the process is complete, you’ll see the newly added coin in your list of assets.
Congratulations! You have successfully added coins to your Metamask wallet. Now you can easily manage and track your digital assets using the wallet’s user-friendly interface.
Choose and Install Metamask Extension
Before you can add coins to your Metamask wallet, you need to install the Metamask browser extension. Follow the steps below to choose and install the extension:
Step 1: Choose a Supported Browser
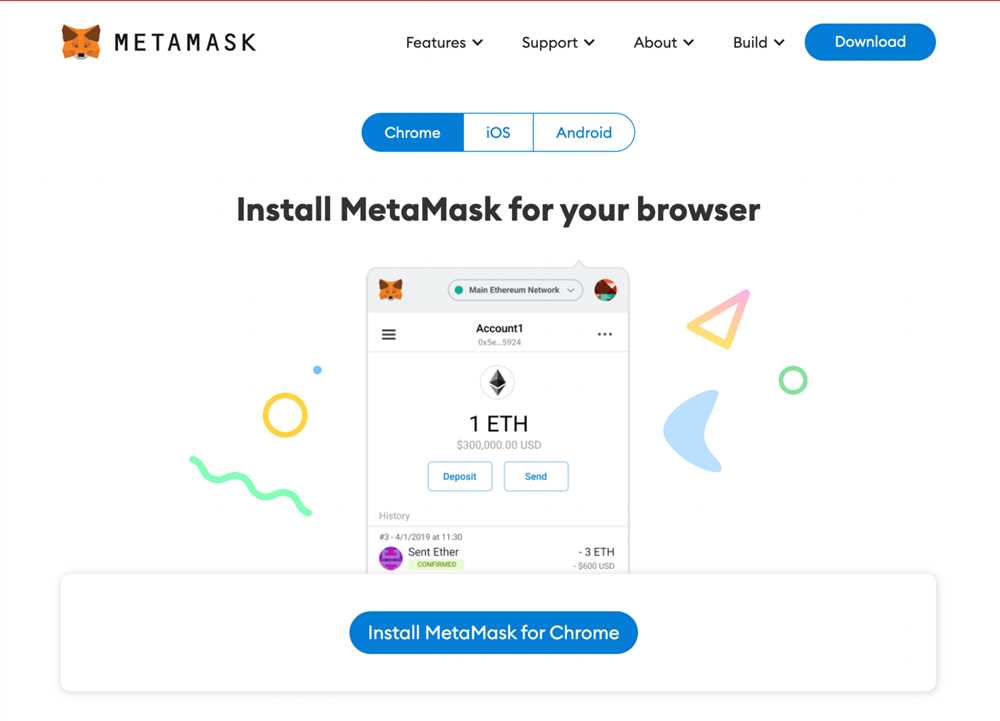
Metamask is compatible with several browsers, including Chrome, Firefox, Brave, and Edge. You can choose the browser that suits your preferences and install it on your computer or device.
Step 2: Install the Metamask Extension
- Open your chosen browser and search for the Metamask extension in the browser’s extension store.
- Click on the Metamask extension in the search results to view the extension details.
- Click on the “Add to [Browser Name]” button to begin the installation process.
- Confirm the installation by clicking on the “Add Extension” or similar button, if prompted.
- Wait for the installation to complete. Once installed, you should see the Metamask icon added to your browser’s toolbar.
Congratulations! You have successfully installed the Metamask browser extension. Now, you can proceed with adding coins to your Metamask wallet.
Create or Import a Wallet
To add coins to Metamask, the first step is to create or import a wallet. A wallet is required to securely store and manage your digital assets. Follow these steps to create or import a wallet in Metamask:
- Download and install the Metamask extension on your web browser.
- Click on the Metamask icon in your browser’s toolbar to open the wallet.
- On the welcome screen, click on the “Get Started” button.
- Choose the option to “Create a Wallet” if you don’t have one, or “Import Wallet” if you already have an existing wallet.
- If you choose to create a wallet, you will be asked to set a strong password. Remember to write it down and store it in a secure place, as losing your password may result in permanent loss of access to your funds.
- If you choose to import a wallet, you can use your recovery seed phrase or private key. It is highly recommended to use a recovery seed phrase, as it provides an additional layer of security. Enter the seed phrase or private key and follow the on-screen instructions to complete the wallet import process.
- Once your wallet is created or imported, you will be prompted to accept the terms and conditions.
- Set a unique wallet name to easily identify it.
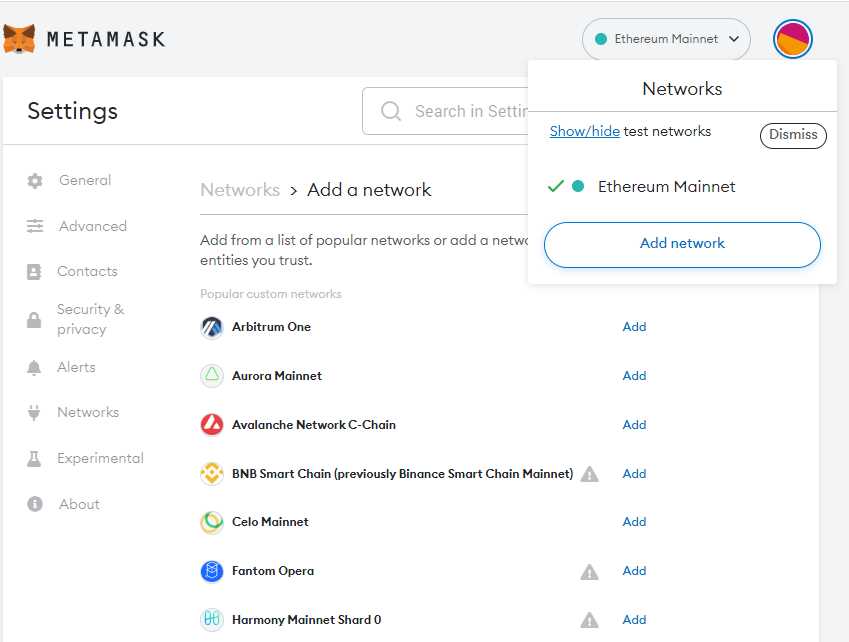
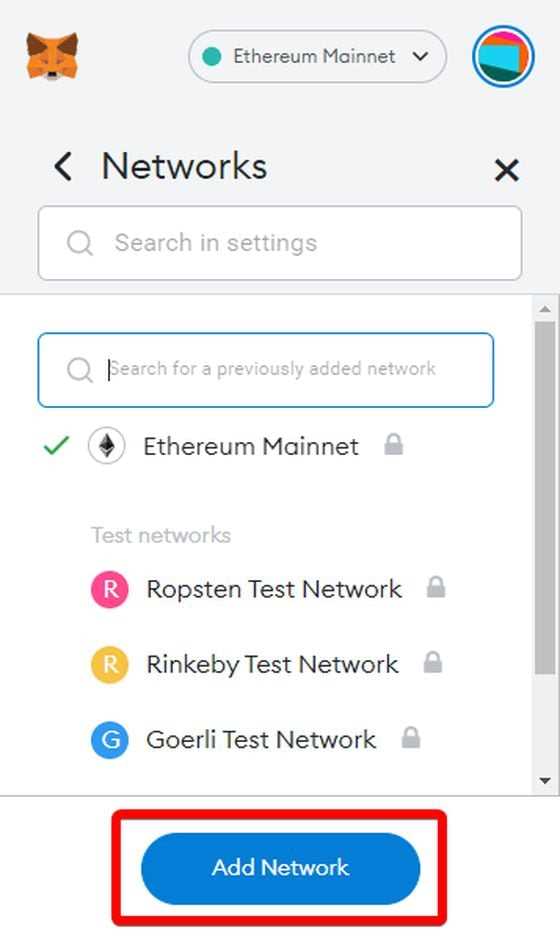
- Choose the network you want to connect to. By default, it is set to the Ethereum mainnet, but you can also connect to testnets or other networks if you desire.
- Finally, click on the “All Done” button to finish creating or importing your wallet.
You have now successfully created or imported a wallet in Metamask. You can proceed to the next steps to add coins to your wallet.
Add Coins to Your Metamask Wallet
Metamask is a popular cryptocurrency wallet that allows you to securely store and manage your digital assets. Adding coins to your Metamask wallet is a straightforward process that can be done in just a few simple steps.
| Step 1: | Open your Metamask wallet and make sure you are on the “Assets” tab. |
| Step 2: | Click on the “Add Token” button located at the bottom of your screen. |
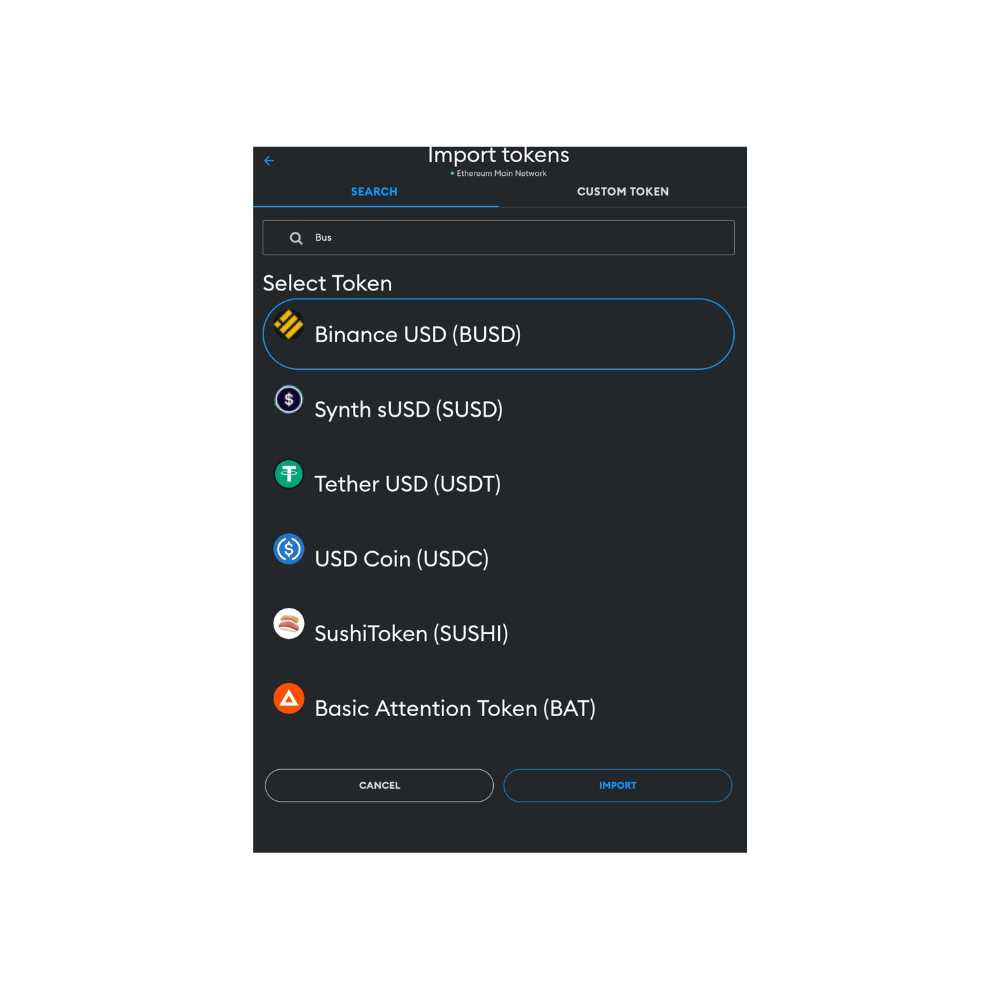
| Step 3: | You will be presented with two options: “Search” and “Custom Token.” |
| Step 4: | If the coin you want to add is a well-known cryptocurrency like Bitcoin or Ethereum, select the “Search” option and search for the coin by its symbol or name. If the coin is not a well-known cryptocurrency, select the “Custom Token” option. |
| Step 5: | If you selected the “Search” option, Metamask will search for the coin and display the results. Click on the coin you want to add from the search results. |
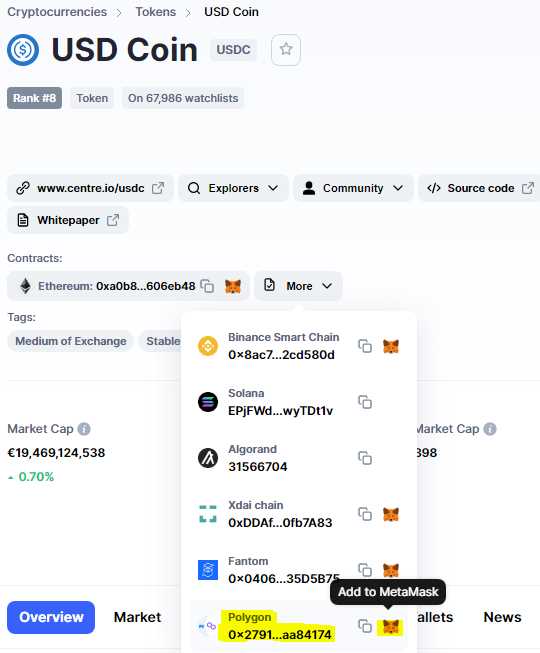
| Step 6: | If you selected the “Custom Token” option, you will need to manually enter the contract address, symbol, and decimals of the coin you want to add. This information can usually be obtained from the coin’s official website or a reputable cryptocurrency listing platform. |
| Step 7: | After selecting the coin or entering its details, click on the “Next” button to proceed. |
| Step 8: | You will be presented with a summary of the coin’s details. Verify that the information is correct and click on the “Add Tokens” button to add the coin to your Metamask wallet. |
| Step 9: | Once the coin is successfully added, you will be able to see it in your Metamask wallet under the “Assets” tab. |
Adding coins to your Metamask wallet allows you to conveniently track your cryptocurrency portfolio and easily manage your digital assets. Follow the steps above and start adding your favorite coins to your Metamask wallet today!
Verify and Track Your Coins in Metamask
After successfully adding coins to your Metamask wallet, it is important to verify and keep track of them to ensure their security and transparency. Here are the steps to verify and track your coins in Metamask:
1. Verify Coin Address
Before adding coins to your Metamask wallet, always verify the coin address to ensure that you are sending the coins to the correct wallet. Cross-check the address with the official website or trusted sources to avoid any fraudulent activity.
2. Check Coin Balance
Once you have added coins to your Metamask wallet, you can easily check your coin balance by following these steps:
Step 1: Open the Metamask extension or mobile app on your device.
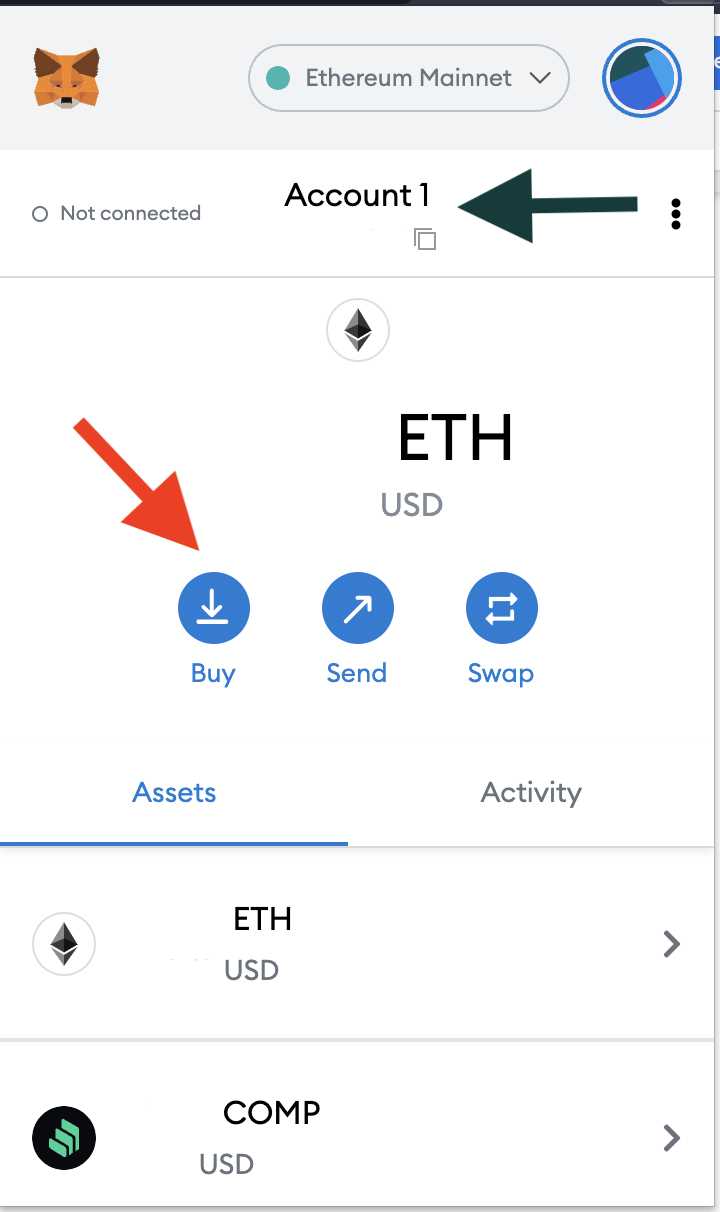
Step 2: Click on the account icon located at the top right corner of the screen.
Step 3: Select the account you want to check the coin balance for.
Step 4: Under the selected account, you will find the coin balance displayed next to the respective coin symbol or name.
3. Track Coin Transactions
To keep track of your coin transactions within Metamask, you can use the built-in transaction history feature. Here’s how:
Step 1: Open the Metamask extension or mobile app on your device.
Step 2: Click on the account icon located at the top right corner of the screen.
Step 3: Select the account you want to track coin transactions for.
Step 4: Scroll down and click on the “View Account on Etherscan” option.
Step 5: You will be redirected to Etherscan, where you can view all the transaction details associated with your account, including incoming and outgoing coin transfers.
Note: Etherscan is a popular blockchain explorer tool that provides transaction information and other blockchain-related data.
By following these steps, you can easily verify the coin address, check your coin balance, and track your coin transactions in Metamask. This will help you ensure the accuracy and security of your coin holdings.
Frequently Asked Questions:
What is Metamask?
Metamask is a cryptocurrency wallet and browser extension that allows users to interact with the Ethereum blockchain. It allows users to securely store, send, and receive digital assets and also enables them to access decentralized applications (dApps) directly from their web browser.
+ There are no comments
Add yours