


Are you a fan of decentralized finance and eager to explore the world of blockchain? If so, you’ve probably heard about Metamask – a popular Ethereum wallet that allows users to store, manage, and interact with their digital assets securely. While Metamask is primarily built for Ethereum, it also supports other tokens, including Matic.
Matic is an Ethereum scaling solution that aims to provide faster and cheaper transactions. By adding Matic to your Metamask wallet, you’ll be able to seamlessly transfer and interact with Matic tokens, participate in decentralized applications, and take advantage of the innovative features offered by the Matic network.
In this step-by-step guide, we’ll walk you through the process of adding Matic token to your Metamask wallet, so you can start exploring the Matic ecosystem without any hassle.
Step 1: Install and Set Up Metamask
The first step is to install the Metamask extension in your browser. Metamask is available for Chrome, Firefox, and Brave browsers. Once installed, create a new wallet or import your existing wallet using the seed phrase or private key.
Step 2: Accessing Your Wallet
After setting up Metamask, you can access your wallet by clicking on the Metamask icon in your browser toolbar. Enter your password to unlock your wallet.
Step 3: Adding Matic Token
To add Matic token to your Metamask wallet, click on the “Add Token” button on the main screen. In the search field, type “Matic” or “Polygon” to find the Matic token. Once you see the Matic token in the search results, click on “Add” to add it to your wallet.
Step 4: Viewing Your Matic Balance
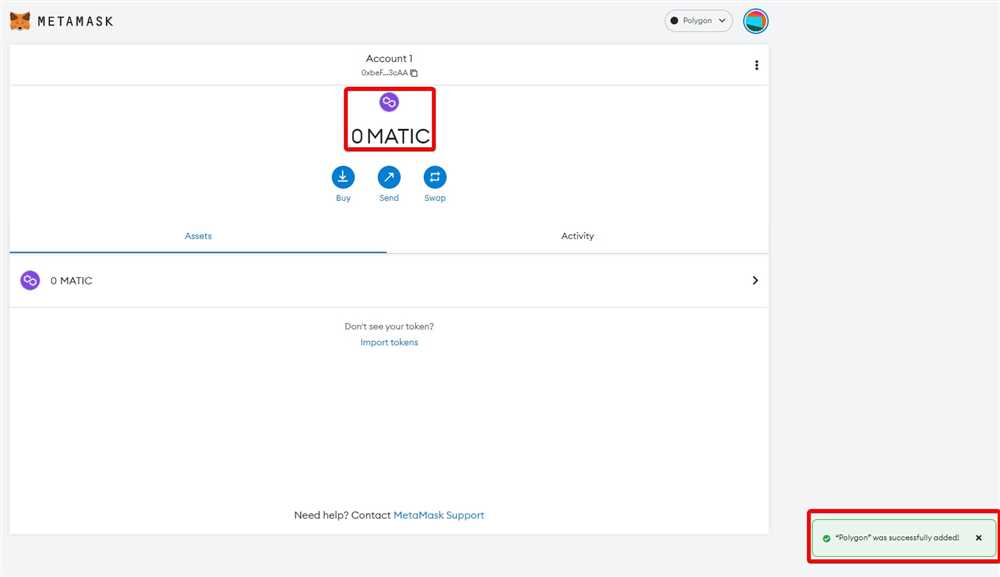
After successfully adding Matic token to your Metamask wallet, you can now view your Matic balance by clicking on the “Assets” tab. The Matic token should appear in the list of assets, along with its corresponding balance.
Congratulations! You’ve successfully added Matic token to your Metamask wallet. With Matic token in your wallet, you’re ready to explore the exciting world of Matic and leverage the benefits of its scalable infrastructure.
Step 1: Install Metamask Extension
The first step to adding Matic Token to your Metamask wallet is to install the Metamask extension. Metamask is a popular cryptocurrency wallet that allows users to manage their digital assets and interact with decentralized applications (DApps).
To install Metamask, follow these simple steps:
- Open your preferred web browser and visit the Metamask website.
- Click on the “Get Chrome Extension” button to download the Metamask extension.
- After the download is complete, click on the installation file to begin the installation process.
- Follow the on-screen instructions to install the extension.
- Once the installation is complete, you will see the Metamask icon added to your browser’s toolbar.
- Click on the Metamask icon to launch the wallet.
- A setup wizard will guide you through the process of creating a new wallet. Follow the instructions and make sure to securely back up your seed phrase.
Congratulations! You have successfully installed Metamask on your browser. In the next step, we will learn how to add the Matic Token to your Metamask wallet.
Step 2: Create or Import a Wallet
In order to add Matic token to your Metamask wallet, you will first need to create or import a wallet. Here are the steps to do so:
- Open the Metamask extension or app on your device.
- If you already have a wallet, click on “Import Wallet” and follow the instructions to import it using your recovery seed phrase or private key.
- If you don’t have a wallet yet, click on “Create Wallet” and follow the prompts to set up a new wallet. Make sure to write down and securely store your recovery seed phrase or private key.
- Once your wallet is created or imported, you will be prompted to set a password for it. Choose a strong and secure password.
- After setting a password, your wallet will be created or imported and you will have access to your Ethereum mainnet wallet.
With your wallet set up, you can now proceed to the next step to add the Matic token to your Metamask wallet.
Step 3: Switch to Matic Network
Now that you have added the Matic token to your Metamask wallet, the next step is to switch your network to the Matic Network. Follow the steps below:
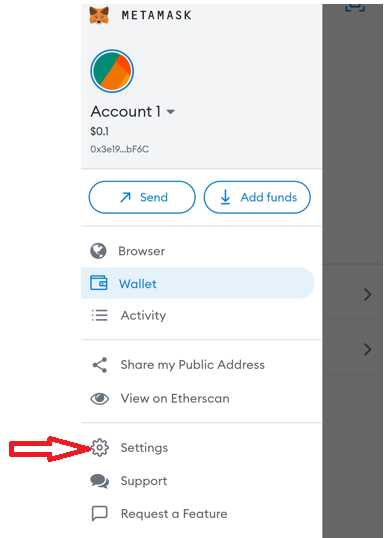
Step 1: Open Metamask
Open your Metamask extension or mobile app and log in to your wallet if you haven’t already.
Step 2: Click on the Network Dropdown
In the top right corner of the Metamask interface, you will see a dropdown menu with a network name. Click on it.
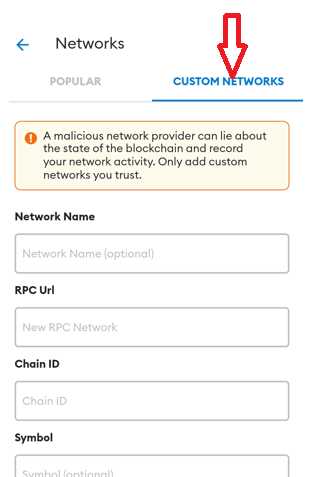
Step 3: Select “Custom RPC”
From the dropdown menu, select the “Custom RPC” option. This will allow you to connect to the Matic Network.
Step 4: Enter Matic Network Details

In the “New RPC URL” field, enter the Matic Network URL: https://rpc-mainnet.maticvigil.com/. Then, fill in the “Chain ID” field with the Matic Network chain ID: 137.
Make sure you double-check that the URL and chain ID are correct to avoid any issues.
Step 5: Save and Switch to Matic Network
After entering the Matic Network details, click on the “Save” button to save the changes. Once saved, you will see the Matic Network as an option in the network dropdown menu. Select the Matic Network to switch to it.
Now you are ready to use your Metamask wallet on the Matic Network. You can interact with Matic-based dapps and perform transactions using Matic tokens.
Note: When switching to the Matic Network, make sure you have some ETH in your wallet to cover transaction fees on the Ethereum mainnet, as Matic uses Ethereum as its base layer.
Step 4: Add Matic Token to Your Wallet
Once you have set up your Metamask wallet and connected to the Matic Mainnet, it’s time to add the Matic token to your wallet. Here’s how you can do it:
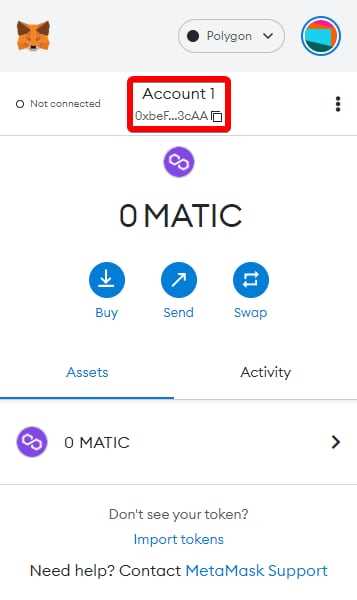
- Open your Metamask wallet.
- Click on the “Assets” tab.
- Scroll down and click on the “Add Token” button.
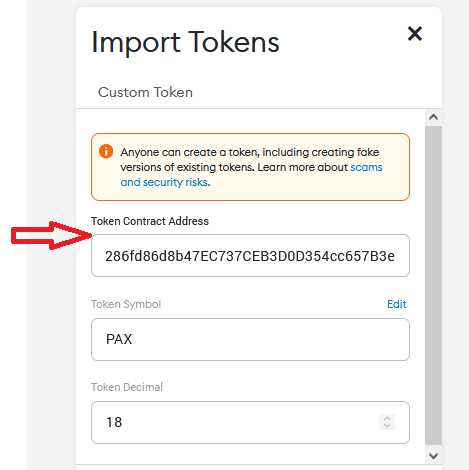
- A new window will pop up. Click on the “Custom Token” tab.
- In the “Token Contract Address” field, enter the Matic token contract address: 0x7d1afa7b718fb893db30a3abc0cfc608aacfebb0
- The “Token Symbol” and “Decimals of Precision” fields should automatically be filled. If not, you can enter “MATIC” for the token symbol and “18” for the decimals of precision.
- Click on the “Next” button.
- Review the details and click on the “Add Tokens” button.
Congratulations! You have successfully added the Matic token to your Metamask wallet. You can now view your Matic token balance and use it for transactions on the Matic network.
Frequently Asked Questions:
What is Matic token?
Matic token is the native token of the Matic Network, which is a scaling solution for Ethereum. It is used for payment of transaction fees, staking, and participating in the network’s governance.
Why should I add Matic token to my Metamask wallet?
Adding Matic token to your Metamask wallet allows you to easily interact with decentralized applications (DApps) and use Matic Network’s features. It also enables you to store and manage your Matic tokens securely.
How can I add Matic token to my Metamask wallet?
To add Matic token to your Metamask wallet, you need to follow a step-by-step process. First, open your Metamask wallet and click on the “Assets” tab. Then, click on “Add Token” and select the “Custom Token” option. In the token address field, enter the Matic token address. Finally, click on “Next” and confirm the token details. The Matic token will now be added to your wallet.
Where can I find the Matic token address?
The Matic token address can be found on the Matic Network’s official website, or you can search for it on a blockchain explorer like Etherscan. It is a long string of alphanumeric characters that uniquely identifies the token on the Ethereum blockchain.
Are there any fees associated with adding Matic token to my Metamask wallet?
Adding Matic token to your Metamask wallet does not involve any fees. However, please note that you may incur transaction fees when interacting with the Matic Network or transferring Matic tokens.

+ There are no comments
Add yours