


If you are new to the world of cryptocurrency, you may have heard of Coinbase and Metamask. Coinbase is one of the most reputable and user-friendly cryptocurrency exchanges, allowing you to buy, sell, and store various digital currencies. On the other hand, Metamask is a popular browser extension that serves as a digital wallet for managing Ethereum and other ERC-20 tokens.
Transferring crypto from Coinbase to Metamask can be a simple process if you follow these step-by-step instructions. The first step is to ensure that you have both a Coinbase account and the Metamask extension installed on your web browser. Once you have these prerequisites in place, you can proceed with the following steps.
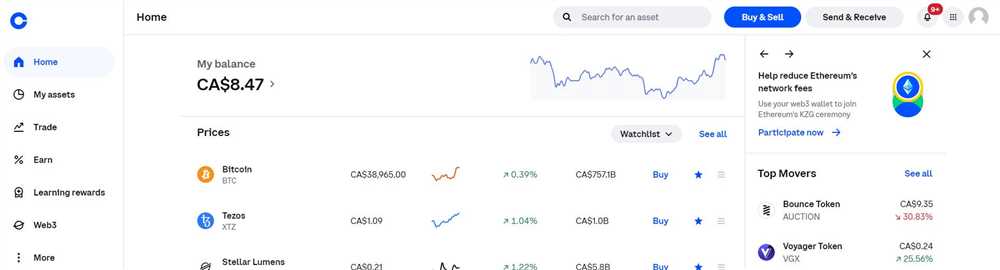
To begin, log in to your Coinbase account and navigate to the “Accounts” tab. From here, select the cryptocurrency you wish to transfer to Metamask. It could be Ethereum, as Metamask is primarily used for managing Ethereum-based tokens. Next, click on the “Send” button associated with the selected cryptocurrency.
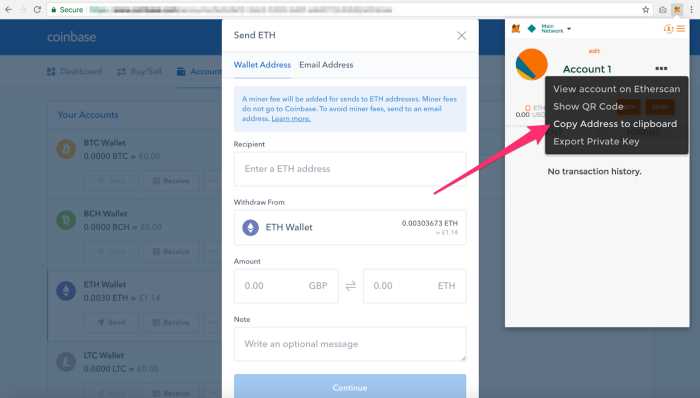
On the send page, you will be prompted to enter the recipient’s address. This is where you will copy and paste your Metamask wallet address. To do this, open your web browser and click on the Metamask extension icon. In the Metamask window, click on the account name and select “Copy Address to Clipboard.”
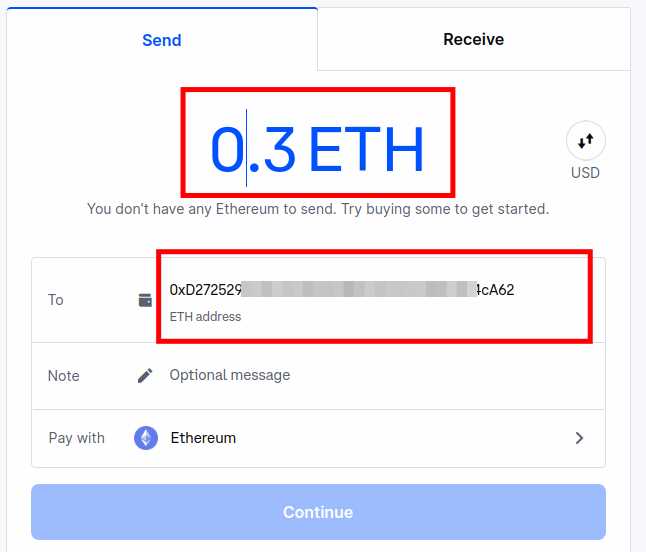
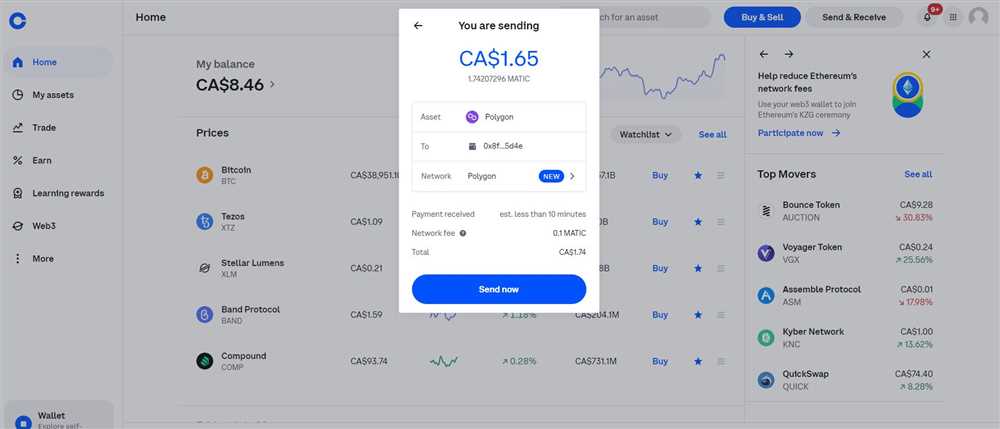
Back in the Coinbase send page, paste the copied address into the recipient field. Take a moment to ensure that the address is correct, as any mistakes could result in the loss of your funds. Once you have verified the address, enter the amount of cryptocurrency you wish to send and review the details of the transaction. If everything looks good, click on the “Send” button to initiate the transfer.
After clicking send, Coinbase may prompt you to confirm the transaction via email or SMS authentication. Follow the necessary steps to complete the verification process. Once the transaction is confirmed, you can head over to your Metamask wallet to see the newly transferred cryptocurrency. Keep in mind that it may take a few minutes for the transaction to be processed and reflected in your Metamask wallet.
That’s it! You have successfully sent cryptocurrency from Coinbase to Metamask. Now you can use your Metamask wallet to manage and interact with your Ethereum-based tokens, such as trading, participating in decentralized finance (DeFi) protocols, or even minting your own tokens.
A Beginner’s Guide to Sending Crypto from Coinbase to Metamask
If you’re new to the world of cryptocurrency and you want to start sending your digital assets from Coinbase to Metamask, this guide is for you. Metamask is a popular wallet and dApp browser that allows you to interact with decentralized applications on the Ethereum blockchain. Coinbase, on the other hand, is a well-known cryptocurrency exchange that allows you to buy, sell, and store various cryptocurrencies.
Before you begin, make sure you have both a Coinbase account and a Metamask wallet. You can sign up for a Coinbase account and create a Metamask wallet by following their respective signup processes.
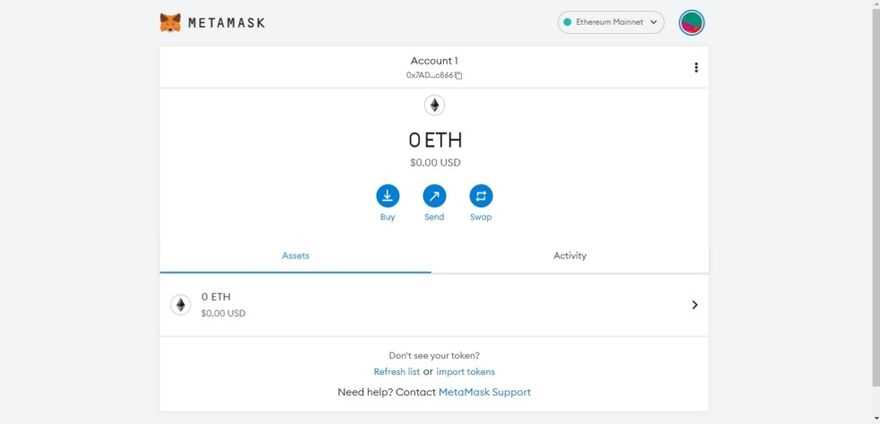
Step 1: Get your Metamask Wallet Address
Open the Metamask extension in your browser and click on the account icon in the top right corner. From the dropdown menu, select “Copy Address to clipboard”. This will copy your Metamask wallet address to your clipboard.
Step 2: Log in to your Coinbase Account
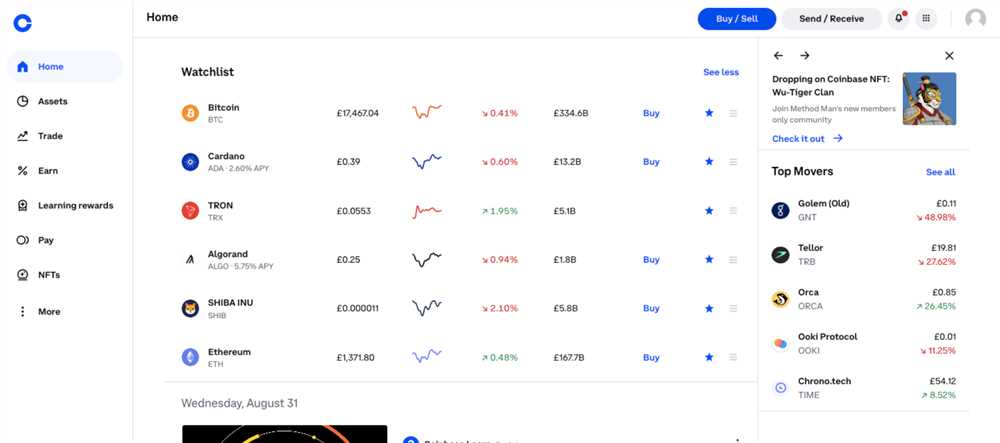
Open the Coinbase website and log in to your account using your username and password.
Step 3: Navigate to the Withdrawal Page
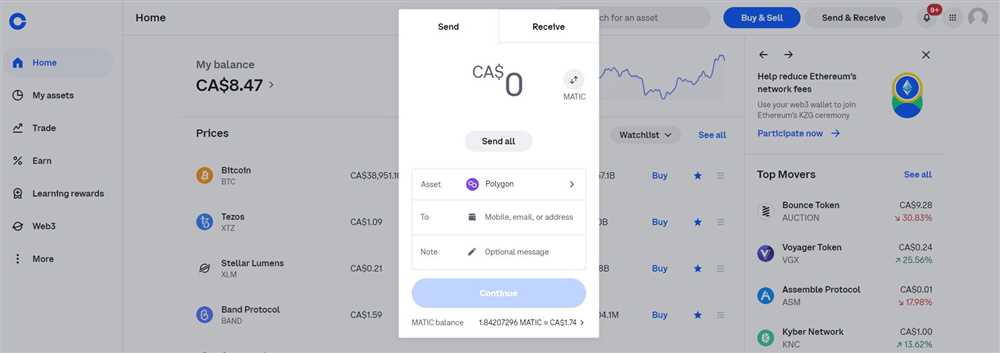
In your Coinbase account dashboard, click on the “Wallets” tab and select the cryptocurrency you want to send to Metamask. Then click on the “Send” button.
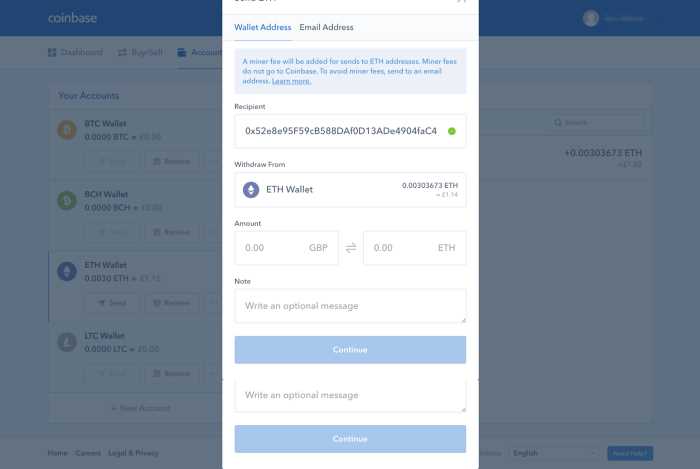
Step 4: Enter Your Metamask Wallet Address
In the “Recipient” field, paste the wallet address you copied from Metamask. Make sure the address is correct to avoid any loss of funds. Double-check the address before proceeding.
Step 5: Choose the Amount and Confirm
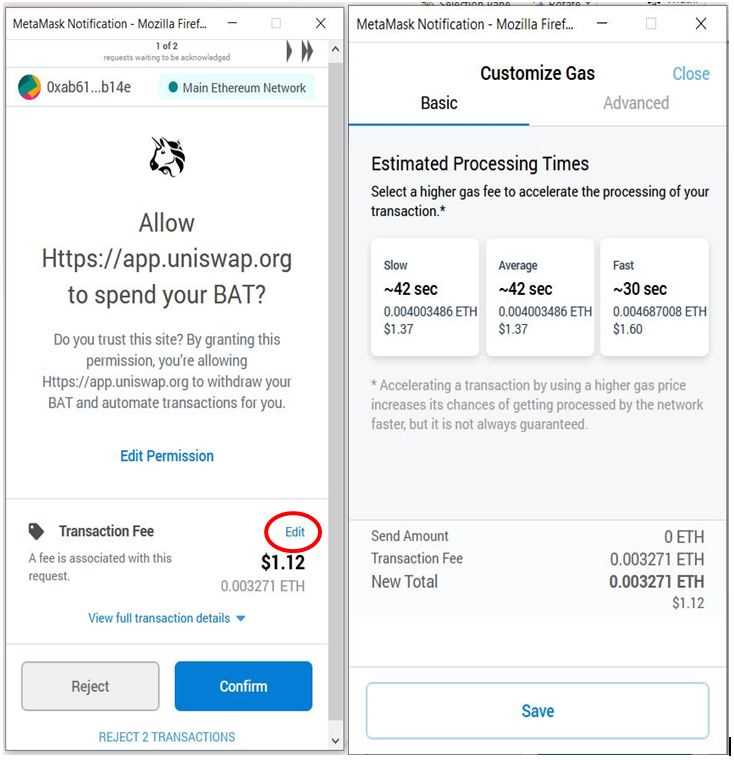
Enter the amount of cryptocurrency you want to send to Metamask and review the transaction details. Take note of any fees associated with the transfer. Once you’re happy with the details, click on the “Send” button. Coinbase will ask you to confirm the transaction. Follow the prompts and enter any necessary verification codes.
Step 6: Wait for the Transaction to be Confirmed
After confirming the transaction, you will need to wait for it to be confirmed on the blockchain. This process may take some time, depending on network congestion. You can check the status of the transaction in your Coinbase account or by using a blockchain explorer.
Step 7: Check your Metamask Wallet
Once the transaction is confirmed, you can open your Metamask wallet to see the newly received funds. Your balance should reflect the amount you sent from Coinbase.
That’s it! You have successfully sent cryptocurrency from Coinbase to your Metamask wallet. Now you can use your Metamask wallet to interact with various decentralized applications and participate in the world of decentralized finance.
Creating a Metamask Wallet
Before you can send crypto from Coinbase to Metamask, you need to have a Metamask wallet set up. Here are the steps to create a Metamask wallet:
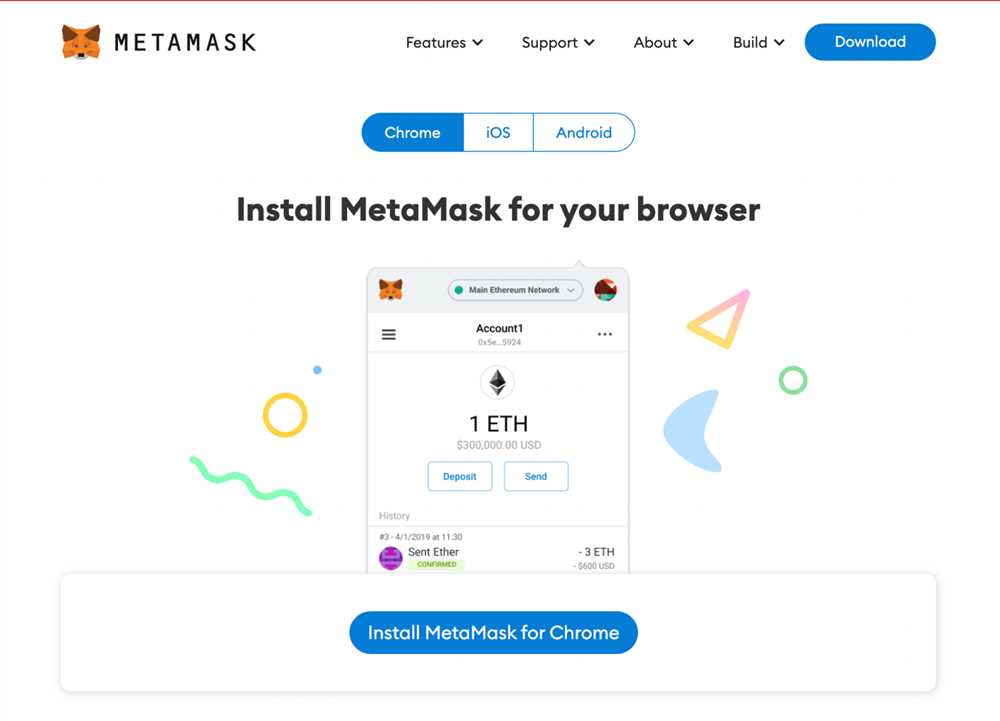
- Open your web browser and search for the official Metamask website.
- Click on the “Get Chrome Extension” button or the respective button for your browser.
- Click “Add to Chrome” or the equivalent for your browser to add the Metamask extension.
- A popup window will appear, click on “Add Extension” to confirm.
- Once the extension is added, click on the Metamask logo in your browser toolbar to open the wallet.
- Click on “Create a Wallet” to start the wallet creation process.
- You will be asked to create a strong password for your wallet. Make sure to choose a secure password and write it down somewhere safe.
- Read and accept the terms of service and privacy policy.
- Metamask will then display a set of backup seed words. Write down these words in the exact order they are shown and keep them in a secure place.
- Confirm the seed words in the next step to verify that you have saved them correctly.
- Once your seed words are confirmed, your wallet will be created, and you will be able to access it by clicking on the Metamask logo in your browser toolbar.
Now that you have created your Metamask wallet, you are ready to send crypto from Coinbase to Metamask.
Adding Coinbase as a Wallet Source
Before you can send cryptocurrency from Coinbase to Metamask, you need to first add Coinbase as a wallet source in Metamask.
Follow these steps to add Coinbase as a wallet source:
- Open the Metamask extension in your browser and make sure you are on the main wallet page.
- Click on the network selection button at the top of the page and choose the desired network (such as Ethereum or Binance Smart Chain).
- Click on the “Assets” tab and then click on the “Add Token” button.
- Click on the “Custom Token” tab.
- In a separate tab or window, log in to your Coinbase account.
- On the Coinbase dashboard, click on the cryptocurrency you want to send to Metamask.
- Click on the “Receive” button or the “Deposit” button, depending on your Coinbase interface.
- Copy the wallet address shown on the Coinbase page.
- Go back to the Metamask tab and paste the copied wallet address into the “Token Contract Address” field.
- Metamask should automatically fill in the “Token Symbol” and “Decimal” fields. If not, you can manually enter this information.
- Click on the “Next” button.
- You will see a summary of the token information. Click on the “Add Tokens” button.
- Wait for a few seconds while Metamask fetches and adds the token.
- Once the token is added, you will see it listed under the “Token” section in Metamask.
- Repeat these steps for any other cryptocurrencies you want to send from Coinbase to Metamask.
Now that you have added Coinbase as a wallet source in Metamask, you can proceed to send cryptocurrency from Coinbase to Metamask.
Sending Crypto from Coinbase to Metamask
Metamask is a popular cryptocurrency wallet that allows users to store, manage, and interact with Ethereum-based assets. If you have purchased cryptocurrencies on Coinbase and want to send them to your Metamask wallet, follow these step-by-step instructions:
Step 1: Set Up Metamask
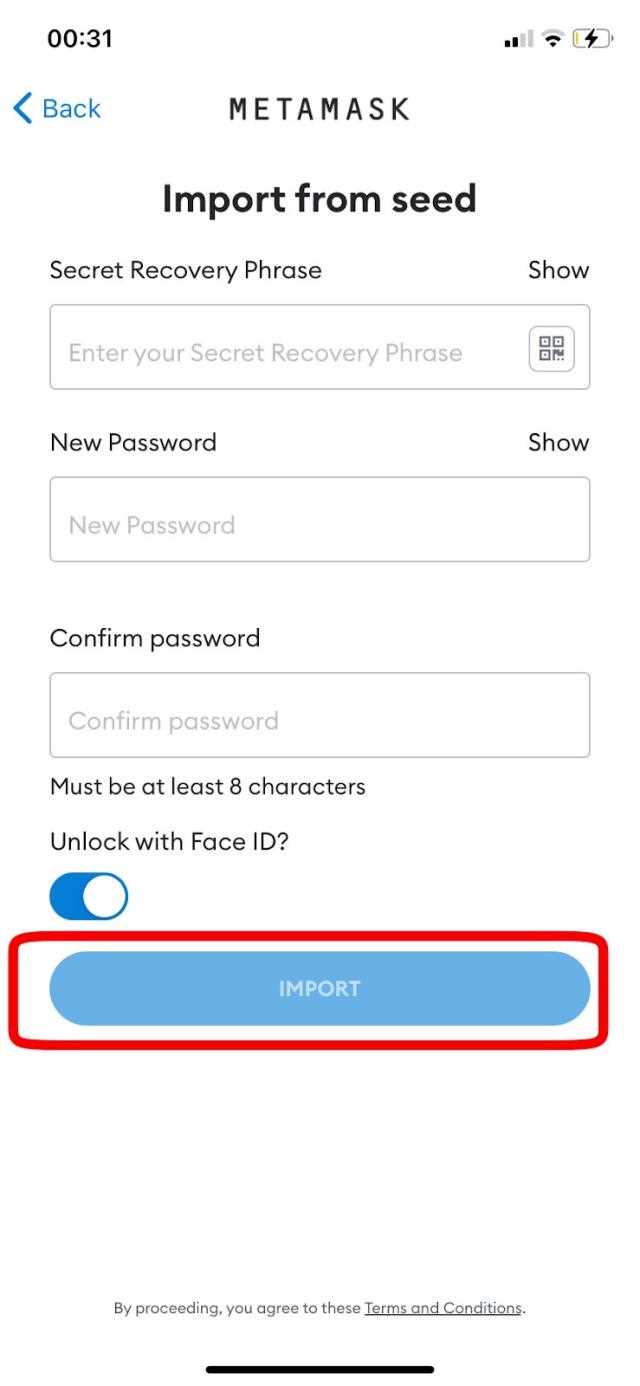
If you haven’t done so already, download and install the Metamask extension for your web browser. Once installed, create a new wallet or import an existing one using your seed phrase or private key.
Step 2: Obtain Your Metamask Wallet Address
Open your Metamask wallet and click on the account icon. From the dropdown menu, select the account you want to receive the funds on. Copy the wallet address by clicking on the “Copy” button. This is the address you need to provide to Coinbase.
Step 3: Log in to Your Coinbase Account
Go to the Coinbase website and log in to your account. If you don’t have an account yet, sign up and complete the necessary verification steps.
Step 4: Navigate to the Send/Withdraw Page
Once you’re logged in, navigate to the “Accounts” tab and select the cryptocurrency you want to send to your Metamask wallet. Click on the “Send” or “Withdraw” button to proceed.
Step 5: Enter Your Metamask Wallet Address
In the recipient field, paste the Metamask wallet address you copied in Step 2. Make sure the address is correct and double-check to avoid any mistakes.
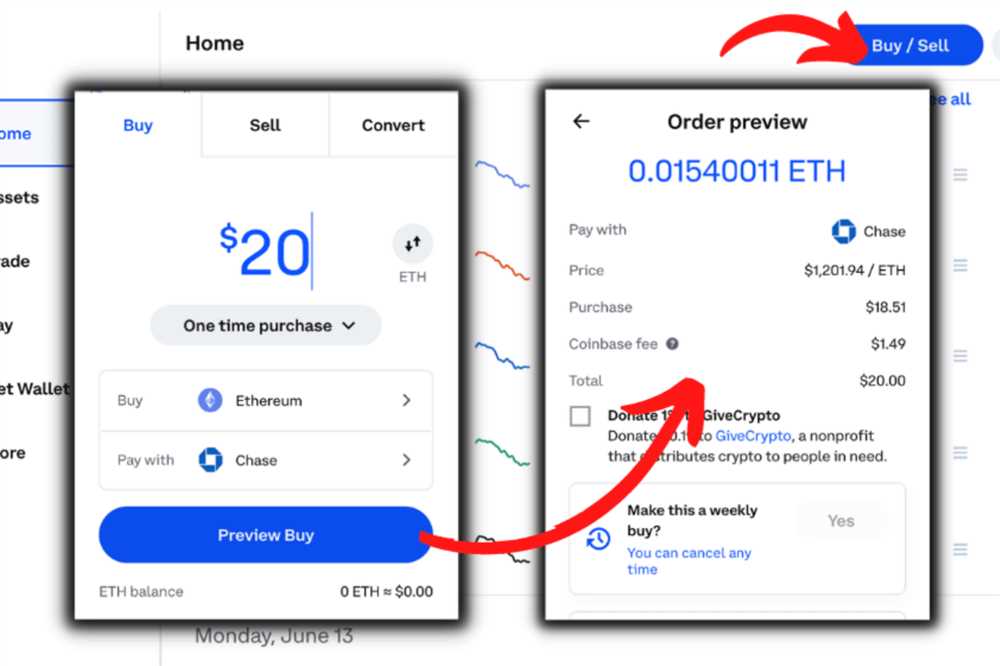
Step 6: Specify the Amount to Send
Enter the amount of cryptocurrency you want to send to your Metamask wallet. Coinbase may also provide you with the option to select a fiat currency equivalent. Review the transaction details to ensure everything is accurate.
Step 7: Confirm and Send
Review the transaction details once again to ensure everything is correct. If you’re satisfied, click on the “Confirm” or “Send” button to initiate the transfer. Coinbase may require you to verify the transaction using two-factor authentication or other security measures.
After completing these steps, Coinbase will process your transaction and send the specified cryptocurrency to your Metamask wallet. The time it takes to receive the funds may vary depending on network congestion and other factors.
Note: It’s important to double-check the wallet address and transaction details before sending any cryptocurrencies. Once a transaction is initiated, it’s usually irreversible and you may lose your funds if you send them to a wrong address.
Always exercise caution and only send cryptocurrencies to wallets you control and trust.
Frequently Asked Questions:
What is Coinbase?
Coinbase is a popular cryptocurrency exchange platform that allows users to buy, sell, and store various cryptocurrencies, including Bitcoin, Ethereum, and more.
What is Metamask?
Metamask is a cryptocurrency wallet that acts as a browser extension and allows users to manage and interact with decentralized applications (DApps) on the Ethereum blockchain.
+ There are no comments
Add yours