


Are you a cryptocurrency enthusiast who wants to learn how to transfer funds from your Metamask wallet to your bank account? Look no further, as this comprehensive guide will take you through the step-by-step process to make it happen.
Metamask is a popular Ethereum wallet that allows you to store, manage, and interact with your digital assets. While it’s predominantly used for decentralized applications, you can also transfer your funds to your bank account when needed. This guide will outline the necessary steps to ensure a smooth and secure transfer.
Firstly, ensure that you have your Metamask wallet set up and connected to your preferred Ethereum network. This can be done through your browser extension or mobile app. Next, you’ll need to navigate to the “Send” function within the Metamask interface.
Step 1: Enter your bank account details
Before initiating the transfer, you’ll need to provide your bank account details. This typically includes the recipient’s name, bank account number, bank name, and the bank’s routing number. It’s essential to double-check this information to prevent any errors.
Step 2: Select the amount to transfer
Once your bank account details are entered, you can input the amount you wish to transfer from your Metamask wallet. Take note of any transaction fees that may apply and ensure you have sufficient funds in your account to cover them.
Step 3: Review and confirm the transaction
After selecting the amount, you’ll have the opportunity to review the transaction details. This includes verifying the recipient’s bank account information, the transfer amount, and any associated fees. Once you’re satisfied with the information provided, you can go ahead and confirm the transfer.
Step 4: Wait for the funds to arrive
After confirming the transfer, it may take some time for the funds to arrive in your bank account. The duration may vary depending on the Ethereum network’s congestion and your bank’s processing time. Be patient, and keep an eye on your bank account for the transaction to reflect successfully.
By following these steps, you can transfer funds from your Metamask wallet to your bank account with ease. Make sure to stay updated with the latest security practices and double-check all the details before initiating any transactions. Happy transferring!
A Step-by-Step Guide to Transfer Funds from Metamask to Your Bank Account
Are you looking to transfer your funds from Metamask to your bank account? This step-by-step guide will walk you through the process to make it quick and easy. Follow these instructions to get started:
Step 1: Connect Your Metamask Wallet to Your Bank Account
Before you can transfer funds from Metamask to your bank account, you need to connect your wallet with your bank account. To do this:
1. Open your Metamask wallet and navigate to the settings menu.
2. Click on “Connect Bank Account” and select your bank from the list of supported options.
3. Follow the prompts to link your bank account to your Metamask wallet. You may need to provide additional verification information.
4. Once your bank account is connected, you’re ready to start transferring funds.
Step 2: Choose the Amount You Want to Transfer
Now that your bank account is linked to your Metamask wallet, you can choose the amount you want to transfer. Make sure you have enough funds in your wallet to cover the transfer.
Step 3: Initiate the Transfer
Once you’ve selected the amount you want to transfer, it’s time to initiate the transfer. Follow these steps:
1. In your Metamask wallet, navigate to the transfer funds section.
2. Select your bank account as the destination for the funds.
3. Enter the amount you want to transfer and click “Confirm.”
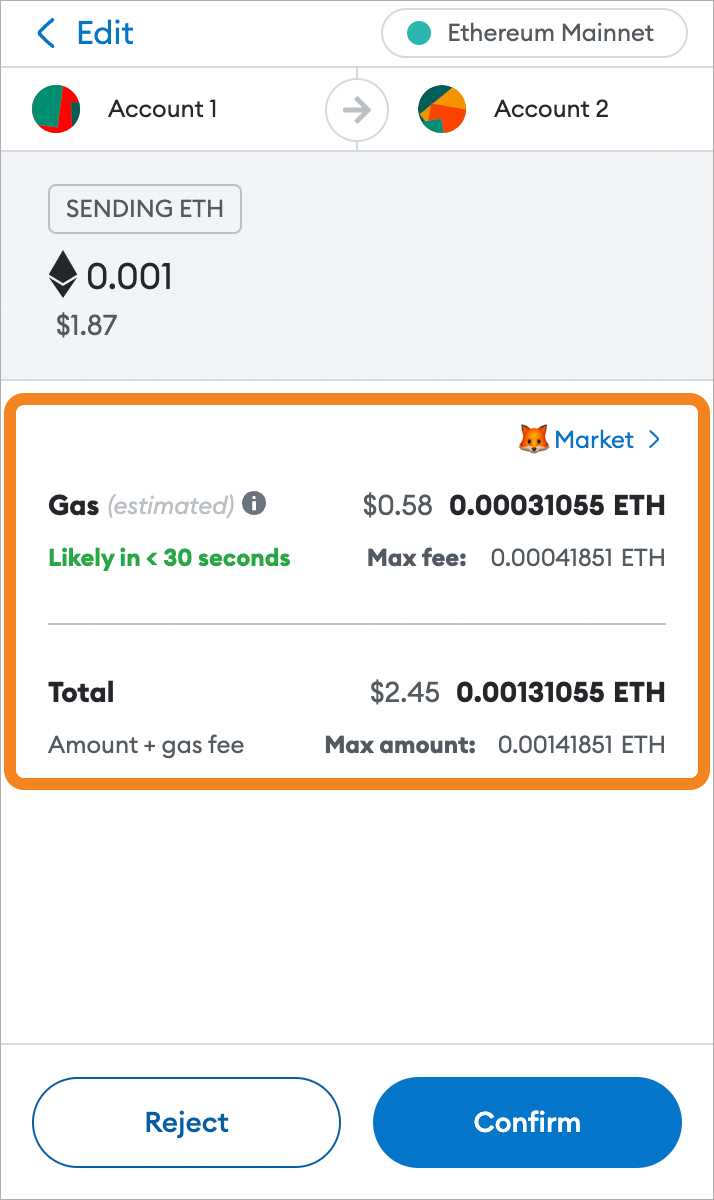
4. Review the details of the transfer and click “Continue” to confirm.
Step 4: Wait for Confirmation and Receipt
After initiating the transfer, you’ll need to wait for confirmation from both Metamask and your bank. The transfer process can take several minutes to a few hours, depending on network congestion and bank processing times. Once the transfer is complete, you’ll receive a confirmation receipt in your Metamask wallet and an email notification from your bank.
Note: It’s important to double-check all the details before confirming the transfer to avoid any mistakes or errors.
Step 5: Check Your Bank Account
After receiving the confirmation, you can check your bank account to ensure that the transferred funds have arrived. The timing may vary depending on your bank’s processing speed.
Remember to keep track of your transactions for accounting purposes and always follow legal requirements for reporting cryptocurrency transactions.
That’s it! By following these steps, you can easily transfer funds from Metamask to your bank account. If you encounter any issues, make sure to contact the support team of your wallet or bank for assistance.
Setting up Metamask Wallet
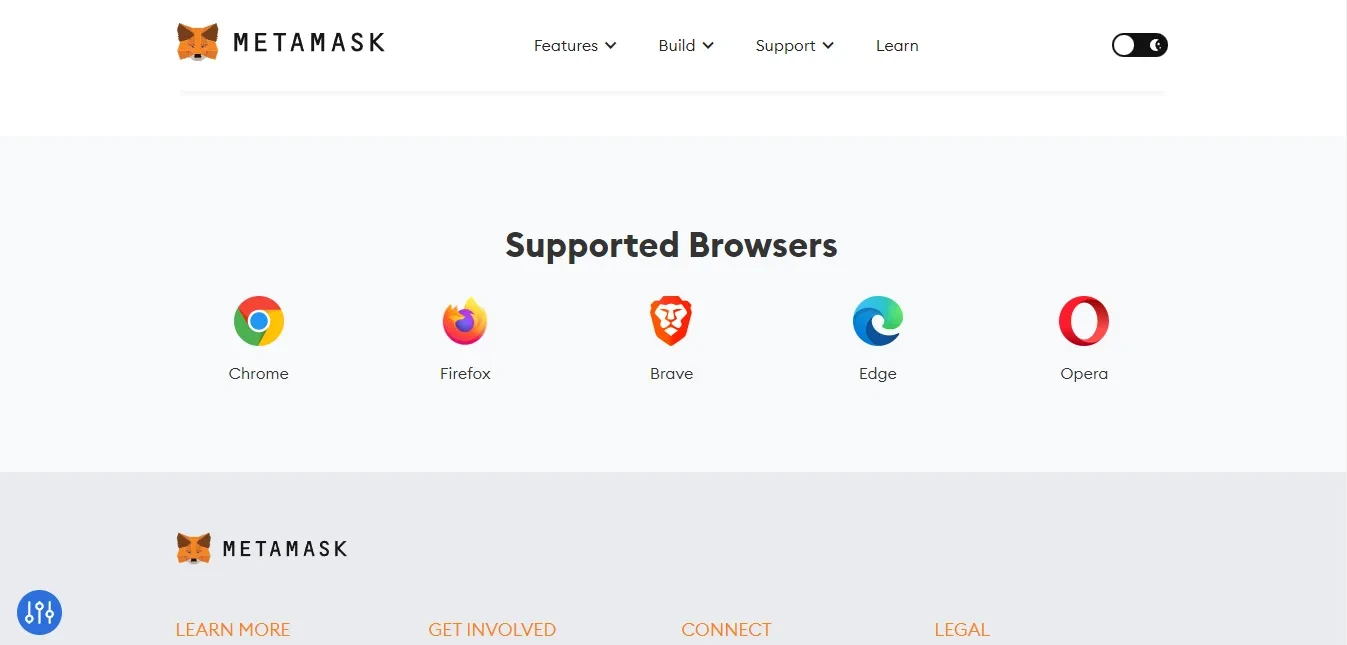
Step 1: Install the Metamask extension in your web browser by visiting the official Metamask website or the extension store of your browser.
Step 2: Once installed, click on the Metamask icon in your browser toolbar to open the extension.
Step 3: Click on the “Get Started” button to create a new wallet.
Step 4: Set a strong password for your wallet and click on “Create” to proceed.
Step 5: Metamask will show you a list of seed words. Copy them down and keep them in a safe place. These seed words are used to restore your wallet in case you lose access to it.
Step 6: Confirm the seed words by typing them in the correct order.
Step 7: Once your wallet is set up, you will need to choose a network to connect to. For this guide, we recommend using the Ethereum mainnet.
Step 8: Connect your wallet to a specific network by clicking on the network name in the top bar and selecting the desired network.
Step 9: Your Metamask wallet is now set up and ready to use. You can view your account balance and send or receive funds using the wallet interface.
Step 10: To ensure the security of your wallet, make sure to enable 2-factor authentication, update your password regularly, and be cautious of phishing attempts.
Note: It is important to safely store your seed words and never share them with anyone. If someone gains access to your seed words, they can access your wallet and funds.
Connecting Your Bank Account to Metamask
In order to transfer funds from Metamask to your bank account, you first need to connect your bank account to Metamask. This process will allow you to seamlessly move funds between the two platforms.
Step 1: Verify Your Bank Account
Before you can connect your bank account to Metamask, you must verify your bank account details. This typically involves providing your bank account number, routing number, and personal identification information.
Step 2: Link Your Bank Account
Once your bank account is verified, you can link it to your Metamask wallet. To do this, open your Metamask wallet and navigate to the settings or account section. Look for the option to add a bank account and follow the prompts to link your verified bank account.
Step 3: Authorize Bank Account Access
To ensure the secure transfer of funds, you will need to authorize Metamask to access your bank account. This typically involves entering a unique authorization code provided by your bank or confirming your identity through additional security measures.
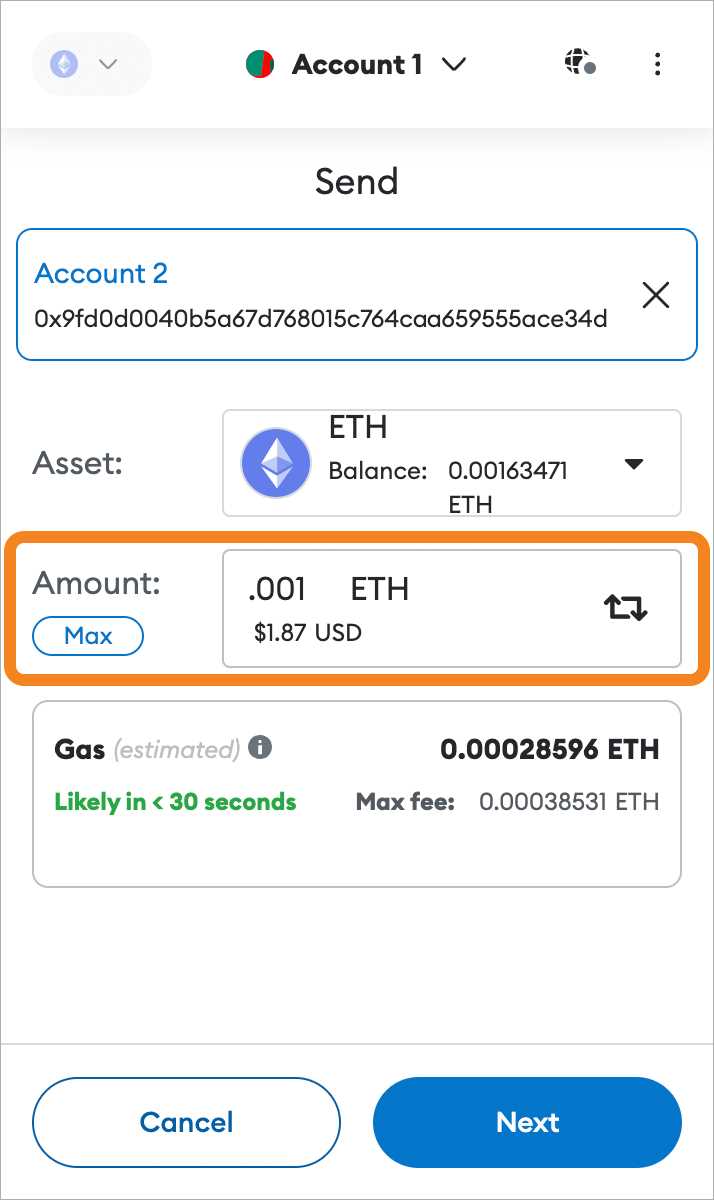
Step 4: Transfer Funds
Once your bank account is successfully connected to Metamask, you can now transfer funds between the two platforms. Simply navigate to the transfer or send funds section of your Metamask wallet, enter the desired amount, select your bank account as the recipient, and confirm the transaction.
| Benefits of Connecting Your Bank Account to Metamask |
|---|
| 1. Seamless transfer of funds |
| 2. Increased convenience |
| 3. Enhanced security |
By connecting your bank account to Metamask, you can easily transfer funds between the two platforms, saving time and reducing the need for multiple transactions. This integration also enhances security, as your bank account information remains encrypted and protected within Metamask’s secure environment.
Transferring Funds from Metamask to Your Bank Account
Metamask is a popular wallet for managing cryptocurrencies and digital assets. While it allows you to store, send, and receive funds in various cryptocurrencies, you might eventually want to convert those funds into your local currency and transfer them to your bank account. In this guide, we will outline the steps you need to take to transfer funds from your Metamask wallet to your bank account.
Selecting a Cryptocurrency Exchange
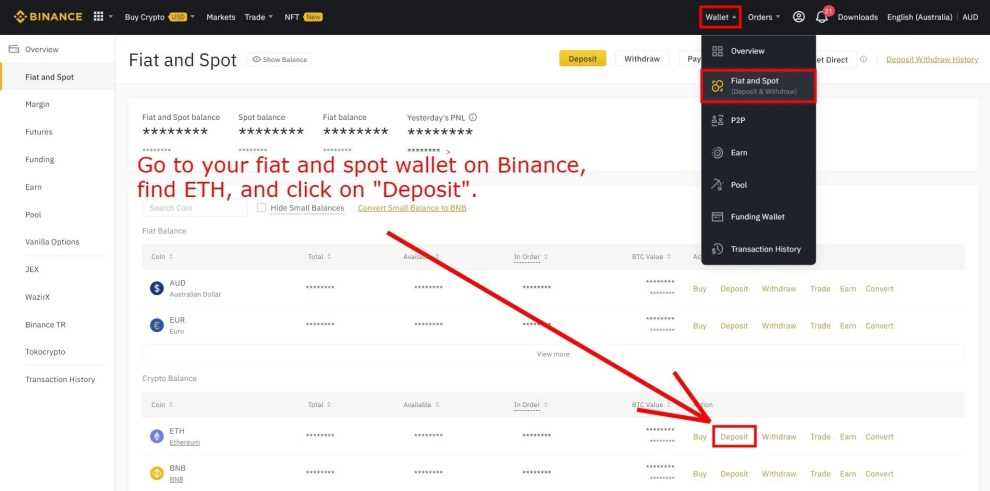
The first step in transferring funds from Metamask to your bank account is to select a reliable cryptocurrency exchange that supports fiat withdrawals to your local bank account. Some popular options include Coinbase, Binance, and Kraken. Research different exchanges and compare their fees, security measures, and user reviews before making a decision.
Verifying Your Identity
Before you can withdraw funds to your bank account, most cryptocurrency exchanges will require you to complete a verification process. This typically involves providing personal information, such as your full name, address, and a photo ID. Follow the exchange’s instructions to complete the verification process accurately.
Adding Your Bank Account
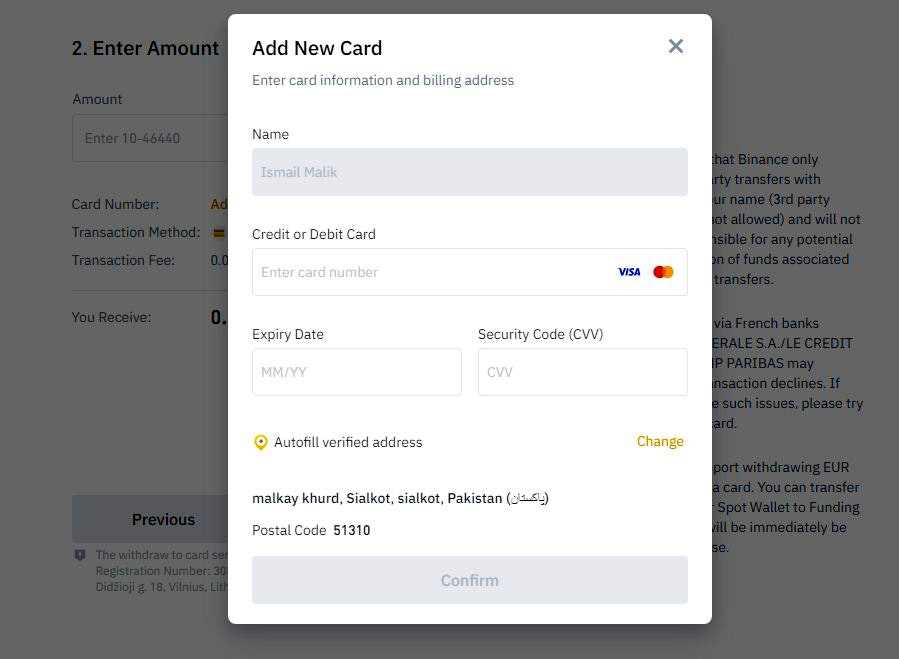
Once your identity is verified, you will need to add your bank account details to the cryptocurrency exchange. This usually involves providing your bank account number, the name of your bank, and your account holder information. Ensure that you enter the correct information to avoid any issues with your withdrawal.
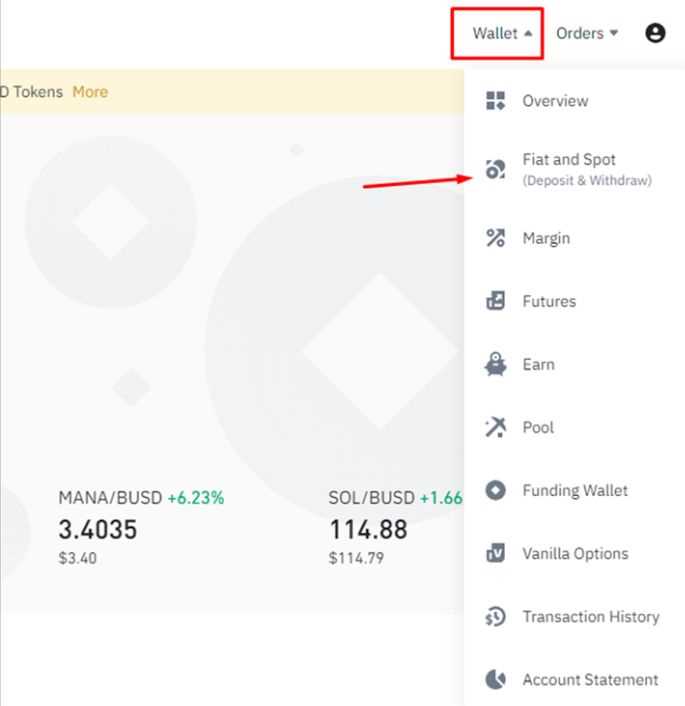
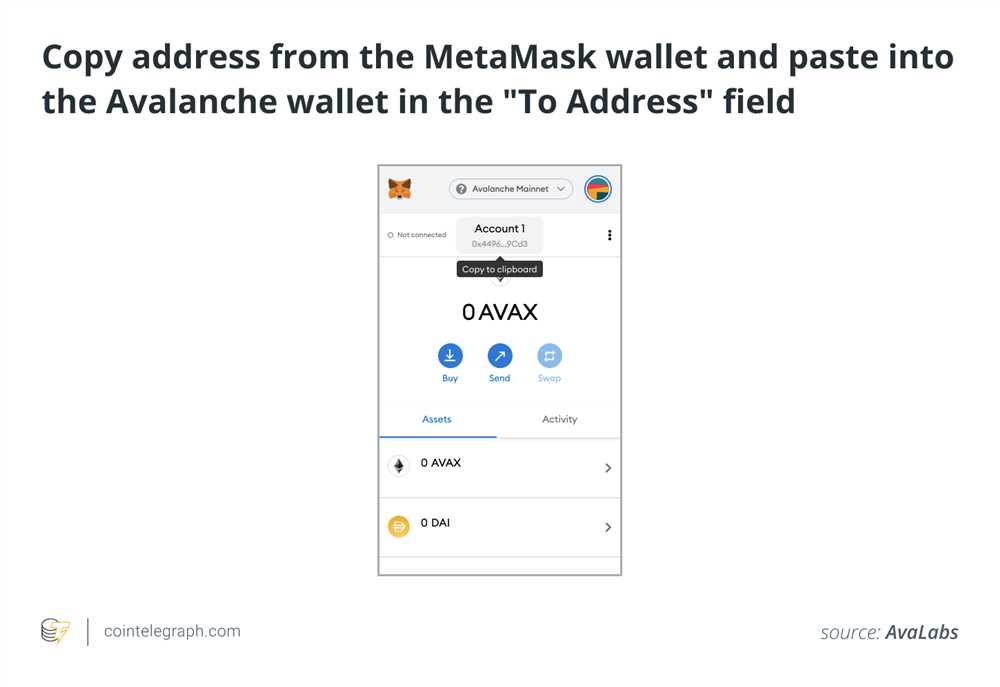
Withdrawing Funds from Metamask to the Exchange
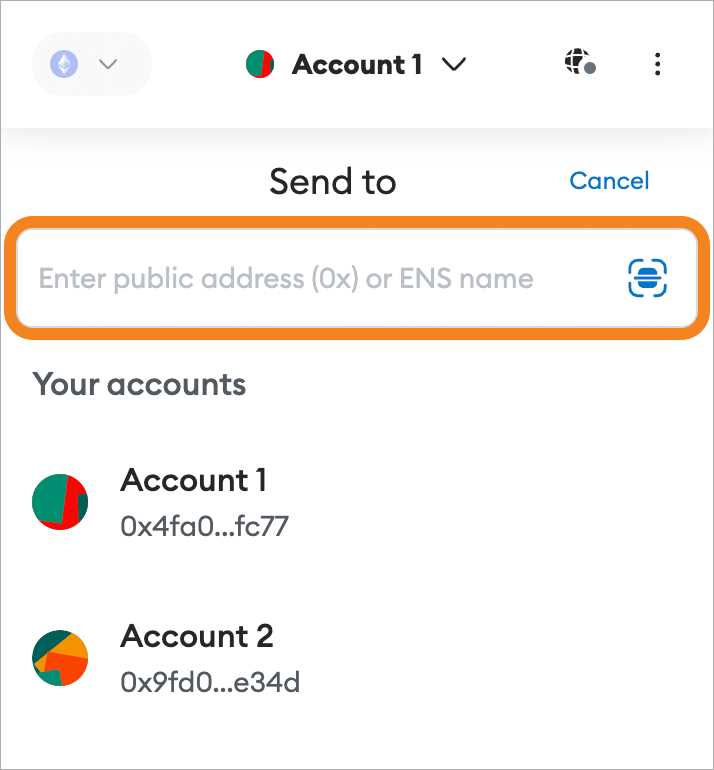
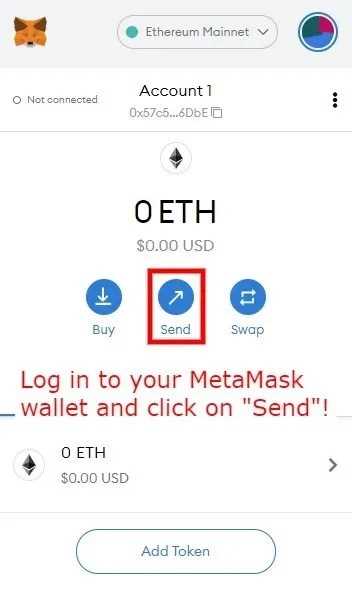
Now that your bank account is linked to the cryptocurrency exchange, you can proceed to transfer funds from your Metamask wallet. Open your Metamask wallet and navigate to the “Send” or “Withdraw” option. Enter the recipient address, which should be your cryptocurrency exchange wallet address. Specify the amount you wish to transfer and initiate the transaction.
Note: Make sure you verify the withdrawal address before confirming the transaction to ensure that you are sending funds to the correct wallet.
Initiating the Fiat Withdrawal
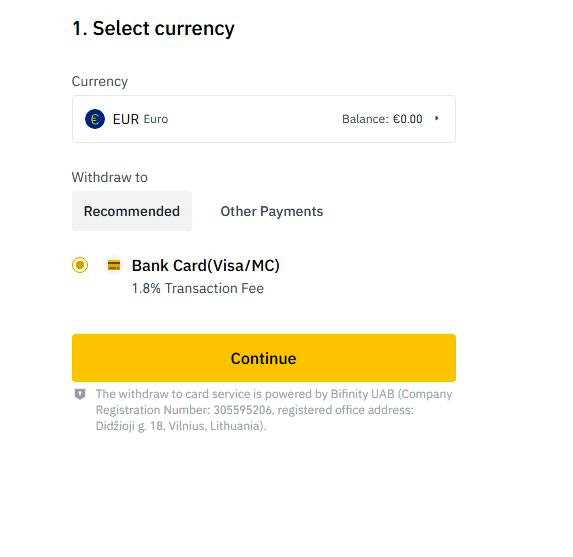
After the funds are successfully transferred to the cryptocurrency exchange, you can initiate a fiat withdrawal to your bank account. Go to the “Withdraw” or “Sell” section of the exchange’s platform. Select the cryptocurrency you sent from Metamask and choose the option to withdraw to your bank account. Follow the prompts, enter the desired amount, and confirm the withdrawal.
Note: Keep in mind that withdrawal fees and processing times may vary depending on the cryptocurrency exchange and your bank.
Once the withdrawal is processed, the funds should be credited to your bank account. It may take a few business days for the transfer to complete, so be patient. You can usually track the progress of the withdrawal on the cryptocurrency exchange’s website or app.
Remember to review your bank account statement and verify that the funds have been deposited correctly.
By following these steps, you can successfully transfer funds from your Metamask wallet to your bank account and convert your cryptocurrencies into your preferred currency.
Security Measures to Keep Your Funds Safe
When it comes to transferring funds from Metamask to your bank account, it’s essential to prioritize the security of your digital assets. Here are some key security measures to implement:
- Use a Strong Password: Choose a unique and complex password for your Metamask account. Avoid using easily guessable phrases or personal information.
- Enable Two-Factor Authentication: Set up two-factor authentication (2FA) to provide an additional layer of security. This typically involves verifying your identity through a mobile app or email code.
- Keep Your Software Up to Date: Ensure that both your operating system and Metamask wallet are regularly updated with the latest security patches and features.
- Be Cautious of Phishing Attempts: Always double-check the URL and domain name before entering any sensitive information. Avoid clicking on suspicious links or opening attachments from unknown sources.
- Enable Wallet Encryption: Encrypt your Metamask wallet to protect your private keys. This adds an extra layer of security when it comes to accessing your funds.
- Use Hardware Wallets: Consider using a hardware wallet, such as a Ledger or Trezor device, to store your funds offline. Hardware wallets provide an extra level of security by keeping your private keys offline and out of reach from hackers.
- Regularly Backup Your Wallet: Create regular backups of your Metamask wallet and store them securely offline. This ensures that you can recover your funds in case of loss or theft.
- Be Vigilant with Third-Party Apps: Exercise caution when using third-party applications that require access to your Metamask wallet. Only use trusted and reputable tools from verified sources.
- Stay Informed: Keep yourself updated with the latest security practices and news related to cryptocurrency wallets. This will help you identify potential threats and take necessary precautions.
By following these security measures, you can significantly reduce the risk of unauthorized access to your funds and ensure the safety of your digital assets during the process of transferring funds from Metamask to your bank account.
Frequently Asked Questions:
Can I transfer funds from Metamask to my bank account?
Yes, you can transfer funds from Metamask to your bank account. In order to do so, you will need to follow several steps.
What is Metamask?
Metamask is a cryptocurrency wallet and browser extension that allows you to interact with decentralized applications (DApps) on the Ethereum blockchain. It also allows you to store, send, and receive Ethereum and ERC-20 tokens.
How do I transfer funds from Metamask to my bank account?
In order to transfer funds from Metamask to your bank account, you will first need to convert your Ethereum or ERC-20 tokens into a stablecoin or a fiat currency-supported cryptocurrency. Then, you will need to find a cryptocurrency exchange that supports the specific stablecoin or cryptocurrency you want to convert to. Next, you will need to create an account on the exchange, complete the necessary verification process, and deposit your funds from Metamask to the exchange. Finally, you can sell your stablecoin or cryptocurrency on the exchange and withdraw the funds to your bank account.
Are there any fees associated with transferring funds from Metamask to a bank account?
Yes, there are usually fees associated with transferring funds from Metamask to a bank account. These fees can vary depending on the exchange and the specific stablecoin or cryptocurrency you are converting to. There may be fees for depositing funds, trading, and withdrawing to a bank account. It is important to check the fee structure of the exchange you choose to ensure you are aware of any potential costs.
Is it safe to transfer funds from Metamask to a bank account?
Transferring funds from Metamask to a bank account can be safe if you follow certain security measures. It is important to use a reputable cryptocurrency exchange that has secure protocols in place to protect your funds. Additionally, make sure to enable two-factor authentication (2FA) on both your Metamask wallet and the exchange account to add an extra layer of security. It is also recommended to double-check the withdrawal address and ensure you are sending funds to your own bank account.
+ There are no comments
Add yours