


If you’re new to the world of cryptocurrencies and you’ve recently started using the Metamask wallet, you may be wondering how to add FTM (Fantom) to your account. Adding FTM to Metamask is actually a pretty straightforward process, and in this step-by-step guide, we’ll walk you through it.
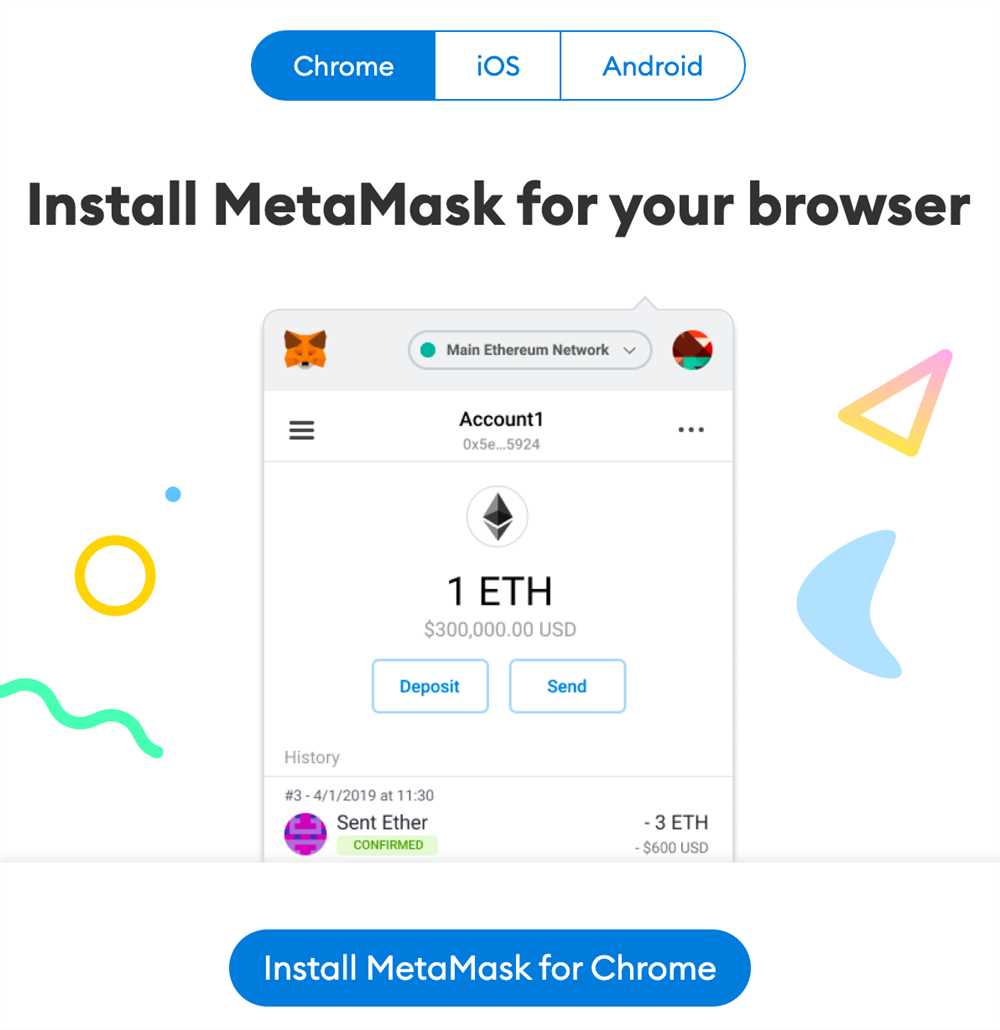
Step 1: Open the Metamask extension in your browser and make sure you’re logged in to your account. If you don’t have Metamask installed, you can easily download and install it from the official website.
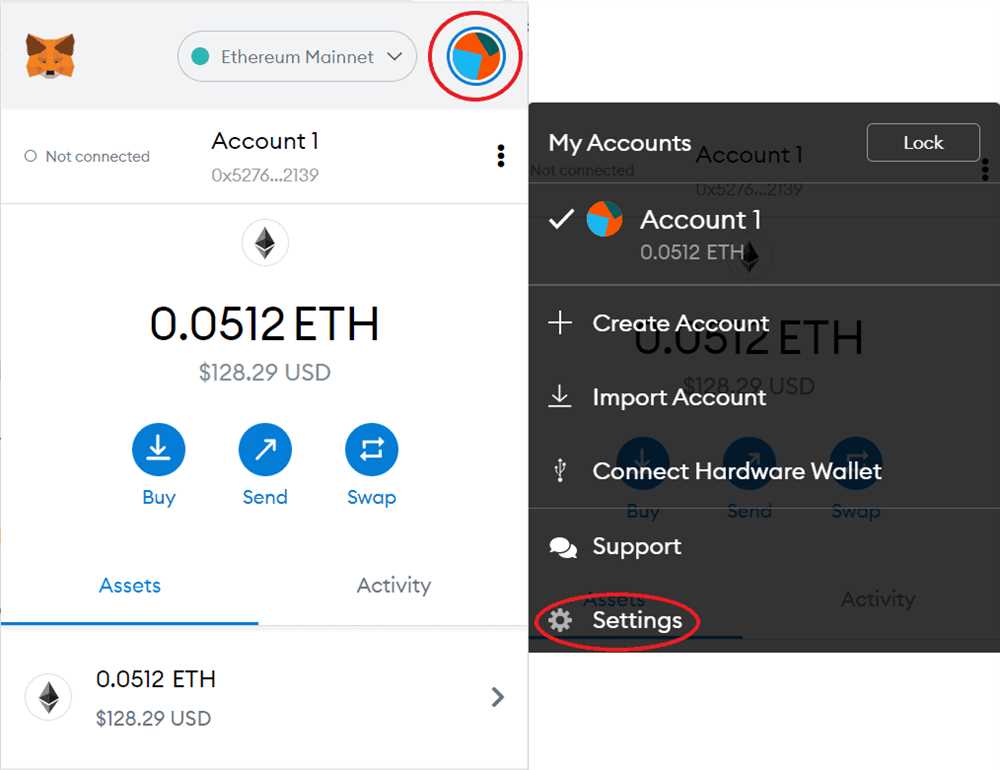
Step 2: Once you’re logged in to your Metamask account, click on the account icon in the top right corner and select “Add Token” from the dropdown menu.
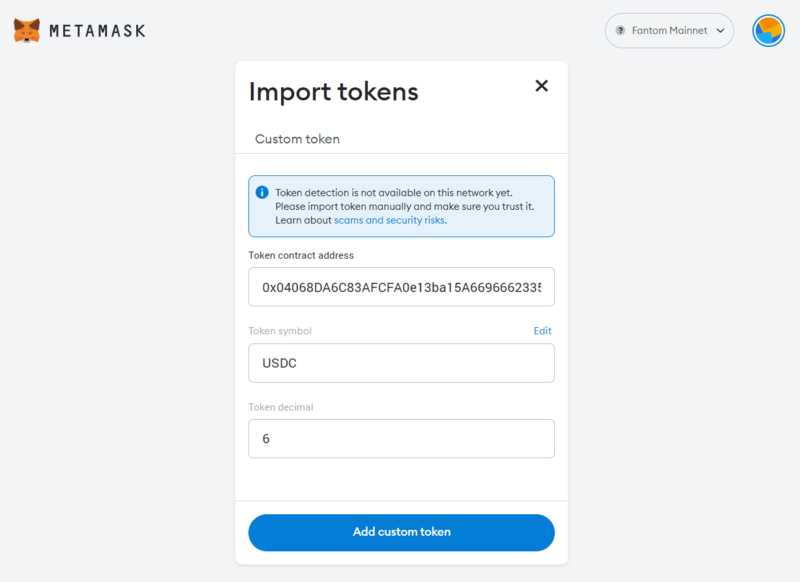
Step 3: In the “Token Contract Address” field, enter the FTM token contract address. You can find the contract address on the Fantom website or in various cryptocurrency marketplaces.
Step 4: Metamask will automatically fill in the Token Symbol and Decimals of Precision fields. If not, you can manually enter “FTM” as the token symbol and “18” as the decimals of precision.
Step 5: Click on the “Next” button and review the token details. If everything looks good, click on the “Add Tokens” button to add FTM to your Metamask wallet.
Step 6: Congrats! You’ve successfully added FTM to your Metamask wallet. You can now view your FTM balance and use it for various transactions in the Fantom ecosystem.
Adding FTM to Metamask is a simple process that allows you to easily manage your FTM tokens in one place. With your FTM tokens added to Metamask, you’ll have quick and easy access to your funds whenever you need them.
Note: Make sure to double-check the token contract address before adding it to Metamask to avoid any potential issues or scams.
Step 1: Download and Install Metamask Extension
To add FTM (Fantom) to your Metamask wallet, the first step is to download and install the Metamask extension. Metamask is a cryptocurrency wallet that allows you to securely store and manage your digital assets.
Follow the step-by-step instructions below to download and install Metamask:
1. Open your preferred web browser
Launch your preferred web browser, such as Google Chrome, Mozilla Firefox, or Brave.
2. Go to the Metamask website
Visit the official Metamask website by typing “metamask.io” in the address bar and pressing Enter.
3. Click on “Get Chrome Extension” or “Get Firefox Extension”
On the Metamask website, you’ll see options to download the extension for Chrome or Firefox. Click on the “Get Chrome Extension” button if you’re using Chrome, or click on the “Get Firefox Extension” button if you’re using Firefox.
4. Confirm the installation
A pop-up window will appear, asking you to confirm the installation. Click on “Add Extension” to proceed.
5. Wait for the installation to complete
Metamask will then be downloaded and installed in your browser. You’ll see a small fox icon in your browser toolbar.
That’s it! You have now successfully downloaded and installed the Metamask extension. In the next steps, we’ll guide you on how to set up and add FTM to your Metamask wallet.
Step-by-step guide on how to add FTM to Metamask
Metamask is a popular cryptocurrency wallet that allows users to interact with decentralized applications (dApps) on various blockchains. If you are interested in using Fantom (FTM) on Metamask, follow these simple steps:
Step 1: Install the Metamask extension
If you don’t have Metamask installed in your browser, you first need to install it. Visit the Metamask website and install the extension for your preferred browser.
Step 2: Create or import a wallet
Once you have Metamask installed, open it and either create a new wallet or import an existing one. Make sure to secure your wallet with a strong password and back up your seed phrase.
Step 3: Connect to the Fantom network
After setting up your wallet, click on the Metamask logo on your browser toolbar to open the wallet. From the network dropdown, select “Custom RPC” to manually add the Fantom network.
Step 4: Add Fantom network details
In the “New RPC URL” field, enter the following details for the Fantom network:
- Network Name: Fantom Opera
- New RPC URL: https://rpc.ftm.tools/
- Chain ID: 250
- Symbol: FTM
- Block Explorer URL: https://ftmscan.com/
Step 5: Save the network details
After entering the Fantom network details, click on the “Save” button to save the changes.
Step 6: Switch to Fantom network
Once the Fantom network is added, you need to switch to it. From the network dropdown, select “Fantom Opera” as your active network.
Step 7: Add FTM to your wallet
To add FTM to your wallet, click on the “Add Token” button in the Metamask wallet. In the token contract address field, enter the following Fantom FTM token address: 0x4e15361fd6b4bb609fa63c81a2be19d873717870
Metamask will automatically fetch the token details. Click on the “Add” button to add FTM to your wallet.
That’s it! You have successfully added FTM to your Metamask wallet and can now use it to interact with decentralized applications on the Fantom network.
Step 2: Create a New Wallet in Metamask
To add FTM to Metamask, you first need to create a new wallet in the Metamask extension. Here’s how:
- Open the Metamask extension in your browser.
- If you already have an existing wallet, click on the account icon in the top right corner and select “Create Account”.
- If this is your first time using Metamask, click on the “Get Started” button.
- Read and accept the terms of use and privacy policy.
- Set a password for your wallet. Make sure it’s strong and secure.
- You will be asked to back up your seed phrase. This phrase is essential for restoring your wallet in case you lose access to it. Write down the words in the correct order and keep them in a safe place.
- Confirm your seed phrase by selecting the words from the list in the correct order.
- Your wallet is now created! Click on the account icon in the top right corner to see your wallet address and balances.
Now that you have a new wallet in Metamask, you are ready to proceed with adding FTM to it.
Step-by-step tutorial for creating a new wallet in Metamask
Creating a new wallet in Metamask is a simple process that allows you to securely store and manage your cryptocurrencies. Follow the steps below to get started:
| Step 1: | Install the Metamask browser extension by visiting the official Metamask website (https://metamask.io/) and downloading the extension for your preferred browser. |
| Step 2: | Once the extension is installed, click on the Metamask icon in the browser toolbar to open the extension. |
| Step 3: | Click on the “Get Started” button on the welcome screen. |
| Step 4: | Read and agree to the terms of use by clicking on the checkbox and then clicking on the “Accept” button. |
| Step 5: | Create a strong password for your wallet. Make sure it is unique and secure. |
| Step 6: | Click on the “Create” button to generate your new wallet. |
| Step 7: | Backup your seed phrase. This is a set of 12 or 24 random words that can be used to restore your wallet in case you lose access to your device. Write it down in a safe place and keep it secure. |
| Step 8: | Confirm your seed phrase by selecting the provided words in the correct order. |
| Step 9: | Your new wallet is now created and ready to use. You can now add funds to your wallet and start managing your cryptocurrencies with Metamask. |
Remember to always keep your wallet password and seed phrase safe and secure. Do not share them with anyone and consider using additional security measures such as two-factor authentication for added protection.
Step 3: Add the Fantom Network to Metamask
Once you have successfully installed and set up Metamask, the next step is to add the Fantom Network to your wallet. Follow the steps below:
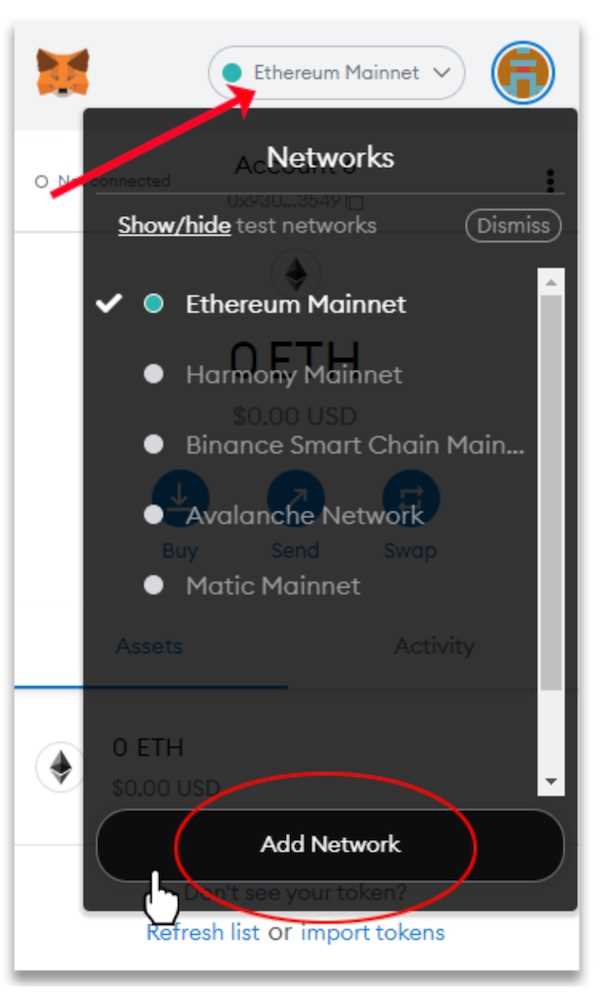
Step 1: Open Metamask in your browser and click on the network name at the top of the wallet, next to the profile icon.
Step 2: A dropdown menu will appear, click on “Custom RPC” at the bottom of the menu to add a custom network.
Step 3: In the “New RPC URL” field, enter the following URL: https://rpcapi.fantom.network
Step 4: Enter “Fantom” in the “Network Name” field.
Step 5: In the “Chain ID” field, enter 250.
Step 6: For the “Currency Symbol” field, enter FTM.
Step 7: For the “Block Explorer URL” field, enter https://ftmscan.com/.
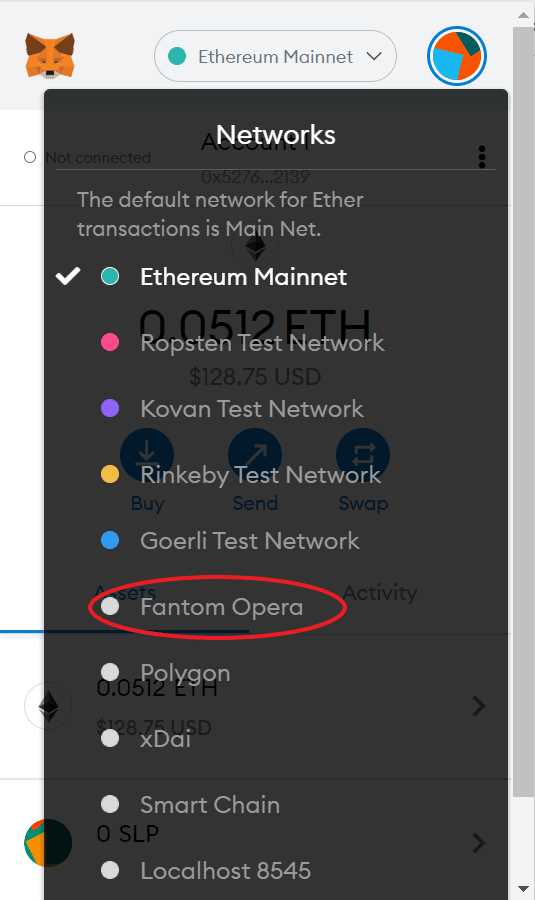
Step 8: Click on “Save” to add the Fantom Network to your Metamask wallet. You should now see the Fantom Network displayed in the network list.
Step 9: To switch to the Fantom Network, click on the network name at the top of the wallet and select the Fantom Network from the dropdown menu.
Congratulations! You have successfully added the Fantom Network to your Metamask wallet. You can now use your wallet to interact with the Fantom network and manage your FTM tokens.
Step-by-step instructions on how to add the Fantom network to Metamask
Adding the Fantom network to Metamask allows you to interact with the Fantom blockchain and its associated tokens using the Metamask wallet. Follow these steps to seamlessly integrate the Fantom network into your existing Metamask setup:
- Open your Metamask wallet by clicking on the extension icon in your browser.
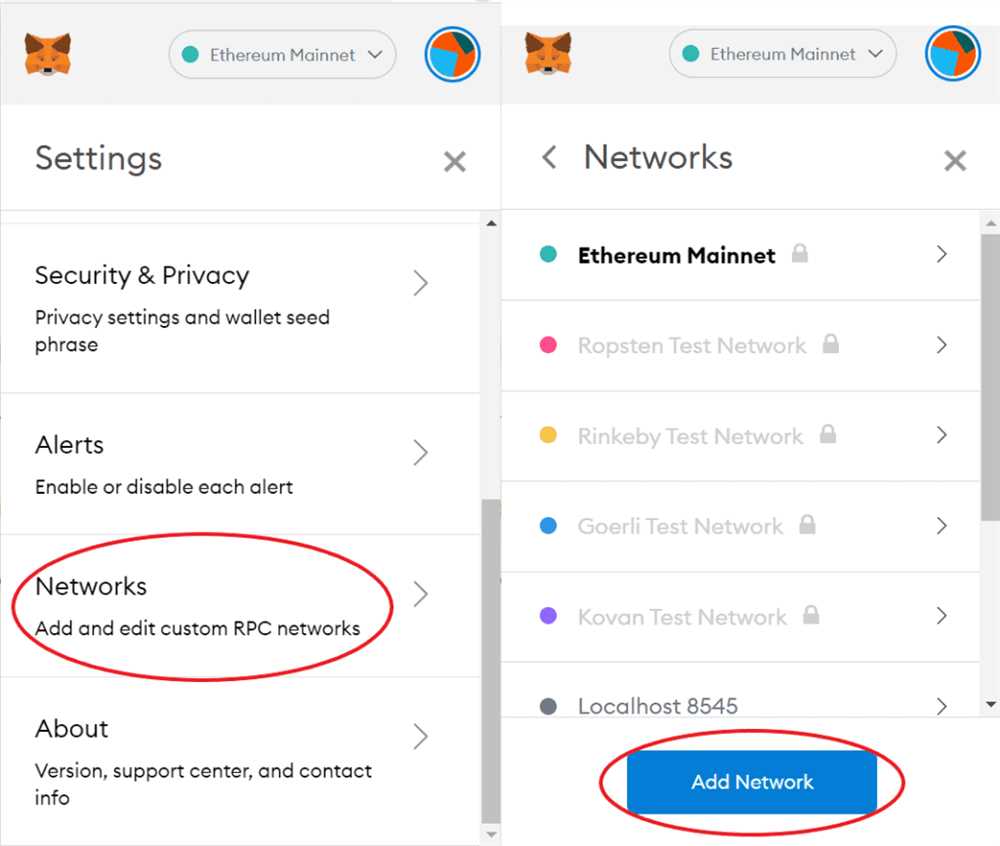
- Click on the account icon in the top right corner of the Metamask window and select “Settings” from the dropdown menu.
- In the Settings menu, click on the “Networks” tab.
- Scroll down and click on the “Add Network” button.
- Fill in the following network details:
- Network Name: Fantom Opera
- New RPC URL: https://rpcapi.fantom.network
- Chain ID: 250
- Symbol: FTM
- Block Explorer URL: https://ftmscan.com
- Confirm the information you entered and click on the “Save” button to add the Fantom network to Metamask.
- You should now see the Fantom network listed in the Networks section of your Metamask wallet.
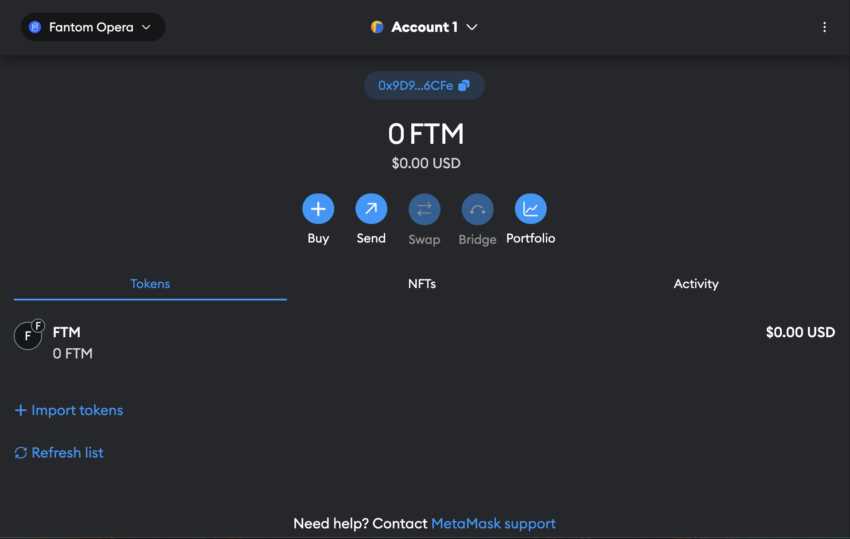
- To switch to the Fantom network, click on the network dropdown menu in the top center of the Metamask window and select “Fantom Opera”.
- You are now ready to use Metamask with the Fantom network. You can send and receive FTM tokens, interact with decentralized applications (dApps) on the Fantom blockchain, and explore the Fantom network using the integrated block explorer.
By following these instructions, you have successfully added the Fantom network to Metamask, expanding your wallet’s capabilities and enabling seamless integration with the Fantom blockchain.
Frequently Asked Questions:
What is FTM and Metamask?
FTM stands for Fantom, which is a highly scalable smart contract platform. Metamask is a browser extension wallet compatible with Ethereum tokens and dApps.
+ There are no comments
Add yours