


Are you looking to expand your Ethereum wallet’s capabilities and explore more blockchain networks? Look no further! In this comprehensive guide, we will walk you through every step to add the Moonbeam network to your Metamask wallet.
Moonbeam is an Ethereum-compatible smart contract platform built on Polkadot, designed to provide developers with a seamless experience and access to the Polkadot ecosystem. By adding Moonbeam to your Metamask wallet, you will gain access to a whole new universe of decentralized applications (dApps) and DeFi projects.
Adding Moonbeam to your Metamask wallet is a straightforward process that involves a few simple steps. In this guide, we will cover each step in detail, including how to install and configure Metamask, how to connect to the Moonbeam network, and how to switch between different networks in Metamask.
By the end of this guide, you will have all the tools and knowledge you need to confidently navigate the Moonbeam network with your Metamask wallet. So, without further ado, let’s dive in and get started!
Understanding Moonbeam Network
Moonbeam Network is a powerful Ethereum-compatible smart contract platform built on top of Polkadot. It aims to provide developers with a seamless way to leverage existing Ethereum tools, assets, and applications within the Polkadot ecosystem.
Ethereum Compatibility
One of the key features of Moonbeam is its Ethereum compatibility. This means that developers can easily migrate their existing Ethereum smart contracts, dApps, and tools to the Moonbeam Network without needing to make significant changes to their codebase. This compatibility opens up a wide range of possibilities for Ethereum developers to tap into the benefits of the Polkadot ecosystem.
Interoperability

Moonbeam Network is part of the Polkadot ecosystem, which is built on a sharded multi-chain network called Substrate. This means that Moonbeam can communicate and interact with other parachains and bridges within the Polkadot network, enabling seamless interoperability between different blockchains. Developers can leverage this interoperability to build cross-chain dApps and easily transfer assets between chains.
| Feature | Description |
|---|---|
| Ethereum Compatibility | Moonbeam is fully compatible with Ethereum, allowing developers to utilize existing Ethereum tools and assets. |
| Interoperability | Moonbeam can communicate with other chains in the Polkadot ecosystem, enabling cross-chain interactions. |
| Smart Contract Support | Moonbeam supports the EVM, allowing developers to deploy their Ethereum smart contracts on the network. |
| Scalability | Through its integration with Polkadot, Moonbeam benefits from the scalability and security of the Polkadot network. |
Overall, Moonbeam Network offers developers an Ethereum-compatible environment with interoperability and scalability benefits of the Polkadot network. This makes it a promising platform for building decentralized applications and leveraging the advantages of both Ethereum and Polkadot.
What is Moonbeam Network?
Moonbeam Network is a platform that aims to bring the functionality and interoperability of Ethereum to Polkadot’s ecosystem. Built as a parachain on the Polkadot network, Moonbeam provides developers with a straightforward way to deploy and port Ethereum projects and DApps onto Polkadot.
One of the main advantages of Moonbeam is its compatibility with the Ethereum Virtual Machine (EVM), which allows developers to use existing Ethereum tools, libraries, and smart contracts on the Moonbeam Network. This compatibility makes it easier for Ethereum developers to transition to the Polkadot ecosystem without having to learn new programming languages or tools.
Moonbeam also provides a bridge to the Polkadot network, which allows assets and tokens to be transferred between the two networks. This interoperability enables users to access the benefits of both networks, such as the scalability of Polkadot and the vibrant ecosystem of Ethereum.
Moreover, Moonbeam aims to address the high transaction fees and congestion issues often experienced on Ethereum. By leveraging Polkadot’s scalability features, Moonbeam can provide faster and cheaper transactions, making it an attractive option for developers and users alike.
Key Features of Moonbeam Network:
- Compatibility: Moonbeam is fully compatible with the Ethereum Virtual Machine (EVM), allowing developers to utilize existing Ethereum tools and smart contracts.
- Interoperability: Moonbeam provides a bridge to the Polkadot network, enabling seamless asset transfers between Moonbeam and other Polkadot parachains.
- Scalability: By leveraging Polkadot’s network, Moonbeam offers improved scalability and throughput compared to the Ethereum network.
- Developer-Friendly: Moonbeam aims to provide a familiar development environment for Ethereum developers, making it easy to deploy and port projects from Ethereum to Polkadot.
How to Add Moonbeam Network to Metamask Wallet
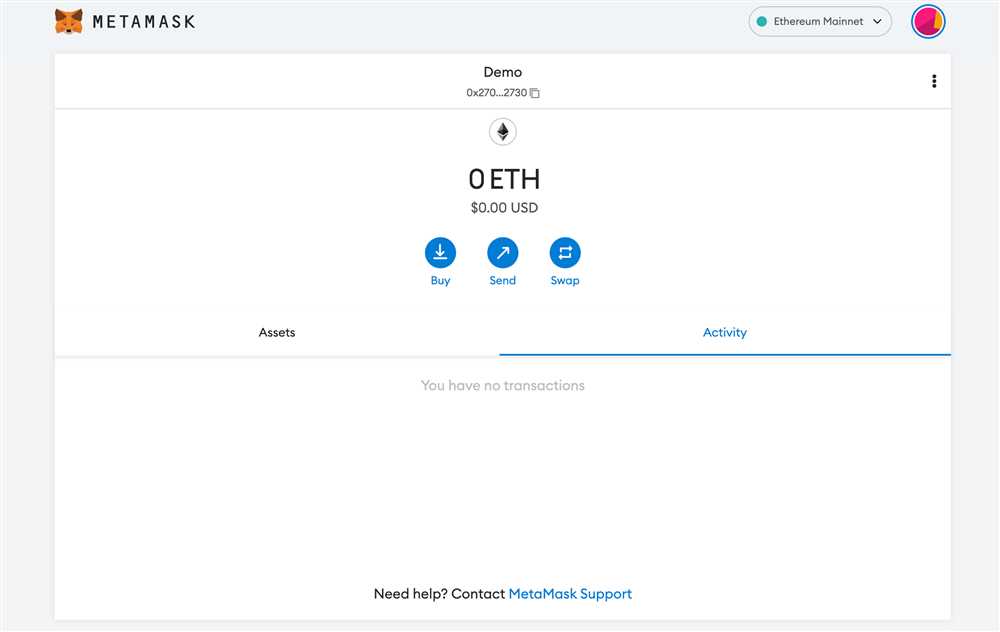
Metamask is a popular Ethereum wallet that allows users to manage their Ethereum assets and interact with decentralized applications (DApps). In this guide, we will walk you through the process of adding the Moonbeam Network to your Metamask wallet.
Step 1: Install and Set Up Metamask
If you haven’t already, you need to install Metamask as a browser extension or mobile app. Once installed, create a new wallet or import an existing one, and set up a strong password.
Step 2: Access Metamask Settings
- Open your Metamask wallet and click on the profile icon in the top right corner.
- Select “Settings” from the dropdown menu.
Step 3: Add Custom Network
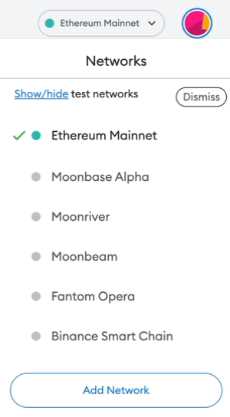
- In the Settings tab, click on “Networks” in the left sidebar.
- Scroll down to the “Networks” section and click on “Add Network”.
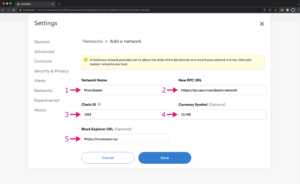
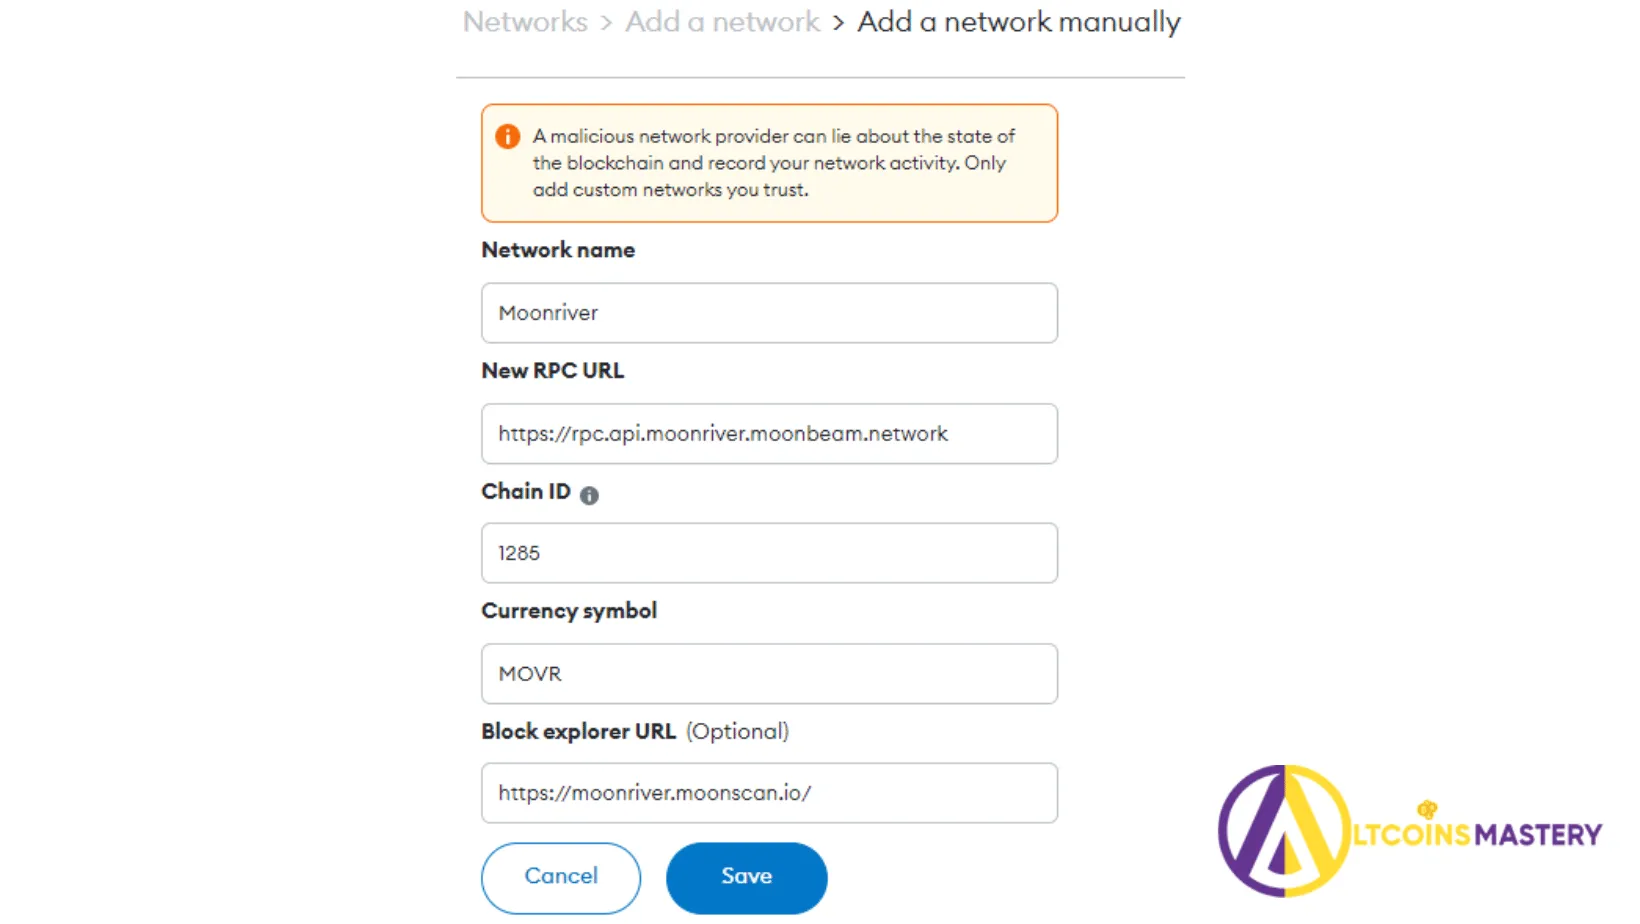
Step 4: Fill in Network Details
In the “Add Network” form, enter the following details:
- Network Name: Moonbeam
- New RPC URL: Enter the RPC endpoint of the Moonbeam Network. (Example: https://rpc.moonbeam.network)
- Chain ID: Enter the Chain ID for the Moonbeam Network. (Example: 1287)
- Currency Symbol (Optional): Enter the currency symbol for the Moonbeam Network. (Example: GLMR)
- Block Explorer URL (Optional): Enter the URL for the block explorer of the Moonbeam Network. (Example: https://moonbeam-explorer.netlify.app)
Step 5: Save Network Configuration
Click on “Save” to add the Moonbeam Network to your Metamask wallet. You should now see the Moonbeam Network listed under the Networks section in your Metamask settings.
Congratulations! You have successfully added the Moonbeam Network to your Metamask wallet. You can now start using your wallet to interact with Moonbeam-based DApps and manage your Moonbeam assets.
Step 1: Installing Metamask Extension
To start using the Moonbeam Network on your Metamask wallet, you need to install the Metamask extension on your preferred web browser. Follow the steps below to install Metamask:
1. Open your web browser
Open your preferred web browser, such as Google Chrome, Firefox, or Brave.
2. Go to the Metamask website
Visit the official Metamask website by typing “https://metamask.io/” in your browser’s address bar. Press Enter to load the page.
3. Click on the “Get Chrome Extension” button
On the Metamask website, click on the “Get Chrome Extension” button if you’re using Google Chrome. If you’re using a different web browser, select the appropriate option (e.g., “Get Firefox Extension” for Firefox).
4. Confirm the installation
A pop-up window will appear asking for confirmation to add the extension to your browser. Click on the “Add to Chrome” button (or the corresponding button for your browser).
5. Access Metamask
The Metamask extension will be added to your browser and its icon will appear in the toolbar. Click on the icon to open Metamask.
Congratulations! You have successfully installed the Metamask extension on your web browser. The next step is to configure and add the Moonbeam Network to your Metamask wallet.
Step 2: Configuring Moonbeam Network
After adding Moonbeam Network to your Metamask wallet, you need to configure it to connect to the Moonbeam network.
Step 2.1: Changing the Network
To configure Moonbeam Network, open your Metamask wallet extension in your browser and click on the network dropdown menu. Then, click on “Custom RPC”.
In the “Custom RPC” tab, you will need to enter the following details:
- Network Name: Enter “Moonbeam” or any other name you prefer.
- New RPC URL: Enter the RPC URL for the Moonbeam network.
Mainnet: https://rpc.moonbeam.network
Testnet: https://rpc.testnet.moonbeam.network
- Chain ID: Enter the Chain ID for the Moonbeam network.
Mainnet: 1284
Testnet: 1287
- Currency Symbol (optional): Enter the currency symbol for the Moonbeam network. (e.g., EGLD)
- Block Explorer URL (optional): Enter the block explorer URL for the Moonbeam network. (e.g., https://moonbeam-explorer.net)
After entering all the details, click on the “Save” button to save the Moonbeam network configuration.
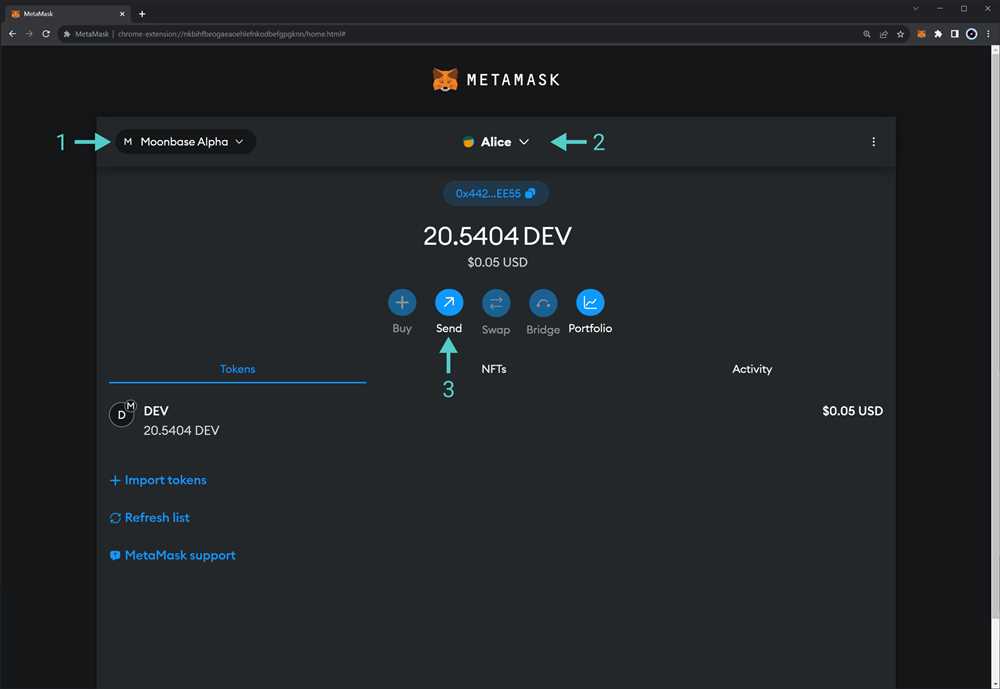
Step 2.2: Switching to Moonbeam Network
To switch to the Moonbeam network, open the network dropdown menu again and select the network you just configured (e.g., “Moonbeam” or the name you entered in the previous step).
Once you have selected the Moonbeam network, you will be able to interact with dApps and smart contracts deployed on the Moonbeam network using your Metamask wallet.
That’s it! You have successfully configured the Moonbeam Network on your Metamask wallet.
Step 3: Connecting Metamask to Moonbeam Network
Once you have successfully added the Moonbeam Network to your Metamask Wallet, the next step is to connect Metamask to the Moonbeam Network so that you can start using it.
Here’s how you can connect Metamask to Moonbeam Network:
| Step | Instructions |
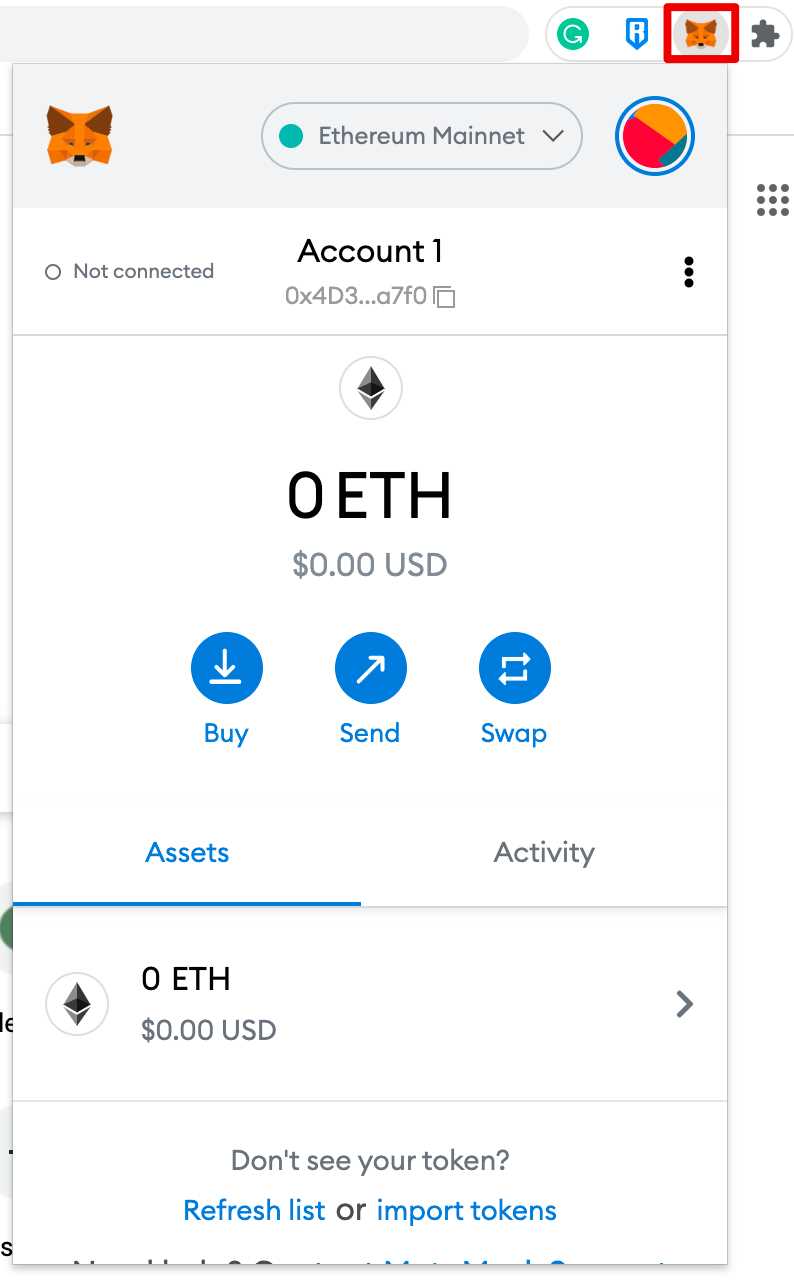
| 1 | Click on the Metamask extension in your browser toolbar to open the wallet. |
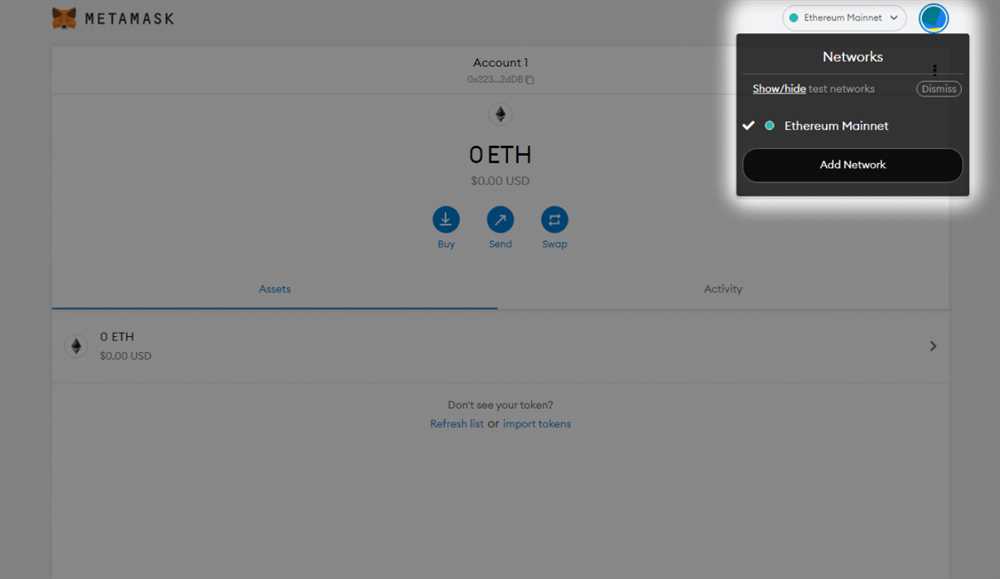
| 2 | At the top of the Metamask window, you will see the current network that you are connected to. Click on it to open the network selection menu. |
| 3 | In the network selection menu, scroll down and look for the “Custom RPC” option. Click on it to open the custom network configuration. |
| 4 | In the custom network configuration, you will need to enter the following details: |
|
|
| 5 | After entering the details, click on the “Save” button to save the custom network configuration. |
| 6 | Once the configuration is saved, you will be redirected back to the Metamask wallet. You should now see the option to select the Moonbeam Network as your current network. |
| 7 | Click on the Moonbeam Network option to connect Metamask to the Moonbeam Network. |
| 8 | After connecting, you can now start using the Moonbeam Network and enjoy its features and benefits. |
By following these steps, you will be able to connect your Metamask wallet to the Moonbeam Network and easily access its functionalities.
Frequently Asked Questions:
What is Moonbeam Network?
Moonbeam Network is a decentralized platform that aims to bring Ethereum-compatible smart contracts to Polkadot. It provides a seamless experience for developers and users, allowing them to interact with DApps on both Ethereum and Polkadot ecosystems.
Why would I want to add Moonbeam Network to my Metamask wallet?
Adding Moonbeam Network to your Metamask wallet allows you to seamlessly interact with DApps built on Moonbeam Network. It gives you access to the functionalities and features of Moonbeam Network directly from your Metamask wallet.
What is the RPC URL and Chain ID for Moonbeam Network?
The RPC URL for Moonbeam Network is “https://rpc.testnet.moonbeam.network” and the Chain ID is “1284”. Make sure to enter these details correctly when adding Moonbeam Network to your Metamask wallet.
+ There are no comments
Add yours