


If you’re a crypto enthusiast, you’ve probably heard of Polygon. It’s a Layer 2 scaling solution for the Ethereum network that aims to improve transaction speed and reduce fees. With the growing popularity of Polygon, it’s essential to add the Polygon network to your MetaMask wallet to take full advantage of its benefits.
Adding Polygon to your MetaMask wallet is a straightforward process that involves just a few simple steps. In this guide, we’ll walk you through the process so you can start using Polygon and enjoy faster and cheaper transactions. So let’s get started!
Step 1: Install MetaMask Extension
If you haven’t already, the first step is to install the MetaMask browser extension. MetaMask is a popular wallet that allows you to interact with decentralized applications (DApps) on Ethereum and other compatible networks. You can easily download and install MetaMask from the official website and follow the setup instructions.
Step 2: Set Up Your MetaMask Wallet
Once you have MetaMask installed, you’ll need to set up your wallet. Create a new wallet or import an existing one using your seed phrase. Make sure to choose a strong password and safely store your seed phrase, as it’s crucial for wallet recovery.
Step 3: Switch to Polygon Network
With your MetaMask wallet set up, it’s time to add the Polygon network. Open MetaMask and click on the network selection dropdown menu. Scroll down and click on “Custom RPC” at the bottom. In the network settings, enter the following details to add the Polygon network:
Network Name: Polygon
New RPC URL: https://rpc-mainnet.matic.network
Chain ID: 137
Symbol: MATIC
Once you’ve entered the details, click on “Save” to add the Polygon network to your MetaMask wallet. You should now see “Polygon” as one of the network options in the dropdown menu.
Step 4: Test and Start Using Polygon
That’s it! You’ve successfully added the Polygon network to your MetaMask wallet. To test it out, you can try sending a small amount of MATIC tokens or interact with Polygon-based DApps. Enjoy the benefits of faster transactions and lower fees that Polygon offers!
Remember to exercise caution and do thorough research before participating in any crypto-related activities. Stay informed and keep your wallet secure!
By following these simple steps, you can easily add the Polygon network to your MetaMask wallet and start taking advantage of its improved scalability. Embrace the power of Polygon and enhance your decentralized finance experience!
Getting Started with Polygon Network on MetaMask
If you’re looking to expand your cryptocurrency ventures, the Polygon network is an excellent choice. By adding the Polygon network to your MetaMask wallet, you can enjoy faster and cheaper transactions compared to the Ethereum network. Here’s how to get started:
Step 1: Install MetaMask
First, make sure you have the MetaMask wallet extension installed in your web browser. If you don’t have it yet, you can find and install it from the official MetaMask website. Once installed, create a new wallet or import an existing one.
Step 2: Switch to the Polygon Network

After setting up your MetaMask wallet, you need to switch to the Polygon network to add it. Click on the network name in the top menu of the MetaMask wallet. This will open a dropdown where you can select “Custom RPC”.
Next, you’ll need to provide the necessary network details. Fill in the following information:
- Network Name: Polygon
- New RPC URL: https://rpc-mainnet.maticvigil.com/ (for the mainnet) or https://rpc-testnet.matic.network/ (for the testnet)
- Chain ID: 137 (for the mainnet) or 80001 (for the testnet)
- Symbol: MATIC (for the mainnet) or TEST (for the testnet)
- Block Explorer URL: https://polygonscan.com/ (for the mainnet) or https://mumbai.polygonscan.com/ (for the testnet)
Once you’ve filled in the information, click on “Save” to add the Polygon network to your MetaMask wallet.
Step 3: Add Tokens on the Polygon Network
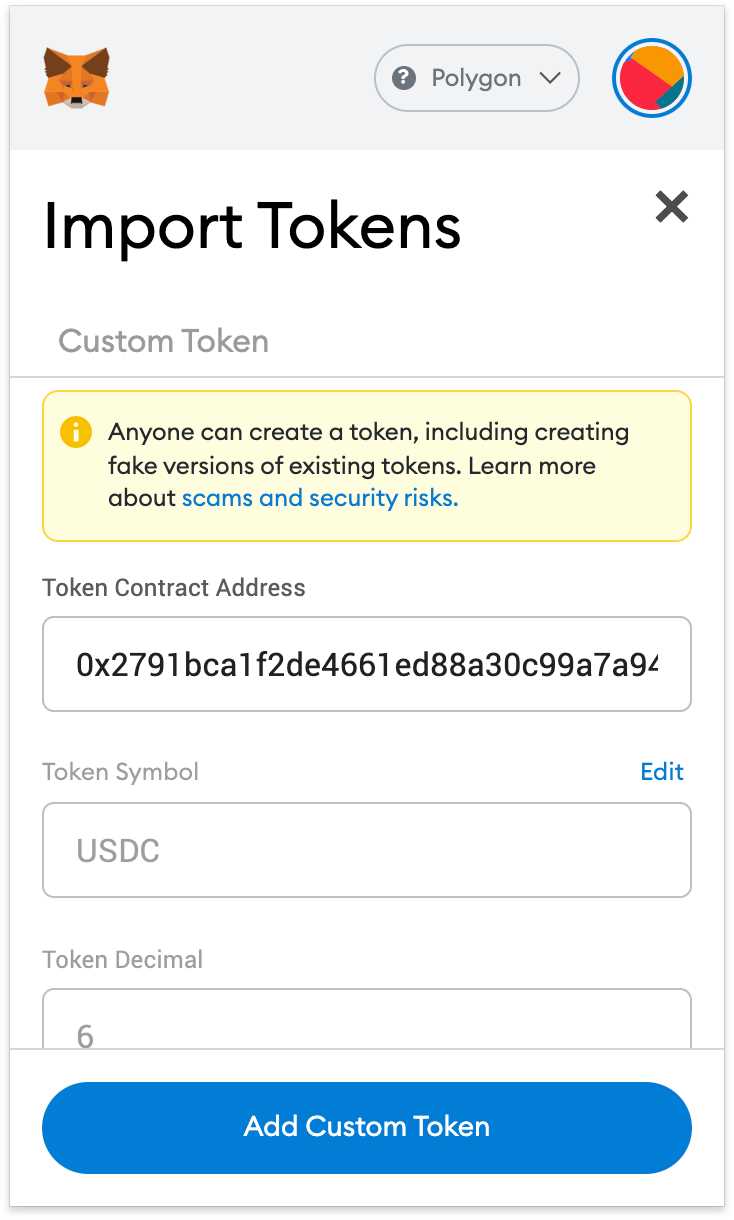
Now that you have the Polygon network added to your MetaMask wallet, you can start adding tokens that are available on the network. To do this, click the hamburger menu in the top left corner of the MetaMask wallet and select “Add Token”.
You’ll be presented with two options: “Custom Token” or “Token List”. If you already know the contract address of the token you want to add, choose “Custom Token” and enter the contract address. Alternatively, you can select “Token List” to browse and select tokens from the available lists.
Once you’ve added the desired tokens, you’ll be able to see and manage them in your MetaMask wallet on the Polygon network.
Congratulations! You’ve successfully set up the Polygon network on your MetaMask wallet. Now you can enjoy faster and cheaper transactions on this exciting network.
Install the MetaMask Wallet Extension
To add Polygon Network to your MetaMask wallet, you need to have the MetaMask wallet extension installed in your browser. Follow these steps to install the MetaMask wallet extension:
- Open your web browser and go to the MetaMask website.
- Click on the “Get Chrome Extension” (or “Get Firefox Extension”) button on the homepage.
- You will be redirected to the Chrome Web Store (or Firefox Add-ons website).
- Click on the “Add to Chrome” (or “Add to Firefox”) button to start the installation process.
- A pop-up window will appear asking for confirmation to install the MetaMask extension.
- Click on the “Add extension” button to proceed.
- Wait for the extension to be downloaded and installed in your browser.
- After the installation is complete, click on the MetaMask logo in your browser toolbar to open the wallet.
Once you have the MetaMask wallet extension installed, you can proceed with adding the Polygon Network to your wallet.
Create a New MetaMask Wallet
To start using the Polygon Network with your MetaMask wallet, you first need to create a new wallet if you don’t already have one. Follow these steps to set up a new MetaMask wallet:
- Visit the official MetaMask website at https://metamask.io/.
- Click on the “Get Started” button to initiate the wallet creation process.
- Choose your preferred platform (e.g., Chrome, Firefox, or Edge) and click on the respective download button.
- Once the extension is installed, click on the MetaMask icon in your browser’s toolbar to open the wallet.
- Click on the “Create a Wallet” button to start the creation process.
- Read and accept the terms of use and privacy policy.
- Create a strong password for your wallet and click “Create”.
- You will be presented with a unique 12-word seed phrase. Make sure to write it down and store it in a safe place. This phrase can be used to recover your wallet.
- Confirm the seed phrase in the correct order to proceed.
- Congratulations! Your new MetaMask wallet has been created. You can now manage and interact with various blockchain networks, including Polygon.
Remember to keep your wallet password and seed phrase secure to protect your funds and personal information. Never share them with anyone.
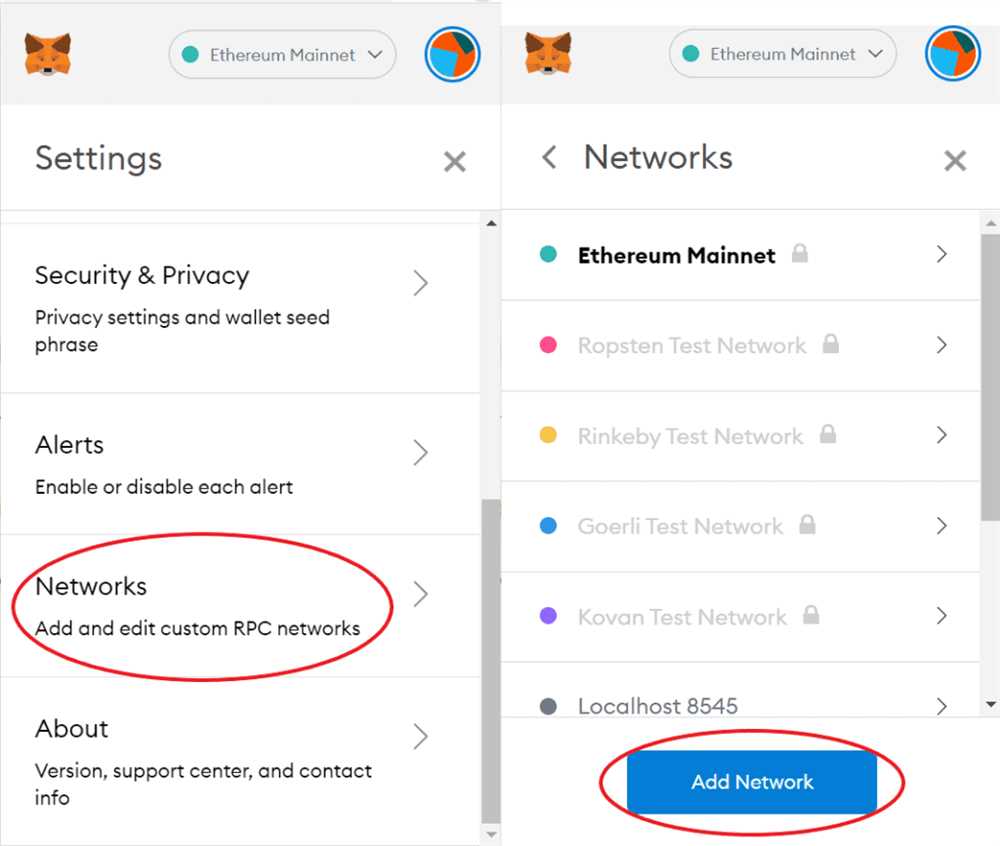
Add the Polygon Network to MetaMask
To add the Polygon network to your MetaMask wallet, follow these steps:
Step 1: Open MetaMask
Open your MetaMask wallet extension in your browser. If you don’t have MetaMask installed, you can download and install it from the official website.
Step 2: Switch Networks
Click on the network selection dropdown at the top of the MetaMask extension. It usually displays the currently selected network (e.g., “Main Ethereum Network” or “Rinkeby Test Network”).
A dropdown list with various networks will appear. Scroll down and click on “Custom RPC” to manually add a new network.
Step 3: Add Network Details

In the “New Network” form that appears, enter the following details:
| Network Name: | Polygon |
| RPC URL: | https://rpc-mainnet.maticvigil.com/ |
| Chain ID: | 137 |
| Symbol: | MATIC |
| Block Explorer URL: | https://polygonscan.com/ |
After entering the details, click on the “Save” button.
Step 4: Switch to Polygon Network
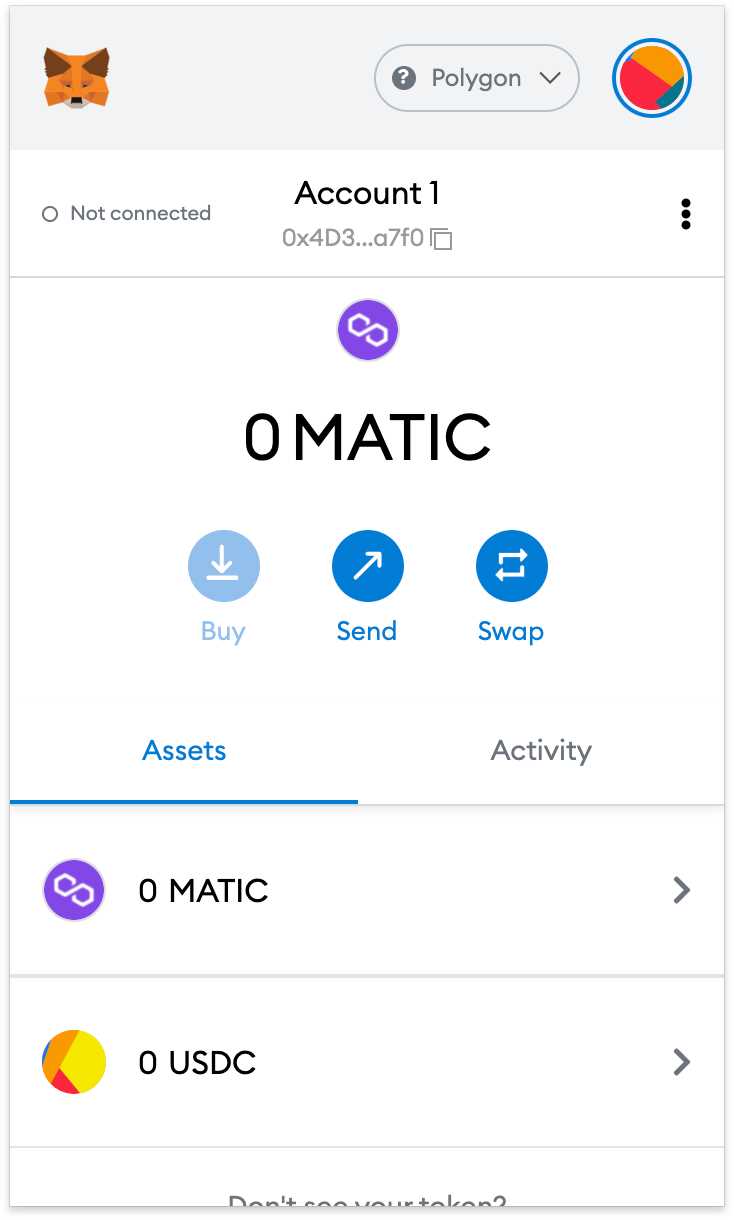
Now that you have added the Polygon network to MetaMask, you can switch to it by selecting “Polygon” from the network selection dropdown.
Congratulations! You have successfully added the Polygon network to your MetaMask wallet.
Start Using Polygon Network on MetaMask
If you want to start using the Polygon network on your MetaMask wallet, follow these step-by-step instructions:
- Make sure you have the latest version of MetaMask installed on your browser.
- Open the MetaMask extension in your browser and click on the account dropdown at the top of the screen.
- Select “Add Network” from the dropdown menu.
- In the “Network Name” field, enter “Polygon Mainnet”.
- In the “RPC URL” field, enter “https://rpc-mainnet.matic.network”.
- For the “Chain ID” field, enter “137”.
- Leave the “Symbol” field blank.
- For the “Block Explorer URL” field, enter “https://polygonscan.com”.
- Click on “Save” to add the Polygon network to your MetaMask wallet.
Now that you have added the Polygon network to your MetaMask wallet, you can start using it to interact with decentralized applications (dApps) and make transactions on the Polygon blockchain.
If you encounter any issues or have any questions, refer to the official MetaMask documentation or seek help from the MetaMask community.
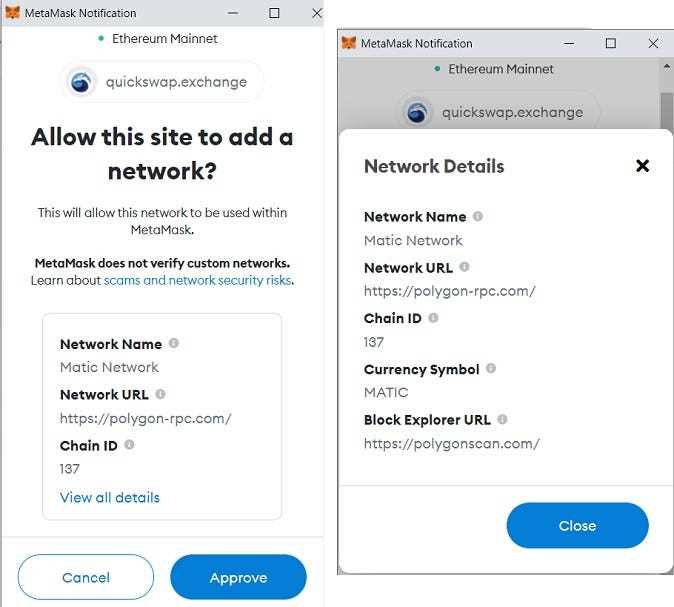
Note that the value of adding the Polygon network to your MetaMask wallet is that it allows you to take advantage of the low transaction fees and fast confirmation times offered by the Polygon network, compared to the Ethereum mainnet.
Frequently Asked Questions:
What is Polygon Network?
Polygon Network is a Layer 2 scaling solution for Ethereum that aims to solve the scalability and high fees issues of the Ethereum network. It allows for faster and cheaper transactions by utilizing sidechains that are connected to the Ethereum mainnet.
Why should I add Polygon Network to my MetaMask wallet?
By adding Polygon Network to your MetaMask wallet, you can access and interact with decentralized applications (DApps) and tokens that are built on the Polygon Network. This gives you the opportunity to take advantage of the faster and cheaper transactions offered by Polygon.
Are there any fees associated with adding Polygon Network to my MetaMask wallet?
No, there are no fees associated with adding Polygon Network to your MetaMask wallet. However, please note that there may be fees involved when you perform transactions or interact with DApps on the Polygon Network.
Can I switch back to Ethereum mainnet after adding Polygon Network to my MetaMask wallet?
Yes, you can switch back to the Ethereum mainnet after adding Polygon Network to your MetaMask wallet. Simply open the network dropdown menu in your MetaMask wallet extension and select “Ethereum Mainnet” from the list of available networks.

+ There are no comments
Add yours