


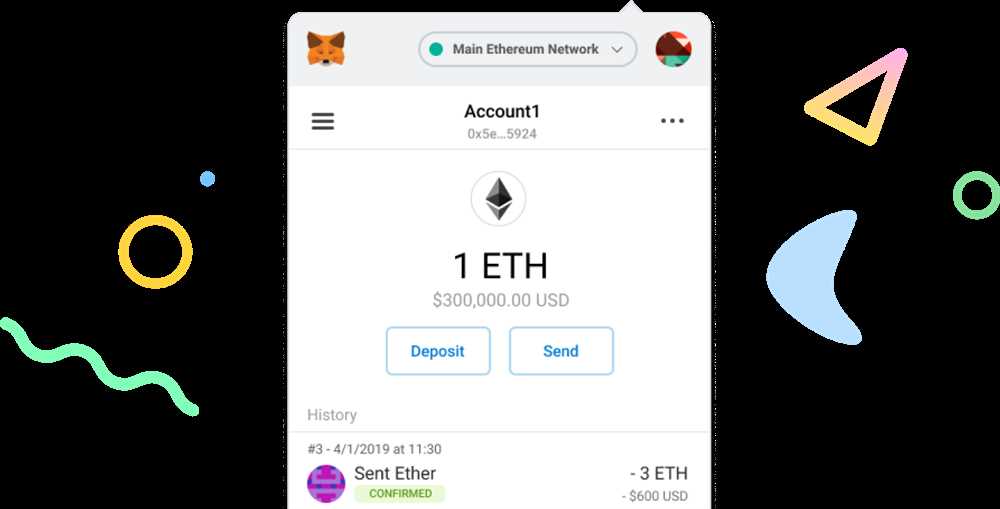
Metamask is a popular web browser extension that allows users to interact with decentralized applications (dApps) on the Ethereum blockchain. It provides a user-friendly interface for managing cryptocurrency assets and accessing various Ethereum-based services. However, by default, it only supports Ethereum and a few other networks. But what if you want to use the xDai network? In this step-by-step guide, I will walk you through the process of adding xDai to your Metamask wallet.
xDai is a stable cryptocurrency that is pegged to the US dollar and runs on its own blockchain based on Ethereum. It offers faster transaction speed and lower fees compared to the Ethereum network, making it an attractive choice for many users. By adding xDai to your Metamask wallet, you will be able to participate in xDai-based dApps and benefit from its advantages.
Step 1: Install Metamask Extension
The first step is to install the Metamask extension in your preferred web browser. Metamask is available for Chrome, Firefox, Brave, and Edge browsers. Simply search for “Metamask” in your browser’s extension store, and follow the on-screen instructions to install it. Once installed, you will see the Metamask icon in the top right corner of your browser.
Step 2: Create or Import a Wallet
After installing Metamask, click on the Metamask icon to open the extension. If you already have a wallet, you can import it by clicking on the “Import Wallet” button and following the prompts. If you don’t have a wallet, you can create a new one by clicking on the “Create a Wallet” button. Make sure to follow the instructions and securely store your wallet’s seed phrase.
Note: It is highly recommended to enable two-factor authentication (2FA) for added security.
Step 3: Switch to the xDai Network
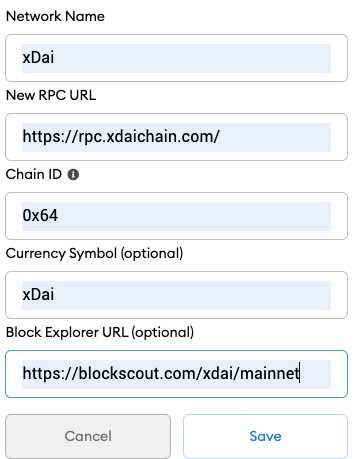
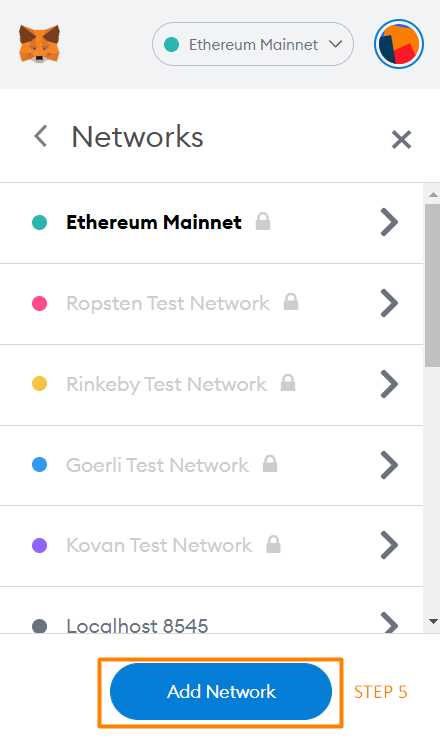
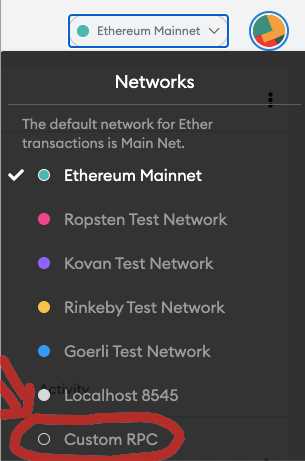
By default, Metamask is set to the Ethereum Mainnet. To switch to the xDai network, click on the network name (usually “Ethereum Mainnet”) at the top of the Metamask extension window. From the dropdown menu, select “Custom RPC” to manually configure a network. In the network settings, enter the following details:
Network Name: xDai
New RPC URL: https://rpc.xdaichain.com/
Chain ID: 100
After entering these values, click on the “Save” button to add the xDai network to your Metamask wallet. You should now see the xDai network selected at the top of the extension window.
Congratulations! You have successfully added xDai to your Metamask wallet. You can now send and receive xDai and interact with xDai-based dApps. Remember to manage your cryptocurrency assets responsibly and stay vigilant against potential scams and phishing attempts. Happy exploring!
Registering on the xDai Network
In order to use the xDai network with your Metamask wallet, you’ll first need to register on the network. Follow these steps to get started:
Step 1: Install and Set Up Metamask
If you haven’t already done so, install the Metamask extension in your web browser. Once installed, create a new wallet or import an existing one. Make sure you have some ETH in your wallet to cover the gas fees for the registration process.
Step 2: Access the xDai Faucet
Visit the xDai faucet website at xxx and click on the “Get xDai” button. This will take you to the registration page for the xDai network.
Step 3: Connect Your Wallet
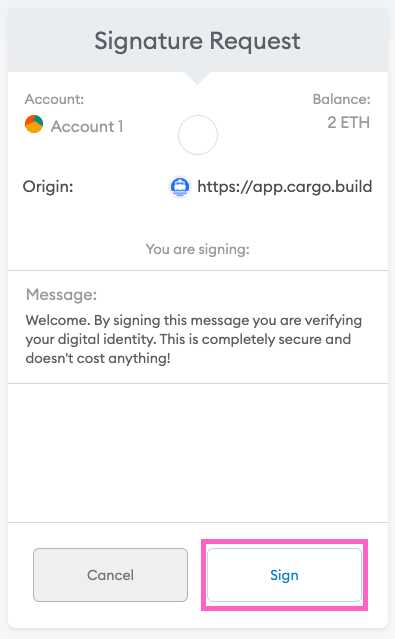
Click on the “Connect Wallet” button. A pop-up menu will appear with various wallet options. Select Metamask and connect your wallet using the Metamask browser extension.
Step 4: Fill Out the Registration Form

Fill out the registration form with your wallet address and click on the “Register” button. This will initiate the registration process on the xDai network.
Note: The registration process may take a few minutes to complete. Be patient and do not close the browser tab or navigate away from the page until the process is finished.
Step 5: Verify Registration
After the registration process is complete, you’ll receive a transaction hash. You can use this hash to verify your registration on the xDai network by searching for it on a block explorer like Etherscan.
Congratulations! You have successfully registered on the xDai network. Now you can start using xDai for fast and inexpensive transactions!
Configuring Metamask Wallet
To add xDai to your Metamask wallet, follow these steps:
Step 1: Install Metamask
If you haven’t already, install the Metamask extension for your web browser. Metamask is available for Chrome, Firefox, Brave, and Edge browsers. You can find the extension in the respective browser’s extension store.
Step 2: Create or Import a Wallet
Open Metamask and either create a new wallet or import an existing one using your seed phrase or private key. Make sure to set a strong password to protect your wallet and funds.
Step 3: Switch to the xDai Network
By default, Metamask connects to the Ethereum mainnet. To use xDai, you need to switch to the xDai network. Click on the network selection dropdown at the top of the Metamask window and choose “Custom RPC”.
Next, click on “New Network” to add a custom network. Fill in the following details:
- Network Name: xDai
- New RPC URL: https://dai.poa.network
- Chain ID: 100
- Symbol: xDai
- Block Explorer URL: https://blockscout.com/poa/xdai
Click “Save” to add the xDai network to Metamask.
Step 4: Add xDai token to Metamask
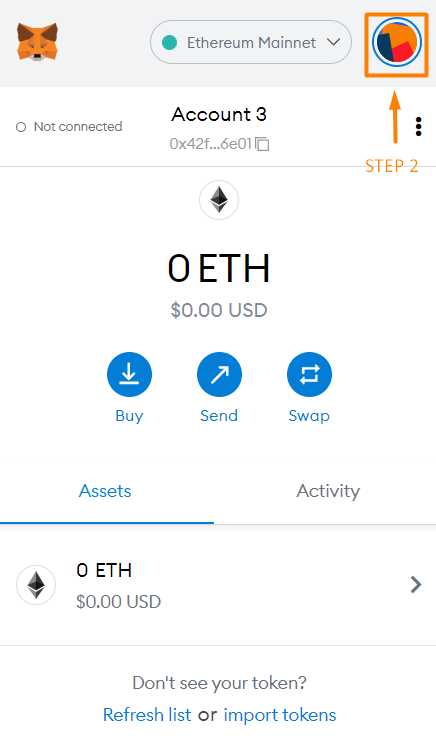
To see your xDai balance in Metamask, you need to add the xDai token. Click on the Metamask icon at the top right corner of your browser, and then click on “Assets” from the dropdown menu.
In the “Tokens” tab, click on “Add Token” and then choose “Custom Token”. Enter the following xDai contract address:
0x0000000000000000000000000000000000000000
Once the token details are filled in automatically, click on “Next” and then “Add Tokens”. You should now see your xDai balance in Metamask.
That’s it! Your Metamask wallet is now configured to work with xDai. You can now send, receive, and interact with xDai tokens and dApps on the xDai network.
Adding xDai Network to Metamask
Metamask is a popular cryptocurrency wallet that allows users to manage their Ethereum-based assets. By default, it only supports the Ethereum mainnet, and if you want to access the xDai network, you will need to add it to your Metamask wallet. Here is a step-by-step guide on how to add the xDai network to Metamask:
- Open your Metamask wallet extension in your browser.
- Click on the network dropdown, which displays the current network you are connected to.
- Select the “Custom RPC” option at the bottom of the list.
- In the “Network Name” field, enter “xDai”.
- In the “New RPC URL” field, enter “https://rpc.xdaichain.com/”.
- For the “Chain ID”, enter “100”.
- For the “Currency Symbol”, enter “xDai”.
- Click “Save” to add the xDai network to your Metamask wallet.
Once you have added the xDai network, you will be able to switch between the Ethereum mainnet and the xDai network in your Metamask wallet. This will allow you to interact with decentralized applications and transfer assets on both networks. Keep in mind that the xDai network operates on its own separate blockchain, so transactions and balances will not affect the Ethereum mainnet.
Note: Adding a custom network to Metamask requires a certain level of technical knowledge. Please double-check the network details and be cautious when interacting with unfamiliar networks to prevent any potential loss of funds.
Disclaimer: The information provided here is for informational purposes only and should not be considered as financial or investment advice. We recommend conducting thorough research and consulting with a professional financial advisor before making any investment decisions.
Verifying and Using xDai in Metamask Wallet
Once you have successfully added xDai to your Metamask wallet, the next step is to verify and use it. Follow the steps below:
1. Verifying xDai Network
- Open your Metamask wallet extension in your browser.
- Click on the network selector (usually located at the top of the wallet) and choose “Custom RPC”.
- In the “New Network” settings, enter the following details:
- Network Name: xDai
- New RPC URL: https://rpc.xdaichain.com/
- Chain ID: 100
- Symbol: xDai
- Block Explorer URL: https://blockscout.com/poa/xdai/
- Click “Save” to add the xDai network to your wallet.
2. Adding xDai Tokens
- Navigate to the “Assets” tab in your Metamask wallet.
- Click on “Add Token” and select “Custom Token”.
- In the “Token Contract Address” field, enter the xDai token contract address (you can find this on the xDai website).
- Metamask should automatically fill in the token information, including the token symbol and decimals. If not, you can manually enter these details.
- Click “Next” and then “Add Tokens” to add xDai to your wallet.
3. Using xDai
With xDai added to your wallet, you can now use it for transactions and interact with dApps on the xDai network. When sending a transaction, make sure to select the xDai network as the active network in Metamask.
You can also view your xDai balance and transaction history in the “Assets” tab of your Metamask wallet.
Remember to always be cautious and double-check addresses before sending any transactions.
That’s it! You have successfully verified and added xDai to your Metamask wallet. Enjoy using the xDai network for fast and low-cost transactions!
Frequently Asked Questions:
What is xDai and why is it being added to Metamask?
xDai is a stablecoin that runs on the Ethereum network and its integration with Metamask provides users with a seamless experience for accessing and transacting with xDai. Adding xDai to Metamask allows users to interact with dapps and DeFi protocols built on xDai without having to switch wallets or networks.

+ There are no comments
Add yours