


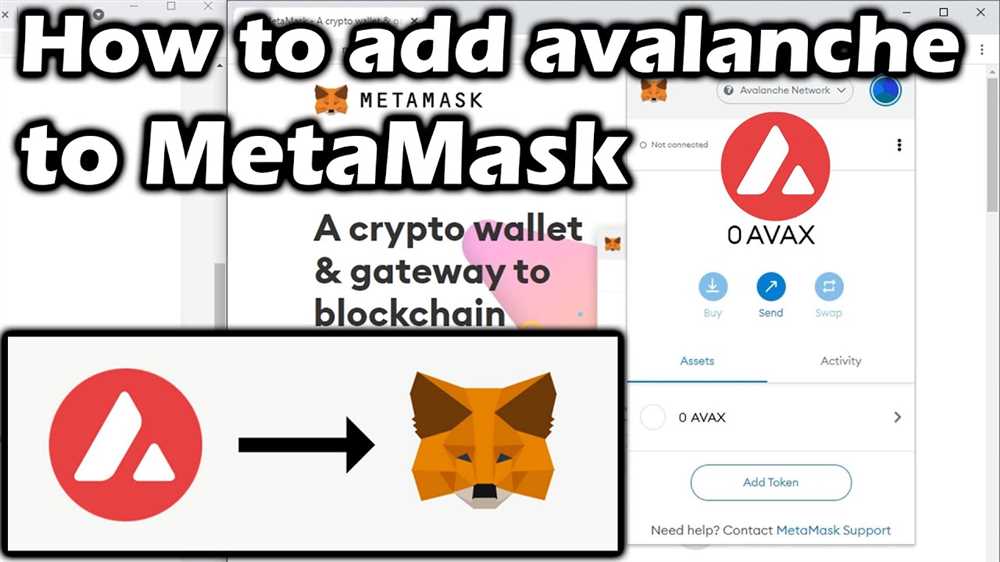
If you are a cryptocurrency enthusiast and use Metamask as your preferred wallet, you may want to add the AVAX token to your wallet. Avalanche, the platform behind AVAX, is gaining popularity in the crypto space, and adding the AVAX token to your Metamask wallet allows you to store, send, and receive AVAX with ease.
Adding a new token to Metamask may seem daunting at first, but this step-by-step guide will walk you through the process and make it easier for you. By the end of this guide, you will have successfully added the AVAX token to your Metamask wallet and be ready to start using it.
Before we get started, make sure you have the latest version of Metamask installed on your browser. If you don’t have it yet, you can download and install it from the official Metamask website. Once you have Metamask installed, follow the steps below to add the AVAX token to your wallet.
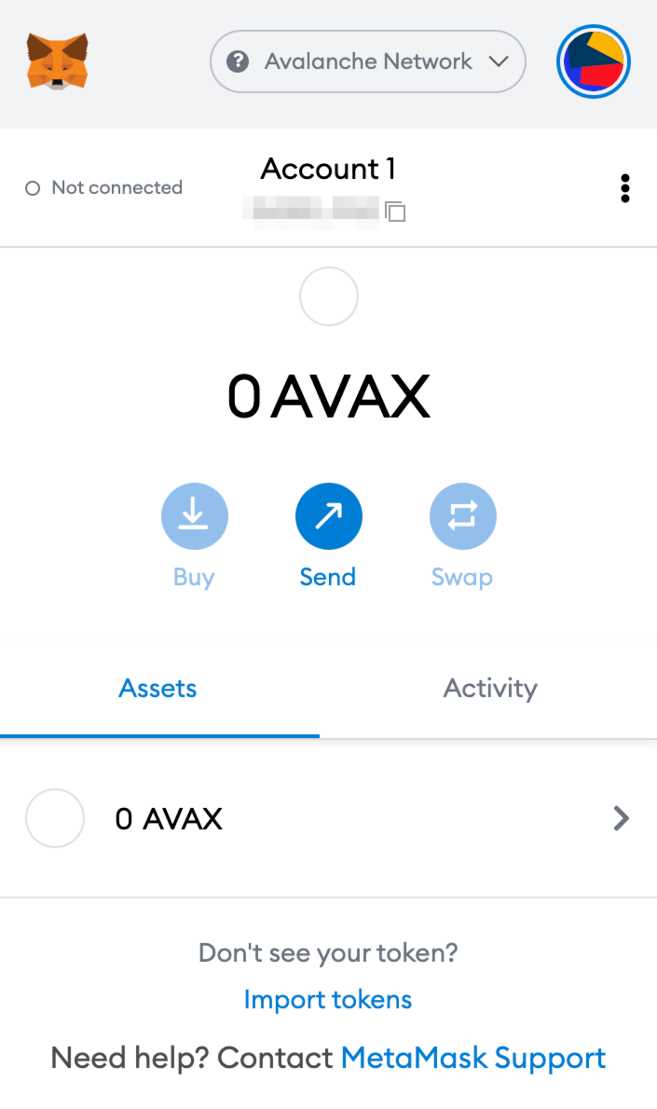
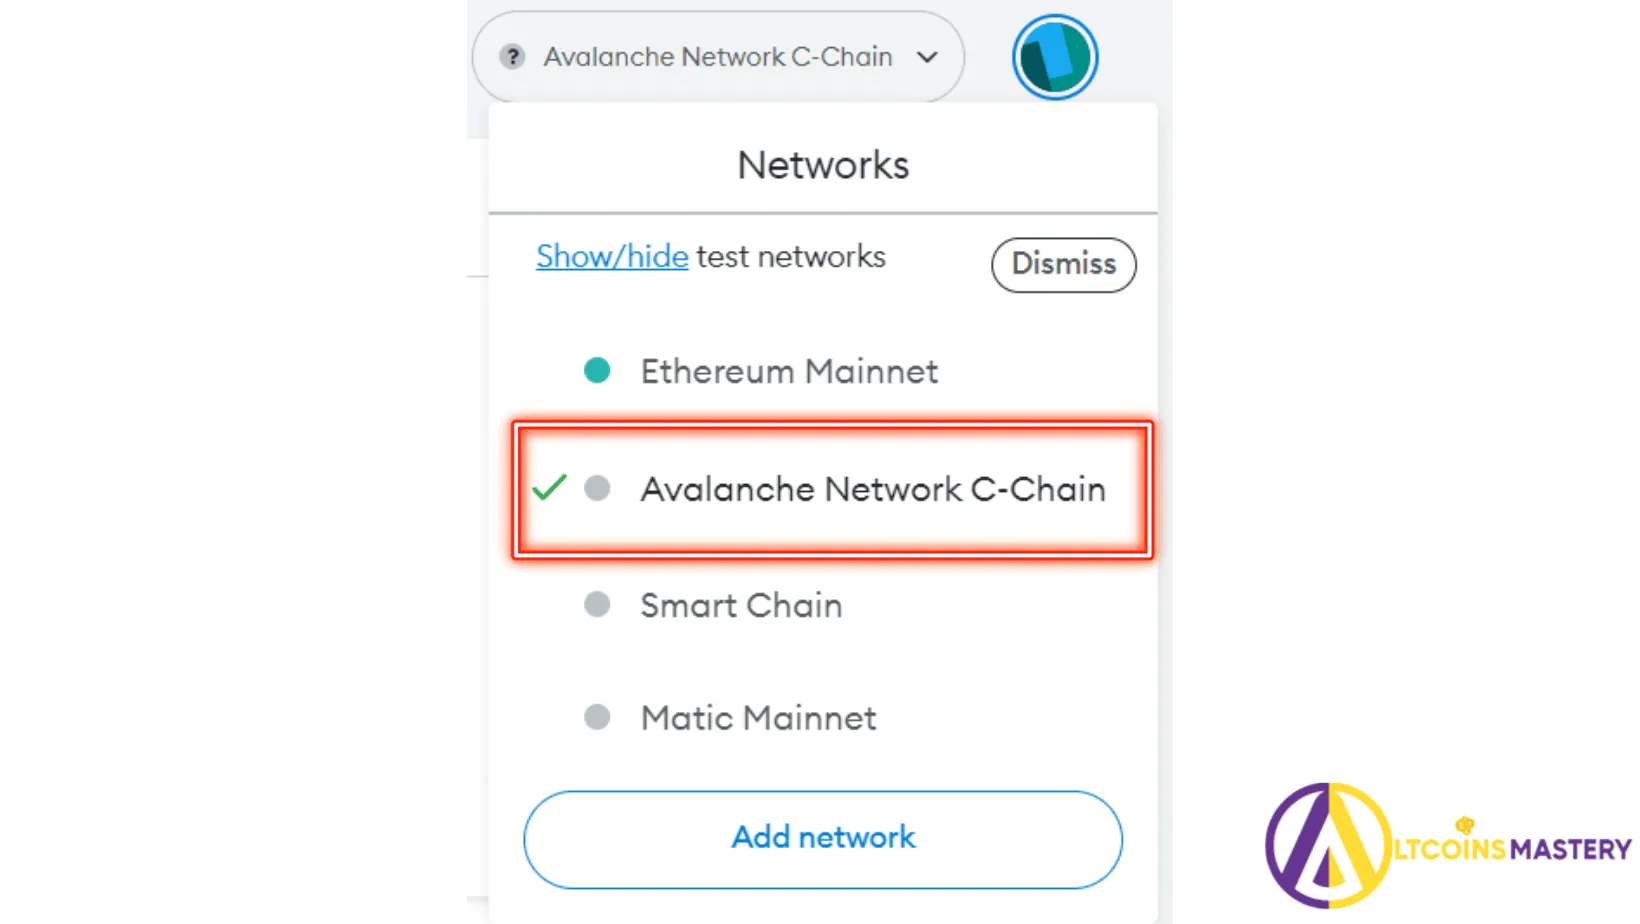
Step 1: Open your Metamask wallet and click on the “Assets” tab.
Step 2: In the “Assets” tab, click on the “Add Token” button.
Step 3: A new window will pop up. Click on the “Custom Token” tab.
Step 4: In the “Token Address” field, paste the AVAX token contract address: [insert AVAX token contract address here].
Step 5: Metamask will automatically populate the “Token Symbol” and “Decimals of Precision” fields. Verify that the information is correct.
Step 6: Click on the “Next” button.
Step 7: Review the token details and click on the “Add Tokens” button.
Step 8: Congratulations! You have successfully added the AVAX token to your Metamask wallet. You can now view your AVAX balance and use the token for transactions and interactions within the Avalanche ecosystem.
Adding tokens to your Metamask wallet opens up a world of possibilities, and now that you have added the AVAX token, you are ready to take advantage of the features and opportunities it brings. Happy hodling and transacting with AVAX!
Step-by-Step Guide: Adding AVAX Token to Metamask
If you want to add AVAX token to your Metamask wallet, follow these step-by-step instructions:
Step 1: Open Metamask
Ensure that you have the Metamask extension installed in your browser. Click on the extension icon in your browser toolbar to open Metamask.
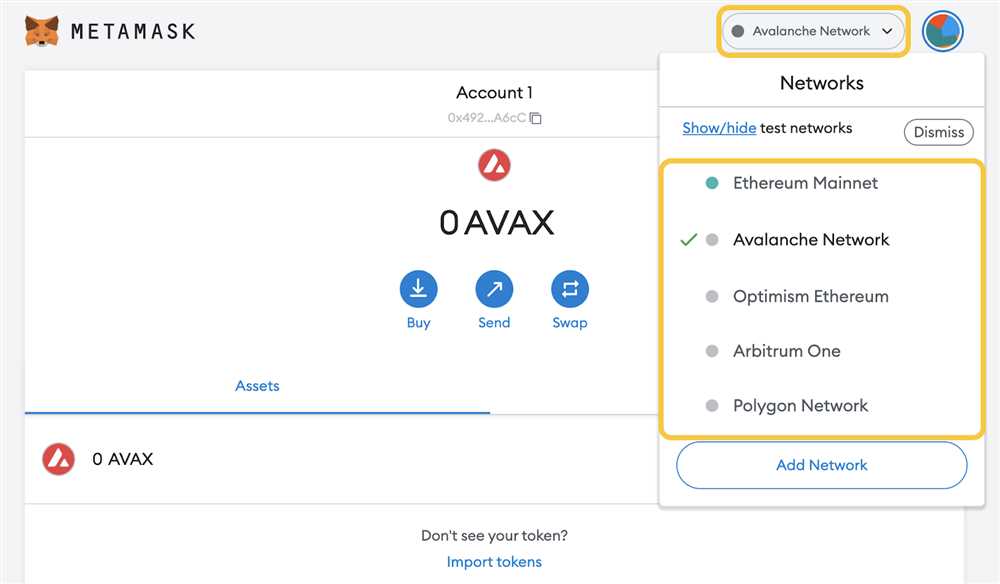
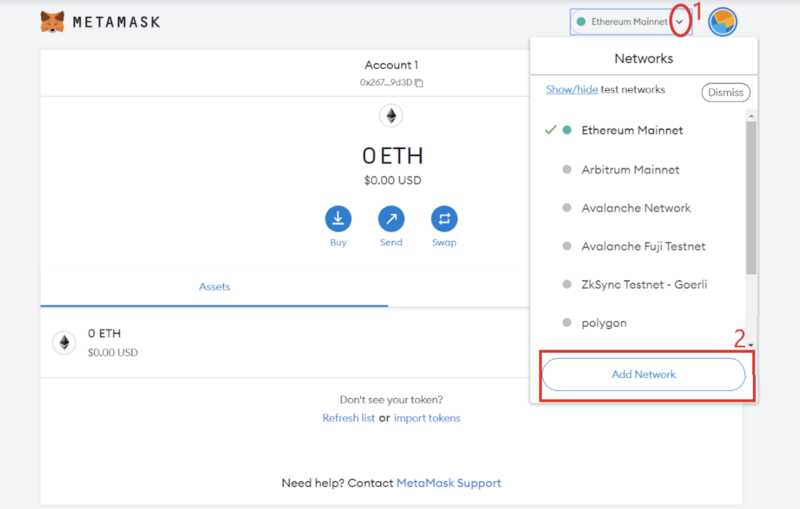
Step 2: Access Token List
In the Metamask wallet, click on the hamburger menu located in the top left corner (three horizontal lines). From the dropdown menu, select “Add Token” and then click on “Custom Token”.
Step 3: Enter Token Information

In the “Token Contract Address” field, enter the AVAX token contract address: 0xB31f66AA3C1e785363F0875A1B74E27b85FD66c7. The “Token Symbol” and “Decimals of Precision” fields should automatically populate.
Step 4: Confirm Token Addition
Click on “Next” to proceed. Metamask will display a confirmation screen with details of the AVAX token. Review the information and click on “Add Tokens” to confirm the addition of the AVAX token to your wallet.
| Field | Information |
|---|---|
| Token Contract Address | 0xB31f66AA3C1e785363F0875A1B74E27b85FD66c7 |
| Token Symbol | AVAX |
| Decimals of Precision | 18 |
Once the token is added, you will be able to see your AVAX balance in your Metamask wallet.
Congratulations! You have successfully added the AVAX token to your Metamask wallet.
Step 1: Open Metamask Wallet
Before you can add AVAX token to your Metamask wallet, you need to first make sure that you have a Metamask wallet set up and open.
What is Metamask?
Metamask is a browser extension and cryptocurrency wallet that allows you to interact with decentralized applications (dApps) on the Ethereum blockchain. It is available as a browser extension for Chrome, Firefox, and Brave.
How to open Metamask Wallet

If you already have Metamask installed, you can open it by clicking on the Metamask icon in your browser’s toolbar. If you don’t have it installed, you can download and install it from the official Metamask website.
Once you have the Metamask extension installed, you can open it by clicking on the extension icon. This will open the Metamask wallet interface.
If you haven’t set up a Metamask wallet yet, you will be prompted to create a new wallet. Follow the on-screen instructions to create a new wallet by setting a strong password and saving your backup phrase.
After setting up your wallet, you can open it by clicking on the extension icon and entering your password.
Step 2: Click on “Add Token”

Once you have successfully installed and opened the Metamask extension in your browser, the next step is to add the AVAX token to your wallet. This will allow you to send, receive, and manage your AVAX tokens within the Metamask interface.
To start the process, locate and click on the “Add Token” button within the Metamask interface. This button is normally found in the assets tab or in the tokens section of the wallet.
After clicking on “Add Token,” a new page or pop-up will appear, prompting you to enter the token’s contract address. This unique address identifies the AVAX token on the Avalanche network. It’s essential to enter the correct contract address to ensure you are adding the AVAX token and not a different token.
Locating the Contract Address
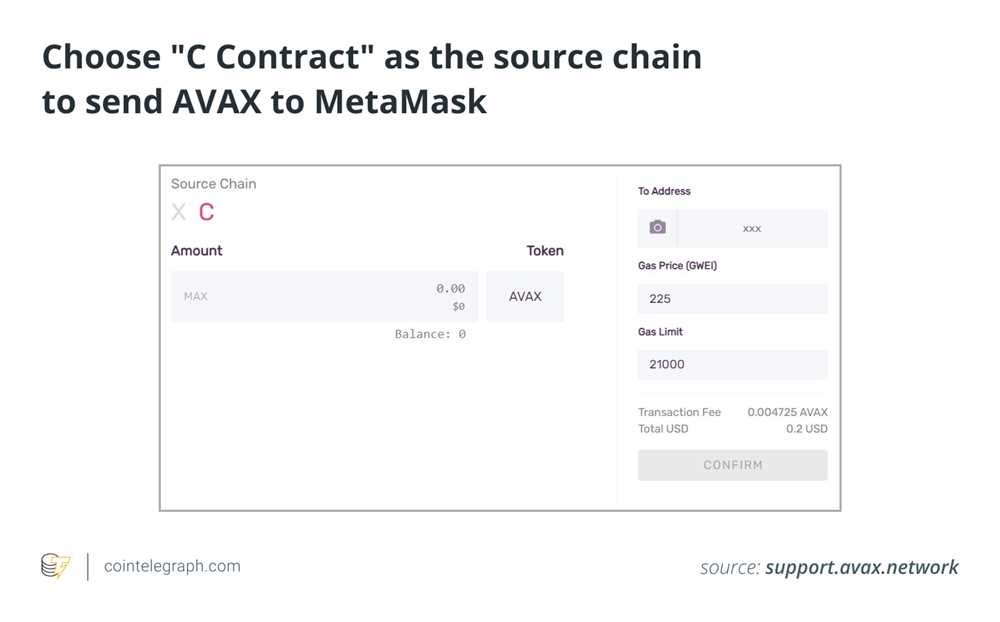
To find the correct contract address, you can visit the AVAX token’s official website or consult an authorized source such as the Avalanche Explorer. Both platforms should provide you with the most up-to-date and accurate contract address.
Entering the Contract Address
Copy the AVAX token’s contract address from the official source and paste it into the designated field on the Metamask page or pop-up. Once you have entered the contract address, double-check to ensure it matches the one provided by the official source.
After confirming that the contract address is correct, proceed by clicking on the “Next” or “Add” button within the Metamask interface. This will initiate the process of adding the AVAX token to your wallet.
Upon successful completion, the AVAX token should now be visible in your Metamask wallet, allowing you to conveniently send, receive, and manage your AVAX tokens without needing to access a separate wallet or exchange.
Step 3: Enter AVAX Token Details
Now that you have connected your Metamask wallet to the Avalanche network, it’s time to enter the details of AVAX token. Follow the steps below:
Step 1: Find AVAX Token Contract Address
First, you need to find the contract address of the AVAX token. You can usually find this information on the official website of the AVAX token or by doing a quick search on a cryptocurrency market data platform.
Note: Make sure you are getting the correct contract address for the AVAX token on the Avalanche network.
Step 2: Add Custom Token

Once you have the AVAX token contract address, open your Metamask wallet and click on the “Assets” tab. Then, click on the “Add Token” button.
A new window will appear. In this window, click on the “Custom Token” tab.
Next, you will need to enter the AVAX token contract address in the “Token Contract Address” field. Metamask will automatically fill in the token symbol and decimals of precision. Click on the “Next” button.
Step 3: Confirm the Token Details
In this step, you will see the token symbol, decimals of precision, and the contract address. Make sure that the information is correct and matches the AVAX token details.
If everything looks correct, click on the “Add Tokens” button to proceed.
That’s it! You have successfully entered the AVAX token details in your Metamask wallet. You should now be able to view your AVAX balance and perform transactions with the AVAX token on the Avalanche network.
Note: Sometimes it may take a few minutes for the token balance to appear in your wallet, so please be patient.
Step 4: Confirm and Add AVAX Token
Once you have specified the token details in the previous step, it’s time to confirm and add the AVAX token to your Metamask wallet.
Follow the steps below to complete the process:
- Review the token details on the form to ensure they are accurate. Make sure the symbol, decimals, and contract address match the AVAX token you want to add.
- If everything looks correct, click on the “Confirm” button to proceed.
- A popup will appear asking you to confirm the transaction. Review the transaction details and ensure the gas fee is reasonable.
- If you are satisfied with the transaction details, click on the “Confirm” button to initiate the addition of the AVAX token to your wallet.
- Wait for the transaction to be confirmed on the Avalanche blockchain. This process may take a few moments.
- Once the transaction is confirmed, you will see the AVAX token listed in your Metamask wallet under the “Assets” section.
- You can now use your AVAX tokens for transactions and interactions within the Avalanche ecosystem.
Congratulations! You have successfully added the AVAX token to your Metamask wallet. Now you can enjoy all the benefits of having AVAX tokens readily available in your wallet.
Note: Make sure to keep your wallet passphrase and private keys secure. If anyone gains access to this information, they can control or steal your AVAX tokens.
Frequently Asked Questions:
What is AVAX token?
AVAX token is the native token of the Avalanche blockchain platform. It is used for paying transaction fees, securing the network, and participating in on-chain governance.
Why should I add AVAX token to Metamask?
Adding AVAX token to Metamask allows you to interact with the Avalanche network directly through the popular Ethereum wallet. You can manage your AVAX tokens, send and receive transactions, and participate in decentralized applications on Avalanche.
+ There are no comments
Add yours