


If you’re a cryptocurrency enthusiast who uses MetaMask as your go-to wallet, you may have encountered a situation where you needed to add a custom contract CRO (Crypto.com Chain) to your wallet. Adding custom contracts to MetaMask allows you to interact directly with new tokens and participate in decentralized applications (dApps) that are built on the CRO blockchain. In this step-by-step guide, we will walk you through the process of adding a custom contract CRO to your MetaMask wallet.
Before we begin, please note that this guide assumes you already have MetaMask installed and set up on your browser. If you haven’t done so, please take a moment to download and install MetaMask on your preferred browser.
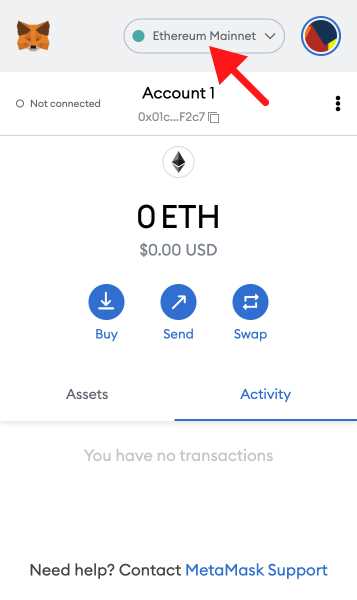
Now, let’s get started with adding a custom contract CRO to MetaMask. The first thing you need to do is open your MetaMask wallet extension and make sure you are on the main account page. From there, click on the menu icon in the top right corner of the extension and select “Add Token” from the dropdown menu.
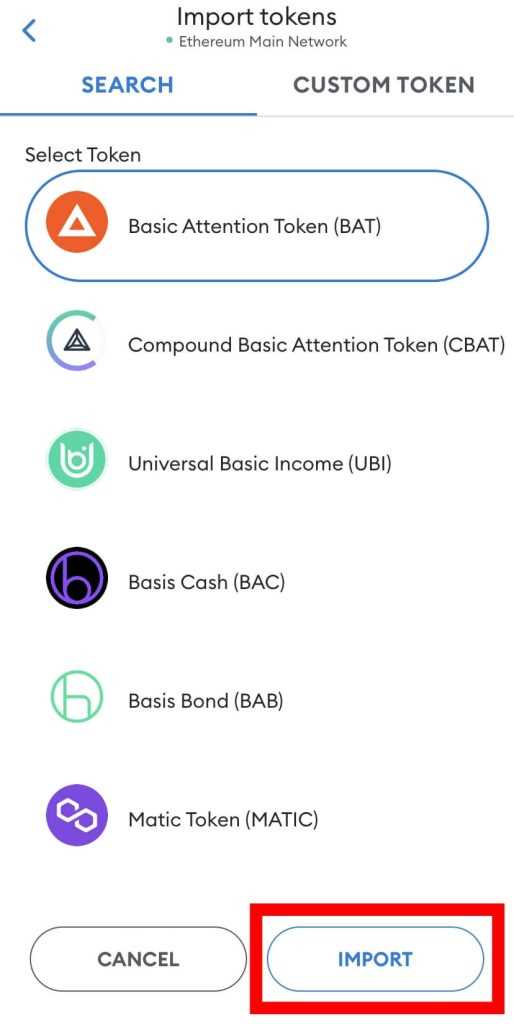
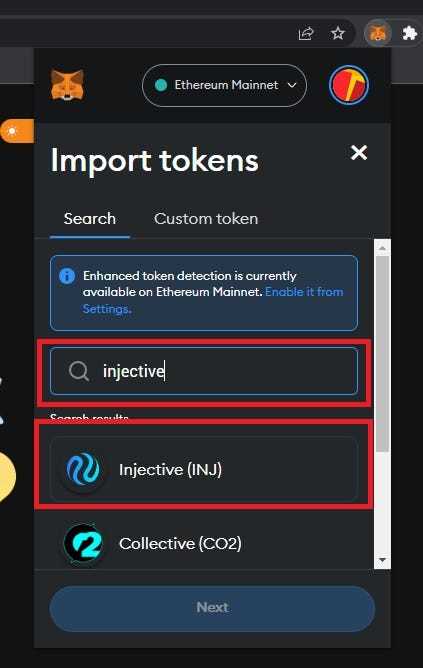
Next, you will see a pop-up window where you can search for the custom contract CRO token. In the search bar, enter the token’s contract address. Make sure you have the correct contract address for the CRO token you want to add. Once you’ve entered the contract address, MetaMask will automatically fill out the token symbol and decimal places for you. Finally, click on the “Next” button to proceed.
On the confirmation screen, you will see the details of the custom contract CRO token, including the token symbol and decimal places. Double-check that these details match the token you want to add. If everything looks correct, click on the “Add Tokens” button to add the custom contract CRO to your MetaMask wallet. Congratulations, you have successfully added a custom contract CRO to your MetaMask wallet!
Now that you have added the custom contract CRO to your MetaMask wallet, you will be able to see your CRO balance and use it for transactions and interactions with dApps on the CRO blockchain. Remember to always double-check the token details before adding custom contracts to your wallet to ensure you are interacting with the correct token. Happy exploring and enjoy the full benefits of using MetaMask with custom contract CRO!
Why Add Custom Contract CRO to MetaMask?
Adding a custom contract CRO to MetaMask allows you to interact with and manage your CRO tokens directly within the MetaMask wallet. Here are a few reasons why you may want to do this:
1. Convenience and Accessibility
By adding the custom contract CRO to MetaMask, you can access and manage your CRO tokens alongside your other cryptocurrencies in one central location. This simplifies the process of tracking your holdings and conducting transactions.
2. Seamless Integration with DApps
MetaMask is widely used for interacting with decentralized applications (DApps) built on the Ethereum blockchain. By adding your custom contract CRO to MetaMask, you can seamlessly integrate your CRO tokens into these DApps, giving you new opportunities for using and leveraging your tokens.
Note: Before using any DApp, make sure to thoroughly research its security and reputation to mitigate the risk of any potential fraudulent or malicious activity.
3. Enhanced Security

When you add a custom contract CRO to MetaMask, you gain the additional security features provided by MetaMask’s built-in wallet. MetaMask offers various security measures, including password encryption, seed phrase backup, and transaction confirmation prompts, to help protect your tokens from unauthorized access.
Disclaimer: Adding a custom contract to MetaMask requires caution and attention to detail. Make sure to obtain the correct contract address and thoroughly verify its authenticity before proceeding.
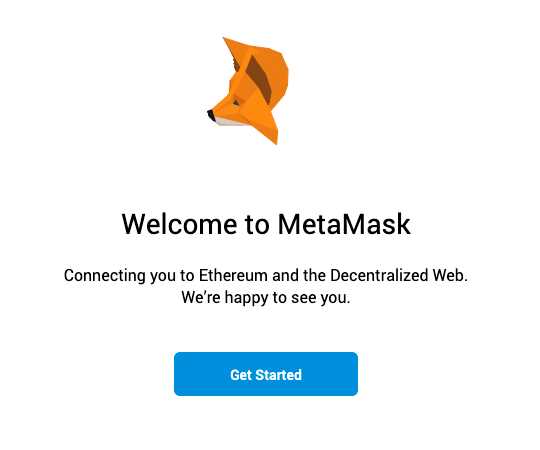
Step 1: Install MetaMask Extension
To start adding a custom contract CRO to MetaMask, you first need to install the MetaMask extension. MetaMask is available as a web browser extension for popular browsers such as Google Chrome, Mozilla Firefox, and Brave.
To install MetaMask, follow these steps:
1. Open your preferred web browser (Google Chrome, Mozilla Firefox, or Brave).
2. Search for “MetaMask” in your browser’s extension store or visit the official MetaMask website at https://metamask.io.
3. Click on the “Install” or “Add to Chrome” button to start the installation process.
4. Follow the prompts provided by your browser to complete the installation.
5. Once the installation is complete, you will see the MetaMask icon in your browser’s toolbar or extension menu.
Congratulations! You have successfully installed the MetaMask extension.
Step 2: Import Custom Contract to MetaMask
After creating your custom contract, the next step is to import it into your MetaMask wallet. Follow the steps below:
- Open your MetaMask wallet extension in your browser.
- Click on the account icon in the top right corner of the extension and select “Settings” from the dropdown menu.
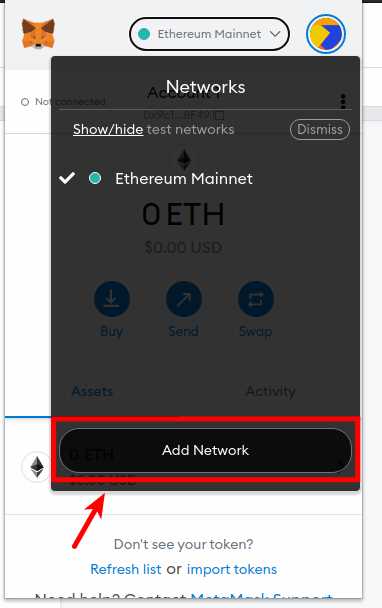
- In the settings menu, scroll down to the “Networks” section and click on “Add Network”.
- Fill in the details of your custom contract network:
Network Name: Enter a name for your custom contract network (e.g., MyContractNet).
New RPC URL: Enter the URL or IP address of your custom contract network.
Chain ID: Enter the chain ID of your custom contract network.
- Click on “Save” to add your custom contract network to MetaMask.
- Now, navigate back to the main screen of your MetaMask wallet by clicking on the account icon and selecting your desired account from the dropdown menu.
- In the main screen, click on “Assets” and select “Add Token”.
- Choose the “Custom Token” tab.
- Fill in the contract address of your custom contract. This can usually be found on the blockchain explorer or provided by the contract creator.
- Click on “Next” and MetaMask will fetch the token symbol and decimal places associated with your custom contract.
- Verify the details and click on “Add Tokens” to complete the import process.
Congratulations! You have successfully imported your custom contract to MetaMask. You are now ready to interact with your custom contract and perform various transactions.
Step 3: Connect MetaMask to the Custom Contract
Now that we have our custom contract deployed on the blockchain, the next step is to connect MetaMask to the contract so that we can interact with it using our wallet.
Step 3.1: Open MetaMask

If you have MetaMask installed as a browser extension, click on the MetaMask icon in your browser’s toolbar to open it. If you are using the MetaMask mobile app, open the app on your smartphone.
Step 3.2: Switch to the Correct Network
Before we can connect MetaMask to the custom contract, we need to make sure that MetaMask is connected to the same network where the contract is deployed.
- Click on the network name at the top of your MetaMask interface (it’s usually set to “Main Ethereum Network” by default).
- In the network selection dropdown, choose the correct network where the custom contract is deployed. It could be “Ropsten Test Network” or “Kovan Test Network” if you are testing, or a different network if the contract is deployed on a private Ethereum network.
- If the network you need is not in the list, click on “Custom RPC” and enter the URL and other details of the network manually.
Make sure that the network you select matches the network where your custom contract is deployed. If you are unsure, check with the developer or the documentation of the contract.
Step 3.3: Add the Custom Contract
Once you have switched to the correct network, we can add the custom contract to MetaMask:
- Click on the “Add Token” button on the main MetaMask screen.
- Click on the “Custom Token” tab.
- Enter the contract address in the “Token Contract Address” field.
- MetaMask should automatically fill in the “Token Symbol” and “Decimals of Precision” fields based on the contract data. If not, you can find this information in the contract documentation or from the contract developer.
- Click on “Next” to proceed.
- Review the details of the custom contract and click on “Add Tokens” to add the contract to MetaMask.
Congratulations! You have successfully connected MetaMask to the custom contract. Now you can interact with the contract using MetaMask and perform various actions like sending tokens or executing contract functions.
Frequently Asked Questions:
What is MetaMask?
MetaMask is a cryptocurrency wallet used to manage and interact with decentralized applications (dApps) on the Ethereum blockchain.
Why would I want to add custom contract CRO to MetaMask?
Adding custom contract CRO to MetaMask allows you to have easy access to your CRO tokens and interact with them directly from your MetaMask wallet.
+ There are no comments
Add yours