


If you’re a user of the Fantom network and want to take full advantage of the growing ecosystem of decentralized applications (dApps) available, then integrating the FTM network with your Metamask wallet is essential. Metamask is a popular browser extension wallet that allows users to interact with various blockchain networks, including Ethereum and Binance Smart Chain. With the recent surge in popularity of the Fantom network, many developers have started building exciting dApps on this platform, making it necessary for users to add the FTM network to their Metamask.
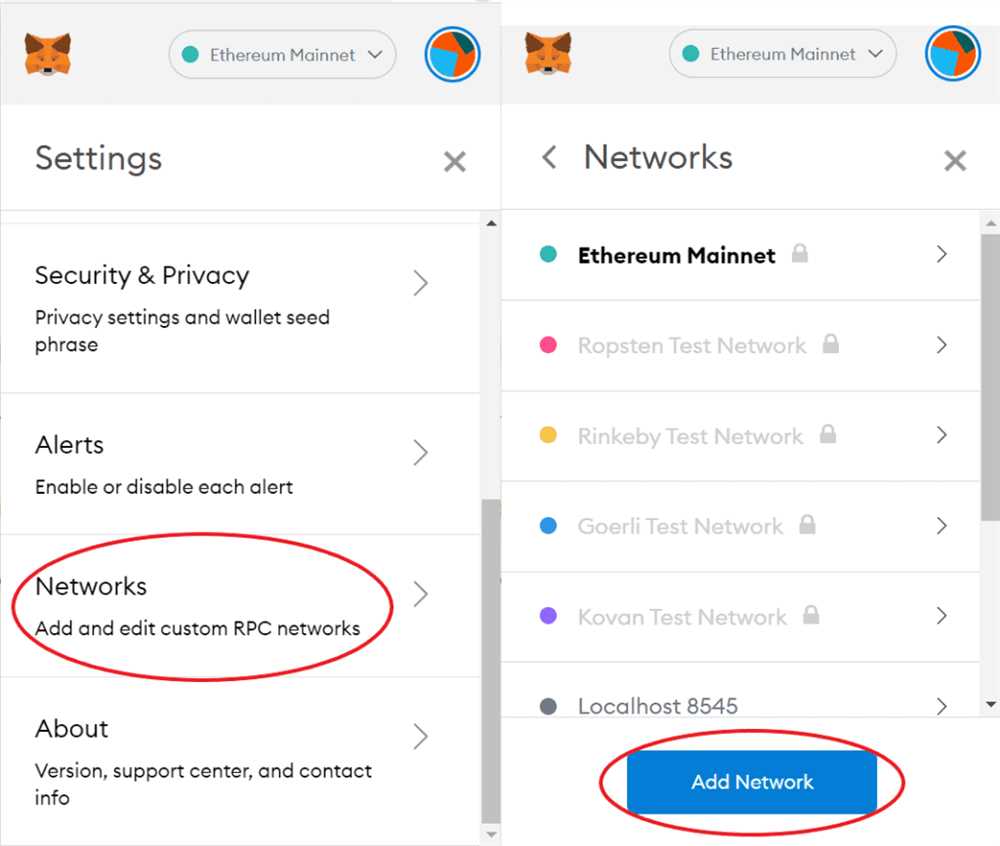
Adding the FTM network to your Metamask wallet can be done in just a few simple steps. First, open your Metamask wallet and make sure you are on the “Main Network” (Ethereum network) by clicking on the network selector at the top of the wallet. From the dropdown menu, select “Custom RPC”. This will allow you to add a custom network.
Next, you will need to fill in the network details for the FTM network. In the “New RPC URL” field, enter the following URL: https://rpcapi.fantom.network/. In the “Chain ID” field, enter the ID for the Fantom network, which is 250. Finally, in the “Currency Symbol” field, enter “FTM”. Once you have entered these details, click on the “Save” button to add the FTM network to your Metamask.
After adding the FTM network, you will now be able to seamlessly interact with Fantom dApps through your Metamask wallet. You can visit popular Fantom dApps such as SpookySwap, SpiritSwap, and HyperJump directly from your Metamask wallet and seamlessly connect with your FTM tokens.
By following these simple steps, you can easily add the FTM network to your Metamask wallet and start exploring the exciting world of Fantom dApps. Whether you’re interested in decentralized exchanges, yield farming, or gaming, the Fantom network offers a diverse range of dApps that are worth exploring. So don’t miss out on the opportunity to be part of this growing ecosystem – add the FTM network to your Metamask wallet today!
Step 1: Opening Metamask and Accessing the Network Settings
Adding the FTM (Fantom) network to Metamask allows seamless interaction with Fantom applications. Follow the steps below to open Metamask and access the network settings:
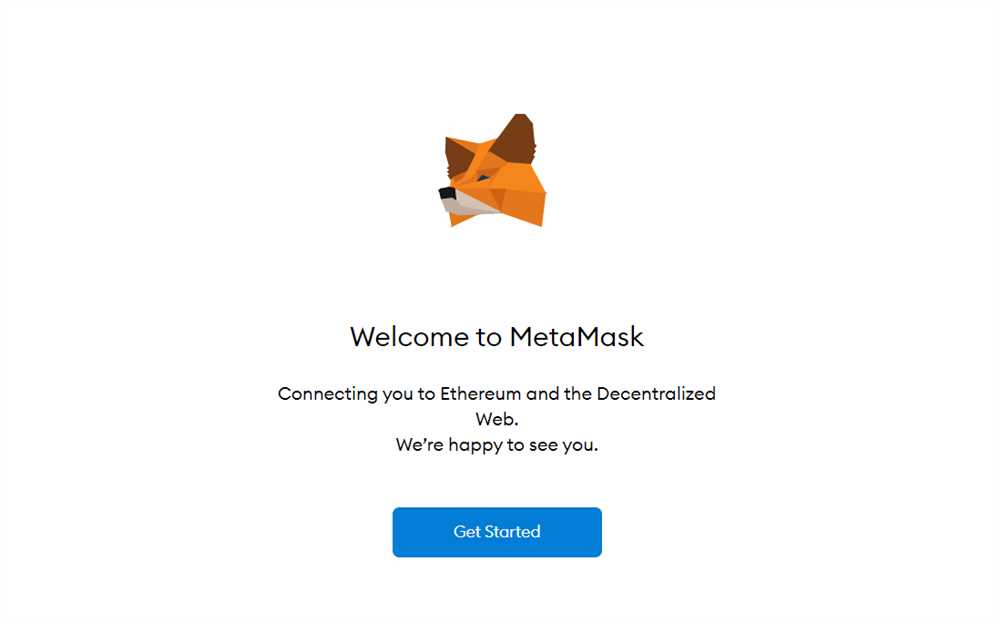
- Ensure that you have Metamask installed as a browser extension. If not, you can download and install it from the official Metamask website.
- Click on the Metamask extension icon in your browser toolbar to open the Metamask wallet.
- If you have not set up a wallet yet, follow the on-screen prompts to create a new wallet or import an existing one using your mnemonic phrase or private key. Otherwise, click on the “Import Wallet” or “Restore Wallet” option if you want to add FTM network to an existing wallet.
- Once you have opened the Metamask wallet, click on the network selector located at the top of the wallet interface.
- A dropdown menu will appear with a list of different networks. Scroll down and click on the “Custom RPC” option to access the network settings.
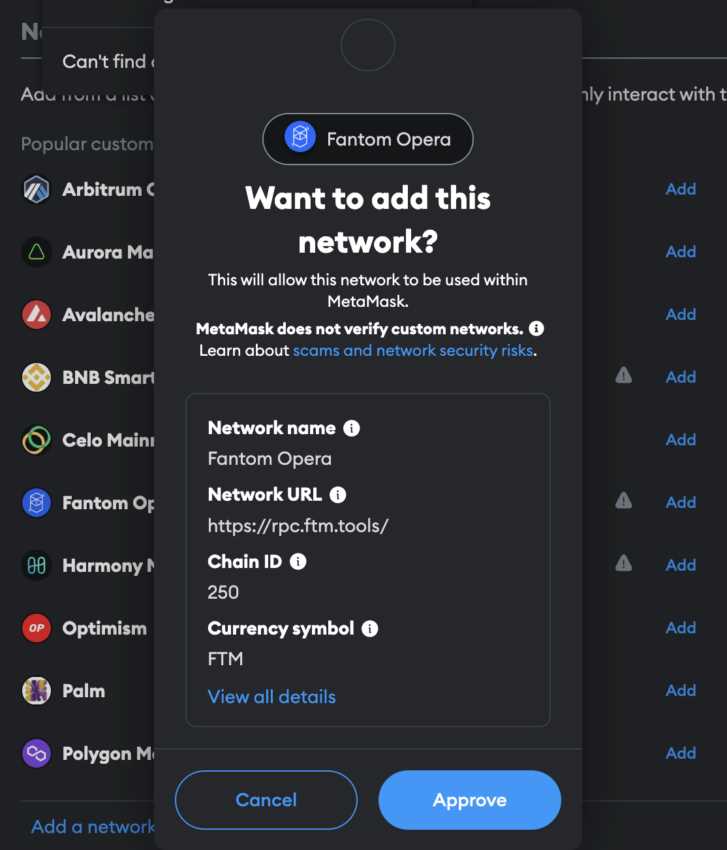
- In the network settings, you will see a form with different fields that need to be filled out to add the FTM network:
Network Name:
Enter a name for the network, such as “FTM” or “Fantom Network”.
New RPC URL:

Enter the RPC URL for the FTM network. The RPC URL for Fantom can be obtained from official Fantom documentation or an authoritative source.
Chain ID:
Enter the chain ID for the FTM network. The chain ID for Fantom is 250.
Currency Symbol:
Enter the currency symbol for the FTM network. The currency symbol for Fantom is “FTM”.
Block Explorer URL:
Enter the block explorer URL for the FTM network. The block explorer URL for Fantom can be obtained from official Fantom documentation or an authoritative source.
After filling out the network settings form, click on the “Save” button to add the FTM network to Metamask. You should now be able to seamlessly interact with Fantom applications using Metamask on the FTM network.
Step 2: Adding the FTM Network to Metamask
Now that you have installed Metamask and created a wallet, it’s time to add the FTM network to your Metamask. This will allow you to seamlessly interact with Fantom applications and perform transactions on the FTM blockchain.
Here’s how you can add the FTM network:
- Open the Metamask extension in your browser.
- Click on the network dropdown at the top of the screen, next to the Metamask logo.
- Scroll down and click on “Custom RPC”.
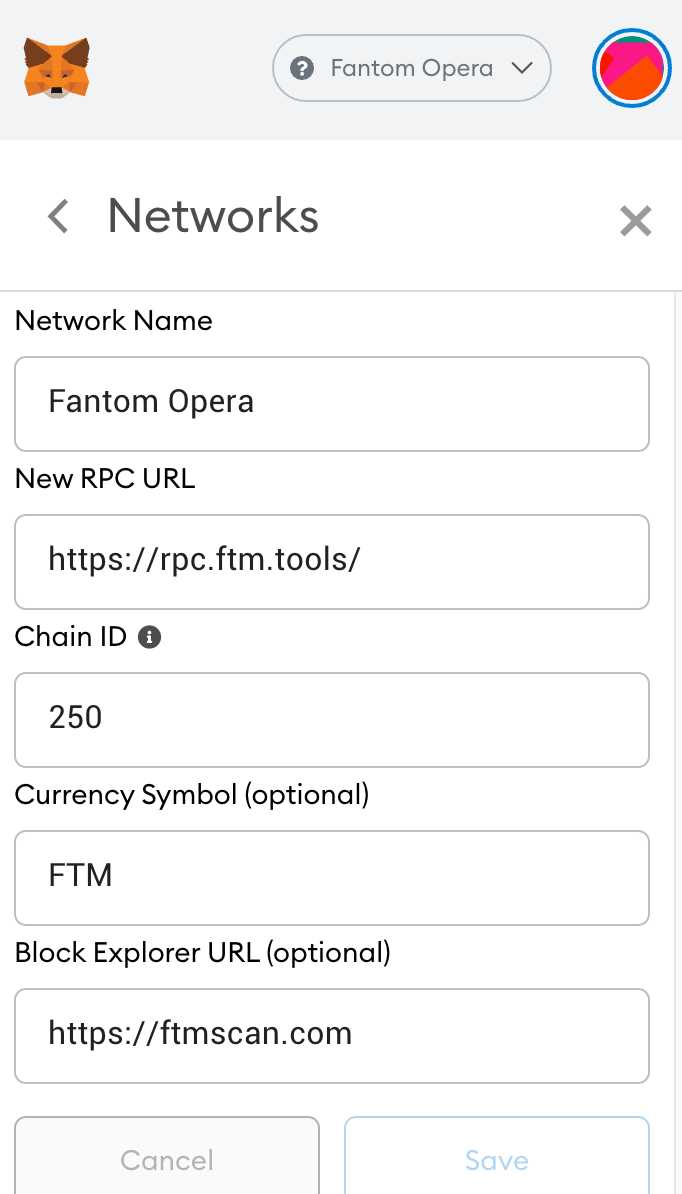
- In the “New RPC URL” field, enter the FTM network URL:
https://rpcapi.fantom.network - In the “Chain ID” field, enter the FTM network chain ID:
250 - Leave the other fields empty and click on “Save”.
That’s it! You have successfully added the FTM network to your Metamask. You can now switch to the FTM network and start using Fantom applications.
Step 3: Configuring the FTM Network with the Correct Settings
After successfully adding the FTM network to your Metamask wallet, the next step is to configure it with the correct settings to ensure seamless interaction with Fantom applications. Follow the steps below:
Step 3.1: Selecting the FTM Network
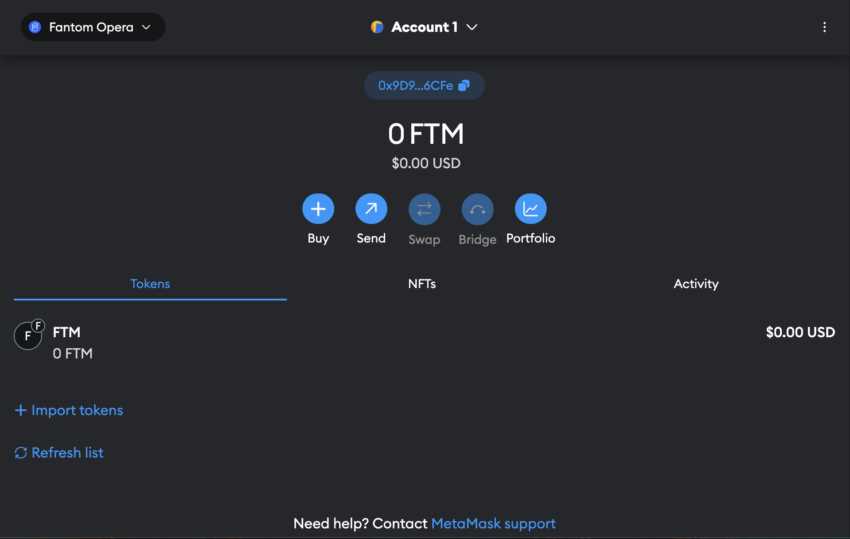
Open your Metamask wallet and click on the network selection dropdown at the top of the screen. From the available options, choose “Fantom Opera” to select the FTM network.
Step 3.2: Adding Custom RPC
To configure the FTM network correctly, you need to add a custom RPC. Follow the steps below:
- Click on the network selection dropdown again and choose “Custom RPC”.
- In the “New RPC URL” field, enter the following URL for the FTM network: https://rpcapi.fantom.network.
- Set the “Chain ID” to 250.
- Enter FTM in the “Currency Symbol” field.
- Set the “Block Explorer URL” to https://ftmscan.com/.
- Click on the “Save” button to save the settings.
By adding the custom RPC with the correct settings, you have configured the FTM network in Metamask.
Step 3.3: Switching to the FTM Network
To switch to the FTM network, click on the network selection dropdown and choose “Fantom Opera” again. Metamask will now connect to the FTM network using the custom RPC you have added.
You have now successfully configured the FTM network with the correct settings in Metamask. You are ready to seamlessly interact with Fantom applications and enjoy the benefits of the FTM network!
Frequently Asked Questions:
What is Metamask?
Metamask is a cryptocurrency wallet and browser extension that allows users to interact with decentralized applications (dapps) on the Ethereum blockchain.
How can I add the FTM network to Metamask?
To add the FTM network to Metamask, you need to open the Metamask extension, click on the network dropdown, and select “Custom RPC.” Then, you can enter the FTM network configuration details, including the network name, RPC URL, chain ID, symbol, and block explorer URL.
What is the RPC URL for the FTM network?
The RPC URL for the FTM network is “https://rpc.ftm.tools/”.
What is the chain ID for the FTM network?
The chain ID for the FTM network is 250.
Why would I want to add the FTM network to Metamask?
Adding the FTM network to Metamask allows you to seamlessly interact with Fantom applications and use the FTM cryptocurrency. It enables you to send and receive FTM, participate in token sales and decentralized finance (DeFi) protocols on the Fantom network, and more.

+ There are no comments
Add yours