


In the world of cryptocurrency, Non-Fungible Tokens (NFTs) have taken the spotlight. NFTs are unique digital assets that represent ownership or proof of authenticity of a particular item or piece of content. One of the most popular digital wallets to store and manage NFTs is Metamask.
If you’re new to the world of NFTs and want to add them to your Metamask wallet, you’re in the right place. In this article, we’ll walk you through simple steps to get started.
Step 1: Install Metamask Wallet
First things first, you’ll need to install the Metamask wallet. You can find the Metamask extension in the Chrome Web Store or as an app in your mobile device’s app store. Follow the installation instructions and create a new wallet or import an existing one.
Step 2: Connect to the Desired Network
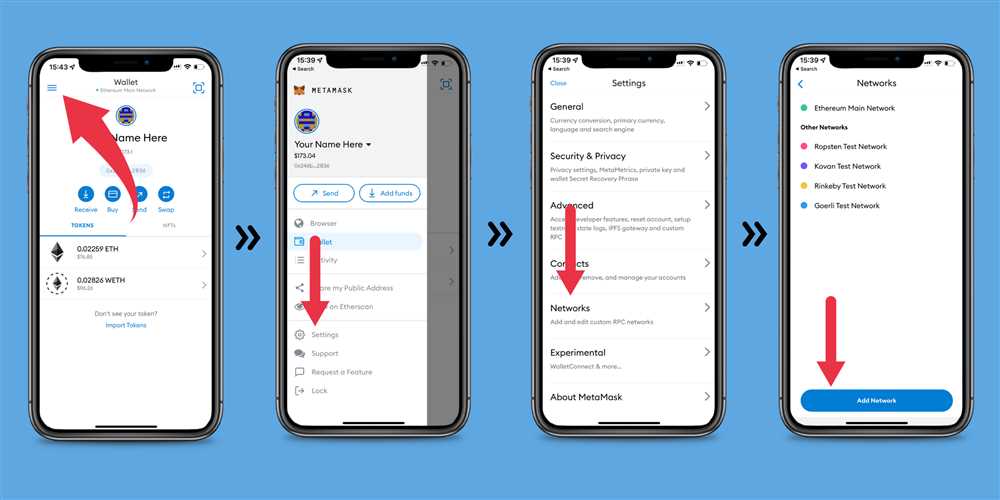
Once you have your Metamask wallet set up, you’ll need to connect to the network where the NFTs are located. Most NFTs are currently hosted on the Ethereum network, so you’ll typically use the Ethereum Mainnet. To connect, open the Metamask extension and select the network from the drop-down menu.
Step 3: Add NFTs to Your Wallet
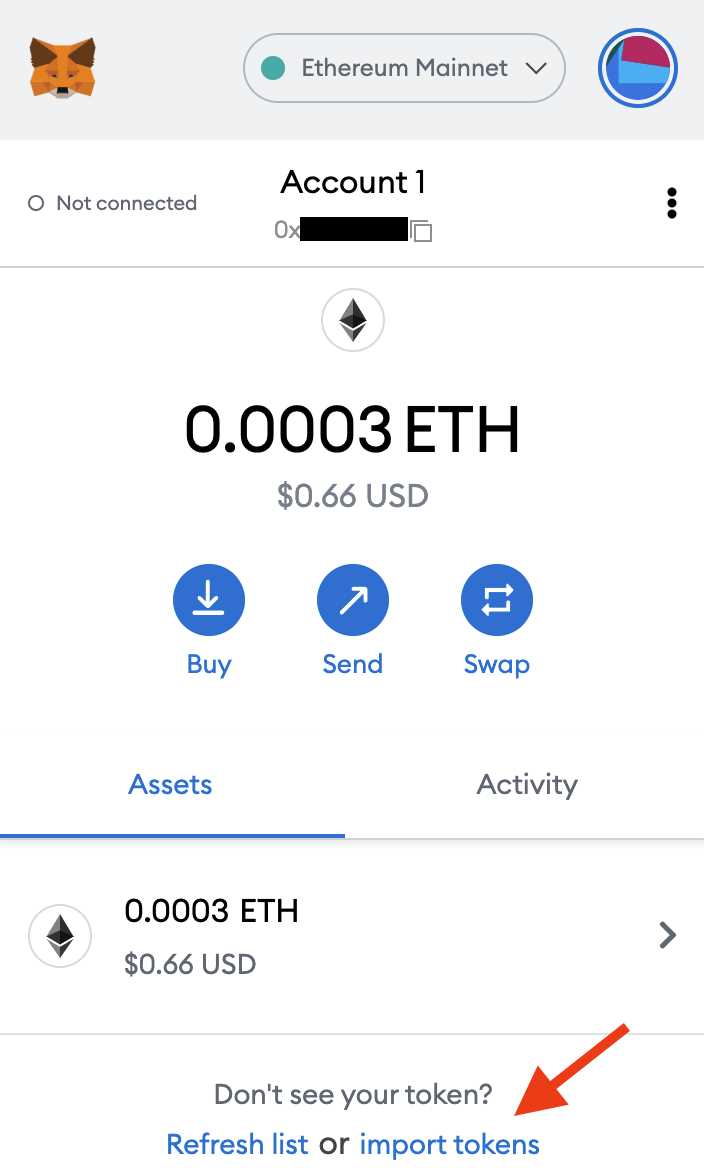
Now that you’re connected to the desired network, it’s time to add NFTs to your Metamask wallet. There are a few different ways to do this. One option is to purchase NFTs from a marketplace or an individual seller. Once you’ve completed the transaction, the NFT will automatically appear in your wallet. Another option is to receive NFTs as gifts or through airdrops. In this case, you’ll need to click on the “Add Token” button in your Metamask wallet and paste the contract address of the NFT.
Step 4: View and Manage Your NFTs
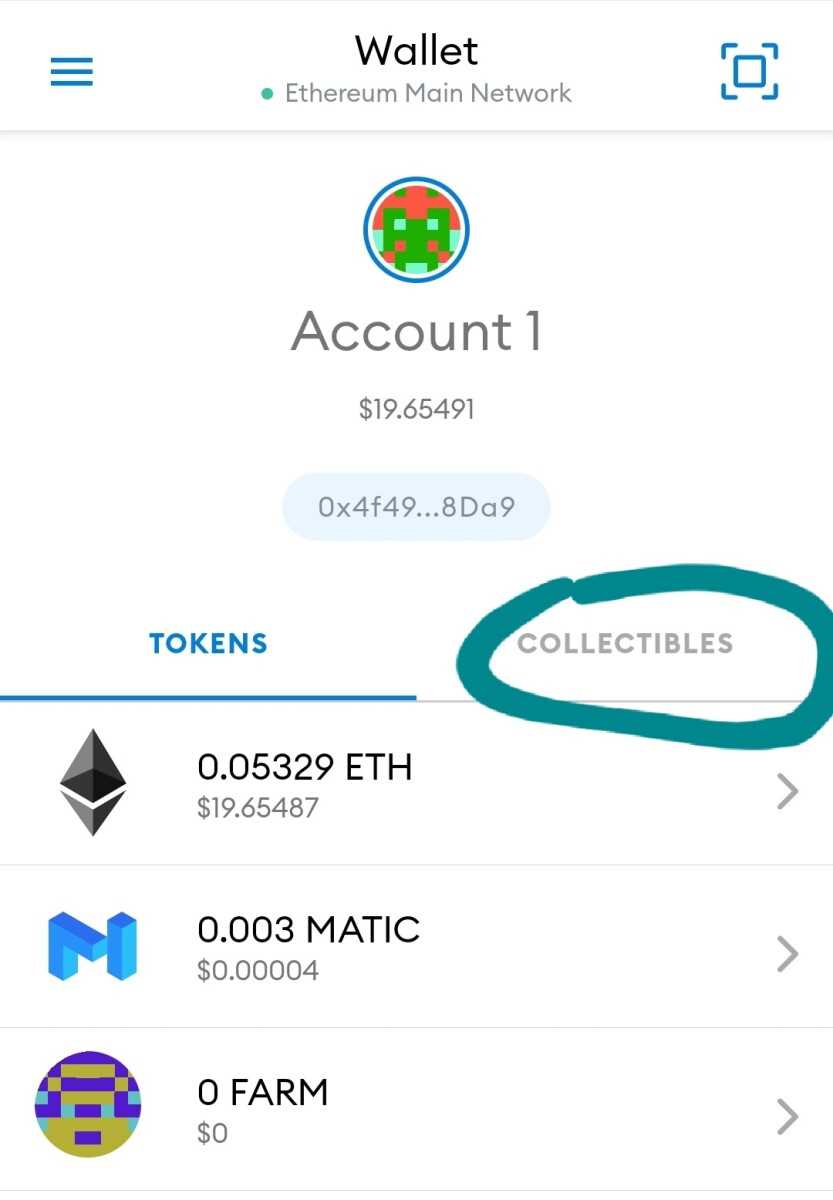
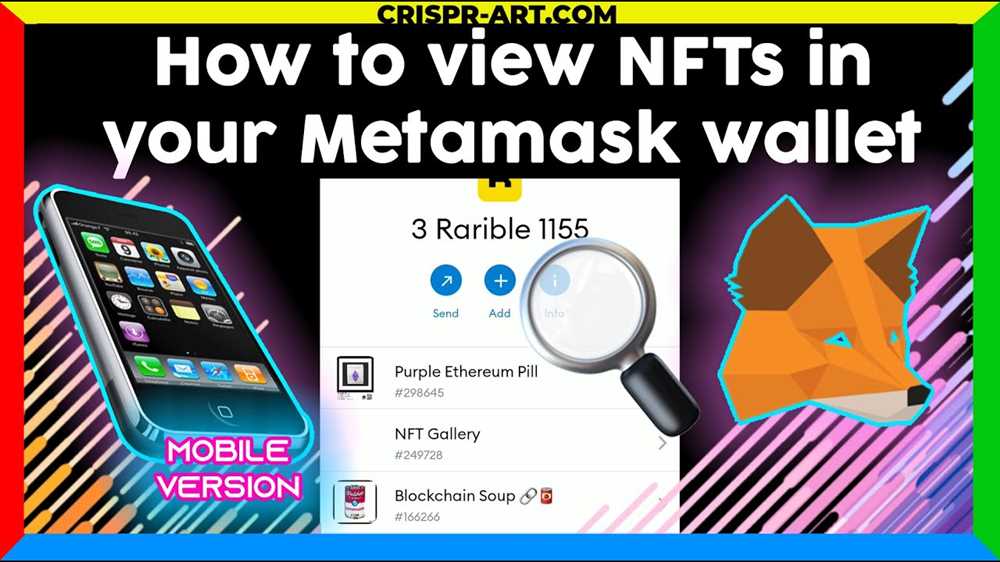
After successfully adding NFTs to your Metamask wallet, you can view and manage them in the wallet interface. Each NFT will have its own unique identifier, such as a name or a symbol. You can click on the NFT to view more details, such as its ownership history or associated metadata. You can also transfer or sell your NFTs directly from your wallet.
Remember to always exercise caution and do your research when participating in the NFT space. Be mindful of the gas fees associated with NFT transactions and ensure you’re interacting with legitimate and reputable platforms.
Adding NFTs to your Metamask wallet is a simple process that opens up a world of possibilities in the digital art and collectibles space. Follow these steps, explore different NFT marketplaces, and start building your own unique collection today!
Easy Ways to Add Non-Fungible Tokens to Your Metamask Wallet
Adding non-fungible tokens (NFTs) to your Metamask wallet is a simple process that allows you to securely store and manage your digital collectibles. Here are a few easy steps you can follow to add NFTs to your Metamask wallet:
Step 1: Install Metamask
If you haven’t already, install the Metamask browser extension or mobile app. Metamask is compatible with various web browsers such as Chrome, Firefox, and Brave.
Step 2: Create or Import a Wallet
Once Metamask is installed, create a new wallet or import an existing one using your seed phrase or private key. Make sure to securely back up your wallet information.
Step 3: Connect to a Supported NFT Marketplace
Connect your Metamask wallet to a supported NFT marketplace, such as OpenSea or Rarible. These platforms allow you to discover, buy, sell, and trade NFTs.
Step 4: Browse and Select NFTs
Browse through the available NFTs on the marketplace and select the ones you want to add to your wallet. You can filter by category, artist, or price to find NFTs that suit your preferences.
Step 5: Confirm the Transaction
Once you’ve chosen an NFT, click on it to view more details. If you decide to purchase it, confirm the transaction through your Metamask wallet. Make sure to review the transaction details and gas fees before proceeding.
That’s it! The NFT will now be added to your Metamask wallet, and you can view it in your collection. Remember to keep your wallet secure and be cautious when interacting with NFT marketplaces and transactions.
Step-by-Step Guide to Adding NFTs
Adding NFTs to your Metamask wallet is a simple process that allows you to store and manage your non-fungible tokens in one secure place. Follow these steps to add NFTs to your Metamask wallet:
Step 1: Install the Metamask extension
First, you need to install the Metamask extension in your web browser. Metamask is compatible with popular browsers like Chrome, Firefox, and Brave. Go to the official Metamask website or visit the browser’s extension store to download and install the extension.
Step 2: Create or import a wallet
Once the extension is installed, open it and follow the prompts to create a new wallet. Make sure to securely save your seed phrase in case you ever need to restore your wallet. Alternatively, if you already have a wallet, you can import it into Metamask using your existing seed phrase or private key.
Step 3: Connect your wallet to a supported blockchain
After setting up your wallet, connect it to a supported blockchain network. Metamask supports various networks such as Ethereum, Binance Smart Chain, and Polygon. Choose the network you prefer and connect your wallet to it.
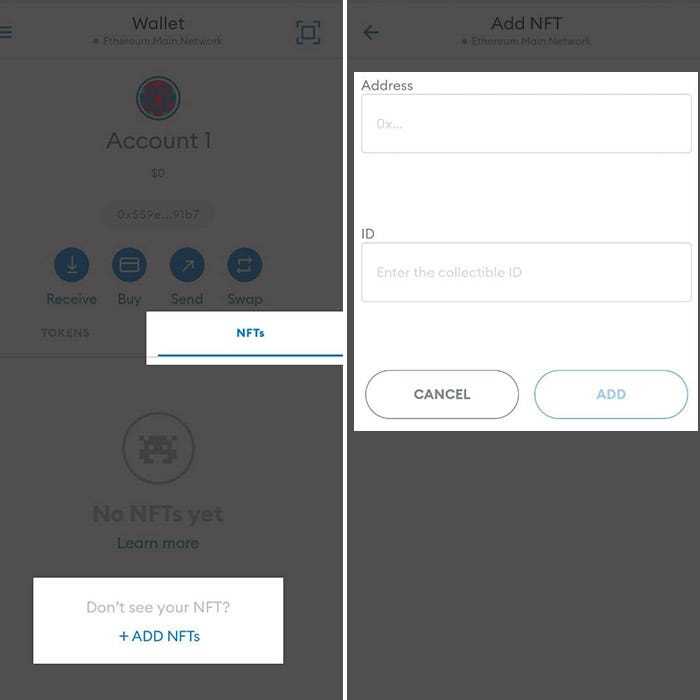
Step 4: Find and add NFT contracts
To add NFTs to your wallet, you need to find the contract address of the NFT you want to add. Visit NFT marketplaces like OpenSea or Rarible and search for the desired NFT. Once you find it, copy the contract address of the NFT.
Step 5: Add the NFT contract to your wallet
In your Metamask wallet, click on the “Assets” tab and then select “Add Token” or a similar option. Paste the contract address of the NFT you want to add and click “Next” or “Add Token” to confirm. The NFT contract will be added to your wallet, and you will be able to view and manage your NFTs.
Step 6: View and manage your NFTs
Go to the “Assets” tab in your Metamask wallet, and you will see the added NFT contract under the “Tokens” section. Click on the contract to view your NFTs, including their name, image, and other relevant details. You can also perform various actions on your NFTs, such as transferring, selling, or trading them.
That’s it! You have successfully added NFTs to your Metamask wallet. Now you can securely store and manage your non-fungible tokens with ease.
How to Import NFTs to Your Metamask Wallet
Importing NFTs to your Metamask wallet is a simple process that allows you to access and manage your non-fungible tokens in one place. Follow these steps to import your NFTs:
Step 1: Open Metamask Wallet
If you haven’t already, install the Metamask extension in your web browser and set up your wallet by creating a new account or importing an existing one.
Step 2: Access the NFT Collectible Website
Go to the website or marketplace where you obtained your NFT collectibles, such as OpenSea or Rarible.
Step 3: Find the Import NFT Option
Navigate to your collection within the website and look for the import or connect wallet option. This will typically be located in the settings or account section of the website.
Step 4: Connect Your Metamask Wallet
Click on the import or connect wallet option and select Metamask as your wallet provider. A pop-up will appear asking for permission to connect your wallet – approve the request.
Step 5: Import NFTs to Metamask
After connecting your Metamask wallet, you will usually see a list of your NFT collectibles. Select the NFTs you want to import to your wallet by clicking on them or following the instructions provided on the website.
Step 6: Confirm the Import
Once you have selected the NFTs you want to import, confirm the import by following the prompts on the website. This will typically involve signing a transaction in your Metamask wallet.
That’s it! You have successfully imported your NFTs to your Metamask wallet. You can now view, manage, and trade your NFTs directly within your wallet interface.
Add NFTs to Your Metamask Wallet with a Few Clicks
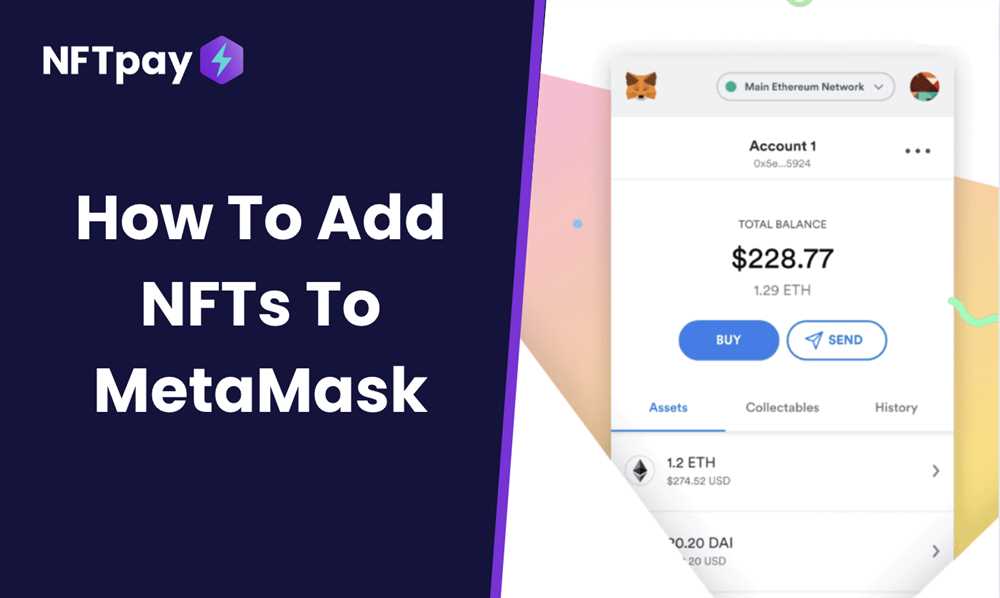
If you’re interested in expanding your cryptocurrency collection, adding NFTs (Non-Fungible Tokens) to your Metamask wallet is a simple process that can be done with just a few clicks. NFTs are unique digital assets that can represent ownership of artwork, collectibles, virtual real estate, and more. By adding NFTs to your Metamask wallet, you’ll have a secure and convenient way to manage and display your digital assets.
Step 1: Install and Set Up Metamask
The first step is to install the Metamask browser extension and set up your wallet. Metamask is a popular digital wallet that allows users to interact with decentralized applications (DApps) on the Ethereum blockchain. You can install Metamask by visiting their official website and following the installation instructions for your browser.
Step 2: Connect Your Metamask Wallet
Once you have installed Metamask, open the extension and create a new wallet or import an existing one. Make sure to securely store your wallet’s seed phrase, as it is the key to accessing your funds. After setting up your wallet, connect it to the Ethereum mainnet by selecting the network option and choosing “Ethereum Mainnet” from the dropdown menu.
Step 3: Browse NFT Marketplaces
With your Metamask wallet set up and connected to the Ethereum mainnet, you can now start browsing NFT marketplaces to find and purchase NFTs. Some popular NFT marketplaces include OpenSea, Rarible, and SuperRare. These platforms host a wide range of digital assets, from digital art to virtual land.
Step 4: Purchase and Add NFTs to your Wallet
Once you have found an NFT that you want to add to your Metamask wallet, you can proceed with the purchase. Each NFT marketplace has its own purchasing process, but generally, you will need to connect your wallet to the marketplace and confirm the transaction. After purchasing the NFT, it will be automatically added to your Metamask wallet.
Step 5: Manage and Display Your NFTs

With NFTs added to your Metamask wallet, you can now manage and display your digital assets. Metamask provides a user-friendly interface that allows you to view your NFT collection, track their value, and interact with them. You can also explore additional features offered by NFT marketplaces, such as trading and lending your NFTs.
Adding NFTs to your Metamask wallet is a straightforward process that enables you to securely store and manage your digital assets. By following these simple steps, you can expand your collection and participate in the growing world of NFTs with ease.
| Benefits of Adding NFTs to Metamask |
|---|
| Safe and Secure Storage |
| Convenient Access to Your Digital Assets |
| Ability to Track and Monitor NFT Value |
| Interaction with NFT Marketplaces and DApps |
Quick and Simple Process for Adding NFTs to Metamask

If you’re new to the world of NFTs and want to add them to your Metamask wallet, you’ve come to the right place. Adding NFTs to Metamask is a quick and straightforward process that anyone can follow. Here’s a step-by-step guide to help you get started:
Step 1: Install the Metamask Extension
The first thing you’ll need to do is install the Metamask extension for your preferred web browser. Metamask is available for Chrome, Firefox, and Brave. Simply search for “Metamask” in your browser’s extension marketplace, click on the install button, and follow the on-screen instructions to set it up.
Step 2: Create or Import a Wallet
Once you have Metamask installed, open the extension and click on the “Create Wallet” button if you don’t have a wallet already. If you already have a Metamask wallet, you can import it by clicking on the “Import Wallet” button and entering your seed phrase or private key. Remember to set a strong password for your wallet to ensure its security.
Step 3: Connect to the NFT Marketplace
Now that you have a Metamask wallet set up, you’ll need to connect it to an NFT marketplace where you can browse, buy, and sell NFTs. Popular NFT marketplaces include OpenSea, Rarible, and SuperRare. Go to your preferred NFT marketplace, connect your wallet by clicking on the “Connect Wallet” button, and select Metamask from the list of available wallets.
Step 4: Browse and Select Your NFT
Once you’re connected to the NFT marketplace, you can start browsing through the available NFTs. Use the search bar or explore different categories to find the NFT you want to add to your Metamask wallet. Click on the NFT to view more details, including its price and owner.
Step 5: Purchase or Transfer the NFT
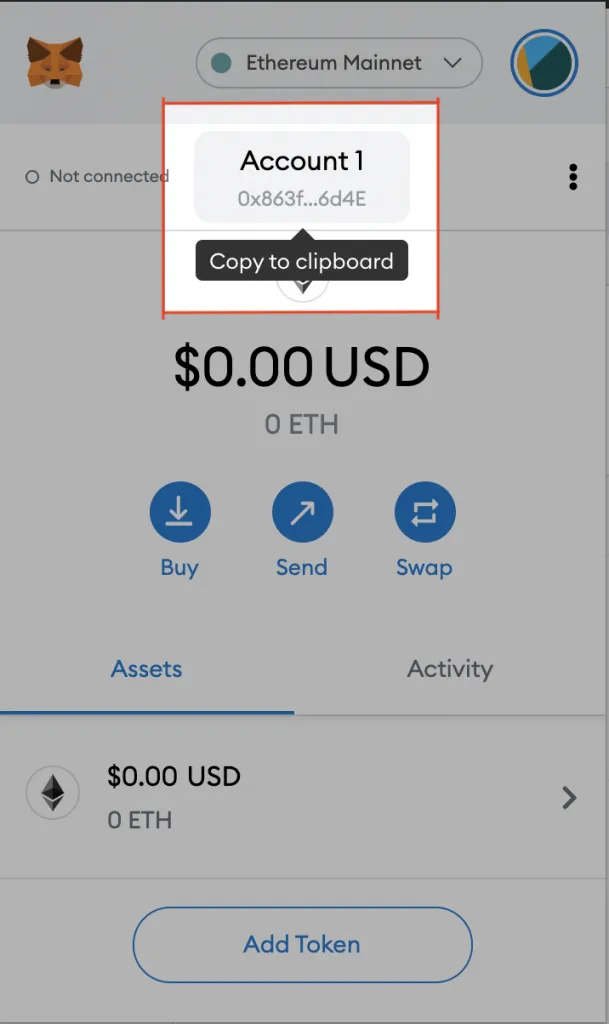
If you’re buying an NFT, make sure you have enough cryptocurrency in your Metamask wallet to complete the purchase. Follow the on-screen instructions on the NFT marketplace to finalize the transaction. If you’re receiving an NFT from someone else, they will need to initiate the transfer by sending it to your wallet address. You can find your wallet address in the Metamask extension under the “Account” section.
That’s it! By following these simple steps, you can add NFTs to your Metamask wallet and start building your own NFT collection. Remember to always do your research and be cautious when engaging in NFT transactions to ensure a safe and enjoyable experience.
Frequently Asked Questions:
How do I add NFTs to my Metamask wallet?
To add NFTs to your Metamask wallet, you need to first connect your wallet to a marketplace or platform that supports NFTs. Once you have connected your wallet, you can browse and purchase NFTs directly from the platform. The NFTs will then be automatically added to your Metamask wallet.
Can I add NFTs to my Metamask wallet from different platforms?
Yes, you can add NFTs to your Metamask wallet from different platforms as long as they support the Ethereum network and are compatible with Metamask. Each platform will have its own process for connecting your wallet and adding NFTs. Once connected, you can manage and view all your NFTs from within your Metamask wallet.

+ There are no comments
Add yours