


Welcome to our step-by-step tutorial on setting up and using Avalanche with MetaMask! If you’re new to the world of decentralized finance (DeFi) or just curious about exploring the Avalanche ecosystem, you’ve come to the right place. In this tutorial, we will guide you through the process of setting up your MetaMask wallet to interact with Avalanche and walk you through some of the basics of using this powerful blockchain platform.
First things first, if you haven’t already, you’ll need to install the MetaMask extension for your preferred web browser (Chrome, Firefox, or Brave). Once installed, create a new MetaMask wallet or import an existing one. Make sure you securely backup your wallet’s seed phrase – this is crucial for restoring your wallet if you ever lose access to it.
Now that you have your MetaMask wallet set up, let’s connect it to the Avalanche network. Open your MetaMask extension and click on the network selection dropdown (usually located on the top right). In the dropdown, select “Custom RPC” to manually add a new network. Now, you’re ready to enter the details for connecting to the Avalanche network.
Name: Avalanche
New RPC URL: https://api.avax.network/ext/bc/C/rpc
Chain ID: 43114
Symbol: AVAX
Block Explorer URL: https://cchain.explorer.avax.network/
After entering these details, click on “Save” and your MetaMask wallet will be connected to the Avalanche network. Now, you can start exploring the wide array of dApps, decentralized exchanges, and other DeFi protocols available on Avalanche.
Remember to always double-check the URLs and verify the authenticity of the websites and applications you interact with while using Avalanche. By following these steps, you’re well on your way to harnessing the full potential of the Avalanche blockchain with the convenience of your MetaMask wallet.
Disclaimer: This tutorial is for informational purposes only and should not be considered as financial or investment advice. Always do your own research before interacting with new platforms or investing in cryptocurrencies.
Why Use Avalanche with MetaMask
There are several reasons why using Avalanche with MetaMask can be beneficial:
- Interoperability: Avalanche is a blockchain platform that offers compatibility with the Ethereum Virtual Machine (EVM), which means that you can use your existing Ethereum-based applications and tools on the Avalanche network through MetaMask.
- Scalability: Avalanche is designed to prioritize high-speed and low-cost transactions. By using Avalanche with MetaMask, you can benefit from the platform’s fast and efficient consensus protocol, which enables thousands of transactions per second.
- Security: MetaMask is known for its robust security features, including private key management and encrypted communication. By combining MetaMask with Avalanche, you can enjoy the security benefits of both platforms, ensuring the safety of your transactions and digital assets.
- Access to DeFi: The Avalanche network has a growing ecosystem of decentralized finance (DeFi) applications, offering various opportunities for financial services, such as lending, borrowing, and yield farming. By using MetaMask, you can easily access and interact with these DeFi applications on Avalanche.
- Community: Both Avalanche and MetaMask have active and supportive communities that provide resources, tutorials, and assistance. By using Avalanche with MetaMask, you can tap into these vibrant communities and connect with like-minded individuals who are interested in blockchain technology and decentralized applications.
In conclusion, using Avalanche with MetaMask allows you to leverage the benefits of both platforms, such as interoperability, scalability, security, access to DeFi, and community support. Whether you are a developer, trader, or blockchain enthusiast, this combination can enhance your experience and open up a world of possibilities on the Avalanche network.
Benefits of Using Avalanche with MetaMask
There are several benefits to using Avalanche with MetaMask, a popular Ethereum wallet and browser extension. Here are some of the key advantages:
- Interoperability: Avalanche is designed to be interoperable with Ethereum, meaning that you can seamlessly connect MetaMask to Avalanche and use your existing ETH assets and applications on the Avalanche network.
- Scalability: Avalanche offers high scalability, with the ability to process thousands of transactions per second. By using Avalanche with MetaMask, you can enjoy faster transaction times and lower fees compared to the Ethereum network.
- Security: Avalanche uses a consensus protocol called Avalanche consensus, which is designed to provide strong security against attacks. By utilizing MetaMask as your wallet, you can trust in its robust security features to keep your assets safe on the Avalanche network.
- Decentralization: Avalanche is built to be a decentralized platform, similar to Ethereum. By using MetaMask with Avalanche, you can participate in the decentralized ecosystem, such as trading on decentralized exchanges or using decentralized applications (dApps) on the Avalanche network.
- Community: Both Avalanche and MetaMask have active and growing communities. By using Avalanche with MetaMask, you can connect with like-minded individuals, learn from experts, and contribute to the development and growth of the ecosystem.
In conclusion, using Avalanche with MetaMask brings numerous benefits, including interoperability, scalability, security, decentralization, and access to a vibrant community. By combining the strengths of Avalanche and MetaMask, you can have a powerful and user-friendly experience in the world of decentralized finance and blockchain applications.
How Avalanche and MetaMask Work Together

MetaMask is a popular Ethereum wallet and browser extension that allows users to interact with decentralized applications (dApps) and manage their Ethereum assets. Recently, MetaMask has expanded its capabilities to support other blockchain networks, including Avalanche.
Avalanche is a high-performance blockchain platform that aims to provide fast and scalable solutions for decentralized finance and other applications. By integrating Avalanche with MetaMask, users can now seamlessly switch between Ethereum and Avalanche networks.
Here’s how Avalanche and MetaMask work together:
|
1. Installing MetaMask: |
First, you need to install the MetaMask browser extension if you haven’t already. You can find the official MetaMask extension on the Google Chrome Web Store or the Mozilla Firefox Add-ons Marketplace. Once installed, set up your MetaMask account by creating a new wallet or importing an existing one. |
|
2. Connecting to Avalanche: |
To connect MetaMask to the Avalanche network, click on the MetaMask extension icon in your browser toolbar. In the MetaMask window, click on the network dropdown menu and select “Custom RPC.” Here, you will need to enter the Avalanche network details, including the network name, RPC URL, chain ID, and symbol. Once you’ve entered the correct details, click “Save” to connect MetaMask to Avalanche. |
|
3. Switching Networks: |
After successfully connecting MetaMask to Avalanche, you can switch between Ethereum and Avalanche networks by selecting the desired network from the MetaMask network dropdown menu. This allows you to easily access and manage your assets on both networks without the need for multiple wallets or extensions. |
|
4. Transacting on Avalanche: |
With MetaMask connected to Avalanche, you can now interact with Avalanche dApps and perform transactions on the network. Simply navigate to an Avalanche dApp, connect your MetaMask wallet, and follow the instructions provided by the dApp. MetaMask will handle the transaction signing process, ensuring the security of your funds. |
|
5. Managing Assets: |
MetaMask provides a unified interface for managing your assets on both Ethereum and Avalanche. You can view your account balance, send and receive assets, and monitor transactions across both networks from the MetaMask wallet interface. This streamlines the asset management process and makes it convenient for users to navigate between different networks. |
By leveraging the power of both Avalanche and MetaMask, users can enjoy a seamless and user-friendly experience when interacting with decentralized applications and managing their assets across multiple networks.
Setting Up Avalanche with MetaMask
MetaMask is a popular cryptocurrency wallet and browser extension that allows users to interact with Ethereum-based decentralized applications (dApps). However, with the emergence of Avalanche, a high-performance blockchain platform, you can now set up MetaMask to work seamlessly with Avalanche-based dApps as well.
1. Install MetaMask
The first step is to install the MetaMask browser extension. Open your preferred web browser and visit the official MetaMask website. Follow the instructions provided to add the extension to your browser.
2. Create or Import a Wallet
Once MetaMask is installed, click on the extension icon in your browser’s toolbar to launch it. If you already have a MetaMask wallet, you can choose to import it by clicking on “Import Wallet” and following the instructions. Otherwise, click on “Create a Wallet” to generate a new wallet.
3. Connect to Avalanche
After your wallet is created or imported, click on the network dropdown menu in the MetaMask interface. Select “Custom RPC” to manually add a new network. You will need to provide the following details:
- Network Name: Avalanche
- New RPC URL: Enter the Avalanche RPC URL provided by the dApp or network you want to connect to.
- Chain ID: Enter the Avalanche Chain ID provided by the dApp or network you want to connect to.
- Symbol (optional): Enter the symbol for the Avalanche network, such as “AVAX”.
- Block Explorer URL (optional): Enter the Avalanche block explorer URL if available.
Once you have entered all the necessary information, click on “Save” to connect to the Avalanche network.
4. Fund Your Wallet
Before you can start using Avalanche-based dApps, you will need to fund your MetaMask wallet with AVAX, the native cryptocurrency of the Avalanche network. You can do this by purchasing AVAX from a cryptocurrency exchange and then sending it to your MetaMask wallet address.
5. Start Using Avalanche with MetaMask
Now that your MetaMask wallet is connected to the Avalanche network and funded with AVAX, you can start using Avalanche-based dApps. Simply visit the dApp’s website or platform, and MetaMask will automatically detect the network and prompt you to connect. Approve the connection request, and you will be able to interact with the dApp using Avalanche.
Remember to always exercise caution when using cryptocurrency wallets and interacting with dApps. Keep your wallet and seed phrase private, and double-check the URLs and contracts you interact with to avoid phishing or scam attempts.
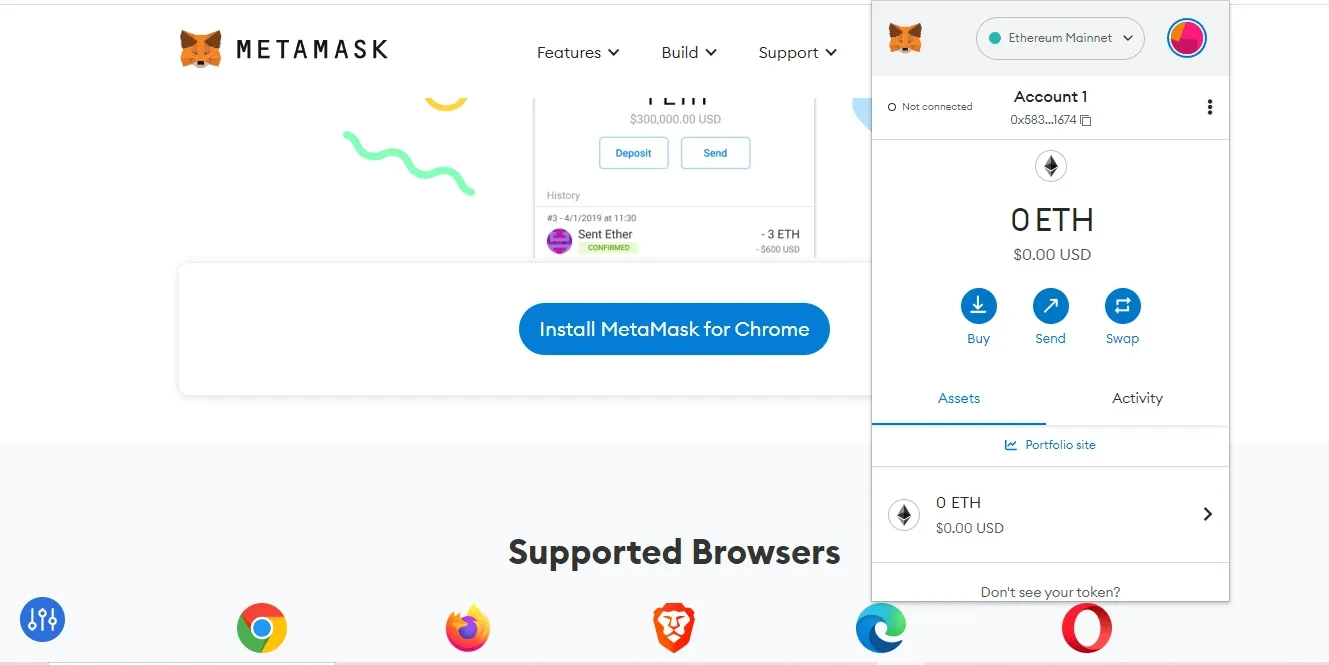
Installing MetaMask Extension
To begin using Avalanche with MetaMask, you need to first install the MetaMask extension in your preferred web browser. Here are the steps to install MetaMask:
- Open your web browser and go to the MetaMask website.
- Click on the “Get Started” button.
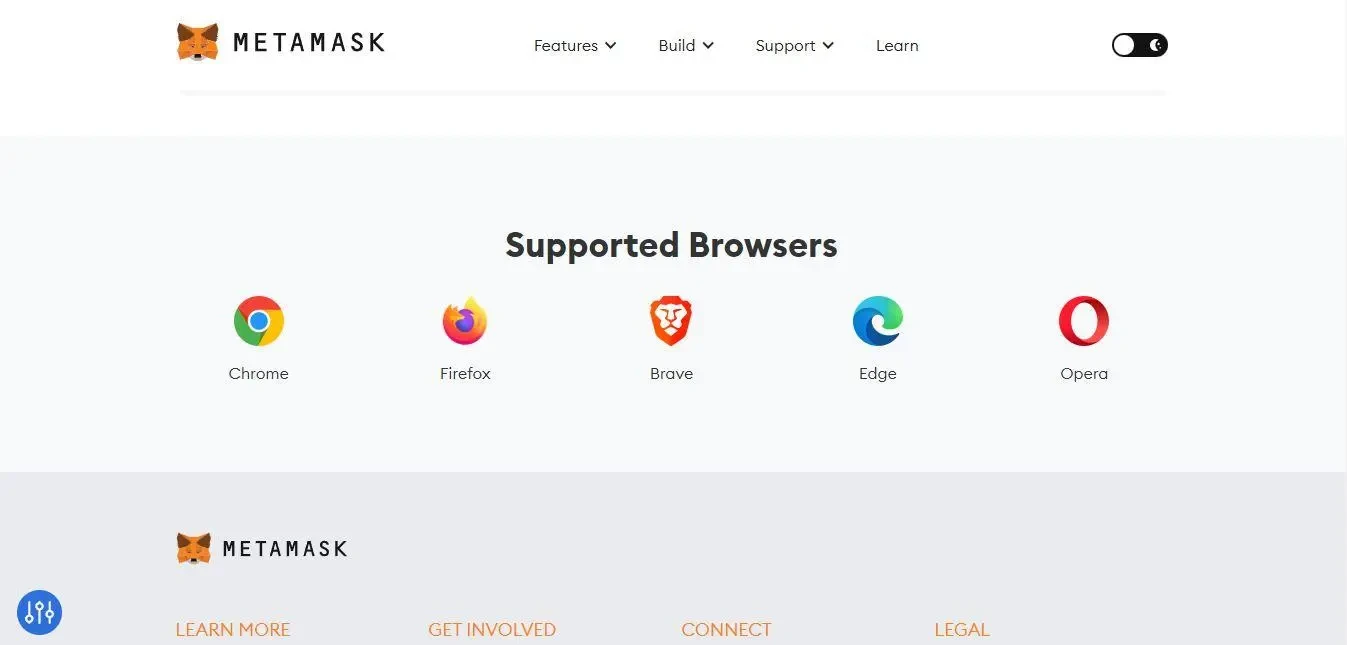
- Choose your browser (Google Chrome, Firefox, or Brave) and click on the respective button.
- You will be redirected to the corresponding extension page in the browser’s web store.
- Click the “Add to [Browser]” button to begin the installation process.
- Wait for the extension to install. This may take a few moments.
- Once installed, a new MetaMask icon will appear in your browser’s toolbar.
- Click on the MetaMask icon to launch the extension.
- The MetaMask welcome screen will appear. Click on the “Get Started” button.
- On the next screen, you can either import an existing wallet or create a new one. Follow the prompts to complete the process.
- Once your wallet is set up, you can connect it to the Avalanche network by following the steps outlined in the tutorial.
Once MetaMask is installed and set up, you are ready to start using Avalanche and interacting with decentralized applications on the network.
Adding Avalanche Network to MetaMask
MetaMask is a popular web3 wallet that allows you to interact with various blockchain networks. To use Avalanche with MetaMask, you’ll need to add the Avalanche network to your wallet. Here’s how you can do it:
Step 1: Install MetaMask Extension
If you don’t have MetaMask installed in your browser, you’ll need to install it first. You can download the MetaMask extension from the official website and add it to your preferred browser.
Step 2: Create or Import a Wallet
If you don’t have a MetaMask wallet, you’ll need to create one. Follow the instructions provided by MetaMask to create a new wallet. If you already have a MetaMask wallet, make sure you have access to it.
Step 3: Launch MetaMask
Once you have MetaMask installed and a wallet set up, you can launch the MetaMask extension. You should see the MetaMask icon in your browser toolbar. Click on the icon to open the MetaMask wallet.
Step 4: Add Avalanche Network
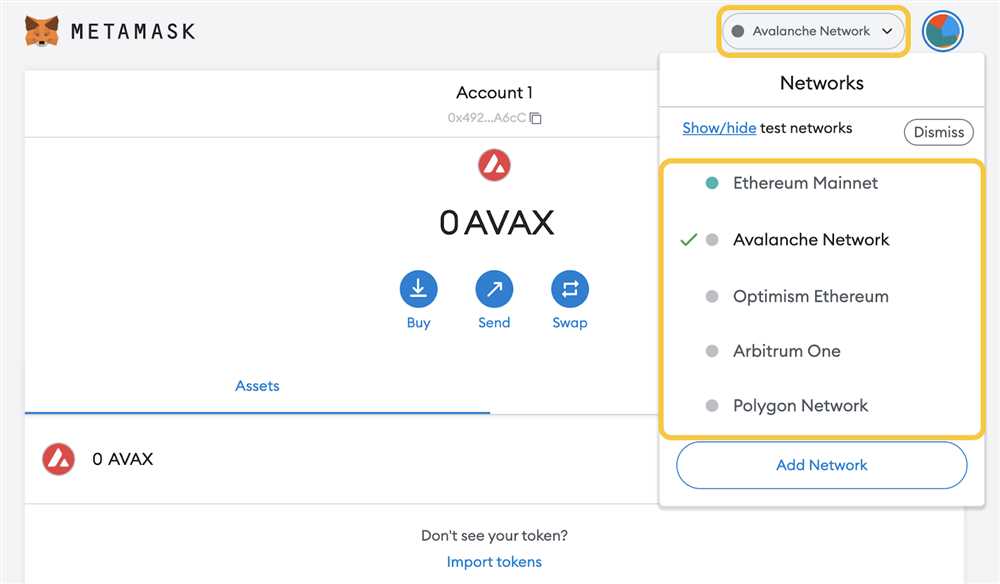
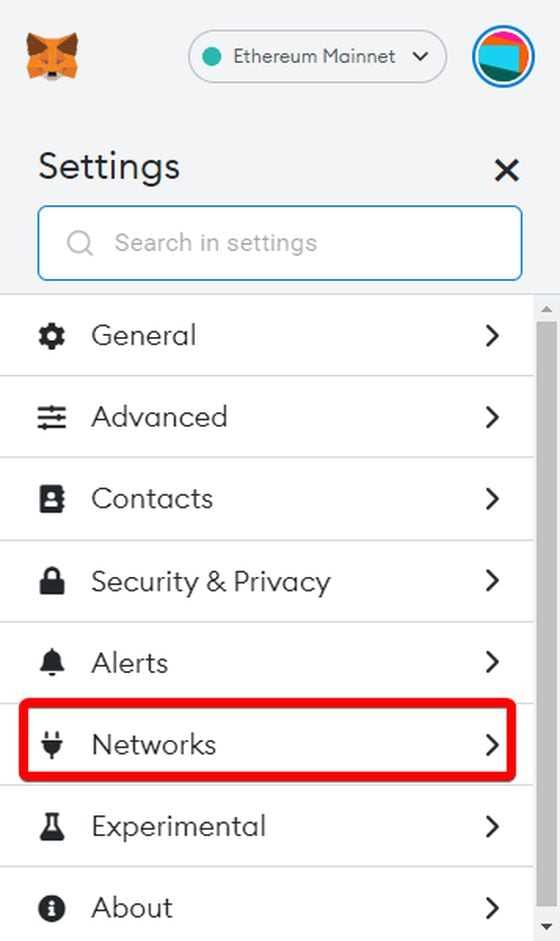
- Inside the MetaMask wallet, you’ll see your account details. Click on the network dropdown list located at the top of the wallet.
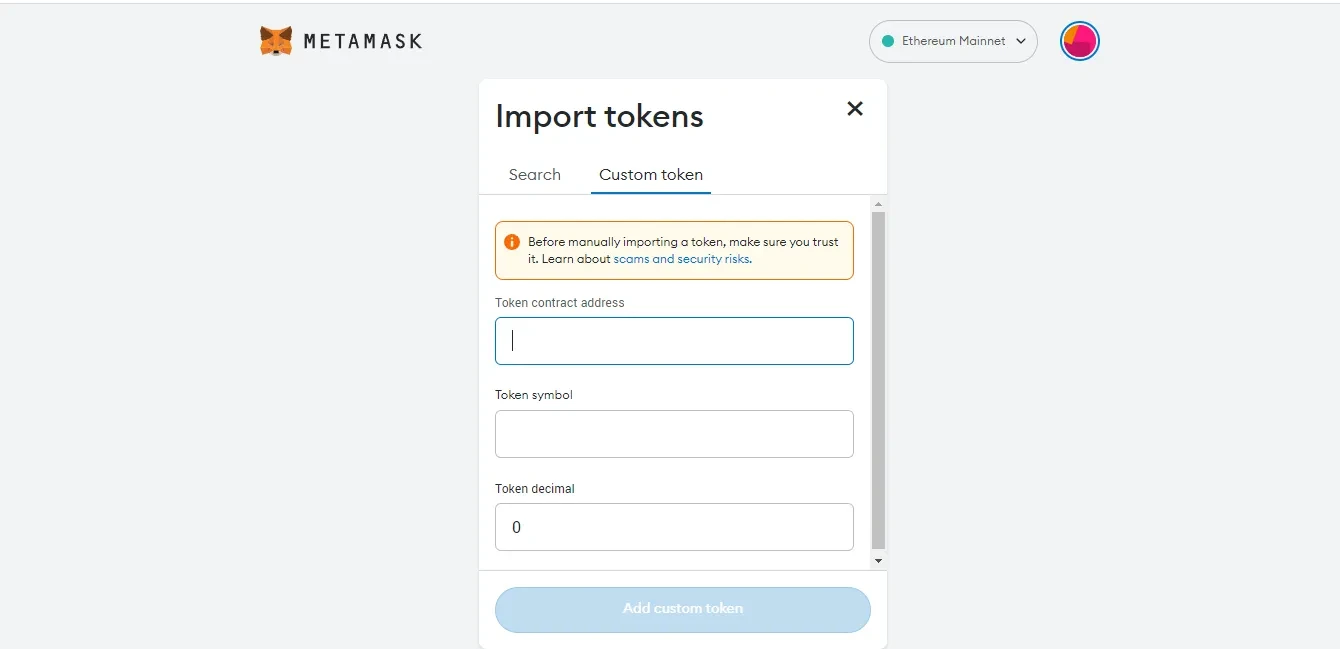
- Scroll down and click on “Custom RPC” to add a custom network.
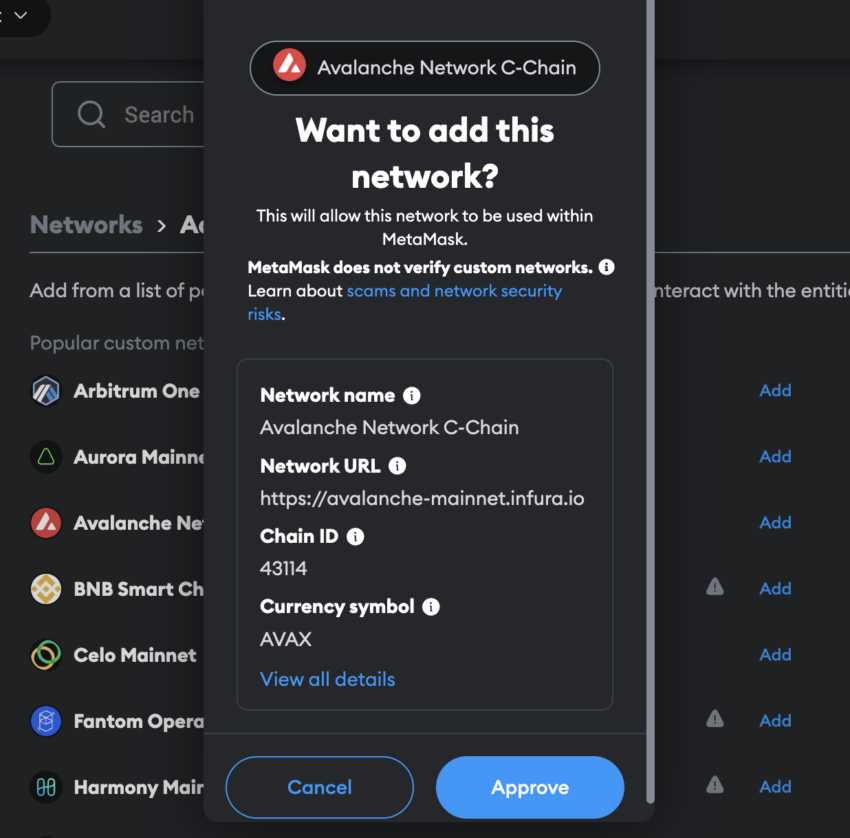
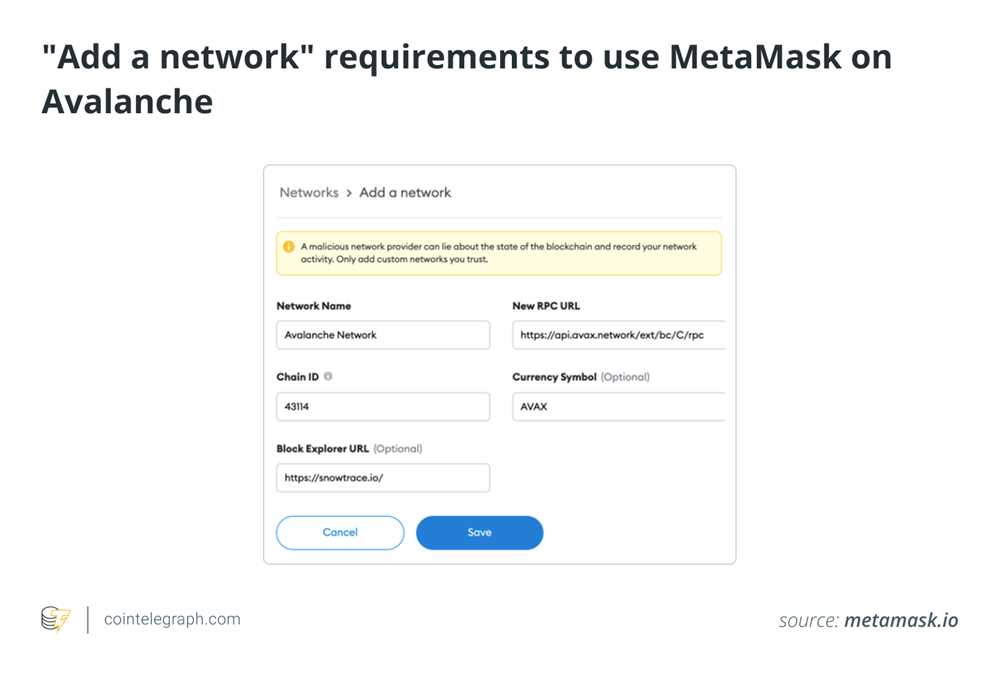
- In the “New Network” window, enter the following details to add the Avalanche network:
- Network Name: Avalanche
- New RPC URL: https://api.avax.network/ext/bc/C/rpc
- ChainID: 43114
- Symbol: AVAX
- Block Explorer URL: https://cchain.explorer.avax.network/
- Click “Save” to add the Avalanche network to MetaMask.
Congratulations! You have successfully added the Avalanche network to your MetaMask wallet. You can now start interacting with Avalanche-based decentralized applications (dApps) and managing your AVAX tokens.
Note: Make sure to switch to the Avalanche network whenever you want to use Avalanche-based dApps or transact with AVAX tokens. You can switch networks by clicking on the network dropdown list in the MetaMask wallet and selecting the Avalanche network.
Frequently Asked Questions:
What is Avalanche?
Avalanche is a platform that aims to solve the scalability issues of blockchain networks. It is a high-performance blockchain network that can process thousands of transactions per second, making it ideal for decentralized applications and financial services.
Can I use MetaMask with Avalanche?
Yes, you can use MetaMask with Avalanche. In fact, MetaMask is one of the most popular cryptocurrency wallets and it supports various blockchains, including Avalanche.
How do I use Avalanche with MetaMask?
Once you have set up Avalanche on MetaMask, you can use it just like any other blockchain network. You can send and receive AVAX tokens, interact with decentralized applications (dApps) on the Avalanche network, and perform various transactions.
What are the benefits of using Avalanche with MetaMask?
Using Avalanche with MetaMask offers several benefits. Firstly, MetaMask is a highly trusted and widely used cryptocurrency wallet, providing a secure and user-friendly interface for managing your digital assets. Secondly, Avalanche is a high-performance blockchain network, offering fast and scalable transactions. By combining MetaMask and Avalanche, you can enjoy the benefits of both platforms.
+ There are no comments
Add yours